
Theory · C1 Licence - Light Truck · Module 11 of 18
Load securing and safety
You learn how to position, distribute and secure the lorry’s load, and how to check its safety during the journey and deliveries. You can answer C1 licence questions on securing loads, stability, tankers, loading and unloading, projecting loads and V-20 warning panels without confusing a correctly marked load with one that is authorised and properly secured.
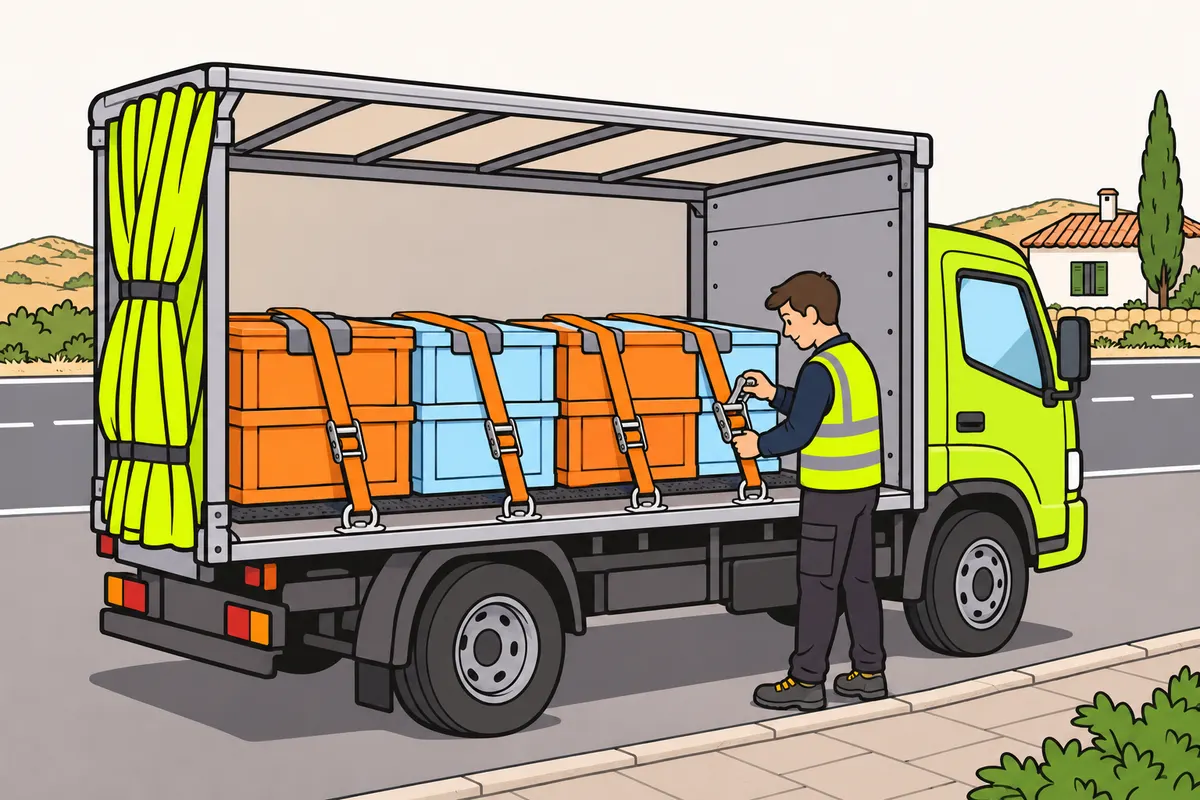
1What you must achieve with your load
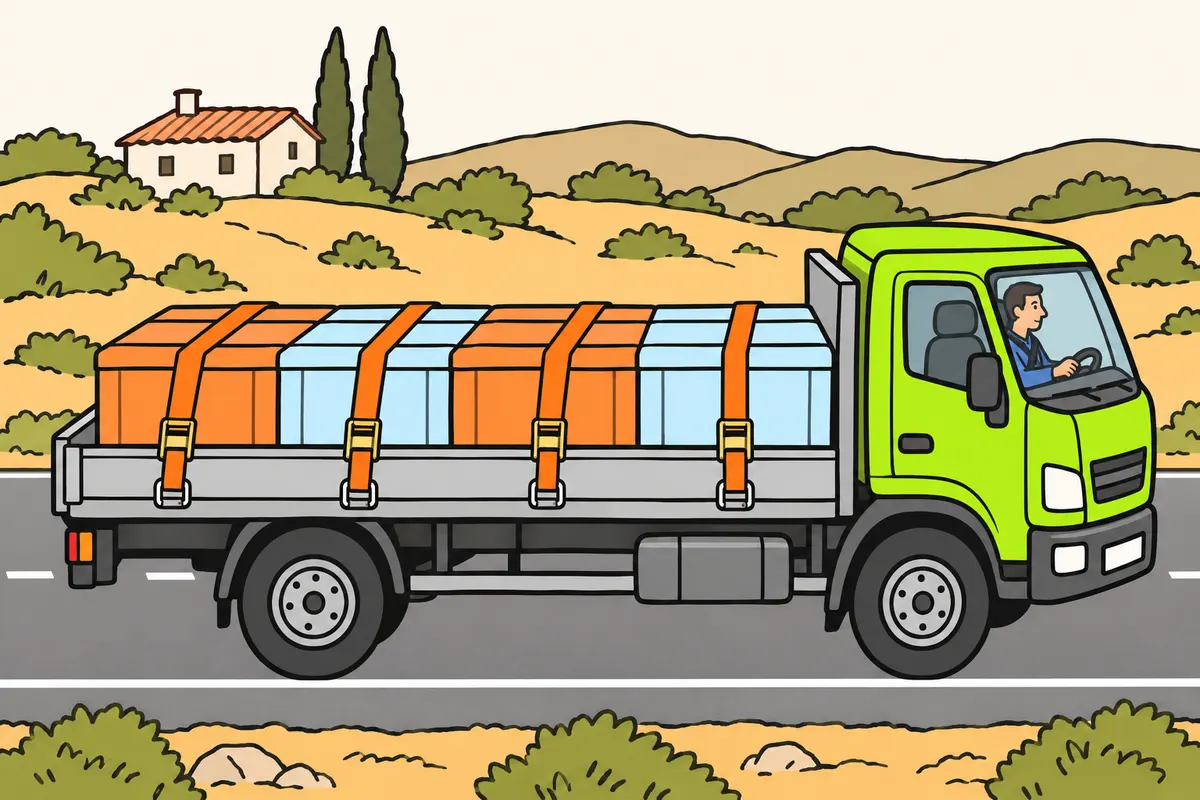
Position and secure your load so you can drive safely.
Remember
- Stop goods and accessories from falling, dragging or moving dangerously.
- Secure packaging, tarpaulins and tools in your cab too.
- Keep lights, signs, number plates and hand signals visible.
- Keep your view clear, move freely and reach the controls.
- Check weight distribution and the strength of the supports.
- Before driving, know how the load is stowed and how it limits your lorry.
Exam trap: Wrong: if everything fits, you can drive. Right: also check distribution, supports and securing.
Read the full explanation
- You must prevent the goods and their accessories from dragging, falling or moving dangerously, affecting stability, causing avoidable nuisance, or obscuring lights, signs, number plates or hand signals. This obligation includes packaging, tarpaulins and protective equipment, even if the main goods remain in place. [RGC, art. 14](https://www.boe.es/buscar/act.php?id=BOE-A-2003-23514#a14).
- When positioning, stowing and securing the load, you decide where each item rests, how you distribute it with the others, and what prevents it from moving. The fact that all the goods fit inside the load body does not prove that the transport is safe; you must also assess how the weight is distributed and the strength of the supports.
- Before driving your C1 lorry, you must know how the load is stowed and what restrictions it imposes on the vehicle. The fact that its maximum authorised mass (MMA) does not exceed 7,500 kg does not remove the risk of rollover: weight concentrated high up or on one side changes how it behaves on bends, even if you have not exceeded the authorised mass. Knowing how the load is stowed helps you stay in control and anticipate manoeuvres. [RGC, art. 14.1.b](https://www.boe.es/buscar/act.php?id=BOE-A-2003-23514#a14).
- You must preserve your field of vision, freedom of movement and access to the controls; secure tools and objects in the cab to prevent dangerous movement and anything that could affect the lorry’s stability. [RGC, art. 18](https://www.boe.es/buscar/act.php?id=BOE-A-2003-23514#a18). [RGC, art. 14.1](https://www.boe.es/buscar/act.php?id=BOE-A-2003-23514#a14).
2A low, centred centre of gravity
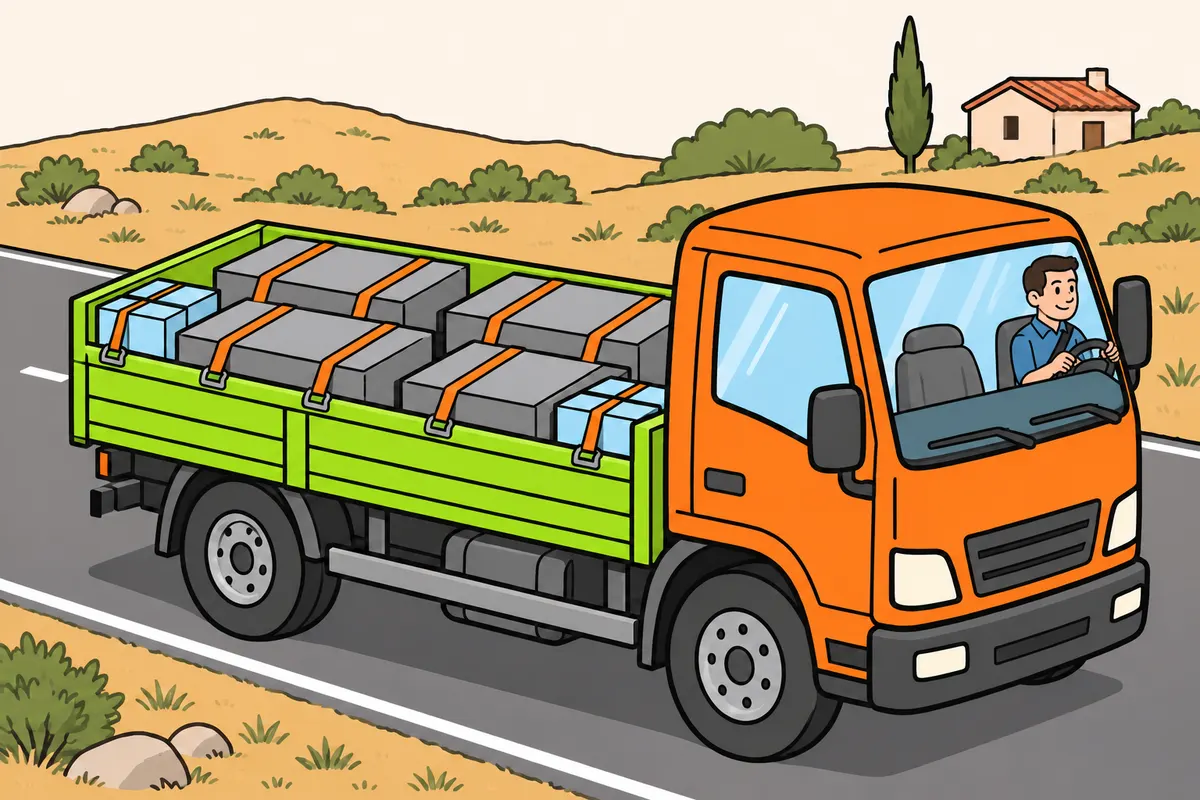
Keep heavy goods low and balanced to reduce the risk of overturning.
Remember
- Put the heaviest items low.
- Balance the load on both sides.
- Avoid stacking items without need.
- For tall items, check the base and the height of the weight.
- Keep each item in its authorised transport position.
- Do not always aim for the geometric centre; respect axles and supports.
Exam trap: Wrong: preventing sliding is enough. Right: also prevent the item from overturning.
Read the full explanation
- You must understand the centre of gravity as the point at which the weight of the lorry and its load is considered to be concentrated. Its position depends on the lorry and the entire load, including packaging and equipment. You do not have to place it at the geometric centre of the load body; you must achieve a distribution compatible with the axles and the intended supports.
- As a stowage principle, place the heaviest items low down and avoid stacking them unnecessarily. Raising a substantial mass increases the tendency to roll over on bends or when changing direction. A large-volume load can be light, while a small metal block can greatly affect the balance.
- You must aim for a balanced distribution on both sides of the longitudinal axis. If you concentrate heavy items on one side, you load the wheels and suspension unevenly and reduce the stability margin on that side.
- For a tall item, consider both its support base and the height of its centre of gravity. A wide base and a low position for transport improve its stability, provided you follow the authorised orientation for the item. Blocking that prevents sliding does not, by itself, guarantee that the item cannot tip over.
3Longitudinal distribution and axle loads
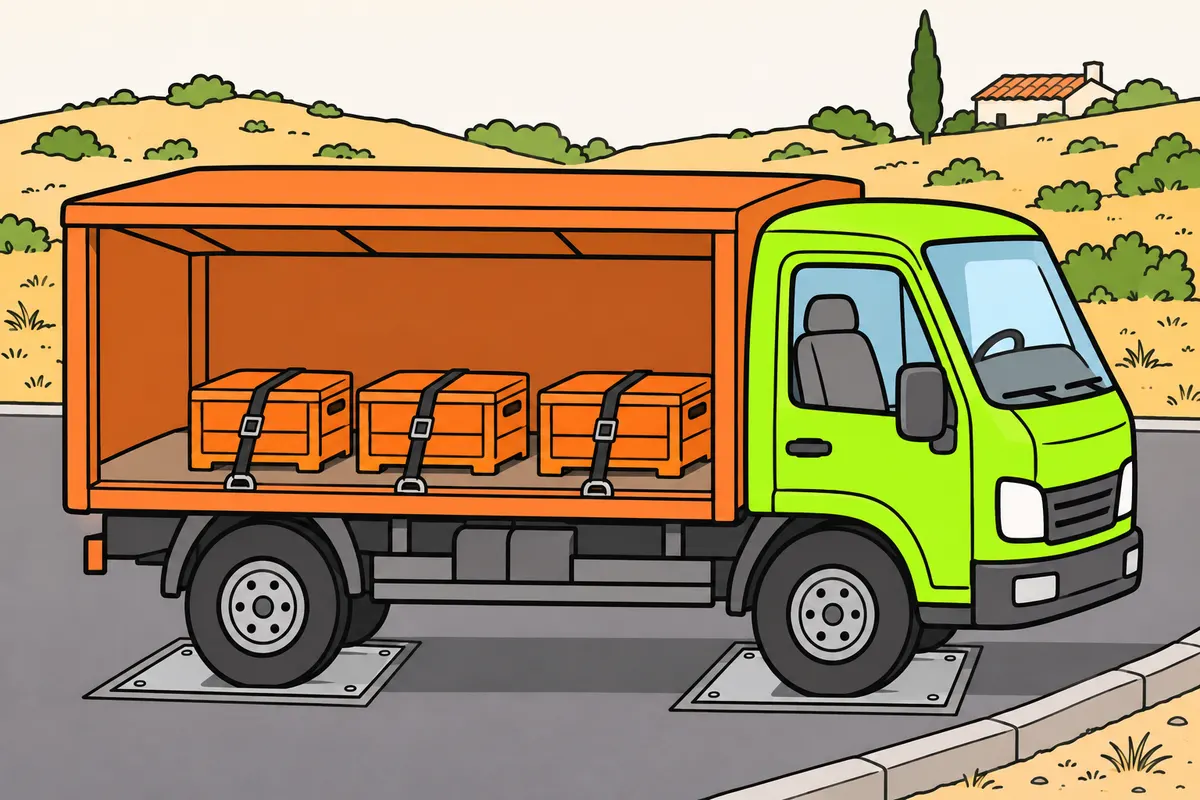
Keep within the total weight limit and the limits for each axle.
| If you move the load | What to expect |
|---|---|
| Forwards | Generally increases weight on the front axle |
| Towards the rear axle | Increases weight on that axle |
| Behind the rear axle | May overload it and reduce weight on the front axle |
Remember
- Respect maximum weights and the minimum loads needed on each axle.
- Use the load distribution diagram when available.
- Avoid concentrating weight behind the rear axle.
- Check the front axle before grouping goods next to the cab.
- Use reliable data and weigh axles when needed.
Exam trap: Wrong: meeting the total weight limit is enough. Right: check each axle’s limits too.
Read the full explanation
- You must comply simultaneously with the vehicle’s maximum mass, the maximum axle loads and the minimum loads needed to preserve its functions. The loading plan must take all these limits into account; complying with the total mass does not guarantee an acceptable distribution. [RD 563/2017, annex III.I.2](https://www.boe.es/buscar/act.php?id=BOE-A-2017-6512#ai-3).
- If you move a load forwards, you generally increase the load it places on the front axle; if you move it closer to the rear axle, the share supported by that axle increases. Use the vehicle’s load distribution diagram when available, because the correct position depends on its wheelbase, axle tare and configuration.
- Avoid concentrating heavy goods at the rear overhang. A mass behind the rear axle can overload that axle and unload the front axle, impairing steering. You must not group everything next to the cab without checking the front axle and the strength of the front wall either.
- Check the distribution using reliable data and, when necessary, by weighing each axle. It is not enough for the lorry to look level or to check the tyre pressure. The complete mass and dimension tables are covered in the “Dimensions and masses of the light lorry” module; here, you must know how to apply them to the stowage plan.
4Dividing and distributing goods
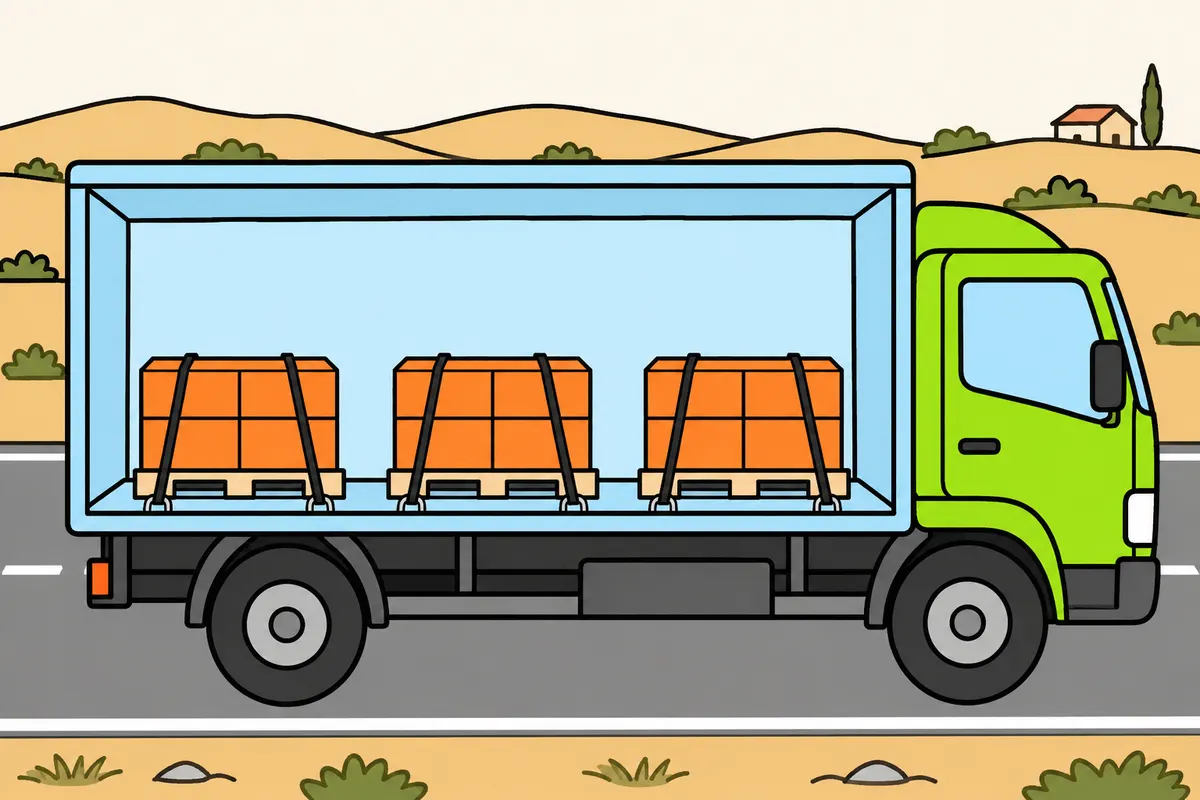
Distribute your goods according to their weight and the available supports.
Remember
- Count each pallet’s weight and position, not just the number of pallets.
- Include people, packaging, supports and equipment in the journey mass.
- Check each axle and the floor before using the total allowance.
- Use suitable, secured supports to spread concentrated loads.
- Plan deliveries so the load stays balanced at every stage.
Exam trap: Wrong: you can place the whole remaining weight allowance anywhere. Right: check axles and floor strength.
Read the full explanation
- When the goods can be divided, distribute the units to make use of the supports without creating excessive concentrations. You must consider the mass and position of each pallet, not just how many pallets you place in each row. Two rows with the same number of items can have very different weights.
- You must include supports, packaging, equipment and occupants when checking the effective mass for the journey. Do not confuse the theoretical available capacity with permission to load that same amount of goods anywhere in the load body. An axle limit or the floor’s strength may be reached before the overall maximum. For example, if your lorry has an MMA of 7,500 kg and weighs 4,500 kg before loading goods, with the people and equipment for the journey on board, the margin for total mass is 3,000 kg; you must also check each axle and the floor. [RD 563/2017, annex III.I.2](https://www.boe.es/buscar/act.php?id=BOE-A-2017-6512#ai-3).
- For a concentrated load, use supports or load-spreading elements suited to the goods and the floor. Their purpose is to distribute forces and prevent damage or the floor giving way; you must check that they cannot move. An improvised plank does not prove that it has enough capacity to support a machine or a heavy item.
- Plan deliveries before loading so that you can access each consignment and maintain an acceptable distribution at every stage of the journey; checking after goods have been removed is covered in “Partial unloading and restowing”.
5Choosing a load body, packaging and supports
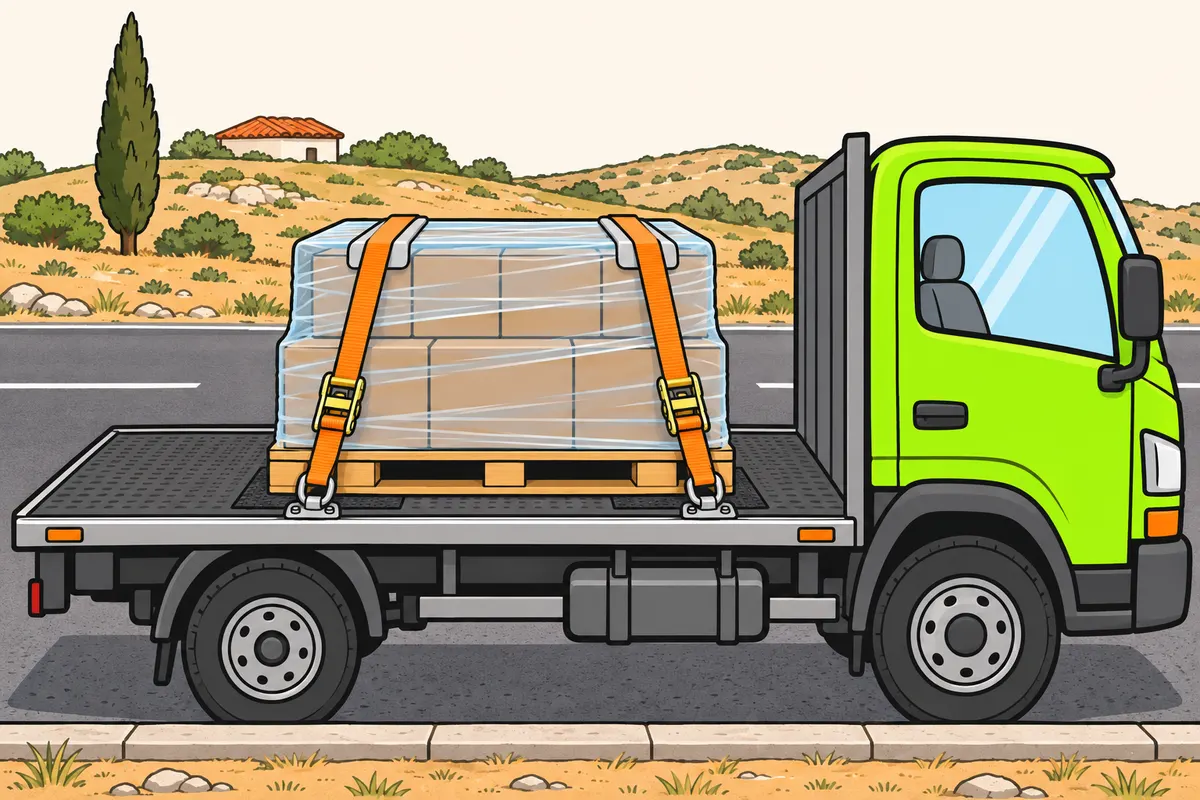
Choose a load body and packaging that let you support and secure your goods properly.
| Load body or vehicle type | What to recognise |
|---|---|
| Open load body | Open top, with fixed or folding sides |
| Flatbed | No side protection for the load |
| Low-loader | Very low platform |
| Padded van body | Closed body with padded or specially adapted interior |
| Silo vehicle | Closed tank for powders or grains |
| Insulated body | Insulation limits heat transfer |
| Tipper | Body raises or tilts to unload |
Remember
- Check that your vehicle suits the goods.
- Check pallets, packaging and attachment points.
- Check walls, doors and supports before relying on them.
- Respect package strength when stacking.
- Secure products to the pallet and the pallet to your lorry.
Exam trap: Wrong: pallet wrapping secures the pallet to your lorry. Right: check that connection too.
Read the full explanation
- You must choose a vehicle suited to the goods and packaging that allows you to secure them. A broken pallet, crushed box or machine without suitable securing points can make safe stowage impossible. Inspections expressly cover the suitability of the vehicle and packaging. [RD 563/2017, annex III.II](https://www.boe.es/buscar/act.php?id=BOE-A-2017-6512#ai-3).
- On a platform without sides, you must plan to restrain items in every relevant direction. The walls of an enclosed load body do not have unlimited strength either. Before using the front wall, sides, doors or stakes as part of the securing system, you must check what forces they can withstand.
- If you stack items, respect their capacity to withstand compression and place the strongest and heaviest in positions compatible with the whole load. Packaging that gives way creates slack in the lashings and can allow movement. Protect fragile goods without turning the padding into an unstable support.
- You must distinguish between the wrapping that groups boxes on a pallet and the devices that secure that pallet to the lorry. Stretch film can hold the load unit together, but it does not prove that the unit is restrained in relation to the vehicle. You must check both connections: between the goods and their support, and between the support and the load body.
- An open box has a receptacle open at the top, with fixed or folding sides; a platform has no side protection for the load. A low-loader has a very low platform. This lower height can make it easier to position an item low down, but you must still provide suitable support and secure it. [RGV, annex II, classification by use](https://www.boe.es/buscar/act.php?id=BOE-A-1999-1826#anii).
- A padded body is an enclosed load body specially padded or adapted inside. A silo carries powdered or granular solids in an enclosed tank, with or without auxiliary loading and unloading equipment. The insulation of an insulated load body limits heat exchange; it does not prove that its walls can restrain any kind of goods. [RGV, annex II](https://www.boe.es/buscar/act.php?id=BOE-A-1999-1826#anii).
- On a tipper, you must identify the mechanism that raises or tilts the load body to unload at the rear or on one side. Do not confuse this unloading method with the function of a silo or an insulated load body. You must choose both the receptacle and the unloading method to suit the product. [RGV, annex II](https://www.boe.es/buscar/act.php?id=BOE-A-1999-1826#anii).
6Forces the securing system must withstand
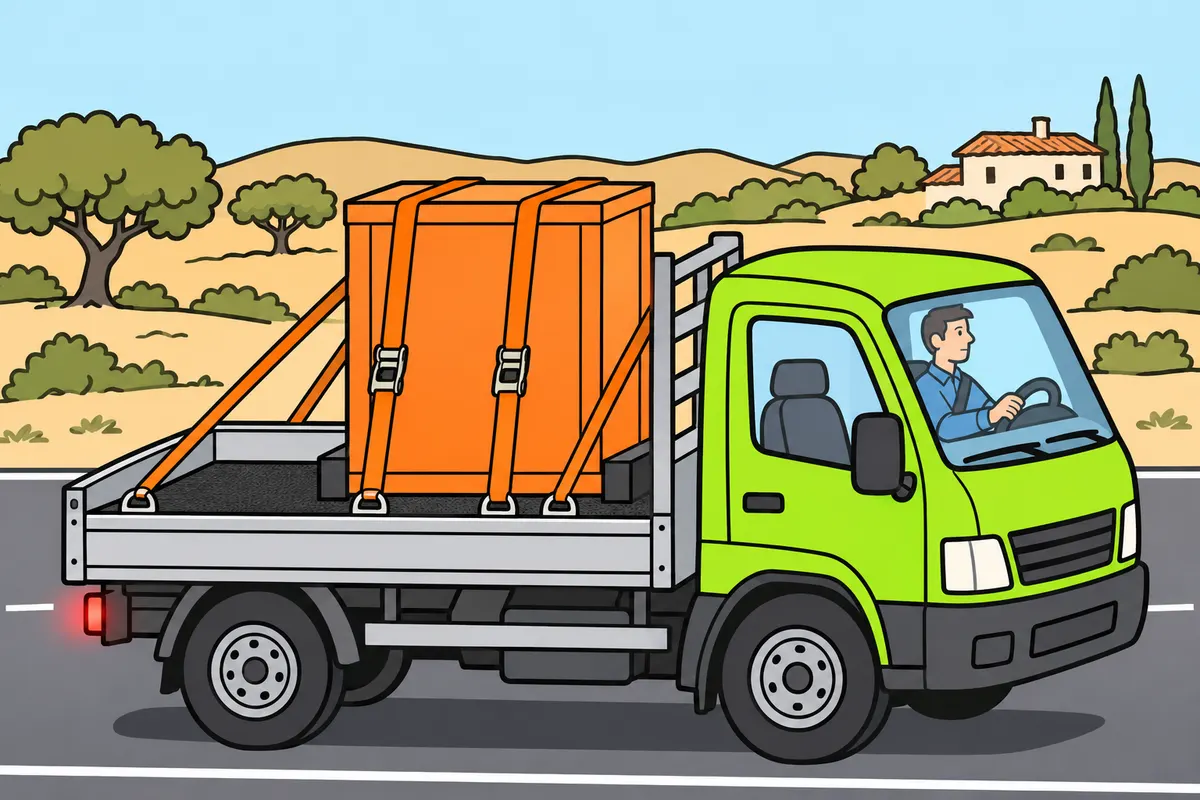
Prepare your securing system to withstand braking, acceleration and turns.
| Your manoeuvre | Where the load tends to move |
|---|---|
| Braking | Forwards |
| Accelerating | Rearwards |
| Turning | Towards the outside of the bend |
Remember
- Prevent sliding, overturning and rolling where relevant.
- Prepare your load for emergency braking.
- You can combine blocking, hooking and lashings.
- Do not add capacities that act in different directions.
Exam trap: Wrong: these factors let you leave some goods unsecured. Right: use them to size the securing system for the whole load.
Read the full explanation
- You must size the system for forces equivalent to the load’s weight multiplied by 0.8 forwards, 0.5 sideways and 0.5 backwards. These are the acceleration and deceleration criteria in the securing annex; they are not percentages of the load that you can leave unsecured. [RD 563/2017, annex III.I.1](https://www.boe.es/buscar/act.php?id=BOE-A-2017-6512#ai-3).
- You must also prevent the load from tilting longitudinally or sideways. For this reason, you must assess sliding, tipping and, where relevant, rolling separately. A tall item may not slide on a high-friction surface and can still tilt until it falls. [RD 563/2017, annex III.I.1](https://www.boe.es/buscar/act.php?id=BOE-A-2017-6512#ai-3).
- When you brake, the goods tend to continue forwards in relation to the load body; when you accelerate, they may tend to move backwards, and when you turn, towards the outside of the bend. You must allow for these forces even if you normally drive smoothly: an emergency may require you to brake hard.
- You can combine hooking, blocking, direct lashing and top-over lashing. You must assess how the system works as a whole, including friction and supports, without adding together capacities that act in different directions or depend on a weak component. [RD 563/2017, annex III.I.4](https://www.boe.es/buscar/act.php?id=BOE-A-2017-6512#ai-3).
7What the EN load-securing standards mean
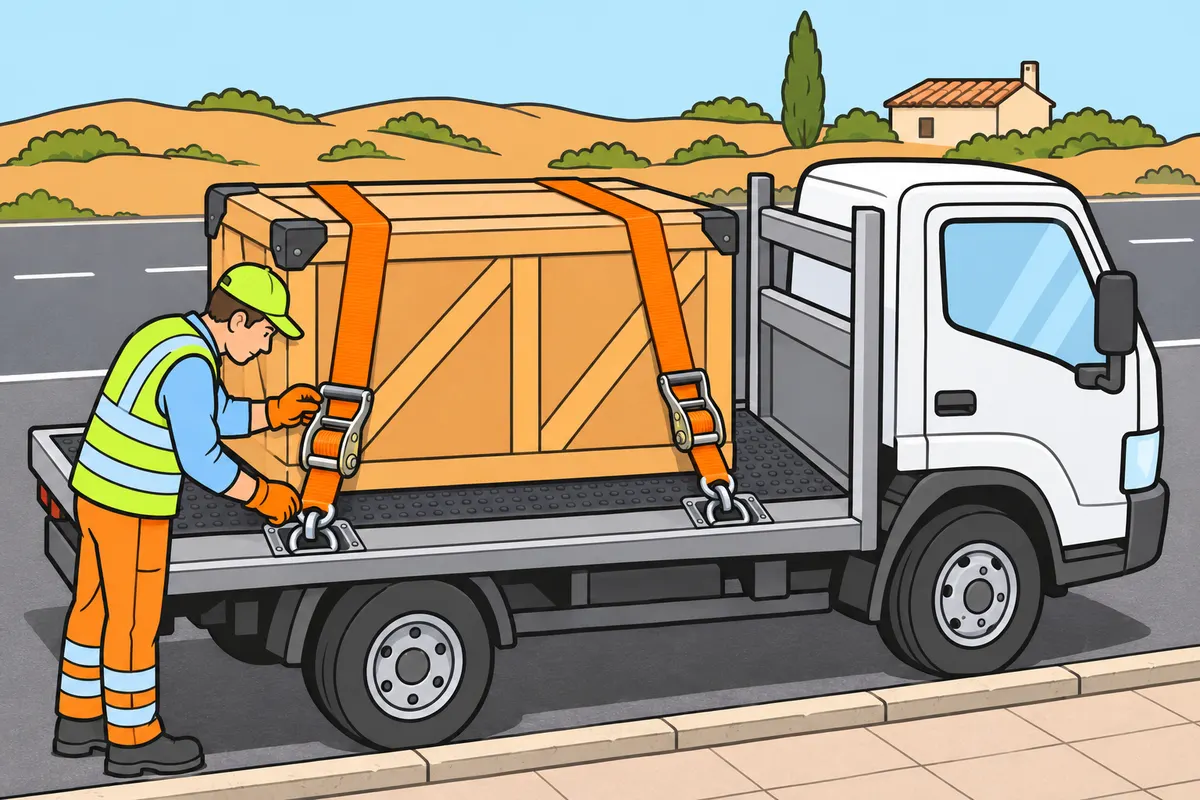
Use the standards to distinguish calculations, equipment and securing points.
| Standard | What it covers |
|---|---|
| EN 12195-1 | Calculating lashing forces |
| EN 12195-2 | Synthetic straps |
| EN 12195-3 | Lashing chains |
| EN 12195-4 | Steel wire rope lashings |
| EN 12640 | Lashing points |
| EN 12642 | Bodywork strength |
Remember
- Calculate lashings using weight, friction, position and securing method.
- Follow the instructions for your particular system.
- Check every part’s capacity and condition.
- Do not judge a strap or chain by appearance alone.
Exam trap: Wrong: one strap per pallet always suffices. Right: calculate how many you need and their capacity.
Read the full explanation
- You must associate EN 12195-1 with calculating lashing forces. The number and capacity of the devices depend on mass, friction, geometry and method; there is no universal rule of one strap per pallet. [RD 563/2017, Annex III.I.5](https://www.boe.es/buscar/act.php?id=BOE-A-2017-6512#ai-3).
- To choose the equipment, identify EN 12195-2 with synthetic web lashings, EN 12195-3 with chains and EN 12195-4 with steel wire rope lashings. The choice depends on the goods and the conditions of use. A thick strap or a chain that looks strong does not replace information about its capacity and condition. [RD 563/2017, Annex III.I.5](https://www.boe.es/buscar/act.php?id=BOE-A-2017-6512#ai-3).
- You must associate EN 12640 with lashing points and EN 12642 with bodywork strength. A high-capacity device is of little use if you connect it to a point that cannot withstand the force. Check the declared characteristics of each component and do not assume a wall has the strength of the chassis. [RD 563/2017, Annex III.I.5](https://www.boe.es/buscar/act.php?id=BOE-A-2017-6512#ai-3).
- To decide how many lashings you need, use the calculation and instructions for the specific system. [RD 563/2017, Annex III.I.5](https://www.boe.es/buscar/act.php?id=BOE-A-2017-6512#ai-3).
8Blocking and immobilising the load
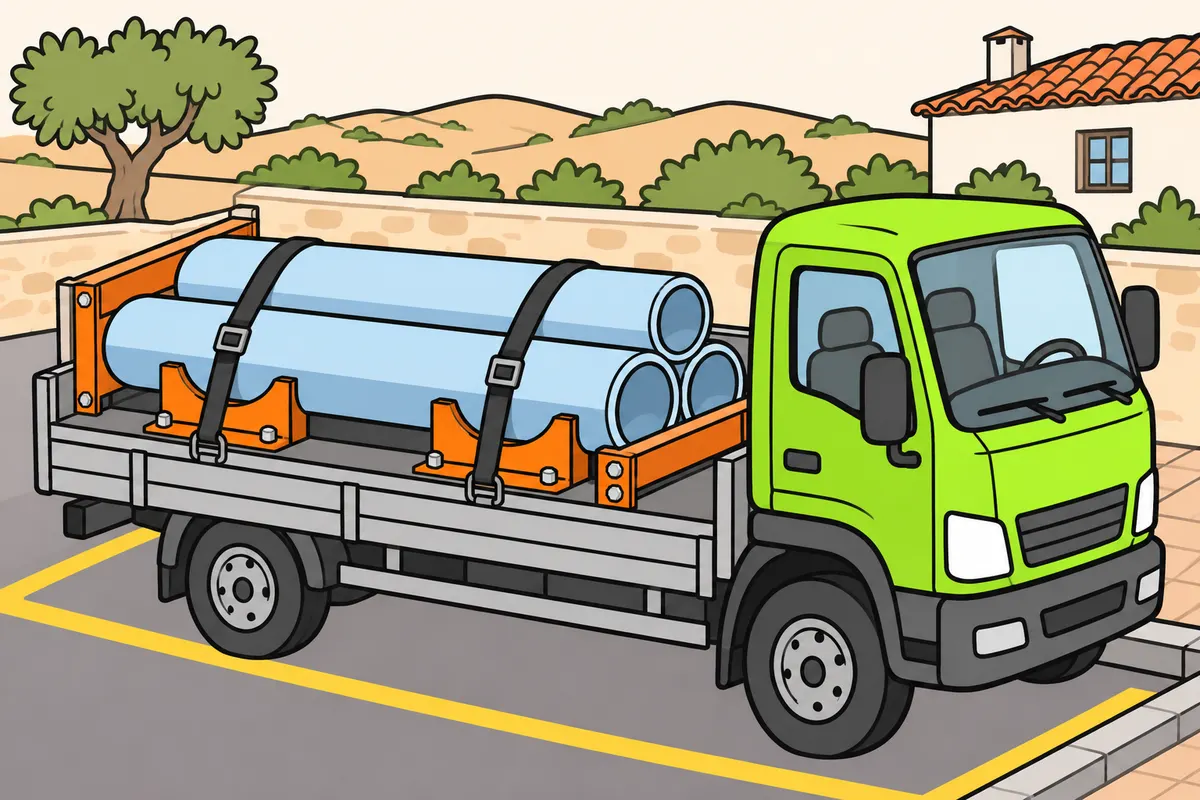
Block your load with strong supports that prevent movement.
Remember
- Check that supports pass forces into strong parts of your lorry.
- Fill necessary gaps with suitable materials.
- Avoid damaging packaging when blocking.
- For items that roll, use suitable cradles or load chocks.
- Add extra securing where needed.
- Secure wedges so vibrations cannot shake them loose.
Exam trap: Wrong: preventing rolling is enough. Right: also check restraint forwards, rearwards and sideways.
Read the full explanation
- You must understand blocking as restraining the load through contact with elements capable of taking its force. You can use supports, spacers, bars, cradles or suitable structures. They work only if they transmit the force to a strong part of the vehicle and stay in place.
- If you use the front or sides to block the load, check their capacity and conditions of use. Do not leave gaps that let the goods move before hitting the support. Fill necessary spaces with elements designed to withstand the expected force without damaging the packaging.
- For pipes, coils or other items that can roll, use suitable load cradles or chocks and additional securing where appropriate. Do not confuse these with the lorry's wheel chocks for parking. Preventing an item from rolling does not prove that it is restrained forwards, backwards and sideways.
- You must secure wedges and other blocking elements so that vibration or settling does not dislodge them.
9Friction and anti-slip materials
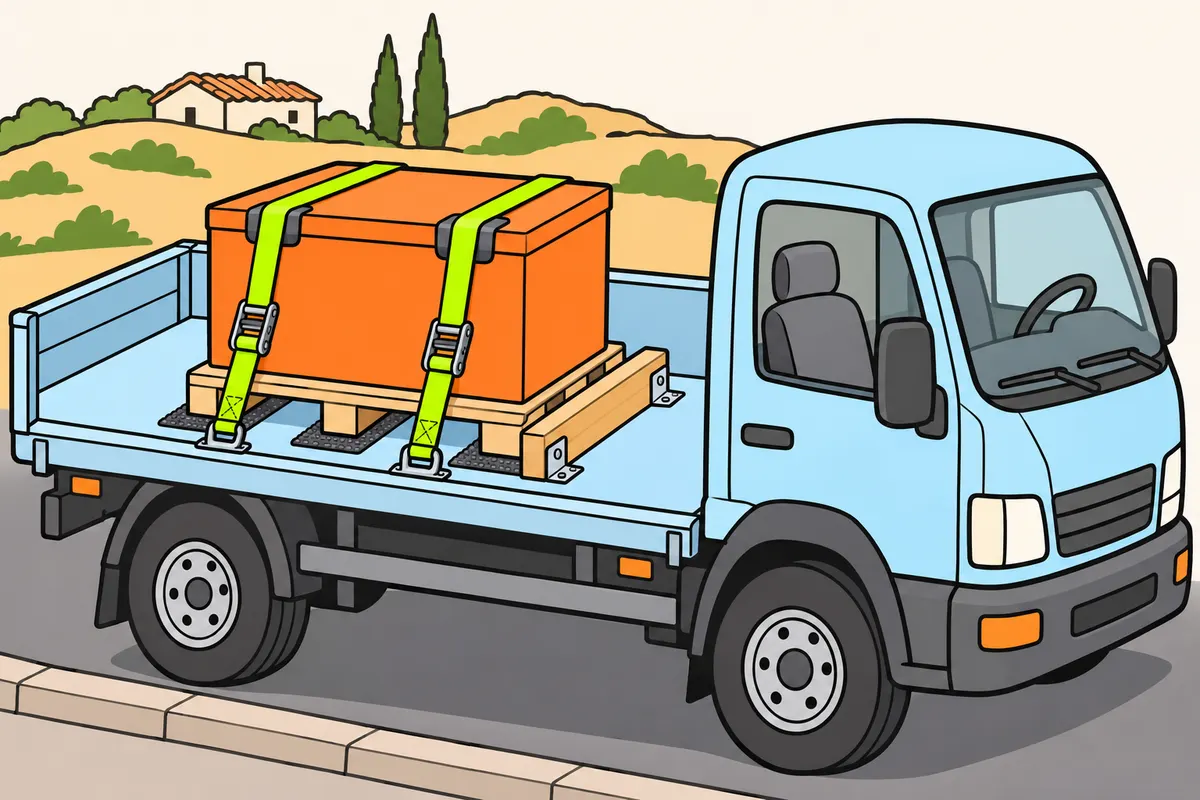
Improve grip between your load and supports while keeping other necessary securing measures.
Remember
- Clean the floor and supports.
- Check which materials touch and their condition.
- Place suitable anti-slip mats where the supports rest.
- Check that mats are not damaged, dirty or crushed.
- Calculate friction alongside the blocking and lashings you need.
Exam trap: Wrong: a heavy item cannot move. Right: check friction and the complete securing system.
Read the full explanation
- Friction between the load and its support resists sliding. You must assess the materials actually in contact and their condition, because clean, oily and icy surfaces behave differently. An item's great weight alone does not guarantee that it stays still.
- As preparation, clean the floor and supports and remove debris that could roll, slide or contaminate the contact surfaces. A good lashing plan loses effectiveness if you place the pallet on dirt or loose material. Do not assume any rubber has a high coefficient of friction without knowing its performance.
- You can use suitable anti-slip mats to improve contact. You must place them where the supports bear, observe their capacity and check that they are not damaged or contaminated. The material must retain its function under the expected load; a crushed or badly positioned piece may not provide the effect you calculated.
- You must calculate the contribution of friction together with the blocking and lashings you need for the forces and movements described in “Forces the securing system must withstand”.
10Top-over lashing and direct lashing
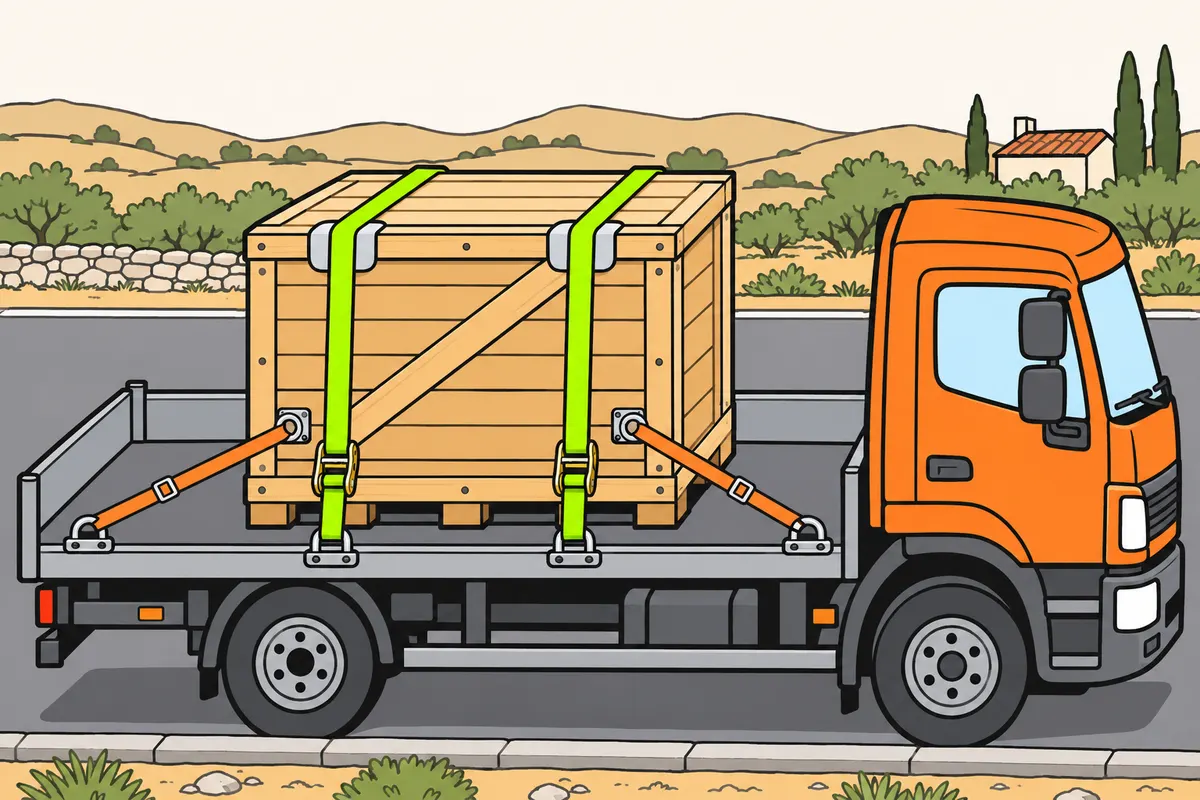
Choose your lashing method according to how it must prevent load movement.
| Method or label | What it means |
|---|---|
| Top-over lashing | Presses your load down to increase friction |
| Direct lashing | Connects your load to strong points; restraint depends on lashing direction |
| LC | Lashing capacity |
| STF | Standard tension force: the initial tension |
Remember
- Protect edges so they cannot cut your straps.
- Keep edge protectors in place during the journey.
- Do not tighten lashings so much that fragile packaging is crushed.
- Check the equipment label and instructions for use.
Exam trap: Wrong: LC means initial tension or lifting capacity. Right: LC means lashing capacity.
Read the full explanation
- For top-over lashing, you pass the device over the load and tighten it towards the anchor points. The added pressure increases friction against the support, so the pre-tension and strap angle matter. You must not confuse this effect with directly restraining the load in a particular direction.
- For direct lashing, you connect the load or its restraint system to strong points on the vehicle. Lashings resist movement according to their orientation. You must arrange them to restrain the directions you need, because a nearly longitudinal lashing does not provide the same sideways restraint as one with a different geometry.
- You must protect edges so they do not cut the straps and so pressure is spread without damaging the goods. The protectors must stay in place during the journey. Do not tighten until you deform fragile packaging: if it is crushed, tension may be lost, along with some of the lashing's effectiveness.
- Lashing capacity is shown as LC; pre-tension force is shown as STF when stated on the equipment. LC does not mean you can lift that mass with the strap, nor is its value equivalent to pre-tension. To use a device, follow its intended method and label. [RD 563/2017, Annex III.I.5](https://www.boe.es/buscar/act.php?id=BOE-A-2017-6512#ai-3).
11Checking straps, chains and anchorage points
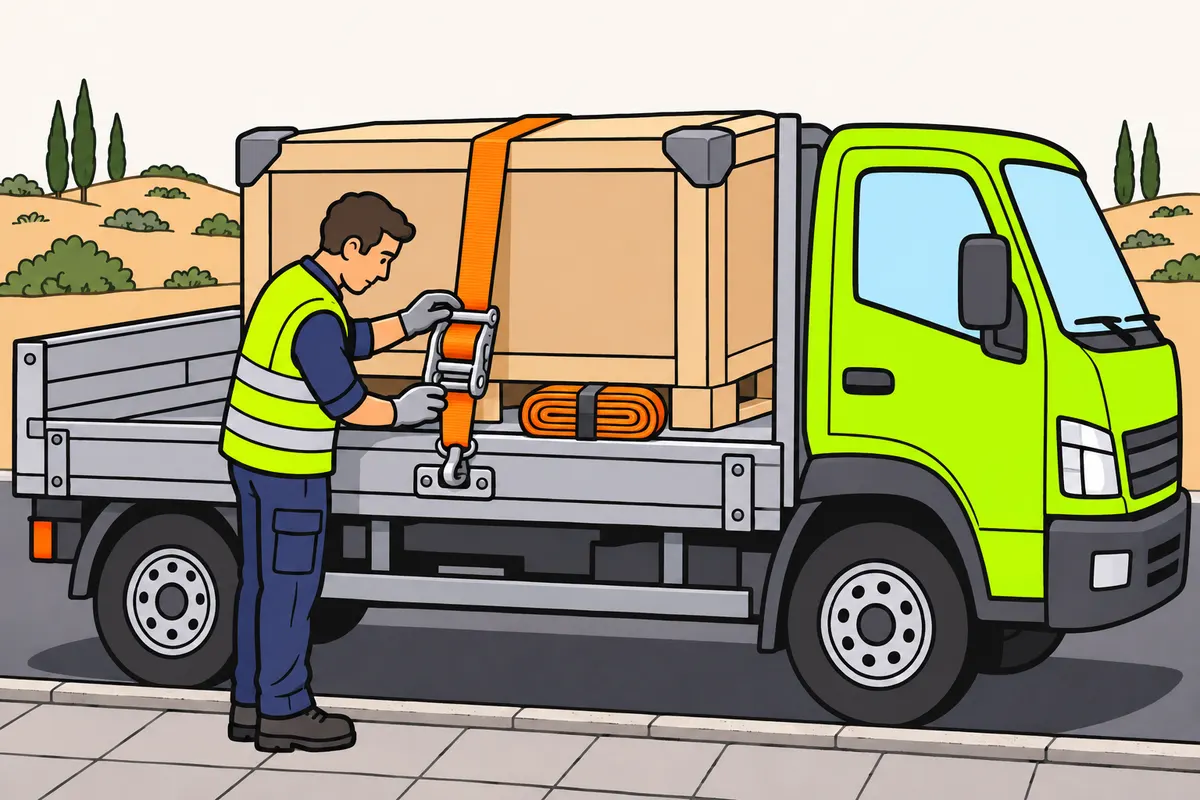
Check your lashings and their anchorage points before use.
Remember
- Set aside parts that are cut, bent, damaged or insufficiently identified.
- Do not repair lashings with knots or makeshift joints.
- Attach each part as designed.
- Close tensioners and protect them against accidental opening.
- Gather loose ends and prevent damaging rubbing.
- Use points intended for lashing and respect their strength.
Exam trap: Wrong: any hinge can serve as an anchorage point. Right: use intended securing points and check their strength.
Read the full explanation
- Before using them, you must check webbing, stitching, hooks, tensioners, chains and anchorage points. Set aside items with cuts, deformations, damage or insufficient identification to determine whether they can be used safely. Do not try to restore capacity with knots, improvised joins or repairs not specified by the manufacturer.
- You must attach each device in a way that suits its design and avoid loading edges or parts of a hook that are not intended to take the force. Check that the tensioner is closed and protected against accidental opening. Gather up the excess ends so they do not drag or strike other road users.
- You must use the anchorage points intended for securing and observe their strength. A step, hinge or lightweight side does not become a lashing point just because you can pass a strap through it. The usable strength of the assembly is limited by its components and by how they take the forces.
- When you finish stowing the load, check that no lashing rubs harmfully against the goods or bodywork. If you combine methods, make sure they work compatibly. You must be able to explain what prevents each item from moving; seeing many straps over the load does not prove that the forces are distributed correctly.
12Tarpaulins, covers and bulk goods
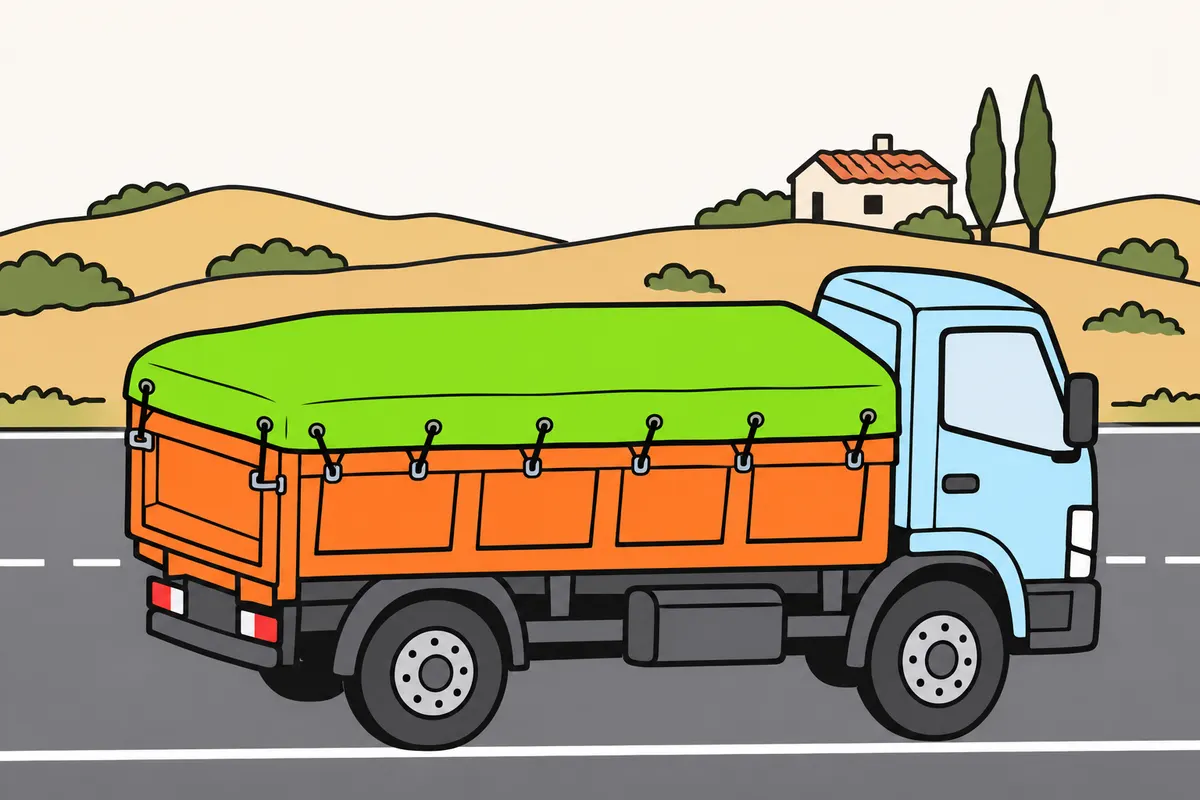
Cover materials effectively if they produce dust or could fall.
Remember
- Cover them outside built-up areas too, even when driving slowly.
- Keep the cover closed during your journey.
- Check tailgate and side closures.
- Spread material without dangerous piles.
- Secure the tarpaulin, its tensioners and equipment too.
- Use a net only if it effectively holds the material in.
Exam trap: Wrong: an ordinary side curtain holds pallets in place. Right: check that your securing system can restrain them.
Read the full explanation
- You must cover materials that produce dust or could fall off, completely and effectively, throughout the journey. The cover must be suitable for the product being carried and stay closed during the journey. [RGC, art. 14.2](https://www.boe.es/buscar/act.php?id=BOE-A-2003-23514#a14).
- Check that the tailgate and side closures are secured before carrying aggregates or other bulk goods. Distribute the material without creating piles that could fall or unnecessarily raise the centre of gravity. A correctly fitted tarpaulin does not fix an open tailgate or a container that lets material escape underneath.
- You must also secure the tarpaulin itself, its tensioners and the covering equipment. Avoid loose ends that could come free, strike something or obscure lights and number plates. A net only serves as a cover if it effectively contains the material: an open mesh does not prevent fine dust from spreading.
- A cover protects the goods; to use it as a restraint, you must have a structure certified for that purpose. Do not assume an ordinary side tarpaulin has the strength needed to contain moving pallets. Protection from rain or dirt and restraint during braking are separate functions that you must address in the load plan.
13Liquids and surge in tankers
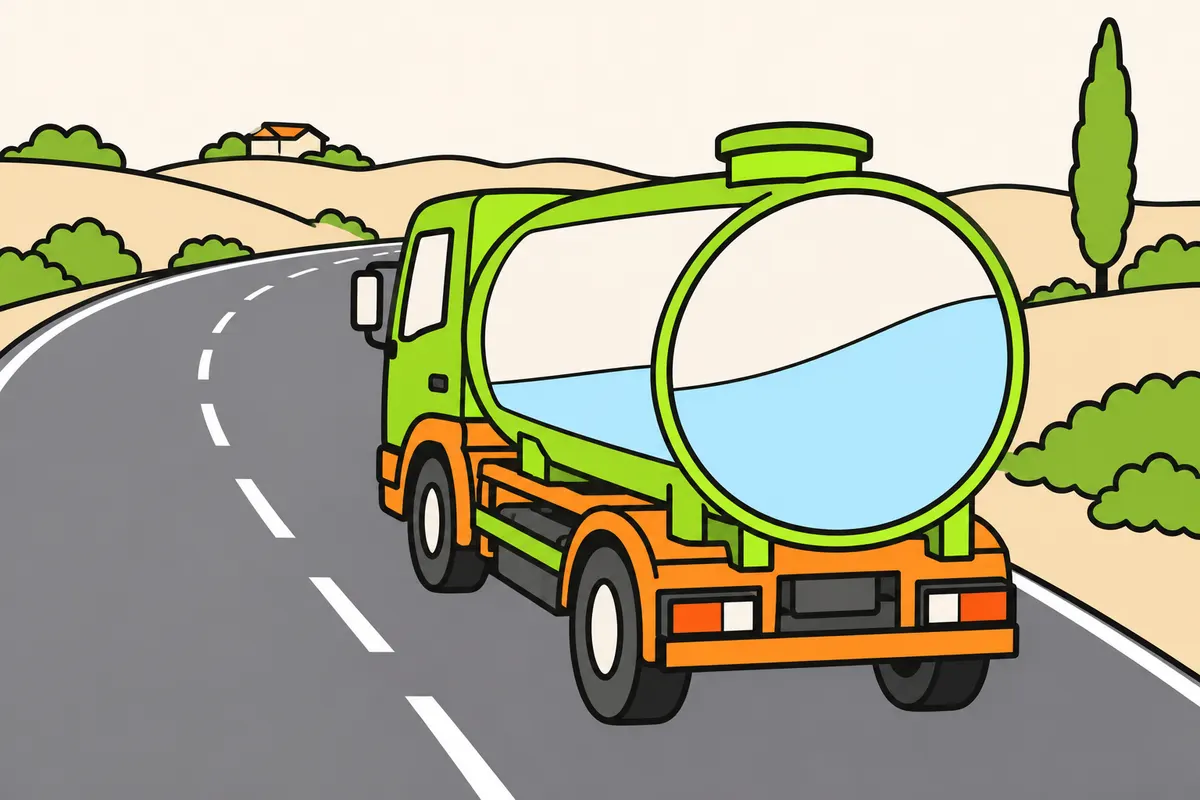
Expect liquid to push against your tanker when it is partly full.
Remember
- Expect liquid to move when braking, accelerating and turning.
- On bends, remember that moving liquid can increase rollover risk.
- You may feel the liquid push when the manoeuvre is nearly over.
- Know your tanker’s compartments and baffles.
- Follow filling instructions and the permitted capacity.
- Follow special product rules when they apply.
Exam trap: Wrong: baffles remove every risk. Right: assess liquid quantity, tanker design and liquid distribution.
Read the full explanation
- If you carry liquid in a partially filled tanker, you must expect it to move inside the tank when you brake, accelerate or turn. This surge changes the distribution of mass and transmits forces to the vehicle. You may feel its effects even as the manoeuvre that started it is coming to an end.
- On a bend, the liquid moving outwards harms stability and can contribute to rollover. When braking, its longitudinal movement changes the forces on the supports. You must take account of both the load's mass and the space available for the liquid to move, as well as the tank's shape.
- Compartments and baffles limit certain movements of the liquid, depending on their design. You must know your tanker's configuration and how its compartments are loaded; you cannot assume that all tanks have the same divisions or that these eliminate every risk of surge.
- You must follow the filling instructions and the permitted capacity of the equipment and product. There is no single percentage that makes any tanker safe in terms of stability; the quantity, design and distribution all matter. For goods with special conditioning or stowage requirements, you must also comply with their specific regulations. [RGC, art. 14.3](https://www.boe.es/buscar/act.php?id=BOE-A-2003-23514#a14).
14Suspended loads and swinging
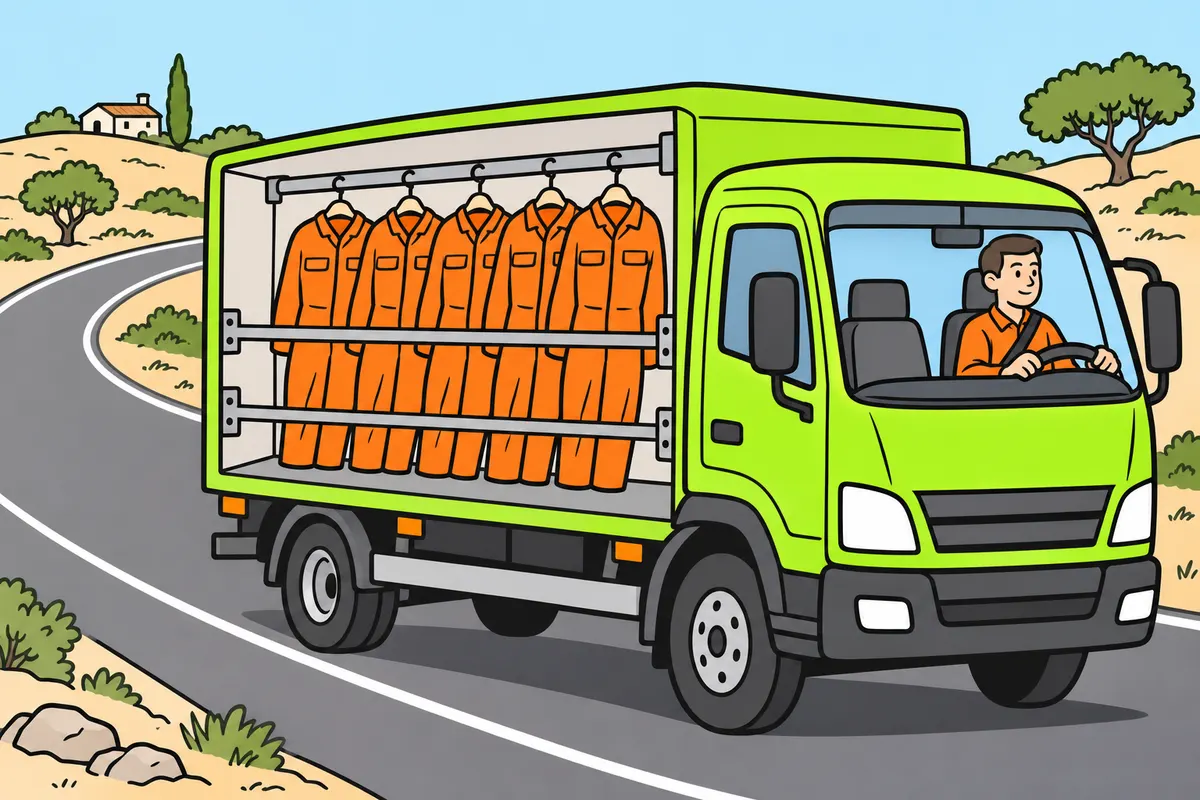
Expect hanging loads to swing and change your lorry’s balance.
Remember
- On bends, expect hanging loads to move outwards and rise.
- When braking, expect them to move forwards and possibly rise.
- Slow down before entering a bend.
- Steer, brake and accelerate smoothly.
- Check that fitted restraint devices are locked.
- If you carry a crane, secure its hook and accessories as instructed.
Exam trap: Wrong: a hanging load keeps its centre of gravity fixed. Right: expect it to move and rise.
Read the full explanation
- If you carry meat carcasses on rails or hanging garments, you must expect them to swing. On a bend, the load moves outwards and rises as it swings; when braking, it moves forwards and may also rise. This changes the position of the combined centre of gravity and increases the risk of instability. [RGC, art. 14.1.b](https://www.boe.es/buscar/act.php?id=BOE-A-2003-23514#a14).
- Reduce your speed before entering the bend and use the steering, brakes and accelerator smoothly to limit the swinging. Use the blocking bars and retaining devices provided when fitted; check that they are secured before setting off. If your lorry has a crane, secure the hook and attachments in their transport position according to the manufacturer's instructions. [RGC, art. 14](https://www.boe.es/buscar/act.php?id=BOE-A-2003-23514).
15Driving and checking during the journey
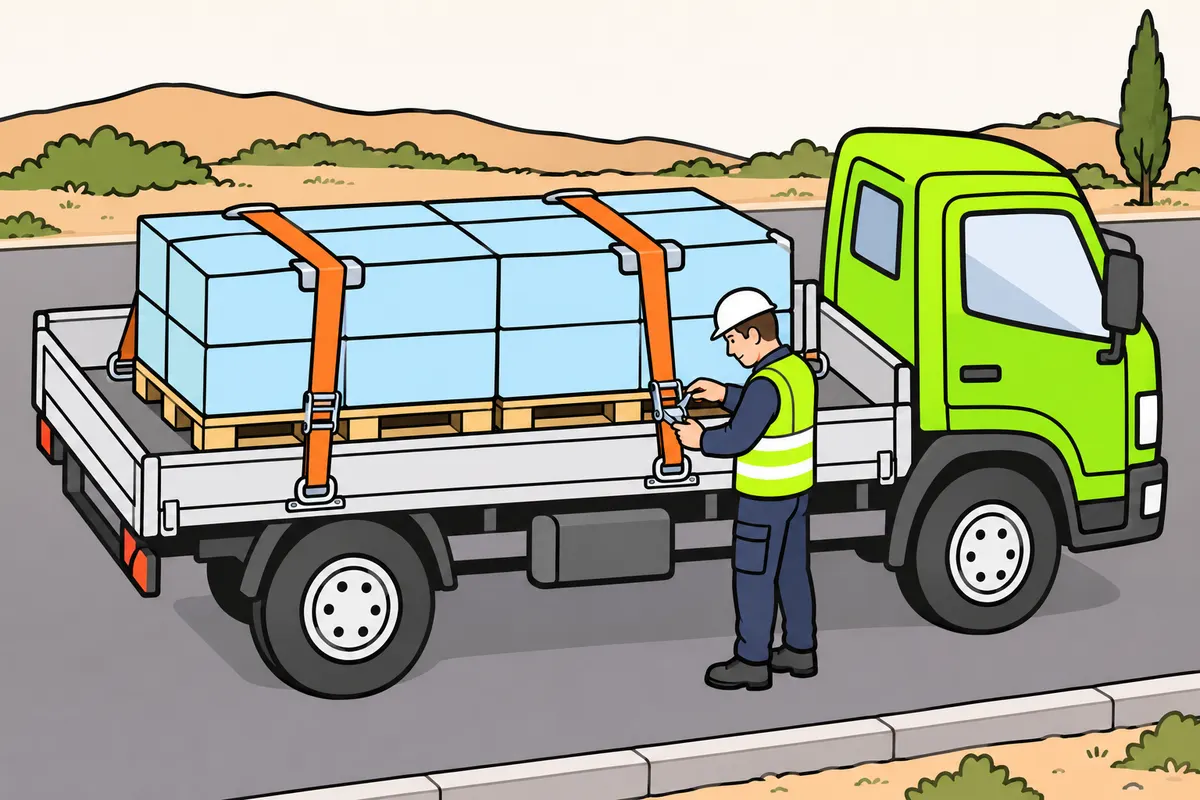
Adapt your driving to your load and check its securing in safe places.
Remember
- Adapt manoeuvres to your load’s stability.
- Allow enough stopping space for your lorry and load.
- Check securing after the goods first settle, in a safe place.
- Check again when circumstances warrant it, such as after hard braking or jolts.
- If goods lean or knock, stop safely and correct the problem.
- Stay clear of goods that could fall when a door opens.
Exam trap: Wrong: always check after the same distance. Right: adapt checks to your load and circumstances.
Read the full explanation
- You must adapt your manoeuvres to the stability allowed by the stowage; techniques for taking bends and preventing rollover are covered in “Lorry driving techniques”, “Bends, centre of gravity and rollover”.
- You must adjust your stopping margin to the condition of your lorry and its load; stopping distances are covered in “Speed and safe following distances”, “Braking distance” and “Following distance to avoid collisions”.
- As a precaution, check the securing after the load has initially settled and whenever circumstances make it advisable, for example after heavy braking or a stretch of road that has caused jolting. You must do this in a safe place. No universal kilometre interval applies to every load.
- If you notice abnormal knocks, leaning or signs that the load has shifted, stop safely and arrange for it to be corrected before continuing. Opening a door against which goods are resting can cause them to fall: assess the risk and obtain suitable equipment. Do not stand in the path of a load that could come free.
16Choosing where to load and unload
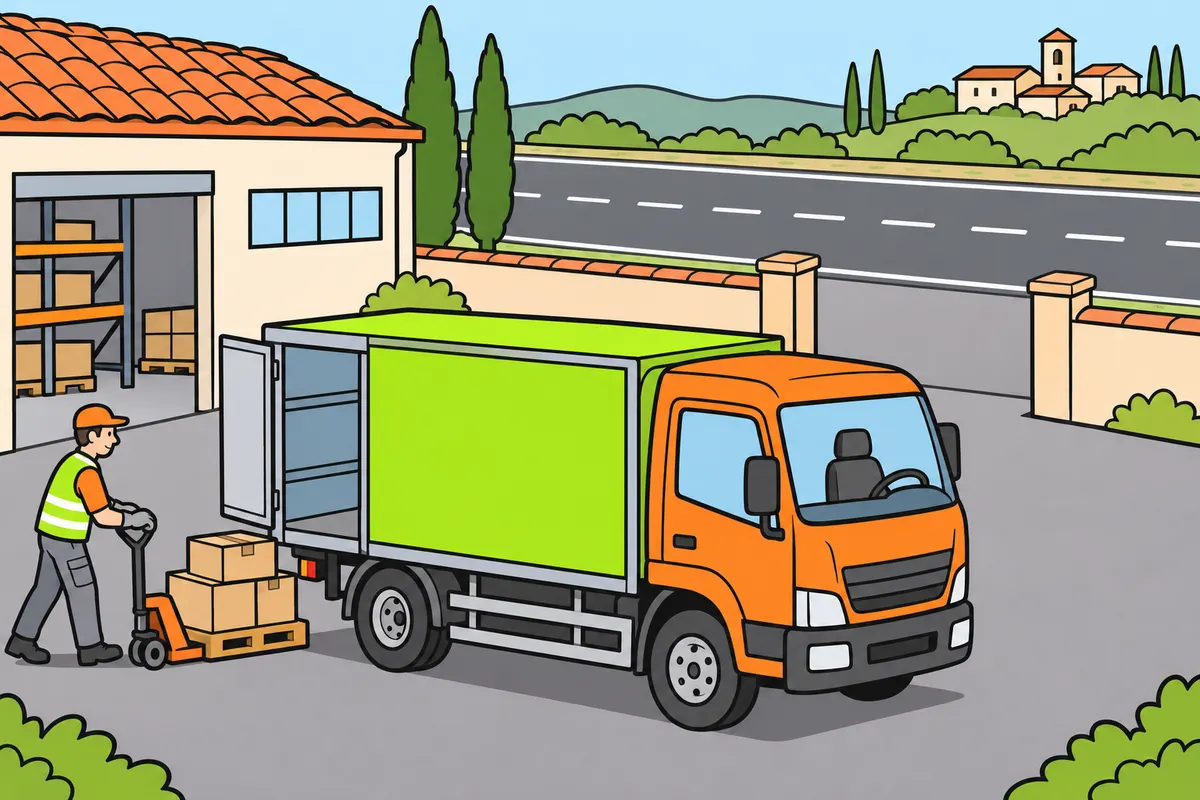
Load and unload off the road unless using the road is unavoidable.
Remember
- If using the road is unavoidable, avoid danger and serious disruption.
- Follow stopping and parking rules.
- In built-up areas, follow municipal rules on places and times too.
- On interurban roads, stay off the carriageway, on the right.
- Keep the usable hard shoulder clear.
- Before entering the loading bay, check the ground and working space.
Exam trap: Wrong: you may double-park to unload if you stay at the wheel. Right: staying there does not permit double-parking.
Read the full explanation
- You must load and unload off the road. Only when it is unavoidable to do so on the road may you use this exception, without creating danger or serious disruption and while observing the rules on stopping and parking and, in built-up areas, municipal places and times. [RGC, art. 16](https://www.boe.es/buscar/act.php?id=BOE-A-2003-23514#a16).
- On an interurban road, you must stop or park off the carriageway, on the right, leaving the usable part of the arcén (hard shoulder) clear. You must not choose the usable hard shoulder as a regular unloading area for convenience or to remain in the cab. [RGC, art. 90.1](https://www.boe.es/buscar/act.php?id=BOE-A-2003-23514#a90).
- You must not double park to deliver goods. Remaining at the wheel does not by itself turn parking into stopping, and unloading does not create a general exception. Double parking without a driver is also listed among serious obstructions. [RGC, arts. 91 and 94](https://www.boe.es/buscar/act.php?id=BOE-A-2003-23514#a94).
- Before entering a loading bay or work area, check that there is room to open doors, use the tail lift or operate the equipment. As an operational precaution, assess the firmness of the ground, uneven surfaces and overhead obstacles. A location that accommodates the lorry while driving may not safely accommodate the planned operation.
17Preparing a safe operation
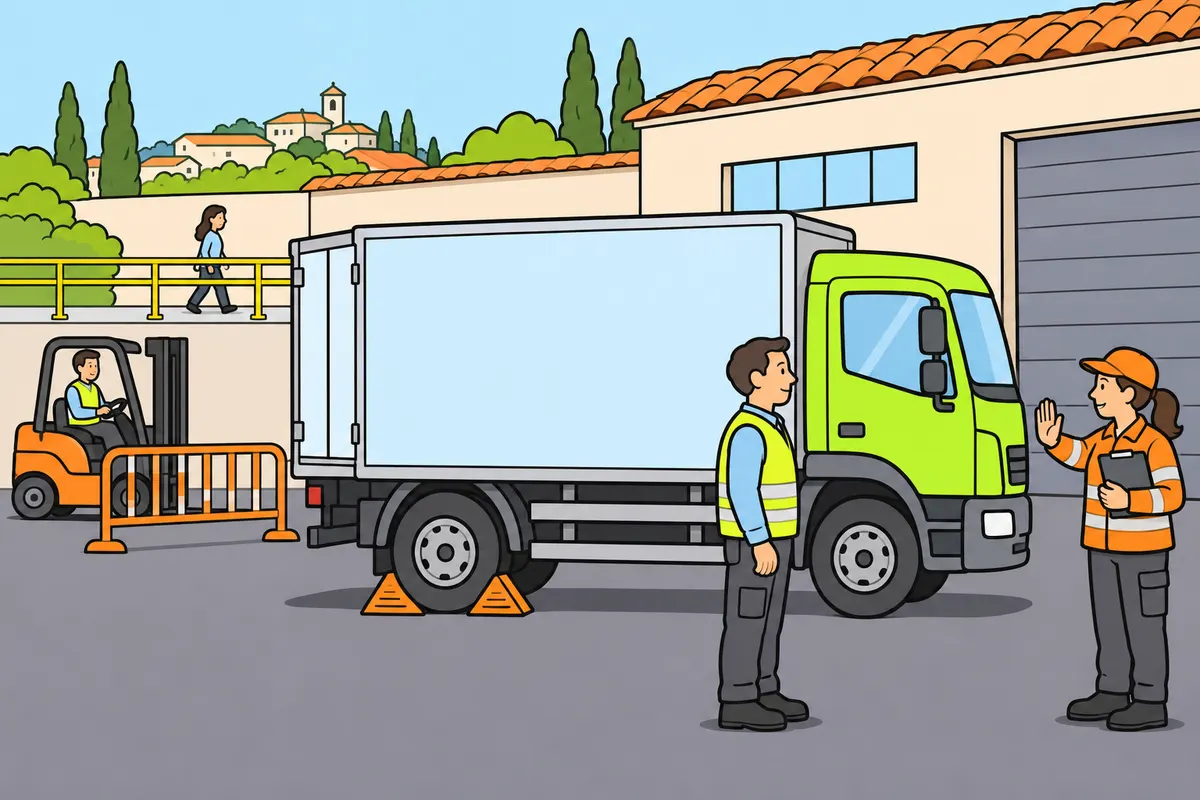
Coordinate people and prepare equipment before moving loads or releasing restraints.
| Equipment | What you must check |
|---|---|
| Crane | Suitable supports and no people in the operating area |
| Rear tail lift | Permitted weight distribution and clear trapping zones |
| Pallet truck | Sound pallet, forks properly inserted and a clear view of your route |
Remember
- Agree when your lorry may move and follow the site procedure.
- Keep people and equipment clear before moving off.
- Stabilise goods before releasing the lashings that hold them.
- Use crane stabilisers on firm ground; respect capacity and reach.
- Do not let anyone pass beneath a suspended load.
- Respect tail lift and pallet truck capacities; prevent uncontrolled movement.
Exam trap: Wrong: you may use the tail lift as a passenger lift. Right: the operator may ride only if the equipment permits this.
Read the full explanation
- You must coordinate the operation with the site staff and agree when the lorry may move. As a precaution, prevent a forklift from entering while the driver prepares to leave, and keep pedestrians away from the loads' route. Do not move off again until you have checked that people and equipment are out of danger.
- You must distinguish securing the parked lorry, covered in “Manoeuvres with your lorry”, “Secure your lorry on a slope”, from the loading bay devices that prevent accidental separation during loading or unloading; follow the site's procedure for using them. [RGC, art. 92.3](https://www.boe.es/buscar/act.php?id=BOE-A-2003-23514#a92). [RD 1215/1997, annex II.1.3 and 4](https://www.boe.es/buscar/act.php?id=BOE-A-1997-17824#anii).
- Before removing lashings, identify what each one is restraining and in what order it can be released without causing goods to fall. As a working practice, keep people out of reach of tensioners and parts that may move. You must stabilise the load with the necessary equipment before releasing the restraint that is keeping it safe.
- To use the lorry's crane, deploy the designated stabilisers on firm ground with suitable supports. Observe the rated capacity for the reach and working configuration; keep people out of the operating area and do not allow anyone to pass beneath the suspended load. [RD 1215/1997, annex II.1.8 and II.3](https://www.boe.es/buscar/act.php?id=BOE-A-1997-17824#anii).
- On the rear tail lift, observe the capacity and load distribution specified by the manufacturer and prevent packages from rolling or falling. Do not use it as a passenger lift: the operator may be present only if the equipment is designed for that purpose. Keep trapping zones clear. [RD 1215/1997, annex II.1.3 and II.3.1.b)](https://www.boe.es/buscar/act.php?id=BOE-A-1997-17824#anii).
- If you use a pallet truck, check its capacity and the condition of the pallet, insert the forks correctly, and maintain visibility and distance from other people. Prevent the pallet truck or pallet from moving uncontrollably between the loading bay, the platform and the body. [RD 1215/1997, annex II.1.7, 8 and 10](https://www.boe.es/buscar/act.php?id=BOE-A-1997-17824#anii).
18Carrying out and completing unloading
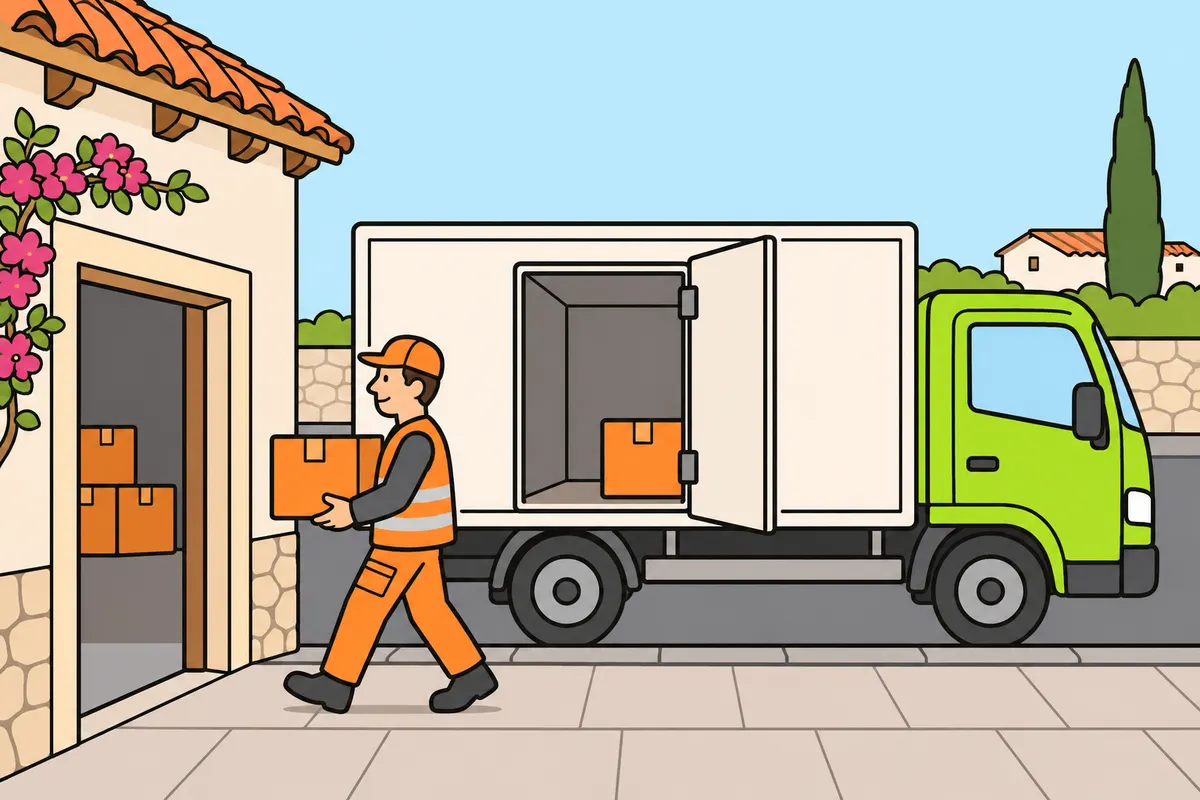
Keep goods out of prohibited spaces and prepare your lorry before leaving.
Remember
- If unloading on the road is unavoidable, finish quickly and avoid unnecessary nuisance.
- Work, if possible, on the side nearest the edge of the carriageway.
- Do not place goods on the carriageway, hard shoulder or pedestrian areas.
- Before raising a tipper body, check firm, level ground and overhead space.
- If material sticks, follow the proper procedure without improvised manoeuvres.
- Before leaving, collect tools, secure closures, lower the body and disconnect connections.
Exam trap: Wrong: unloading hours let you leave packages on the pavement. Right: do not place them there, even briefly.
Read the full explanation
- If the operation on the road is unavoidable, you must work, as far as possible, on the side nearest the edge of the carriageway and have enough equipment to finish quickly, avoiding unnecessary noise and inconvenience. [RGC, art. 16.b and c](https://www.boe.es/buscar/act.php?id=BOE-A-2003-23514#a16).
- You must not place goods on the carriageway, hard shoulder or pedestrian areas, even if you intend to leave them there only while you bring a forklift over. An authorised loading and unloading time does not authorise leaving goods there. You must organise the transfer between the lorry and the destination without using these areas as temporary storage. [RGC, art. 16.c](https://www.boe.es/buscar/act.php?id=BOE-A-2003-23514#a16).
- As a precaution with tipper bodies, check that the ground is firm and level and that there is enough overhead clearance before raising the body, and keep the product's fall zone clear. If material sticks, do not try to dislodge it with improvised manoeuvres that compromise stability. Use the manufacturer's procedure and the site's equipment.
- Before leaving, you must put away tools, secure doors, gates and the platform, and check that the tipper body is in the driving position. Also check that no hoses or connections remain attached to the installation if you have used them. The end of transfer or unloading does not mean that the vehicle is ready to move.
19Who can take part in the operation
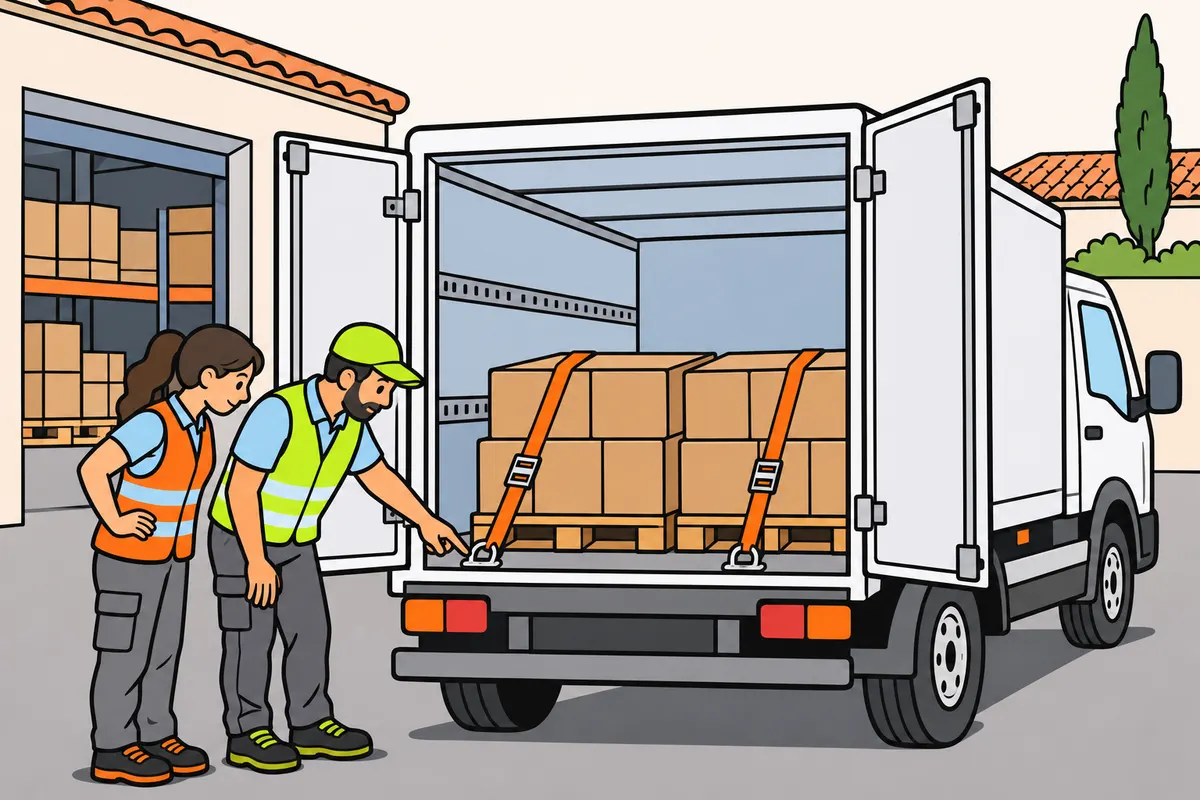
You may take part if it is your responsibility and you have suitable training and equipment.
| Goods lorries: maximum authorised mass | General driver loading/unloading prohibition at this threshold |
|---|---|
| Above 3,500 kg and up to 7,500 kg | Does not apply on this weight threshold |
| Above 7.5 tonnes | General prohibition applies |
Remember
- Compare maximum authorised mass, not your actual weight on this journey.
- Use only equipment you are trained to operate.
- Agree who positions, distributes and secures each unit.
- Coordinate closures, connections and clearance to move your lorry too.
- Even if someone else loads, understand and check the result.
- If you find a risk, arrange its correction before driving.
Exam trap: Wrong: exactly 7,500 kg MMA means the general prohibition applies. Right: it does not exceed 7.5 tonnes; you still need suitable training and equipment.
Read the full explanation
- In your C1 lorry with an MMA over 3,500 kg and no more than 7,500 kg, the general prohibition on taking part in loading and unloading, which applies to drivers of goods vehicles with an MMA over 7.5 tonnes, does not apply on the basis of that threshold. Exactly 7,500 kg does not exceed 7.5 tonnes; you must compare the MMA, not the actual mass of the journey. [LOTT, additional provision thirteen](https://www.boe.es/buscar/act.php?id=BOE-A-1987-17803#da).
- You may take part when the operation is your responsibility and you have the appropriate training and equipment. The fact that the mass threshold does not prohibit you from taking part does not mean that you know how to operate a forklift, crane or lifting platform. As a preventive measure, use only equipment you are trained to operate and follow the site and manufacturer’s instructions.
- Before you start, you must agree who will position, distribute and secure each item. If several people are involved, make sure nobody removes a support while someone else is relying on it to keep the goods stable. Coordination must also cover closing the doors, disconnecting connections and operational authorisation to move the lorry.
- Even if someone else physically loads the goods, you must know how they are stowed and check that you can drive safely. Do not assume that the warehouse handing you a loaded lorry guarantees that the load is correctly distributed or secured. If you spot a risk, you must arrange for it to be corrected before driving. [RGC, arts. 14 and 17](https://www.boe.es/buscar/act.php?id=BOE-A-2003-23514#a14).
20Partial unloading and restowing
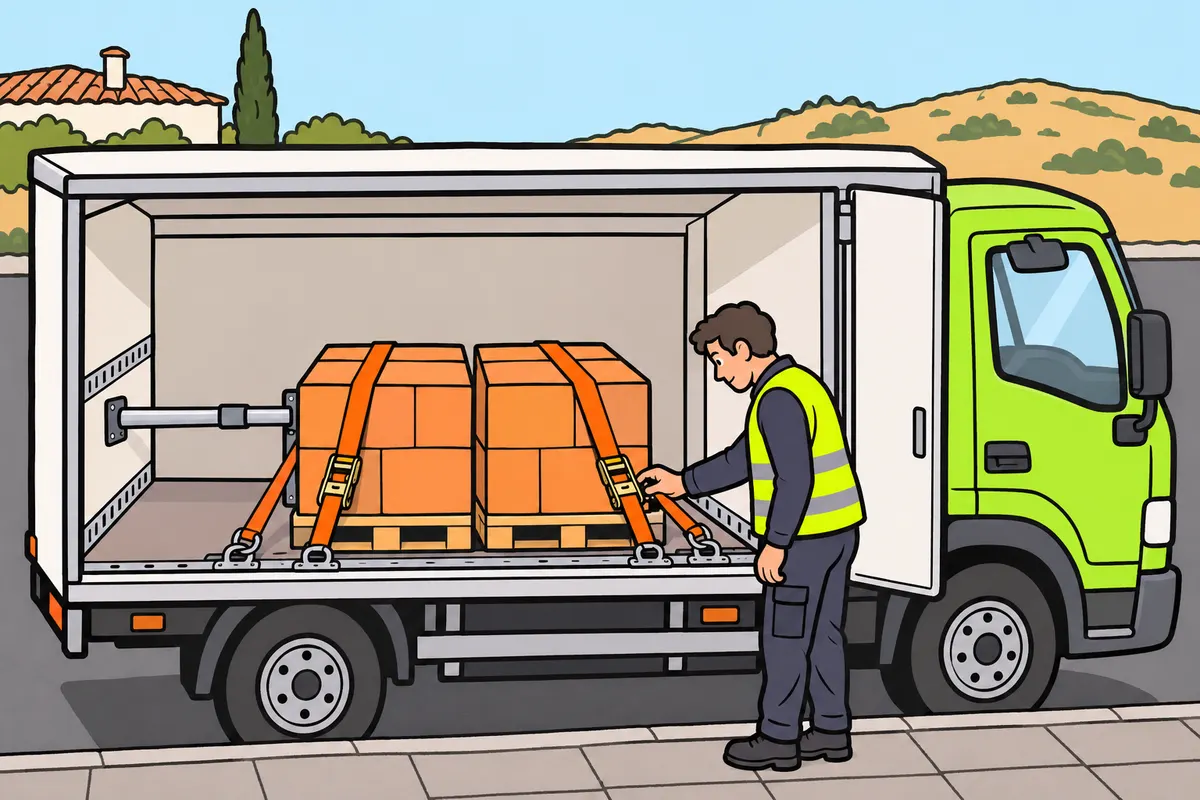
After each delivery, check weight distribution and secure the remaining goods again.
Remember
- After every delivery, check axle and side distribution.
- Restore blocking or adjust lashings if gaps remain.
- With tankers, follow the specified emptying sequence.
- Check closures after each operation.
- Reposition the panel if the projecting end changes.
- Secure any cover that has loosened.
Exam trap: Wrong: removing weight always improves distribution. Right: removing a counterweight can increase weight on another axle.
Read the full explanation
- After each delivery, you must check the distribution across the axles and sides and secure what remains again. Removing goods reduces the total mass, but does not guarantee a better load distribution at every support point: removing a counterweight may increase the load carried by another axle. You must assess the new arrangement, not just how much weight you have removed.
- If the pallets were blocking one another, removing a row may leave the remaining items unsecured. You must restore the blocking or adjust the lashings before setting off.
- In tankers with several compartments, you must anticipate how unloading each one affects longitudinal load distribution. A tanker with less liquid may still pose a significant risk because of load movement and uneven distribution. Follow the operating sequence specified for the equipment and check the closures after each operation.
- You must also check the signs and covers after changing the load. If the projecting end changes, the panel must remain in the corresponding position; if a tarpaulin comes loose, you must secure it again. The check before the first journey does not automatically cover every later stage.
21When a load may project
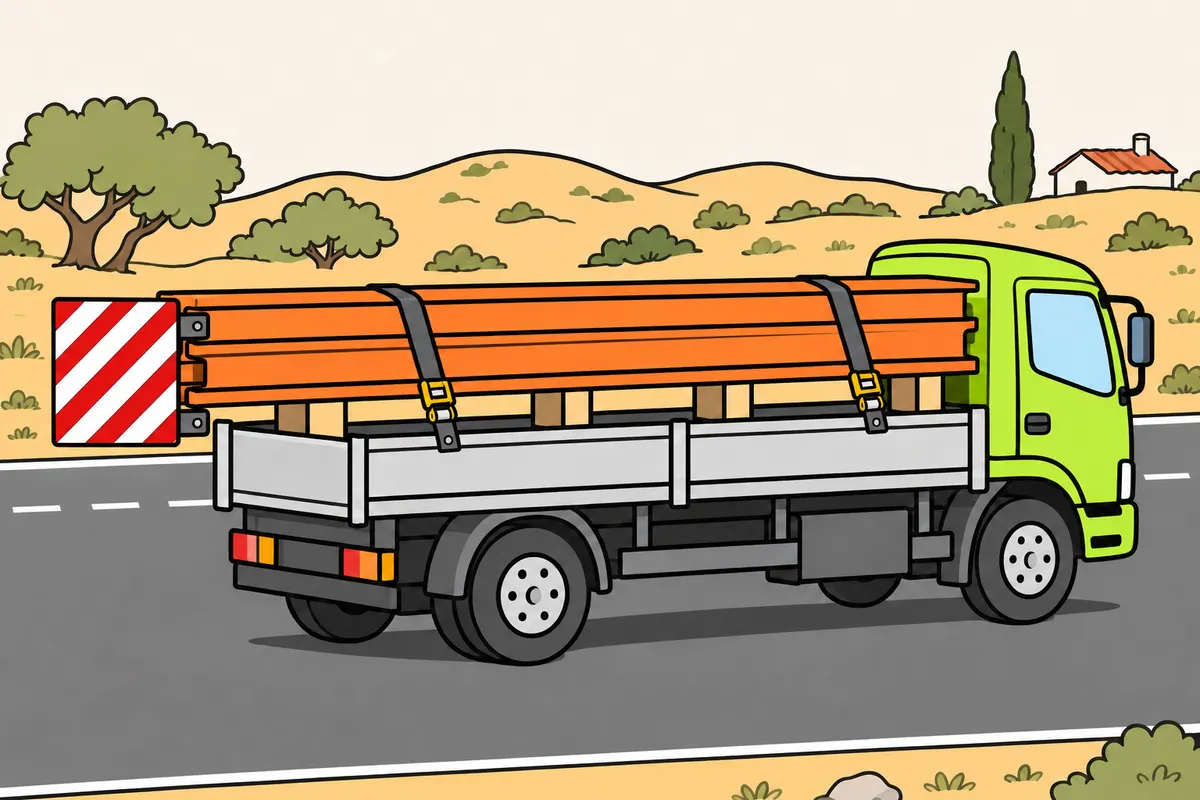
On your goods-only lorry, use permitted projections only for indivisible loads.
| Length of goods-only lorry | Front projection: item of indivisible length | Rear projection: item of indivisible length |
|---|---|---|
| More than 5 m | Up to 2 m | Up to 3 m |
| 5 m or less | Up to one third of lorry length | Up to one third of lorry length |
Remember
- Keep goods within your lorry’s outline unless a permitted exception applies.
- These projections cover beams, posts, pipes and other items of indivisible length.
- Position and secure your load correctly.
Exam trap: Wrong: at exactly 5 m, allow 2 m forwards and 3 m rearwards. Right: for these indivisible items, allow up to one third of lorry length at each end.
Read the full explanation
- In your lorry used exclusively for carrying goods, you must keep the load within its plan-view outline, except for the exemptions for indivisible loads that are properly stowed and prepared. [RGC, art. 15.1 and 2](https://www.boe.es/buscar/act.php?id=BOE-A-2003-23514#a15).
- If you are carrying beams, posts, pipes or other items of indivisible length, they may project by up to 2 m at the front and 3 m at the rear when the lorry is over 5 m long; if it is 5 m or shorter, they may project by up to one third of its length at each end. [RGC, art. 15.2.a](https://www.boe.es/buscar/act.php?id=BOE-A-2003-23514#a15).
22Side projections and overall dimensions
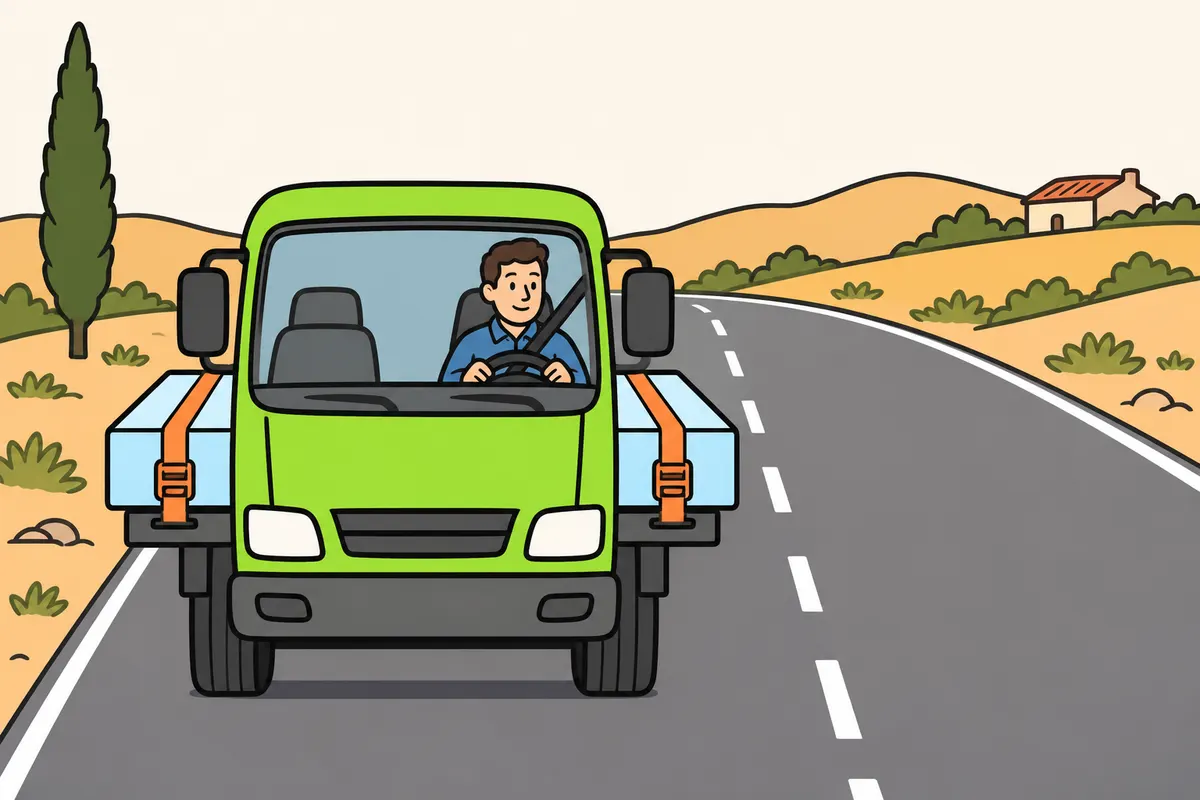
Check side projections and your laden lorry’s overall dimensions.
Remember
- The indivisible item’s smallest dimension must exceed your lorry’s width.
- Measure your lorry with its load.
- Respect overall limits and route limits.
- If an indivisible load inevitably exceeds limits, you need granted additional road use authorisation.
Exam trap: Wrong: side projections can exceed the overall width limit. Right: respect the maximum overall width; if an indivisible load inevitably exceeds limits, you need granted additional road use authorisation.
Read the full explanation
- When the smaller dimension of the indivisible item exceeds the lorry’s width, it may project by up to 0.40 m on each side, subject to a maximum overall width of 2.55 m. [RGC, art. 15.2.b](https://www.boe.es/buscar/act.php?id=BOE-A-2003-23514#a15).
- You must measure the loaded lorry to comply with the overall limits and those applying to your route; if an indivisible load inevitably exceeds them, you need the corresponding supplementary circulation authorisation. See the tables and special transport conditions in “Dimensions and masses of the light lorry”, “Maximum lorry width”, “General height and 4.50 m exceptions”, “Length of rigids, trailers and articulated vehicles” and “When you need special transport authorisation”. [RGC, art. 13](https://www.boe.es/buscar/act.php?id=BOE-A-2003-23514#a13).
23Protection and the V-20 panel
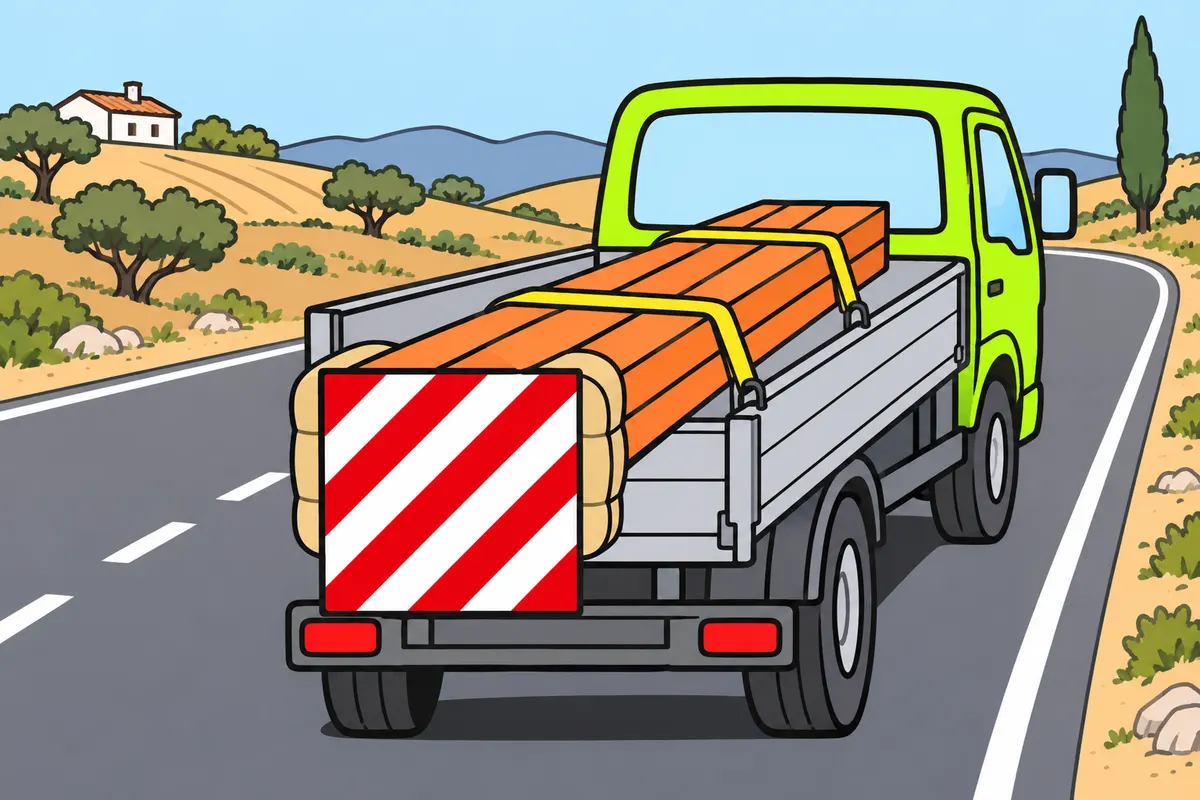
Protect your projecting load and mark its rear end with the required panel.
| Rear load projection | How to place the V-20 |
|---|---|
| Does not occupy the full rear width | One panel at the load’s end |
| Occupies the full rear width | One panel at each side’s end; stripes form an inverted V |
Remember
- Protect the projecting end against scraping and collisions.
- Attach the reflective V-20 panel at the rear end of your load.
- Place it at right angles to your lorry’s length.
- Mark rear projections by day too.
Exam trap: Wrong: one panel suffices when the load projects across the full rear width. Right: fit a panel at each side’s end, with stripes forming an inverted V.
Read the full explanation
- You must protect the projecting end against rubbing or impacts and take the necessary precautions to prevent harm to other road users. [RGC, art. 15.5](https://www.boe.es/buscar/act.php?id=BOE-A-2003-23514#a15).
- To warn of a rear projection, you must attach the reflective V-20 panel, with red and white stripes, to the end of the load, perpendicular to the lorry’s longitudinal axis. If the projection spans the full rear width, place a panel at each outer end, with the stripes forming an inverted V. Rear marking is also required during daylight. [RGC, art. 15.6](https://www.boe.es/buscar/act.php?id=BOE-A-2003-23514#a15). [RGV, annex XI, V-20](https://www.boe.es/buscar/act.php?id=BOE-A-1999-1826#v-20).
24Lighting projecting loads
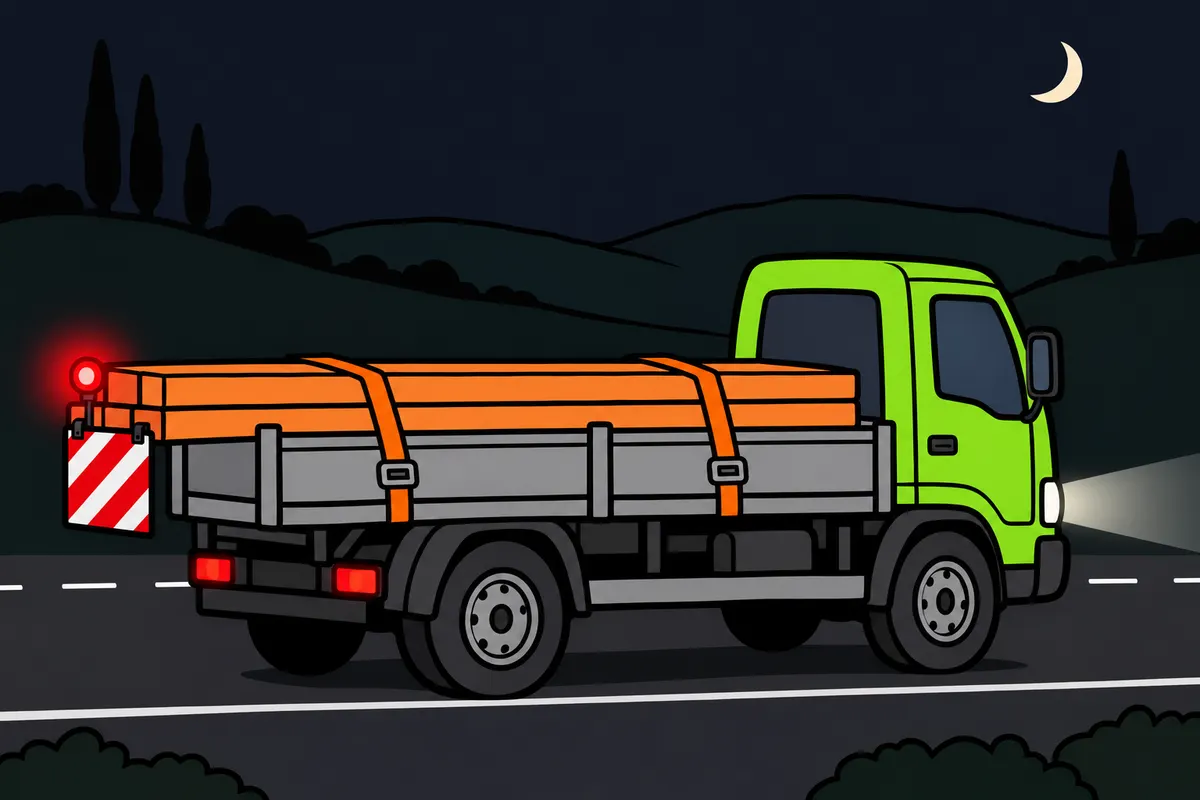
Add the required lights to projections at night or when visibility is significantly reduced.
| Projection at night or in significantly reduced weather/environmental visibility | What you must add |
|---|---|
| Rear | Red light |
| Front | White light |
| Side: beyond vehicle outline and more than 0.40 m from position light’s outer edge | At each affected end: white light and reflector forwards; red light and reflector rearwards |
Remember
- Add lights between sunset and sunrise.
- Also add them when weather or environmental conditions significantly reduce visibility.
- Keep the rear panel when adding the red light.
- Measure sideways from the corresponding position light’s outer edge.
Exam trap: Wrong: measure the side lighting threshold from the load body. Right: when the load projects beyond the vehicle’s outline, measure from the corresponding position light’s outer edge.
Read the full explanation
- Between sunset and sunrise, or when weather or environmental conditions significantly reduce visibility, you must add a red light to a rear projection and mark a front projection with a white light. [RGC, art. 15.6](https://www.boe.es/buscar/act.php?id=BOE-A-2003-23514#a15).
- In the same conditions, if a side end projects beyond the vehicle’s end-outline and is more than 0.40 m from the outer edge of the corresponding position light, you must mark each affected end with a white light and reflector facing forwards, and a red light and reflector facing backwards; measure from the light, not from the side of the body. The use of the other lights is covered in “Lights and signalling on your light lorry” and “When you must switch on your lights”. [RGC, art. 15.7](https://www.boe.es/buscar/act.php?id=BOE-A-2003-23514#a15).
25Keeping the road clean and free of obstacles
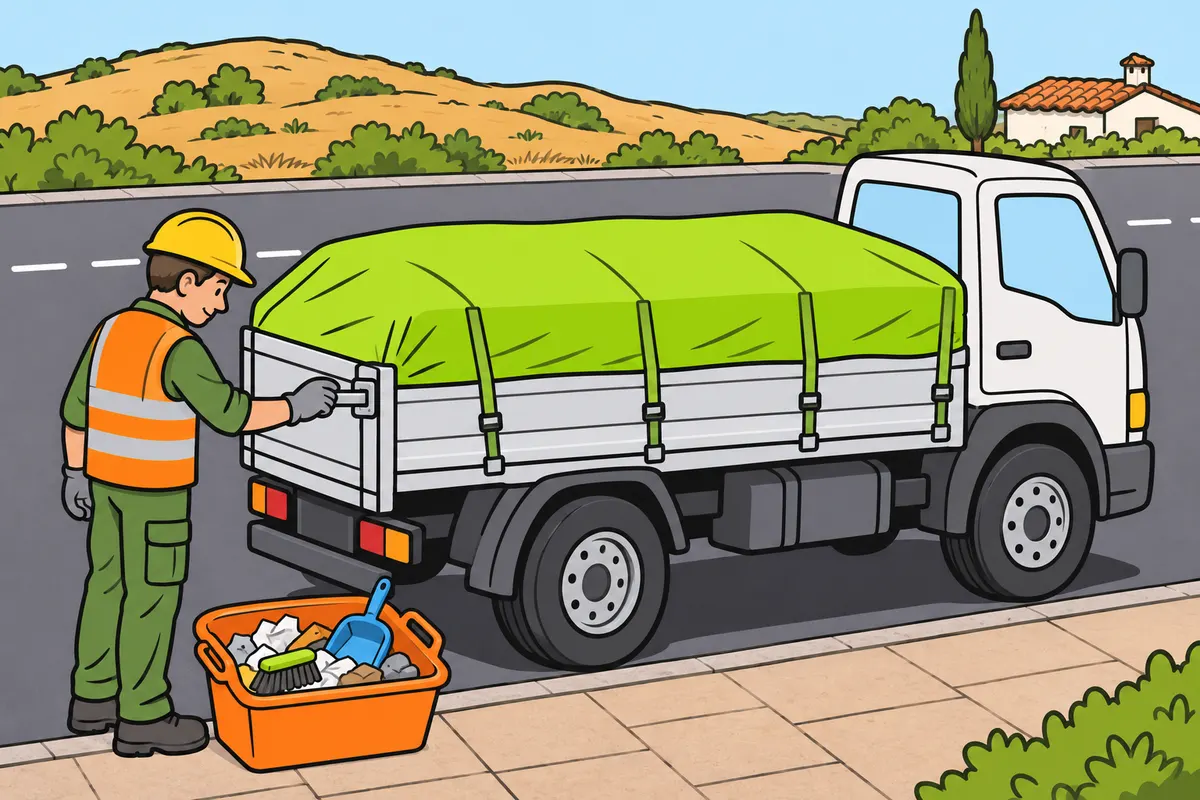
Prevent lost loads and safely remove dangers you have created.
Remember
- Keep packaging and tools gathered up.
- Before leaving, check for mud, stones and debris that could fall.
- Do not empty waste from your load body onto the road.
- If you create a danger, remove it as soon as possible.
- Meanwhile, warn others and avoid obstructing traffic.
- Ask for help if needed and fix the cause before continuing.
Exam trap: Wrong: after a spillage, just remove what fell. Right: also fix the cause before moving off.
Read the full explanation
- You must keep the road clear of goods, packaging and waste that could make traffic dangerous or damage the road; a spillage can reduce grip, especially for people travelling on two wheels. [RGC, art. 4.2](https://www.boe.es/buscar/act.php?id=BOE-A-2003-23514#a4).
- As a preventive check when leaving a roadworks site or unloading area, check for residue on tailgates, edges and equipment, and avoid carrying loose mud or stones that could fall. You must keep packaging materials and tools collected together. Cleaning the load body by losing its contents onto the road is not an acceptable way to finish the job.
- If you create an obstacle or hazard, you must remove it as soon as possible and, in the meantime, take measures to make other road users aware of it and ensure that traffic is not impeded. You must arrange its safe removal and ask for help if you cannot deal with it using your own resources. [RGC, art. 5](https://www.boe.es/buscar/act.php?id=BOE-A-2003-23514#a5).
- Before driving off again after a spillage, you must correct its cause: a faulty fastening or an improperly secured cover could cause the load to spill again. Detailed action in the event of immobilisation or an emergency is covered in “Accidents, breakdowns and first aid”, “Fallen loads and risks specific to lorries”.
26Final check and stowage inspection
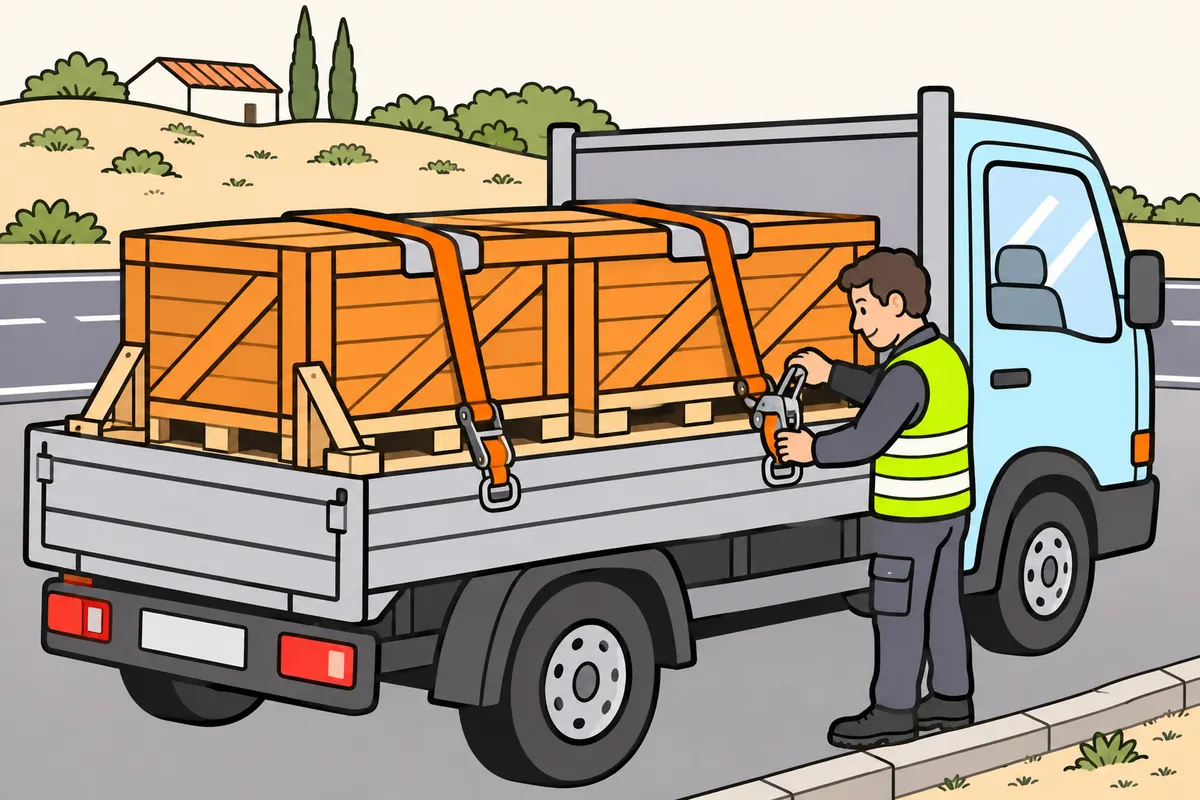
Check every condition affecting your load before driving.
| Load-securing inspection deficiency | What it means |
|---|---|
| Minor | Correct securing, though recommendations may be made |
| Major | Significant movement or overturning is possible |
| Dangerous | Direct danger, such as immediate load loss or injury to people |
Remember
- Check position, mass, supports and restraint.
- Check closures, covers, dimensions and markings.
- Check lights and plates from outside your lorry.
- Know your securing system’s characteristics to help with inspection.
Exam trap: Wrong: a tidy load is already safely secured. Right: check its strength and every condition before driving.
Read the full explanation
- You must finish your inspection in order: position and masses, supports, restraint, fastenings, covers, dimensions and marking. Check the lights and plates from outside the lorry. A load may pass the first part of the inspection and fail another; you must meet every condition before driving.
- During a roadside inspection, officers may visually check the load, measure tensions, calculate the effectiveness of the securing system and check certificates where applicable. You must know the characteristics of the installation to make it easier to inspect. A neat external appearance does not replace the required strength. [RD 563/2017, art. 11 and annex III.II](https://www.boe.es/buscar/act.php?id=BOE-A-2017-6512#ai-3).
- In a stowage inspection, a deficiency is minor when the securing is correct but recommendations may be made, and serious when there is a possibility of significant displacement or overturning. It is dangerous if it creates a direct hazard, for example an immediate risk of the load being lost or of injury to people. [RD 563/2017, annex III.II.1](https://www.boe.es/buscar/act.php?id=BOE-A-2017-6512#ai-3).
Prepare and secure a load
Procedure for setting off with the lorry correctly loaded and secured.
- Identify the mass, dimensions, support points and orientation of each item, and check that the vehicle is suitable.
- Plan the distribution across the axles and sides, keeping heavy items low and taking partial deliveries into account.
- Clean the support surfaces and fit the necessary load-spreading, anti-slip and blocking materials.
- Fit and tension the calculated lashings; check the anchor points, edge protection and measures to prevent tipping or rolling.
- Close and secure doors, tailgates and covers; measure any projections and fit the required signs and lights.
- Make a final walk-round inspection and plan any checks required by the load and the route.
Load or unload safely
From choosing the location to setting off again.
- Choose a place off the road; if operating on the road is unavoidable, check restrictions, permitted times and that there is no danger.
- Check who may take part, coordinate the work and immobilise the lorry in accordance with the location and the site procedure.
- Stabilise the load before opening or releasing the items holding it in place.
- Move the packages using adequate equipment, without placing them on the carriageway, arcén (hard shoulder) or pedestrian areas.
- Check the distribution and secure again anything that remains on board.
- Put away equipment and connections, close the bodywork, check that it is clean and correctly marked, and confirm that you can move off.
Deal with a projecting load on the lorry
Check authorisation, measurements and marking separately.
- Confirm that this is the permitted case of an indivisible load on a vehicle used exclusively for carrying goods.
- Apply the longitudinal limit according to whether the vehicle is over 5 m long or up to and including 5 m; also check the lateral limits.
- Measure the overall dimensions and check route restrictions; obtain supplementary authorisation in advance if required.
- Protect the ends and secure the load.
- Fit the rear V-20 panel; use two panels to form an inverted V if the load projects across the full rear width.
- Add the required lights and reflectors according to the direction of the projection, its distance from the position lights and visibility.
Check the load after a partial delivery
Unloading changes both the support points and the securing system.
- Identify the items or compartments that remain loaded.
- Recalculate or check the distribution across the axles and the lateral balance.
- Locate gaps and support points that are no longer there.
- Adapt the blocking and lashings to the new load condition.
- Check closures, covers, projections and markings before continuing.
Check what you know
Real questions from the bank on this topic. Pick an answer to see the explanation.
Finished this module?
Mark it as read and you will see your progress on the theory list.