
Theory · B+E Licence - Car with Trailer · Module 6 of 13
Safety equipment for your vehicle combination
You learn to identify the lights, reflectors, plates, mirrors and rear protection on your B+E combination, as well as the required emergency equipment: a connected V-16, a reflective vest, a fire extinguisher and a spare wheel or alternative system for the towing passenger car.
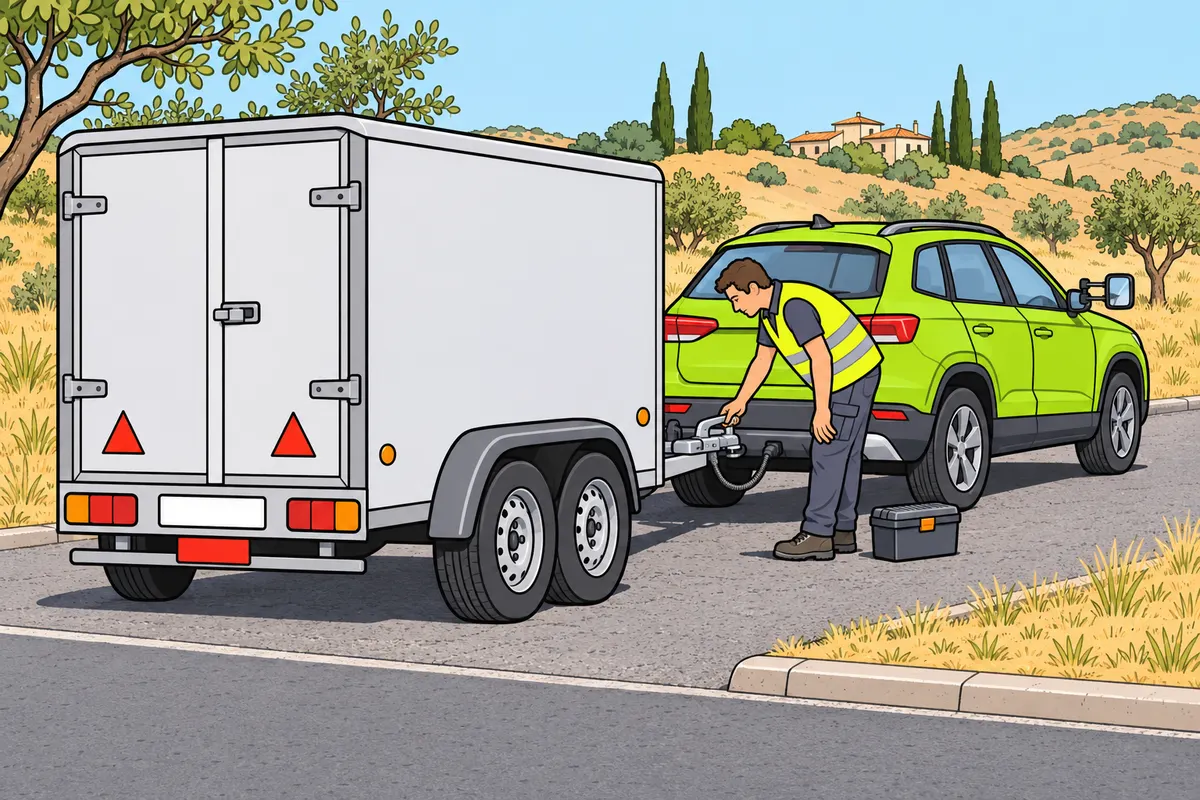
1Each device has a purpose
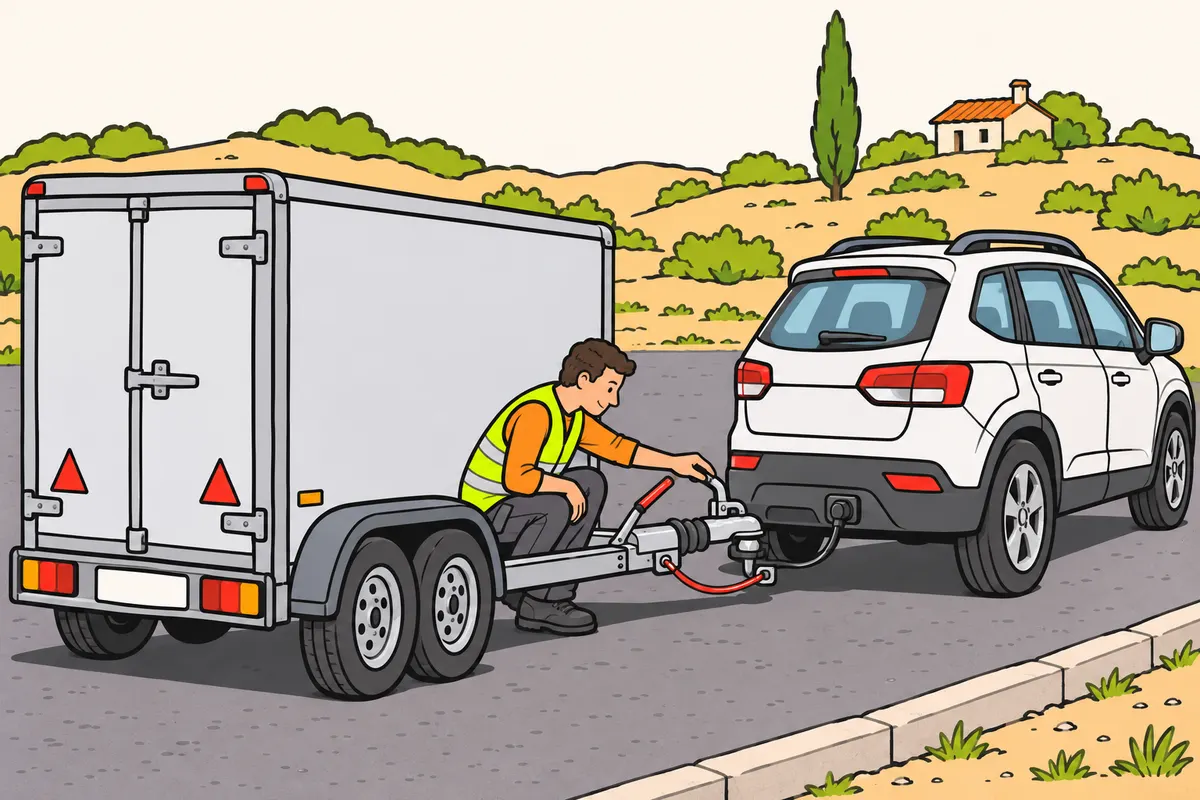
Check each safety device according to its purpose.
Remember
- Check coupling, visibility, securing and personal protection separately.
- Check that the lights work and reflectors are visible.
- Make sure all connections are compatible.
- Check the trailer’s MMA (maximum authorised mass), dimensions, category and type approval.
Exam trap: Wrong: checking the lights is enough. Right: check the coupling and other devices too.
Read the full explanation
- The security of the coupling, the visibility of the combination, securing it against movement and personal protection serve different purposes. A trailer can have all its lights on and an incorrectly fitted cable; it can also be correctly coupled but difficult to identify because its reflectors are covered. Check each group separately.
- On your B+E combination, the mechanical, electrical and, where fitted, pneumatic connections must be compatible. An adapter that allows you to insert a plug does not in itself prove that all the required functions reach the trailer; you must check the result. [RGV, art. 13.1](https://www.boe.es/buscar/act.php?id=BOE-A-1999-1826#a13)
- To decide which devices are required, you must consider the trailer's MMA (maximum authorised mass), dimensions, category and type approval. Do not infer its equipment requirements solely from its appearance, from it being driven empty or from it being a caravan. In exam questions, first identify which characteristic triggers the requirement.
2Coupling and secondary safety
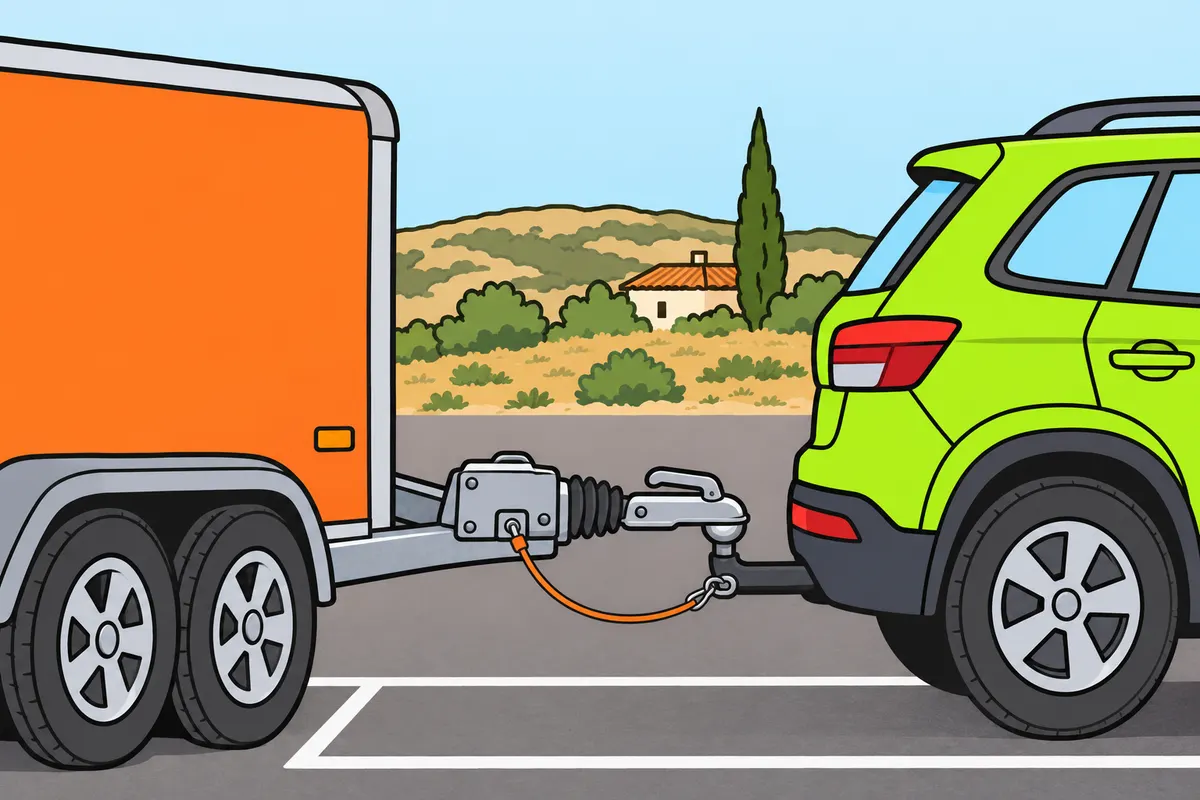
Distinguish the main coupling, breakaway cable and secondary coupling.
| Coupling part | Purpose |
|---|---|
| Main coupling | Keeps the vehicles together |
| Breakaway cable | Applies prescribed braking on separation |
| Secondary coupling | Retains trailer and allows some steering |
Remember
- The main coupling keeps the car and trailer together.
- The breakaway cable applies the prescribed braking if they separate.
- At 1,500 kg MMA or less, check whether a system brakes on separation.
- If no system ensures braking, you need a secondary coupling.
- It must stop the drawbar touching the ground and allow some residual steering.
- The main coupling must prevent detachment.
Exam trap: Wrong: the breakaway cable and secondary coupling do the same job. Right: the cable applies braking; the secondary coupling retains the trailer. You need it at 1,500 kg MMA or less if no system ensures braking on separation.
Read the full explanation
- The main locking mechanism keeps the towing vehicle and trailer connected; the breakaway cable activates the intended braking system if they separate. The secondary coupling provides additional restraint and some residual steering, serving a different purpose from the cable that activates the brake. To connect these components, see «Safe coupling and uncoupling».
- If your trailer has an MMA of 1,500 kg or less and has no system that ensures it brakes if the coupling breaks, it must have a secondary coupling, such as a chain or cable, that prevents the drawbar from touching the ground and allows some residual steering. The main coupling must incorporate a device that prevents it from uncoupling. [RGV, art. 13.3 and 4](https://www.boe.es/buscar/act.php?id=BOE-A-1999-1826#a13)
3Electrical connection and functional checks
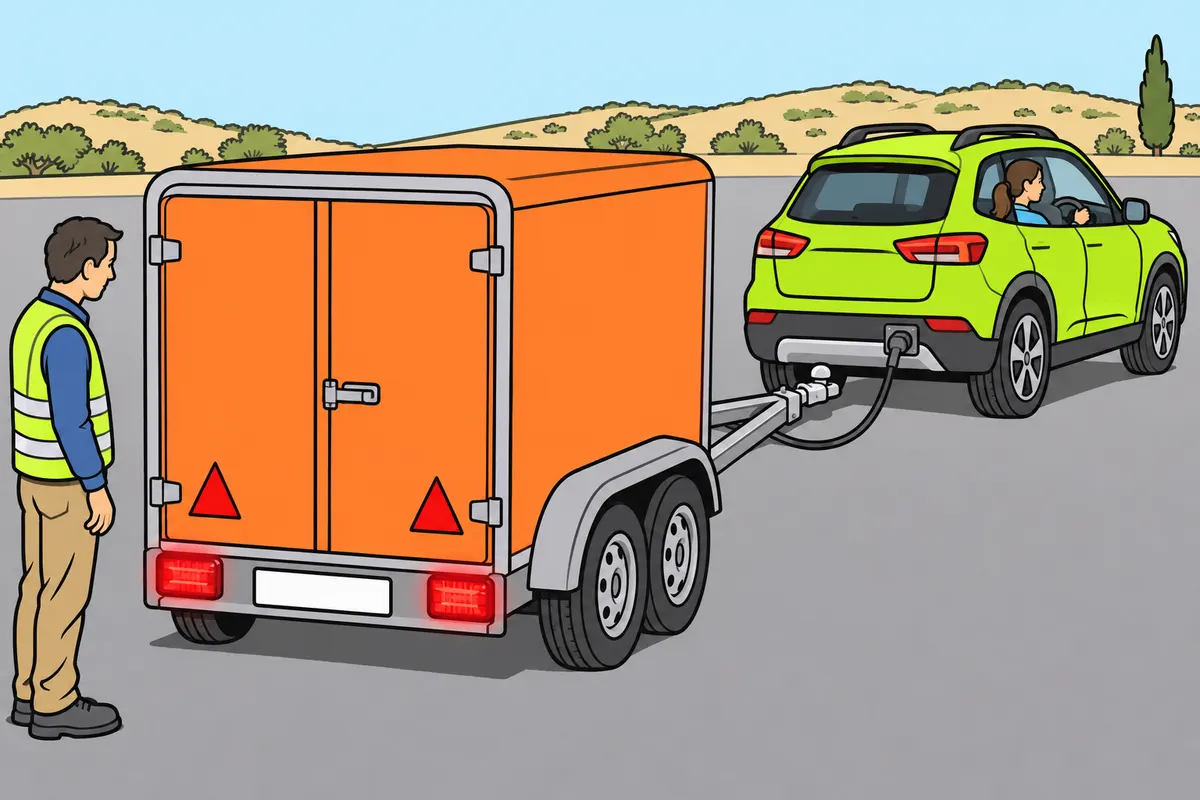
Check that the electrical connection makes every required trailer light work.
Remember
- See “Safe coupling and uncoupling” for fitting and testing.
- Keep lamps, reflectors and plates clean and visible.
- Correct safety faults before setting off.
- Do not use the car’s lights instead of the trailer’s.
- Do not use the caravan’s interior lights as a substitute.
Exam trap: Wrong: one working indicator proves everything works. Right: test every trailer lighting function.
Read the full explanation
- The electrical connection transmits the towing vehicle's lighting and signalling commands to the trailer; fitting it and testing each function are explained in «Safe coupling and uncoupling».
- You must keep lamps, reflectors and plates clean and visible, and correct any defect that compromises safety before starting your journey. Neither the caravan's interior lighting nor the towing vehicle's rear lights replace the trailer's required devices. Their purpose is to show the actual end and dimensions of the combination.
4Rear lights you must recognise
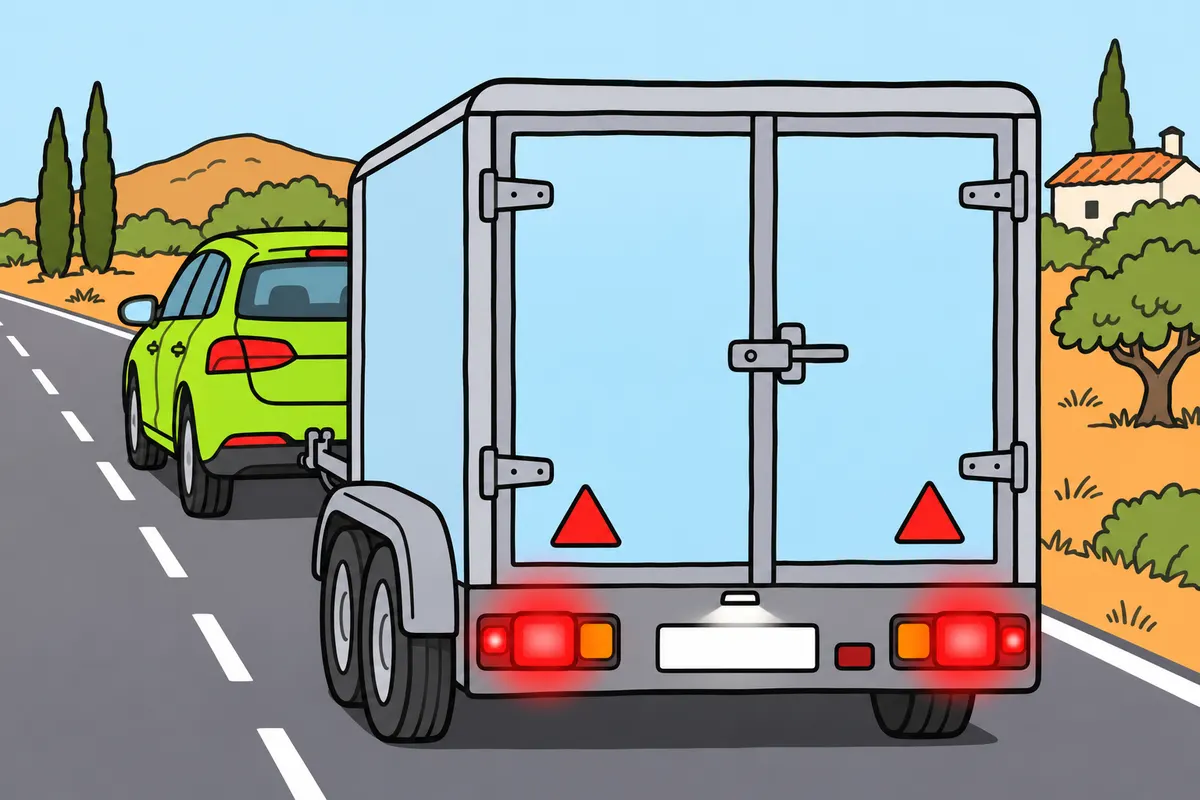
Recognise your trailer’s rear lights by their colour and purpose.
| Trailer light | Colour | Purpose |
|---|---|---|
| Rear position | Red | Show presence and width |
| Brake | Red | Warn that you are braking |
| Indicators | Amber | Show direction |
| Hazard warning | Amber | Flash all indicators together |
| Rear registration plate | White | Light the plate |
| Rear fog | Red | Rear fog lighting |
Remember
- Check that each trailer indicator matches the side you signal on the car.
- Check the trailer’s hazard warning lights too.
- Do not confuse the white plate light with a rear position light.
Exam trap: Wrong: position lights show braking. Right: position lights show the trailer; brake lights warn that you are braking.
Read the full explanation
- Your trailer must have two red rear position lights, positioned towards the outer edges, and two red brake lights. The former show its presence and width; the latter warn that you are braking. Do not confuse a position light that stays on with a braking warning. [RGV, art. 16.5 and Annex X](https://www.boe.es/buscar/act.php?id=BOE-A-1999-1826#anx)
- The rear direction indicators are amber. You must check that the side you signal on the towing vehicle matches the side flashing on the trailer. A reversed connection tells those following you that you intend to perform the opposite manoeuvre. [RGV, Annex X](https://www.boe.es/buscar/act.php?id=BOE-A-1999-1826#anx)
- The hazard warning lights use the direction indicators simultaneously and have the same amber colour. Your trailer must have this function. [RGV, art. 16.5 and Annex X](https://www.boe.es/buscar/act.php?id=BOE-A-1999-1826#anx)
- You must have white lighting for the rear registration plate and one or two red rear fog lights. The white registration plate light illuminates the identification; it is not a white rear-facing lamp for indicating the trailer's presence in normal use. [RGV, art. 16.5 and Annex X](https://www.boe.es/buscar/act.php?id=BOE-A-1999-1826#anx)
5Front and side position lights and end-outline marker lamps
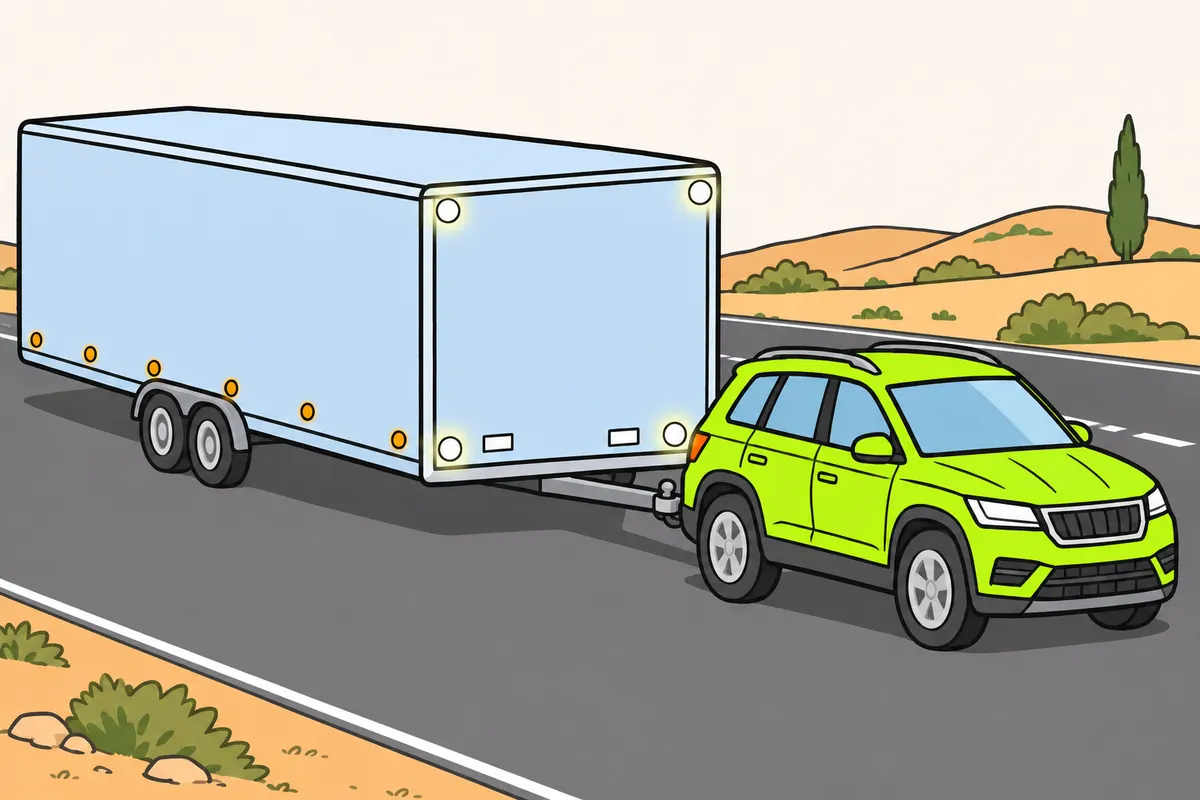
Choose extra lights according to your trailer’s width and length.
| Trailer measurement | Required lights | Colour and position |
|---|---|---|
| Width over 1.60 m | Front position | Two white lamps at the front outer edges |
| Length over 6 m | Side position | Amber lamps along the sides |
| Width over 2.10 m | End-outline markers | Two white front lamps; two red rear lamps; upper outer edges |
Remember
- Measure the trailer without adding the car’s length.
- At widths up to 1.60 m, front position lights are optional generally.
- Do not confuse front lights with white reflectors.
- Keep position lights on even when you have end-outline marker lamps.
Exam trap: Wrong: exactly 2.10 m wide means you need outline lamps. Right: your trailer must exceed that width.
Read the full explanation
- If your trailer is more than 1.60 m wide, you must have two white front position lights at its outer edges. At a width of 1.60 m or less, this function is optional in the Regulations' general list. These lamps emit light; the white front reflectors reflect the light they receive. [RGV, arts. 16.5 and 17.5; Annex X](https://www.boe.es/buscar/act.php?id=BOE-A-1999-1826#anx)
- If its length exceeds 6 m, you must have amber side position lights, with the number depending on its length. For this equipment, the threshold refers to the towed vehicle, rather than automatically adding the lengths of the car and trailer. [RGV, art. 16.5 and Annex X](https://www.boe.es/buscar/act.php?id=BOE-A-1999-1826#anx)
- If your trailer is more than 2.10 m wide, you must have end-outline marker lamps: two white at the front and two red at the rear, positioned to highlight its upper outer edges. Their purpose is to make the outline of the wide vehicle visible; they do not replace the position lights. [RGV, art. 16.5 and Annex X](https://www.boe.es/buscar/act.php?id=BOE-A-1999-1826#anx)
- With a trailer 2 m wide, you must have the white front lights, although this width does not require end-outline marker lamps. If a question gives several dimensions, relate each one to its lighting function: width determines the front and upper outline lighting, and length determines the side lights. [RGV, art. 16.5](https://www.boe.es/buscar/act.php?id=BOE-A-1999-1826#a16)
6Reversing lights and lighting type approval
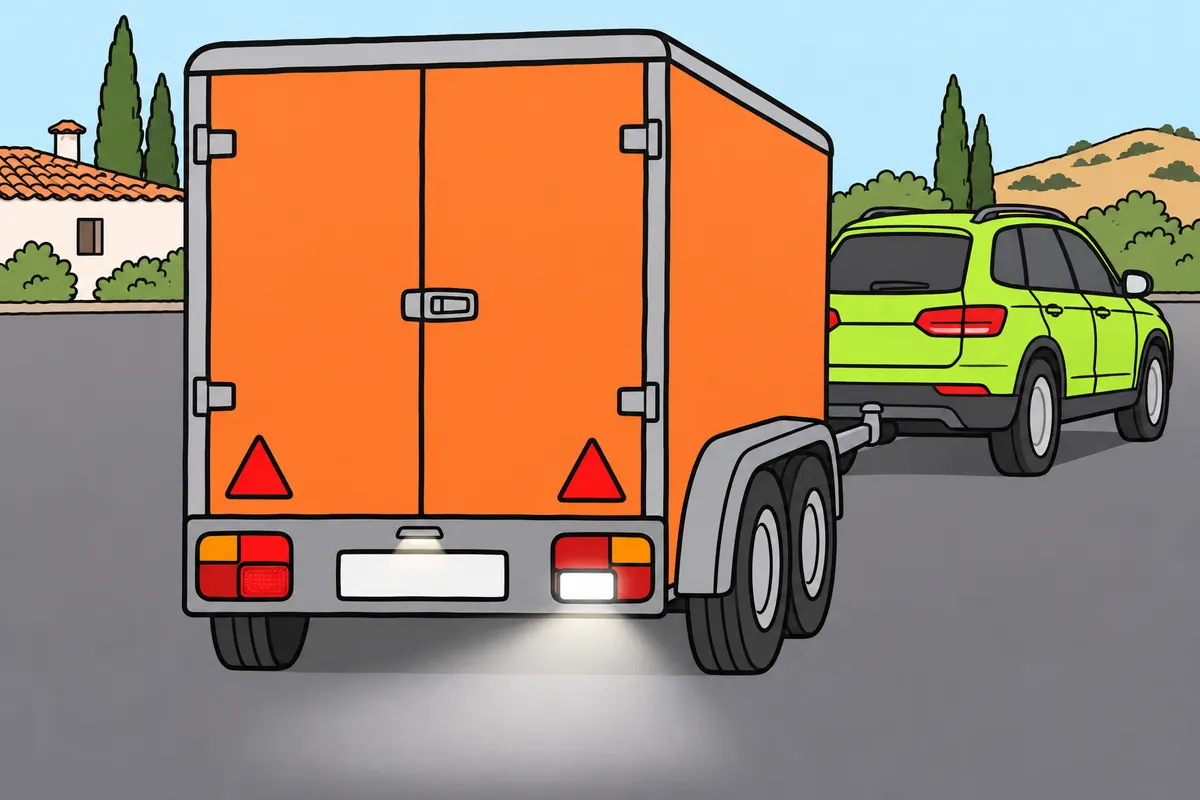
Keep reversing lights when your trailer’s type approval requires them.
| Trailer category | Reversing lights under type approval |
|---|---|
| O2 | Compulsory |
| O1 | Optional |
Remember
- Recognise reversing lights by their white colour.
- Check them when your trailer must have them.
- Check the category, type approval and rules that apply when it enters service.
- Do not add unauthorised lights or reflective devices.
- Follow technical requirements for optional lights too.
Exam trap: Wrong: remove reversing lights because the general list calls them optional. Right: follow your trailer’s type approval.
Read the full explanation
- The reversing light is white and provides a warning and illumination when you reverse. Check that it works if it forms part of your trailer's required equipment. [RGV, Annex X](https://www.boe.es/buscar/act.php?id=BOE-A-1999-1826#anx)
- Article 17.5 of the RGV lists the reversing light as an optional device in its general list for trailers. You must read this list alongside the type-approval rules: UN Regulation No. 48 requires this function on O2 trailers and provides for it as optional on O1 trailers. [RGV, art. 17.5](https://www.boe.es/buscar/act.php?id=BOE-A-1999-1826#a17) [UN Regulation No. 48, paragraph 6.4.1](https://www.boe.es/buscar/doc.php?id=DOUE-L-2021-81325&lang=es)
- To know which equipment your trailer must retain, you must consider its category and the conditions of its type approval, including the regulations applicable when it enters service. [RGV, art. 15](https://www.boe.es/buscar/act.php?id=BOE-A-1999-1826#a15)
- You must not add spotlights, luminous or reflective paint, or other unauthorised devices. Optional lights must also meet the relevant technical requirements; a light being optional does not allow you to choose its colour, position or mode of operation freely. [RGV, art. 15.5](https://www.boe.es/buscar/act.php?id=BOE-A-1999-1826#a15)
7Reflectors: shape, colour and position
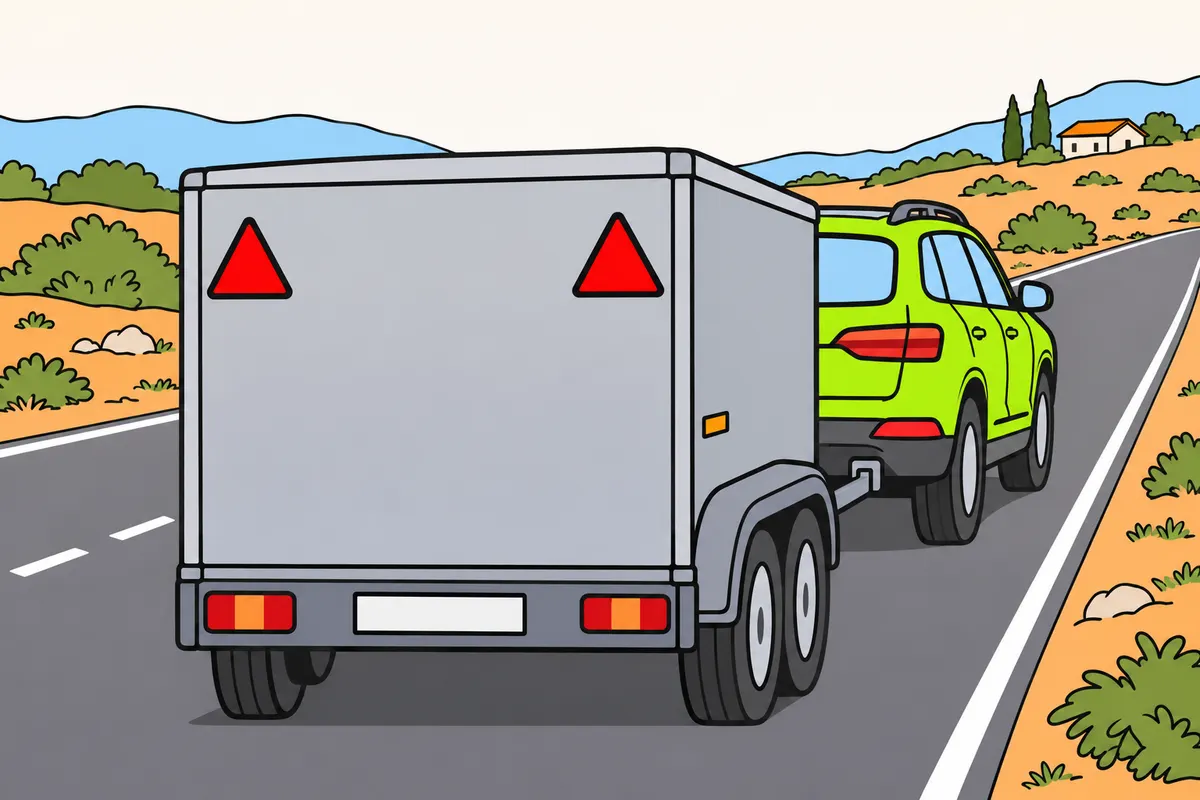
Check your trailer’s reflectors even when all its lights work.
| Position on non-agricultural trailer | Colour | Shape |
|---|---|---|
| Rear outer edges | Red | Triangular |
| Front | White | Non-triangular |
| Sides | Amber | Non-triangular |
Remember
- A reflector sends back light it receives.
- Check reflectors are clean, secure and uncovered.
- Do not replace rear triangles with round reflectors.
- You need side reflectors even when your trailer does not exceed 6 m.
Exam trap: Wrong: testing the plug checks reflectors. Right: check them separately; they do not produce their own light.
Read the full explanation
- A reflector is a passive device that returns light received from other vehicles towards its source. You check its condition by a visual inspection independent of the electrical connection. You must also check that it is clean, securely attached, unbroken and not covered by any objects.
- Your non-agricultural trailer must have two red triangular rear reflectors, positioned towards the outer edges. The triangular shape lets you recognise a towed vehicle. [RGV, art. 16.5 and Annex X](https://www.boe.es/buscar/act.php?id=BOE-A-1999-1826#anx)
- At the front, you must have two white non-triangular reflectors, and along the sides, amber non-triangular reflectors, with the number appropriate to the length. The requirement for side reflectors does not depend on the threshold of more than 6 m that applies to side position lights. [RGV, art. 16.5 and Annex X](https://www.boe.es/buscar/act.php?id=BOE-A-1999-1826#anx)
- During a visual inspection, look at the reflectors from the front, rear and both sides of the trailer. A poorly fitted cover can leave the lights visible while covering the reflectors; a loose component can retain its colour but lose its correct orientation. You should check their surfaces with the trailer clean to detect these defects.
8Use lights according to conditions
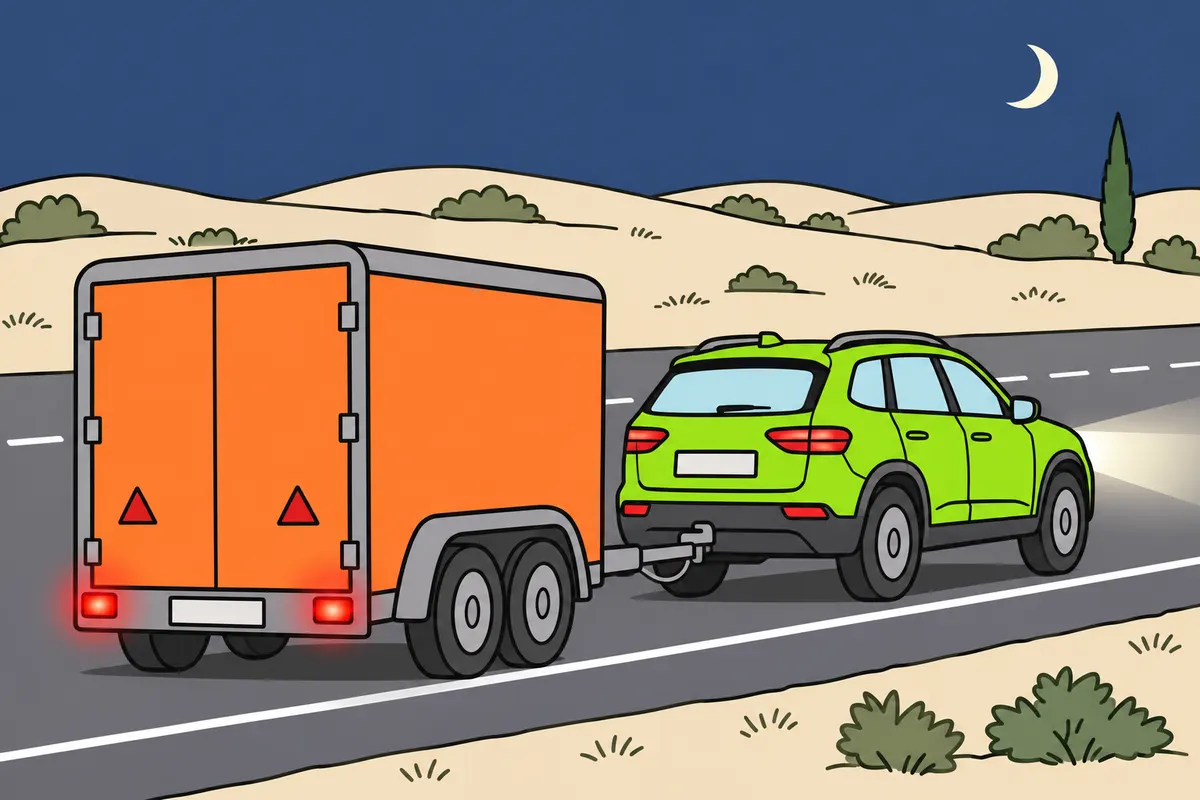
Use your combination’s lights according to daylight and visibility.
| Conditions | Rear fog light use |
|---|---|
| Thick fog, very heavy rain, heavy snow, dense smoke or dust | You must use it |
| Light rain | You must not use it |
Remember
- Use the required lights at night, in tunnels and in underpasses.
- Use them when weather or surroundings greatly reduce visibility.
- Check that your trailer’s position lights come on.
- If immobilised on the carriageway or hard shoulder at night or in poor visibility:
- Keep position lights on, and outline marker lamps when required.
Exam trap: Wrong: hazard lights or V-16 replace position lights. Right: if immobilised on the carriageway or hard shoulder at night or in significantly reduced visibility, keep position lights and required end-outline marker lamps on.
Read the full explanation
- You must use the appropriate lights on your combination between sunset and sunrise, and also in tunnels, underpasses and the other stretches referred to in article 98. Check that the trailer's position lights come on with those of the towing vehicle; lighting only the front of the car is not enough. [RGC, arts. 98 and 99](https://www.boe.es/buscar/act.php?id=BOE-A-2003-23514#a98)
- You must switch on the required lights when weather or environmental conditions significantly reduce visibility. Heavy rain, fog, snow, smoke or dust can make it difficult for others to see the rear end of your trailer. [RGC, art. 106](https://www.boe.es/buscar/act.php?id=BOE-A-2003-23514#a106)
- You must use the rear fog light only in particularly adverse conditions, such as thick fog, very heavy rain, heavy snowfall or dense clouds of smoke or dust. [RGC, art. 106.2](https://www.boe.es/buscar/act.php?id=BOE-A-2003-23514#a106)
- If your combination is immobilised on the carriageway or arcén (hard shoulder) at night or in the visibility conditions described in article 106, you must keep the position lights on and, where required, the end-outline marker lamps. The V-16 and hazard warning lights perform additional functions and do not remove the requirement for these lights. [RGC, arts. 105 and 130](https://www.boe.es/buscar/act.php?id=BOE-A-2003-23514#a105)
9Number plate on a light trailer
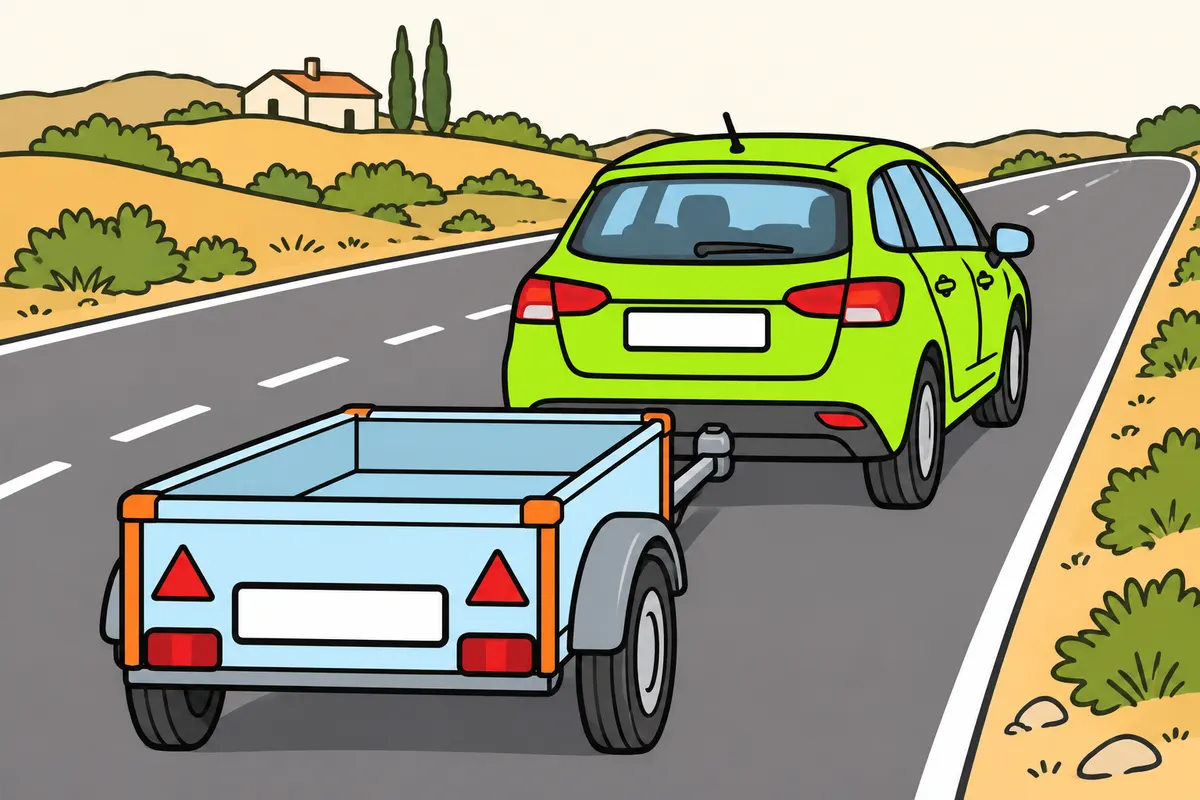
For a light trailer, display a rear plate matching your towing car.
Remember
- At 750 kg MMA or less, display a duplicate rear plate.
- Place it in the centre or on the left.
- You need it even when the car’s plate is visible.
- If you change cars, change the duplicate plate.
- Do not use handwritten cardboard or another car’s registration.
- Keep the plate clean and secure.
Exam trap: Wrong: exactly 750 kg MMA requires the trailer’s own plate. Right: display the towing vehicle’s duplicate plate at the rear, in the centre or on the left.
Read the full explanation
- If you tow a trailer with an MMA (maximum authorised mass) of 750 kg or less, you must display a single plate at the rear bearing the same details as the towing vehicle's plate. It must be in the centre or on the left-hand side of the trailer. Exactly 750 kg falls within this category. [RGV, Annex XVIII.III.4](https://www.boe.es/buscar/act.php?id=BOE-A-1999-1826#iii-3)
- You must display the repeated number plate even if the car's rear number plate is visible from some angles. [RGV, Annex XVIII.III.4](https://www.boe.es/buscar/act.php?id=BOE-A-1999-1826#iii-3)
- If you change the towing car, you must check that the repeated number plate matches the vehicle actually towing the trailer. A plate matching the car you used on another journey does not correctly identify your current combination. Check the characters as well as cleanliness and secure attachment.
- You must not use handwritten cardboard, a plate with a different number or identification placed inside the vehicle that does not meet the regulatory fitting requirements. You cannot justify a missing plate on the grounds that the journey is short or the trailer is empty. Document management is covered in «Driver and vehicle combination documents».
10Own and repeated number plates for B+E
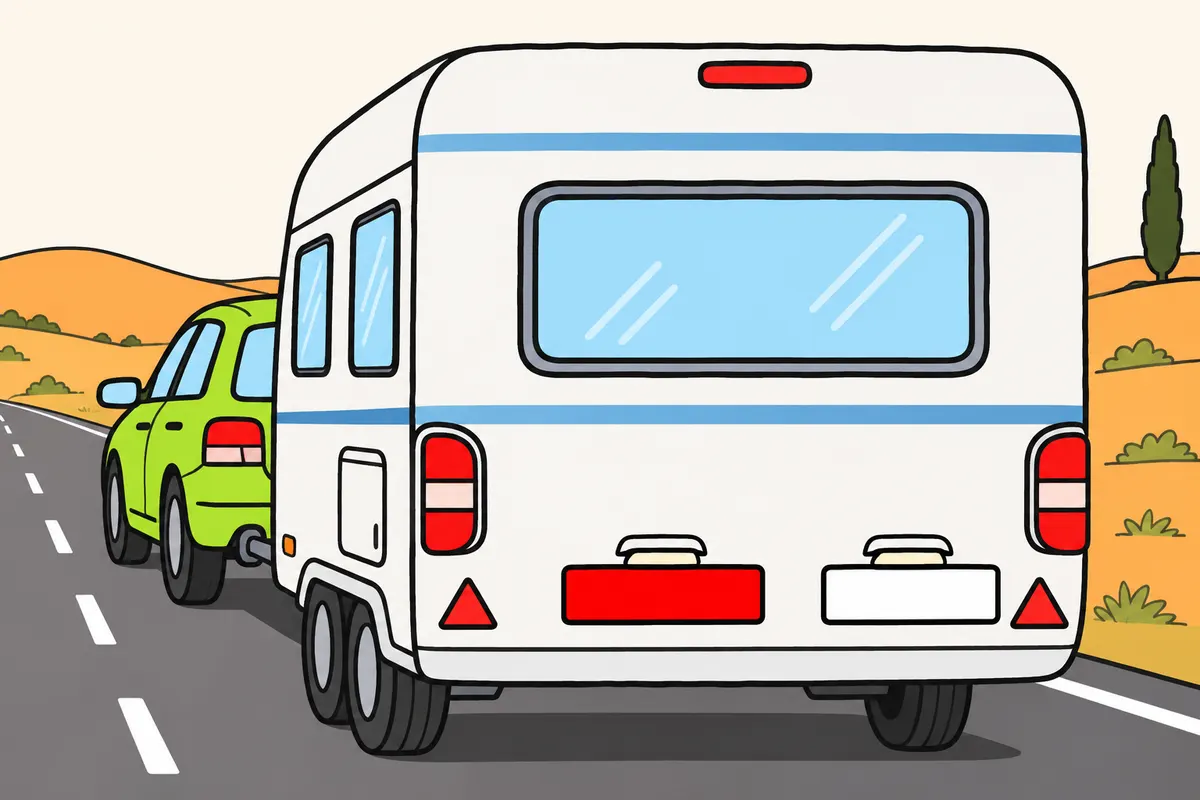
Above the MMA threshold, your trailer needs its own plate and the car’s duplicate.
| Plate on trailer above 750 kg MMA | Appearance | Rear position |
|---|---|---|
| Trailer’s own | Red background; black characters | Central; vertical or nearly vertical |
| Towing car’s duplicate | White background; black characters | Right-hand side |
Remember
- Above 750 kg MMA, display both plates at the rear.
- When changing cars, keep the trailer’s own plate and change the duplicate.
- Keep both plates and their required lighting visible.
- Do not let loads hide plates, lights or signalling devices.
Exam trap: Wrong: the red plate is enough. Right: above 750 kg trailer MMA, also display the towing vehicle’s duplicate plate on the right.
Read the full explanation
- If your trailer's MMA exceeds 750 kg, you must display its own number plate at the rear and, in addition, a plate bearing the towing vehicle's registration on the right-hand side. The trailer's own number plate is positioned vertically or almost vertically in its median longitudinal plane. [RGV, Annex XVIII.III.4](https://www.boe.es/buscar/act.php?id=BOE-A-1999-1826#iii-3)
- Your trailer's own standard number plate has a red retroreflective background and black characters. The repeated plate for the towing passenger car retains the white background and black characters of its standard number plate. These are two identifiers with different purposes. [RGV, Annex XVIII, table 1](https://www.boe.es/buscar/act.php?id=BOE-A-1999-1826#iii-3)
- On a caravan with its own number plate, you must keep that plate when you change the towing vehicle and replace the repeated plate with one matching the car towing it. The red plate does not replace the towing vehicle's plate, and repeating the towing vehicle's registration does not remove the requirement for the trailer's own plate.
- You must keep both plates visible and maintain the corresponding mandatory lighting. A bicycle, cover or load placed at the rear can hide them even if they were correctly fitted before loading. Your load must not obscure number plates, lights or signalling devices. [RGC, art. 14.1](https://www.boe.es/buscar/act.php?id=BOE-A-2003-23514#a14)
11Rear plate for a long vehicle
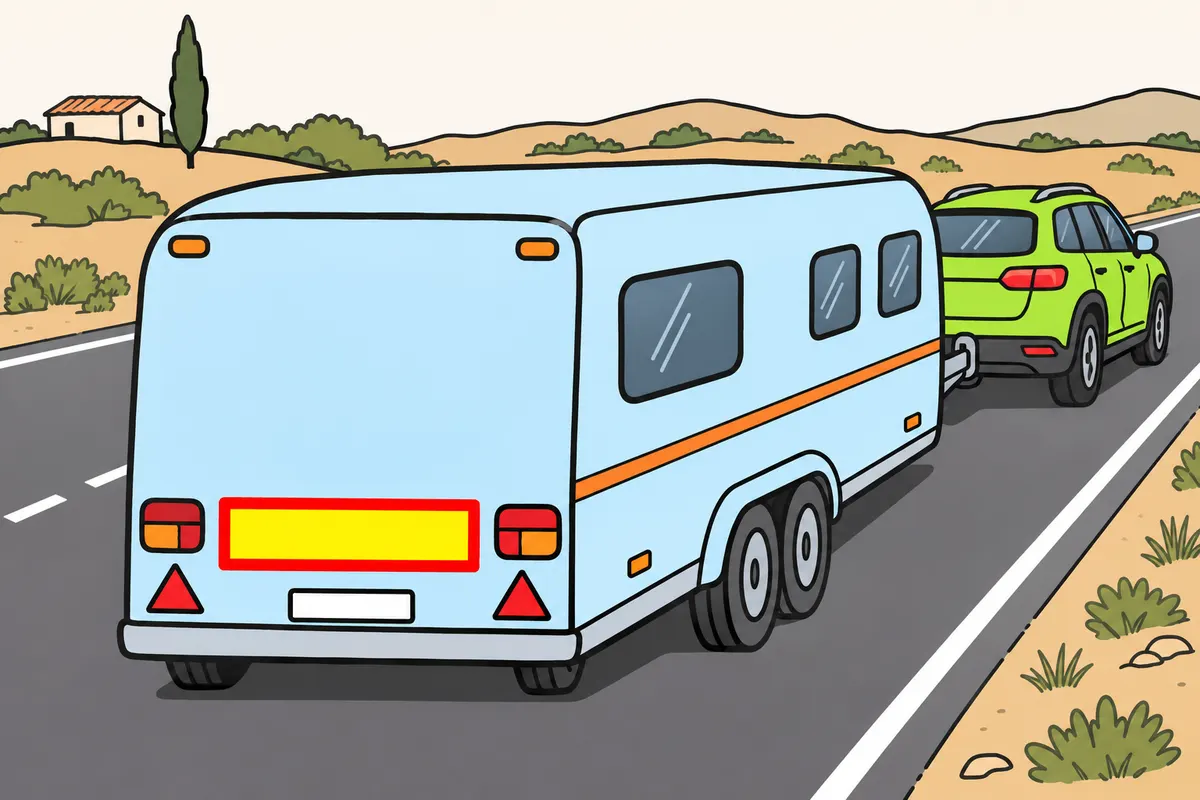
Display the long-vehicle plate when your whole combination exceeds the length threshold.
Remember
- Measure the whole combination to decide whether you need V-6.
- Recognise its reflective yellow area and fluorescent red border.
- Fit it centrally at the rear, within the permitted height range.
- Where useful, fit two equivalent plates symmetrically, close to the edges.
- Do not confuse it with projecting-load markings.
- It does not replace registration plates, lights or reflectors.
Exam trap: Wrong: exactly 12 m requires V-6. Right: the whole combination must exceed 12 m.
Read the full explanation
- If your combination is more than 12 m long, you must indicate this with the V-6, Vehículo largo (long vehicle), at the rear. You must consider the whole combination, not just the trailer. Exactly 12 m does not meet the condition of being more than 12 m long. [RGV, art. 18 and Annex XI, V-6](https://www.boe.es/buscar/act.php?id=BOE-A-1999-1826#v-6)
- The plate has a yellow retroreflective area and a fluorescent red border. It warns others of your length; it does not identify your registration, give you priority or replace the trailer's lights or red triangular reflectors. [RGV, Annex XI, V-6](https://www.boe.es/buscar/act.php?id=BOE-A-1999-1826#v-6)
- You must fit it centrally in relation to the vehicle's centreline. Where advisable for fitting, you may use two plates with similar characteristics, placed symmetrically on either side and close to the edges. Their height above the ground must be between 500 and 1,500 mm. [RGV, Annex XI, V-6.2](https://www.boe.es/buscar/act.php?id=BOE-A-1999-1826#v-6)
- You must not confuse this plate with the marking for a projecting load. To decide whether you need the V-6, you must look at the length of the vehicle or combination; for projections and their marking, you must study «Safe loading of your vehicle combination». Displaying one of these signs does not replace the other when the conditions for both apply.
12Mirrors: the view you need with a combination
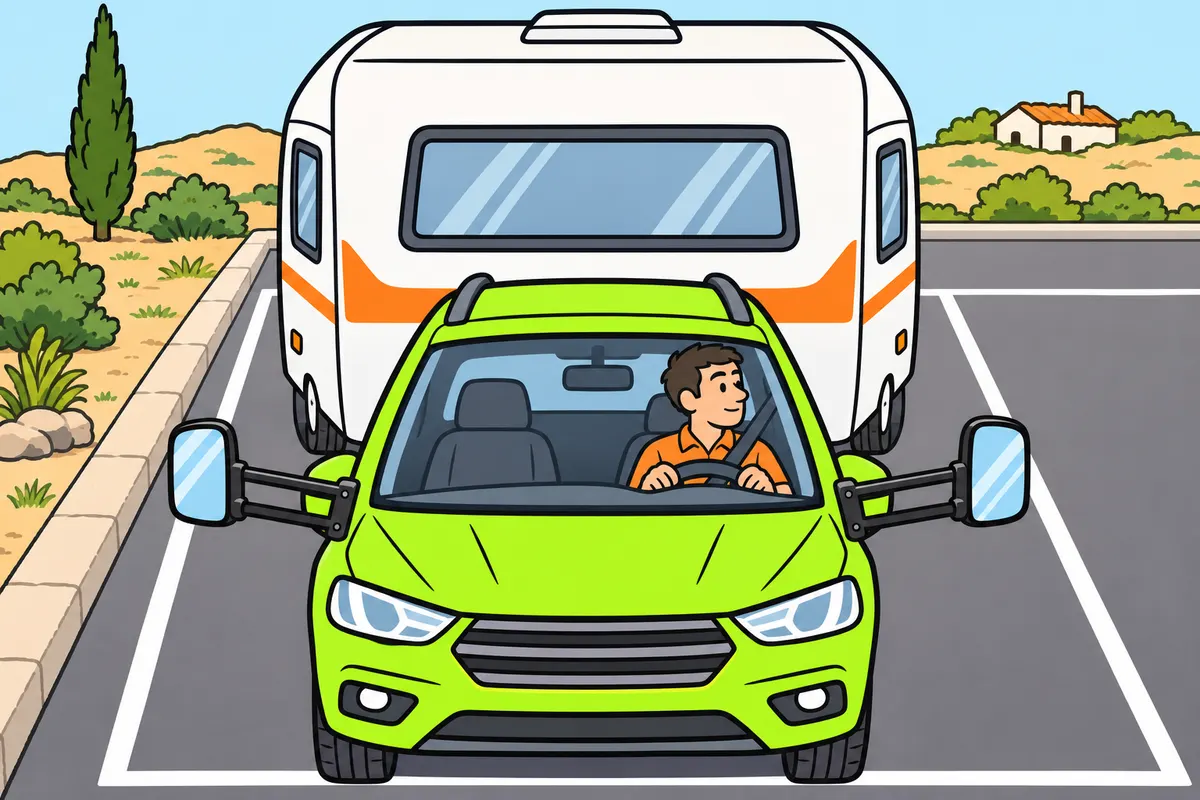
Adjust your mirrors to see around your combination and behind it.
| Passenger car mirror | Requirement |
|---|---|
| Left exterior | Required |
| Interior | Optional when the trailer blocks the required field of vision |
| Right exterior | Required if the interior mirror lacks the specified view |
Remember
- Adjust mirrors before setting off, with the trailer attached.
- Check what you can actually see, rather than just counting mirrors.
- If standard mirrors are insufficient, use suitable or supplementary mirrors.
- Do not assume a clean mirror removes every blind spot.
Exam trap: Wrong: standard mirrors are always enough. Right: check your view with the trailer attached; the interior mirror’s required view covers a flat, level road from the horizon to 60 m behind, across 20 m.
Read the full explanation
- You must adjust your rear-view mirrors from your correct driving position before setting off. With the trailer connected, check the area you can see behind you and along both sides. A wide caravan can obstruct your rearward view and require a wider field of vision than the mirror adjustment for the passenger car without a trailer provides.
- For a passenger car, Annex III provides for an interior mirror and a left-hand exterior mirror, with the right-hand exterior mirror compulsory when the interior mirror does not provide the specified field of vision: a flat, level road from the horizon to 60 m behind you and across a width of 20 m. When your trailer prevents this field of vision, the interior mirror is optional and you must have the right-hand exterior mirror. [RGV, Annex III.2](https://www.boe.es/buscar/act.php?id=BOE-A-1999-1826#aniii)
- You must check your actual field of vision rather than simply count mirrors. Having two exterior mirrors does not by itself guarantee that you can see around a wider trailer. If the standard mirrors are insufficient, you need suitable or supplementary mirrors that provide the required field of vision. [RGV, Annex III](https://www.boe.es/buscar/act.php?id=BOE-A-1999-1826#aniii)
- You must not assume that a clean mirror eliminates all blind spots. You still need correct adjustment and continuous observation; even in good light, you can miss information because of incorrect mirror orientation. The required indirect vision allows you to drive without needing to see through the caravan.
13Correctly fitted supplementary mirrors
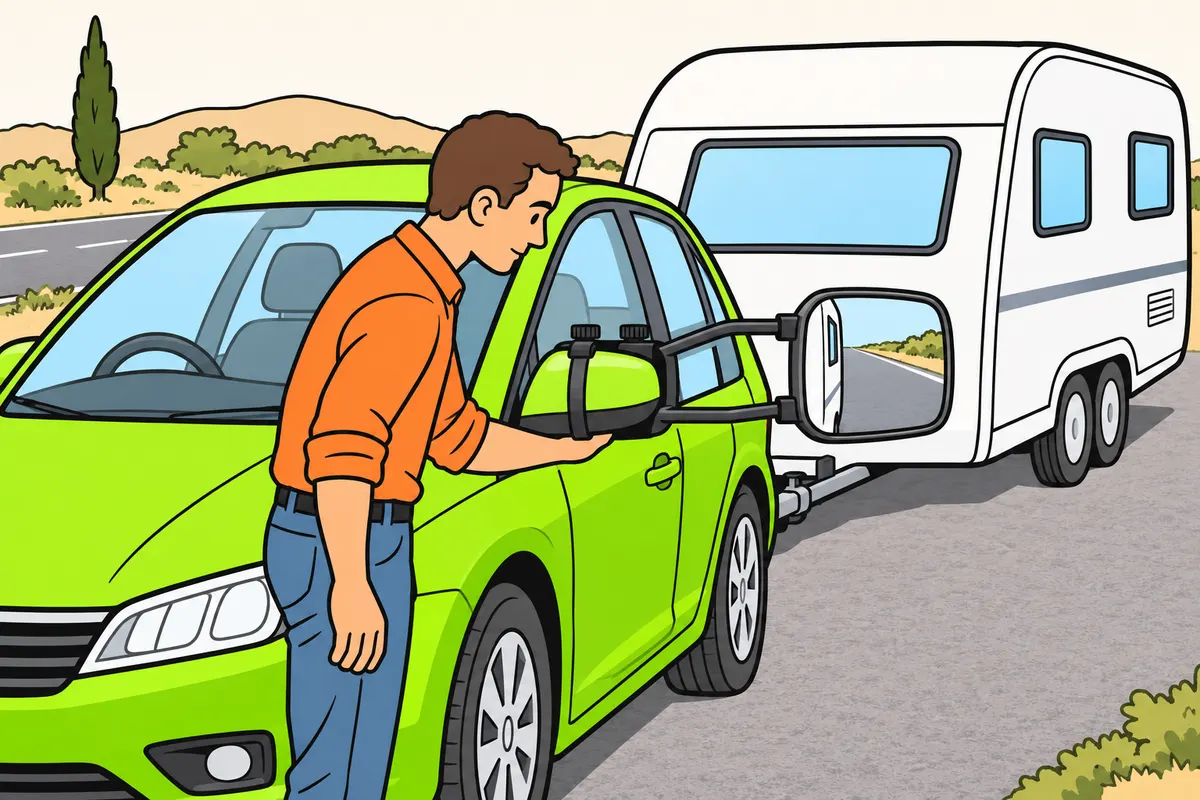
If you need supplementary mirrors, fit them securely and adjust them for your combination.
Remember
- Choose mirrors suitable for your car and trailer.
- Follow the manufacturer’s fitting instructions.
- Check that slight vibration does not move them.
- Adjust both sides to see the road alongside and behind you.
- If you change trailers, check your mirrors again before setting off.
- If a mirror is loose, stop somewhere safe to fix it.
Exam trap: Wrong: choose extensions solely because a trailer is light or heavy. Right: check whether you have the required view.
Read the full explanation
- If you need mirror extensions, you must use devices suitable for the car and trailer, fitted according to their manufacturers’ instructions. Check that they are secure, adjustable and do not shift with slight vibration. An extension is only useful if it keeps the field of vision stable.
- You must adjust each side so that you can see the road alongside the combination and behind it, without using almost the whole mirror surface to view your own caravan. Do this with the combination positioned so that you can assess its alignment; if you tow a different trailer, repeat the check before driving.
- You must keep the mirrors, windows and lighting surfaces clean. If you find a loose or incorrectly adjusted mirror, stop somewhere safe to correct it.
- You must not decide whether to use mirror extensions solely on an automatic rule based on whether the trailer is light or heavy. What matters is obtaining the required field of vision with a legally compliant installation. In «Manoeuvres with a car and trailer», you learn how to combine mirror use with checking your surroundings and blind spots. [RGV, Annex III](https://www.boe.es/buscar/act.php?id=BOE-A-1999-1826#aniii)
14Wheel chocks and securing against movement
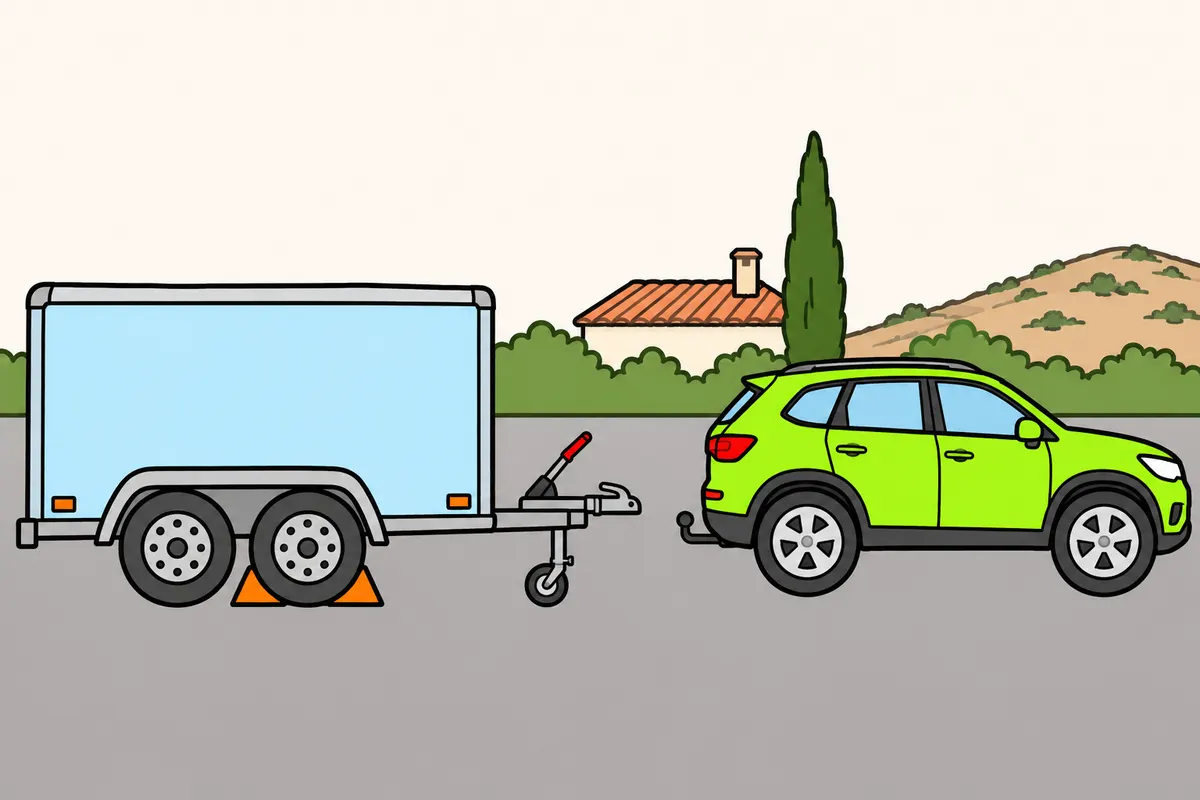
Secure your combination when you stop or park on a significant slope.
| Combination on a significant slope: kerb alternative | Direction of steered wheel |
|---|---|
| Uphill | Towards the centre of the carriageway |
| Downhill | Outwards from the carriageway |
Remember
- Choose chocks that suit the wheels and the available support.
- Do not use damaged or slippery chocks.
- On a significant slope, use chocks or rest a steered wheel against the kerb.
- Do not use stones as chocks.
- See “Safe coupling and uncoupling” for how to place them.
- Remove the chocks from the road before setting off again.
Exam trap: Wrong: use stones when stopping or parking the combination on a significant slope. Right: use suitable chocks or rest a steered wheel against the kerb, towards the centre uphill and outwards downhill.
Read the full explanation
- Wheel chocks are pieces designed to prevent wheels from rolling. You should choose chocks suited to the wheels and the available supporting surface: a damaged chock or one that slips does not provide reliable restraint. For placing them during coupling and uncoupling, see «Safe coupling and uncoupling».
- When you stop or park the combination on a significant gradient, you must secure it with purpose-made wheel chocks or rest a steered wheel against the kerb: pointing towards the centre of the carriageway when facing uphill and outwards when facing downhill. Stones do not qualify as regulation wheel chocks. When you set off again, remove the chocks from the road. The other parking measures are explained in «Manoeuvres with a car and trailer». [RGC, art. 92.3.d](https://www.boe.es/buscar/act.php?id=BOE-A-2003-23514#a92)
15Rear underrun protection
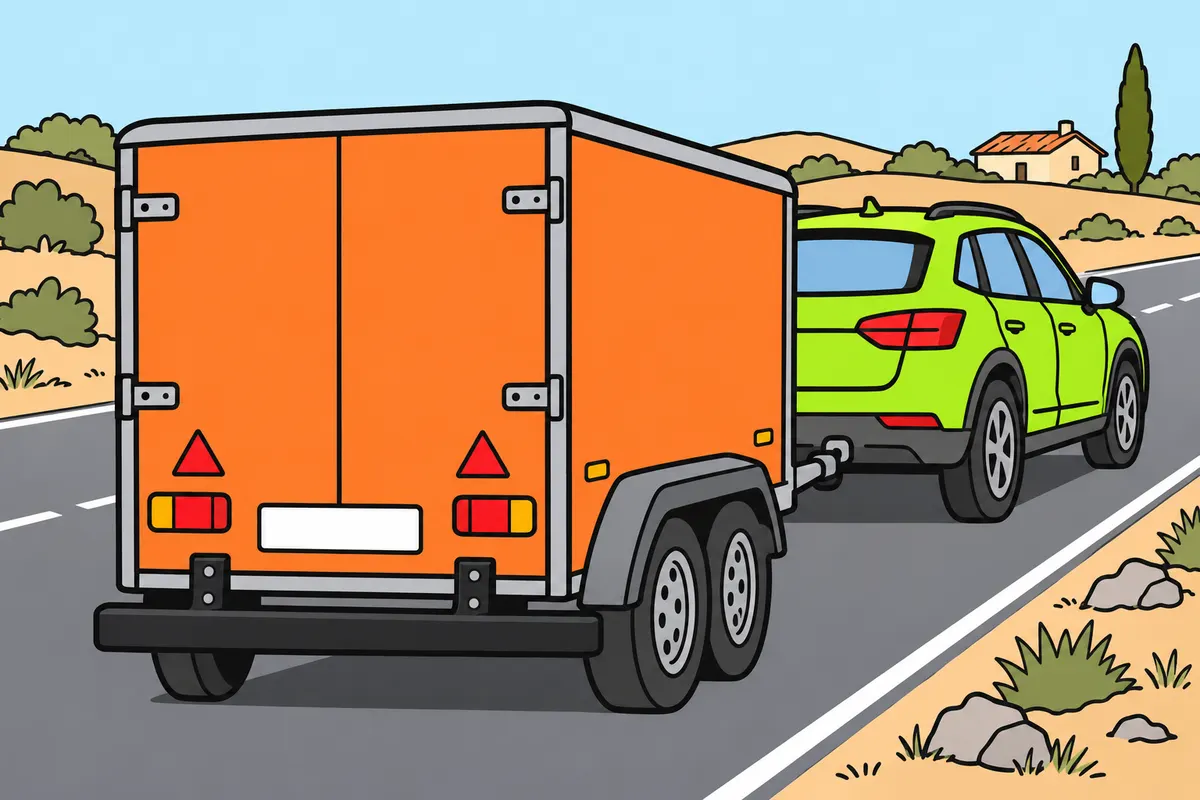
Keep the rear protection that stops another vehicle passing underneath your trailer.
| Protection option for O1 and O2 | Condition |
|---|---|
| Rear shape | Must meet its regulations |
| Rear arrangement by dimensions | Unladen lower edge no higher than 550 mm; no more than 100 mm narrower per side than rear axle |
| Protective device | Must comply with requirements |
Remember
- Do not confuse a reflective plate with protection that resists a crash.
- Keep the approved protection arrangement for your trailer.
- Do not remove its bar or change mountings for convenience.
- Use an exemption only when it appears in the vehicle documents.
Exam trap: Wrong: every trailer needs a separate bar. Right: its rear shape and construction can provide compliant protection.
Read the full explanation
- Rear underrun protection is a structural component. Its purpose is to provide effective protection against a vehicle striking from behind and potentially going underneath the trailer. A reflective plate helps others see you, but does not provide structural resistance to a collision. [RGV, art. 11.16 and Annex IV](https://www.boe.es/buscar/act.php?id=BOE-A-1999-1826#aniv)
- Protection can be provided by a specific device or by the shape and characteristics of the rear itself. You must therefore not answer that every B+E trailer necessarily needs a separate bar identical in appearance to that of a heavy lorry. [RGV, Annex IV](https://www.boe.es/buscar/act.php?id=BOE-A-1999-1826#aniv)
- For categories O1 and O2, among others, Annex IV permits a rear shape complying with its regulations or an arrangement whose lower edge, when unladen, is no higher than 550 mm, across a width no more than 100 mm narrower on each side than the rear axle. It also provides for a regulation protection device. [RGV, Annex IV.2.2](https://www.boe.es/buscar/act.php?id=BOE-A-1999-1826#aniv)
- You must keep intact the arrangement that makes your trailer compliant: do not remove an approved bar or change its mountings for convenience. Exemptions due to incompatibility with use must be recorded in the documentation; you cannot assume an exemption because a component makes loading or unloading difficult. [RGV, Annex IV.3](https://www.boe.es/buscar/act.php?id=BOE-A-1999-1826#aniv)
16Connected V-16 and portable warning triangles
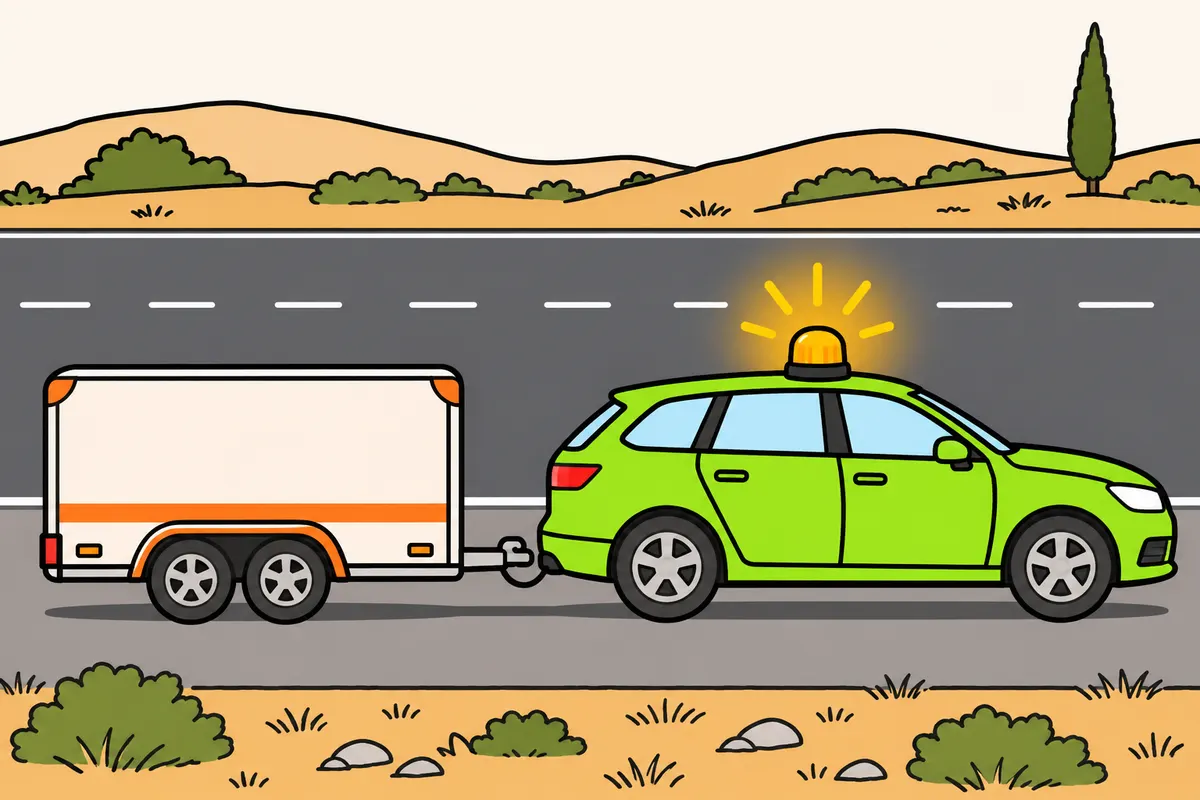
Carry a valid connected V-16 and use it when immobilisation creates danger.
| Device for a combination registered in Spain | Valid regulatory warning device? |
|---|---|
| Valid connected V-16 | Yes |
| Portable warning triangles | No |
| Beacon without connectivity | No |
Remember
- In your Spanish-registered towing vehicle, you must carry a connected V-16.
- Use it when immobilised on the carriageway or your load falls onto it.
- Place it as high as possible on the immobilised vehicle, with maximum visibility.
- Check the make and model on the DGT official list.
- Check when connectivity expires and check its power supply.
- Keep it within reach from the passenger compartment.
Exam trap: Wrong: use triangles or an unconnected beacon. Right: carry a valid connected V-16 in your Spanish-registered towing vehicle. You must use it when immobilised on the carriageway in a hazard or when your load falls onto it.
Read the full explanation
- You must carry a connected V-16 warning light in your towing vehicle registered in Spain, valid for giving advance warning of danger. Portable warning triangles and beacons without connectivity do not fulfil this regulatory function. [RGV, Annex XII.1.a and XII.2](https://www.boe.es/buscar/act.php?id=BOE-A-1999-1826#anxii)
- You must use it to warn that your vehicle is immobilised on the carriageway or that its load has fallen onto it. The light is amber and you must place the device as high as possible on the immobilised vehicle, ensuring maximum visibility. [RGV, Annex XI, V-16.1 and 2](https://www.boe.es/buscar/act.php?id=BOE-A-1999-1826#v-16) [RGC, art. 130.4](https://www.boe.es/buscar/act.php?id=BOE-A-2003-23514#a130)
- You must check that the make and model appear on the official list of valid devices published by the DGT. An advertising label saying connected or approved does not replace this check. The device itself and its packaging must state the expiry date of the connectivity service. [RGV, Annex XI, V-16.7 and 8](https://www.boe.es/buscar/act.php?id=BOE-A-1999-1826#v-16)
- You should keep the beacon accessible from the passenger compartment and periodically check its power supply following the manual. As a practical measure, avoid storing it under the entire load or inside the closed trailer: this makes it harder to give a warning quickly and could force you to expose yourself to traffic to retrieve it.
17What you must know about the beacon
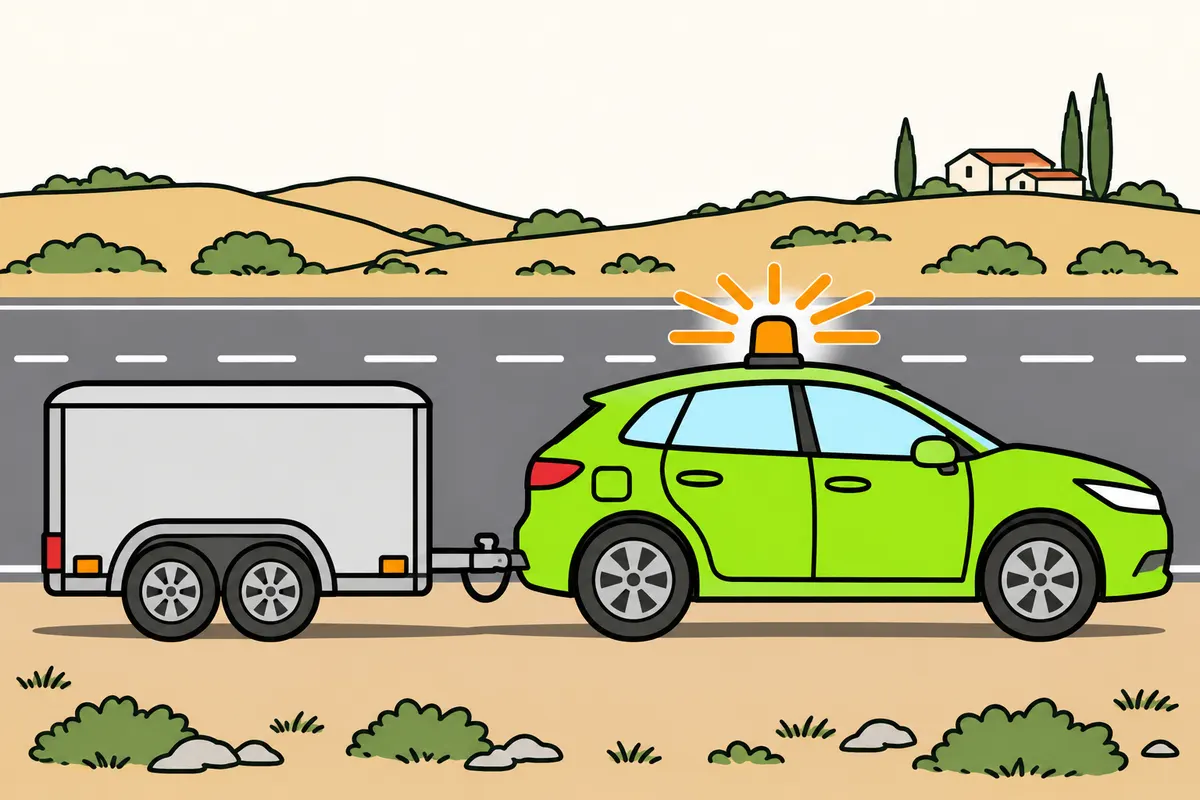
Check that your beacon works and sends its location without your phone.
Remember
- Do not switch it off while the danger remains.
- It sends activation, location and deactivation information.
- Location transmission stops after it reports deactivation.
- Communications must be included in the price.
- Do not confuse location transmission with calling the emergency services.
- Place it securely and visibly, without climbing onto the vehicle or risking a fall.
Exam trap: Wrong: buy a beacon that needs your phone for connectivity. Right: it must work and communicate independently.
Read the full explanation
- The V-16 must emit light visible through 360 degrees horizontally and maintain the regulation light intensity conditions for at least 30 minutes. You must not interpret this technical minimum as permission to switch it off while the danger you are signalling remains. [RGV, Annex XI, V-16.3](https://www.boe.es/buscar/act.php?id=BOE-A-1999-1826#v-16)
- The beacon communicates its activation, deactivation and location to the national access point for traffic and mobility. The location is transmitted every 100 seconds and transmission stops once deactivation is communicated. This transmission does not replace any personal notification you may need to make to the emergency services. [RGV, Annex XI, V-16.4](https://www.boe.es/buscar/act.php?id=BOE-A-1999-1826#v-16)
- Communications must be included in the price and guaranteed for at least 12 years. The device must incorporate everything needed to operate, including communications, without relying on a mobile phone application. [RGV, Annex XI, V-16.5 and 6](https://www.boe.es/buscar/act.php?id=BOE-A-1999-1826#v-16)
- With a tall trailer, you must assess the beacon’s visibility to approaching traffic: the bodywork can obscure it if you position it too low. You must find a stable, visible position suitable for the device, without climbing onto the vehicle or exposing yourself to a fall. Occupant safety is covered in «Accidents, breakdowns and first aid».
18Keep your high-visibility vest within reach
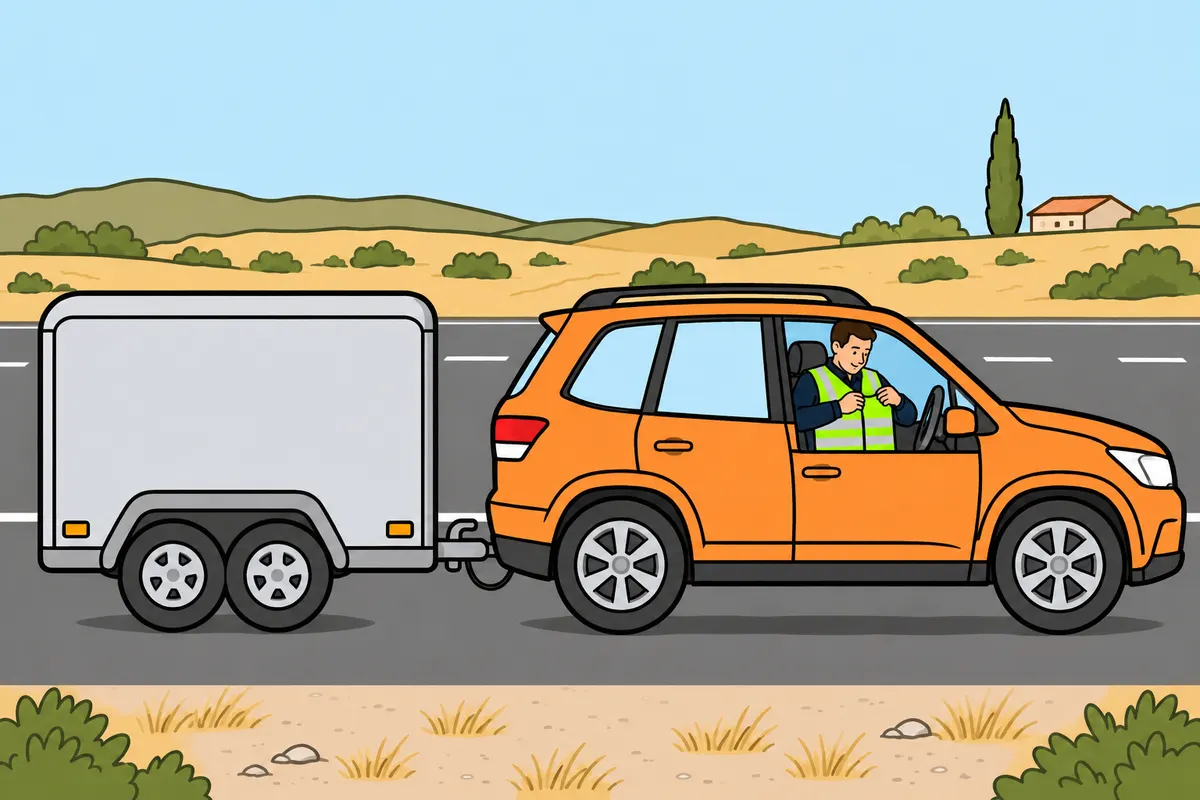
Carry a certified vest and keep it within reach from the passenger compartment.
| Equipment for a non-special combination | What you need |
|---|---|
| Required vest | Certified vest with CE marking |
| Vests for passengers | Carrying them is a sensible precaution |
Remember
- For a non-special combination, carry a certified vest with CE marking.
- Keep it within reach from the passenger compartment.
- Do not replace it with a bright garment lacking the required performance.
- Other drivers can see you better when their headlights light your vest.
- See “Accidents, breakdowns and first aid” for when to wear it.
- Traffic remains dangerous even when you wear the vest.
Exam trap: Wrong: replace the vest with any brightly coloured garment. Right: carry a certified vest with CE marking and at least class 2.
Read the full explanation
- You must carry a high-visibility reflective vest as part of the equipment for a non-special vehicle combination. It must be certified equipment bearing the CE marking, complying with UNE EN 471 and at least class 2 for the surface area of its materials and the retroreflection of its bands. [RGV, Annex XII.1.b and 2](https://www.boe.es/buscar/act.php?id=BOE-A-1999-1826#anxii)
- The vest helps other road users see you more clearly when their headlights illuminate you; the conditions requiring you to wear it are explained in «Accidents, breakdowns and first aid». [RGC, art. 118.4](https://www.boe.es/buscar/act.php?id=BOE-A-2003-23514#a118)
- You should store it where you can reach it from the passenger compartment. Carrying vests for passengers who may need to get out is a sensible precaution in addition to the minimum equipment described in this section.
- The vest improves your visibility, but traffic still poses a risk even when you wear it; leaving safely and protecting occupants are covered in «Accidents, breakdowns and first aid». [RGC, art. 130.3](https://www.boe.es/buscar/act.php?id=BOE-A-2003-23514#a130)
19Fire extinguisher and additional equipment
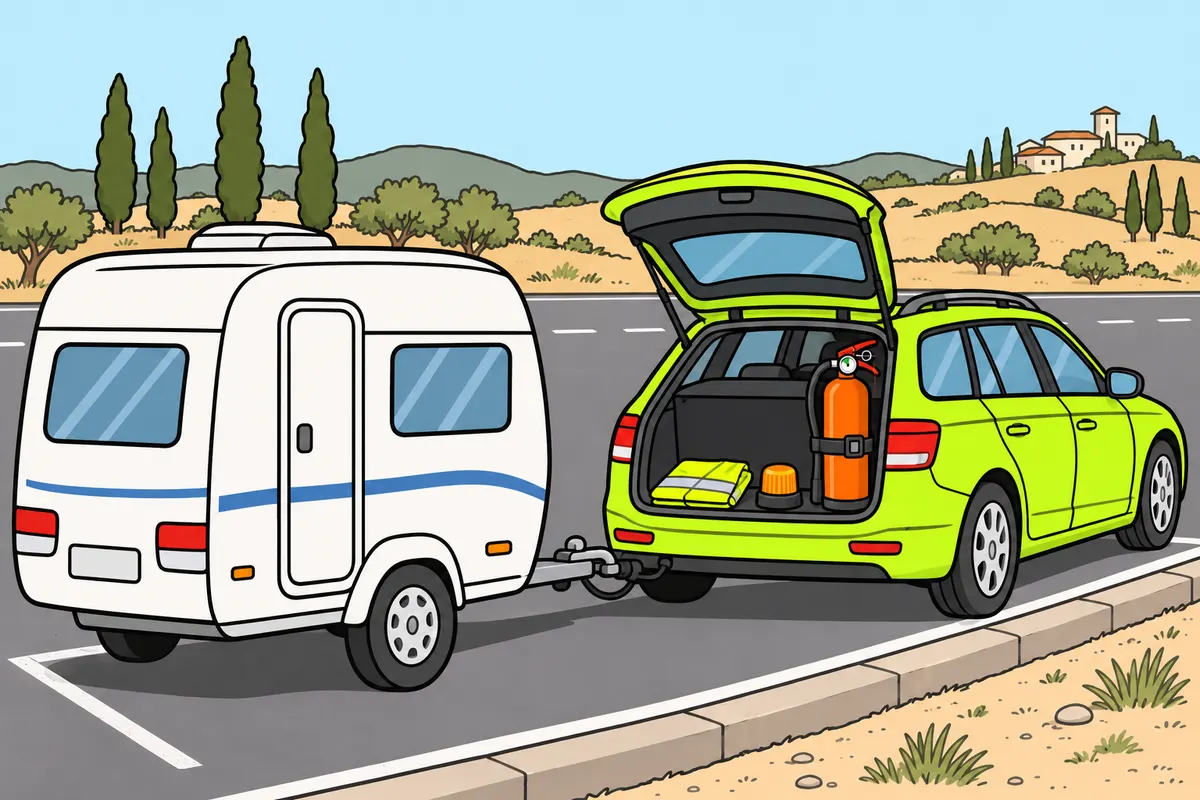
For a non-special combination, carry an extinguisher and check the towing car’s other equipment.
| Equipment and case | Minimum or alternative |
|---|---|
| Extinguisher: passenger transport, up to nine seats including driver | 5A/21B |
| Extinguisher: five-seat passenger car with leisure caravan | Apply passenger transport requirements: 5A/21B |
| Extinguisher: goods combination, MMA from 3,500 to 7,000 kg | 21A/113B |
| Towing car spare | Full-size or temporary wheel and changing tools |
| Alternative to towing car spare | System that sufficiently ensures mobility |
Remember
- Carry an approved, suitable extinguisher in working order.
- You need one with a car and leisure caravan too.
- Keep it secure and accessible, with readable instructions.
- Check its seal, condition and maintenance.
- See “Accidents, breakdowns and first aid” for action in a fire.
- Follow the limits of the system you use to keep the car mobile.
Exam trap: Wrong: choose an extinguisher only by the size of its container. Right: identify the combination’s use and check the certified rating on its label.
Read the full explanation
- If you drive a vehicle combination that is not classed as special, including a passenger car towing a caravan, you must carry an approved, suitable fire extinguisher in working order. [RGV, art. 19 and Annex XII.2](https://www.boe.es/buscar/act.php?id=BOE-A-1999-1826#anxii)
- The minimum fire rating depends on the use under the Order of 27 July 1999: for passenger transport with up to nine seats, including the driver, you must carry a class 5A/21B extinguisher; for a combination intended to transport goods and other items with an MMA of 3,500 to 7,000 kg, you must carry a class 21A/113B extinguisher. Check the certified fire rating as well as the size of the cylinder. [Order of 27 July 1999, paragraph two.a.1 and b.1](https://www.boe.es/buscar/act.php?id=BOE-A-1999-16887#segundo)
- For example, in a five-seat passenger car towing a leisure caravan, you determine the extinguisher class according to passenger transport requirements. In a combination intended to transport goods or other items, you must apply the MMA criterion in the Order. To choose the equipment, identify the use of the combination and read the fire rating on its label: the cylinder capacity alone does not indicate that rating. [Order of 27 July 1999, paragraph two](https://www.boe.es/buscar/act.php?id=BOE-A-1999-16887#segundo)
- You must carry the equipment secured and accessible, with legible instructions and in working order. Check the seal and external condition and follow the equipment's maintenance instructions. If your extinguisher is discharged or buried under the load, you cannot respond as quickly as you need to. [Order of 27 July 1999, paragraph one](https://www.boe.es/buscar/act.php?id=BOE-A-1999-16887#primero)
- You study how to respond to a fire, the limits of using a fire extinguisher and how to alert the emergency services in «Accidents, breakdowns and first aid».
- In the towing passenger car, you must carry a complete spare wheel or a temporary-use spare wheel with the tools needed to change it, or an alternative system that provides sufficient assurance that you can keep the vehicle mobile; you must observe the limitations of whichever alternative you use. [RGV, Annex XII.1.c](https://www.boe.es/buscar/act.php?id=BOE-A-1999-1826#anxii)
20Final check and exam questions
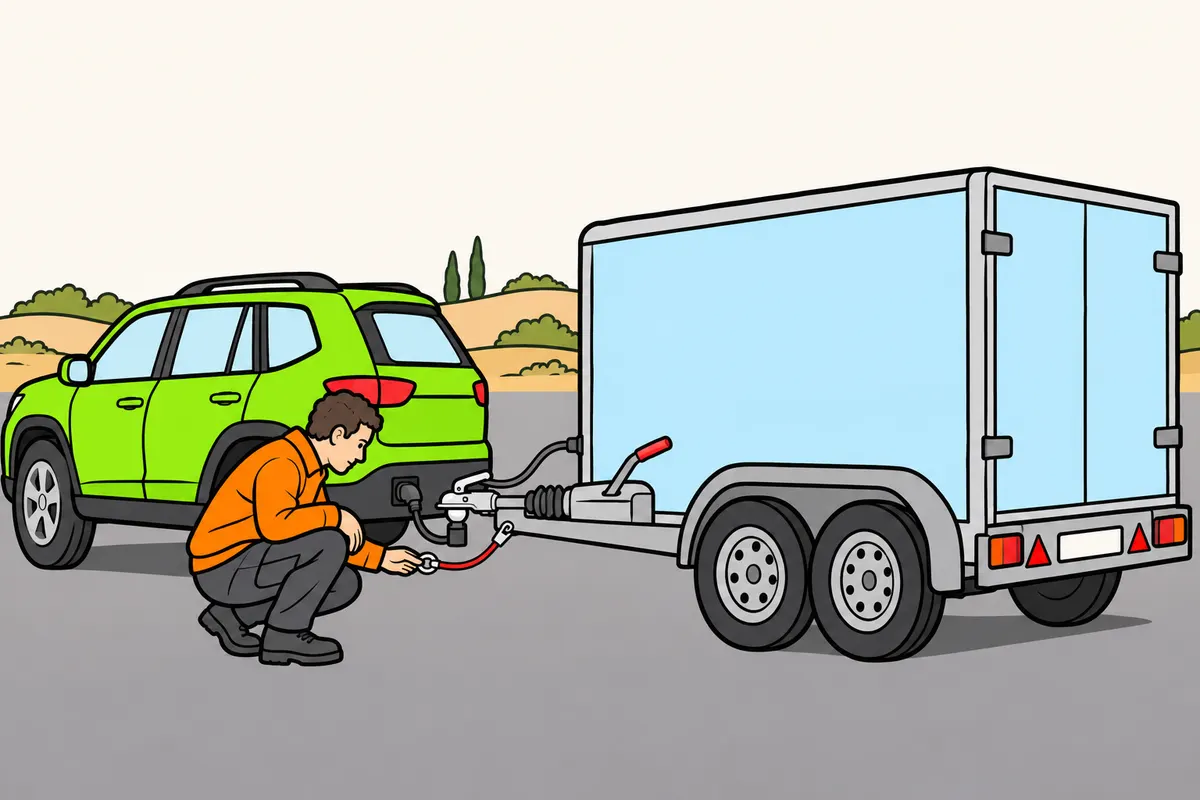
Before setting off, check your combination and answer each question according to its conditions.
| Question asks about | What to distinguish |
|---|---|
| Presence | Carry the required equipment |
| Function | Check that it works |
| Use | Use it when its conditions apply |
Remember
- Walk around your combination to check its devices.
- Check that secondary safety is connected.
- Check lights, reflectors, registration plates and rear protection.
- Check the long-vehicle plate where required.
- Make sure no cover or accessory hides any device.
Exam trap: Wrong: carrying a device means you must always use it. Right: answer according to the specific condition in the question.
Read the full explanation
- You must carry out a walk-round check of the combination: secondary safety connected, lights and reflectors visible, correct number plates, long vehicle plate where required and rear protection intact. Check that no subsequently fitted accessory or cover obscures anything you have just checked.
- To work through a scenario, you must distinguish between equipment being fitted, working and used: you may have a rear fog light without needing to switch it on; you may have a cable but need to correct its connection. Always answer according to the specific condition in the question.
Check lights, reflectors and plates
Check the rear end and sides of the trailer before setting off.
- With the combination secured against movement, connect and secure the electrical socket.
- Switch on the position lights, brake lights, indicators and hazard warning lights and check how the trailer actually responds.
- Check the fog lights, reversing lights and any additional lights appropriate to its equipment.
- Clean and check the red triangular reflectors, white front reflectors and amber side reflectors.
- Check the trailer’s own registration plate and the duplicate plate according to its MMA (maximum authorised mass), and the V-6 plate if the combination exceeds 12 m.
- From the driving seat, check the field of vision and the secure mounting of the supplementary mirrors.
Prepare and use the V-16
Provide a visible warning without exposing yourself to traffic.
- Before the journey, check that the model is valid (on the DGT list), still has connectivity and has a power supply.
- As practical advice, keep the beacon and reflective vest within reach from inside the passenger compartment.
- When immobilised, switch on the hazard warning lights and the appropriate lights.
- Activate the V-16 and place it securely as high as possible on the vehicle, with maximum visibility.
- Wear the reflective vest if you have to get out and stand on the carriageway or arcén (hard shoulder) on an interurban road; follow the rules for leaving the vehicle safely.
- Keep the warning in place while the danger remains and request the appropriate assistance.
Check what you know
Real questions from the bank on this topic. Pick an answer to see the explanation.
Finished this module?
Mark it as read and you will see your progress on the theory list.