
Theory · D+E Licence - Bus with Trailer · Module 6 of 13
Safety devices on a bus and trailer
You learn to check the devices that keep your bus and trailer coupled, visible and protected. You can answer questions about lights, reflectors, plates, mirrors, wheel chocks and emergency equipment by applying the passenger transport rules and the conditions specific to the trailer.
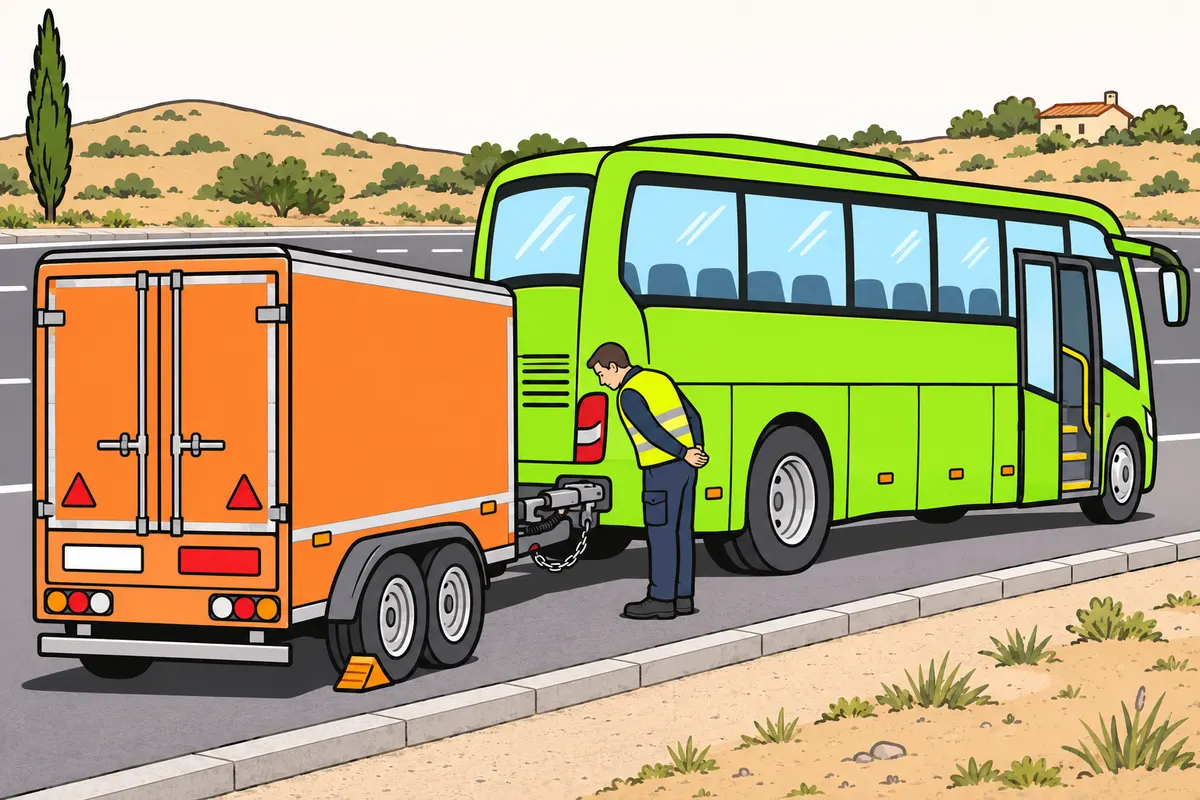
1Each device has its own function
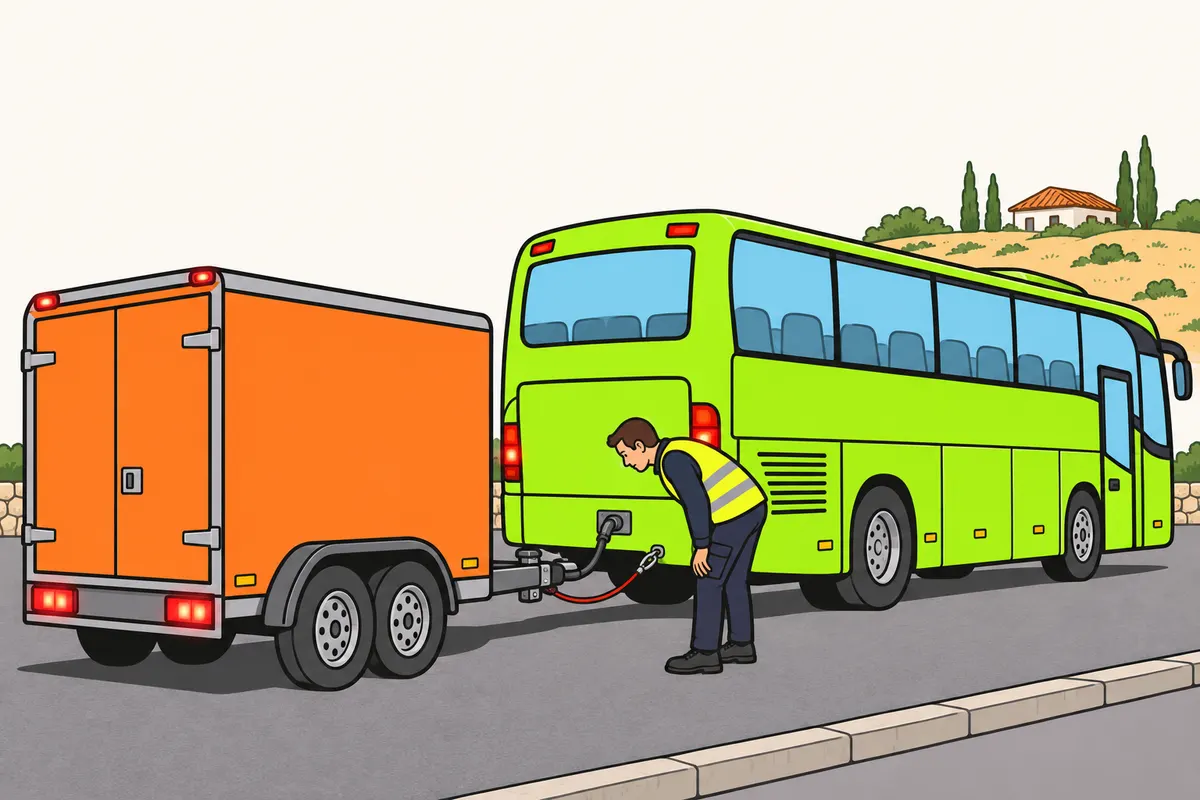
Check each safety system on your bus and trailer.
Remember
- Check the trailer even when you only carry luggage.
- Carry a connected V-16, vest and approved firefighting equipment in your non-special combination.
- Check each duty against the size, mass and use.
- For your test, bring any corrective aids or adaptations you need.
Exam trap: Wrong: working bus lights prove everything works. Right: check each trailer system.
Read the full explanation
- The combination's devices maintain the connection, operate the brakes or allow other road users to see it. The mechanical coupling, automatic braking and lighting are related systems, but each must work independently; a chain or an illuminated lamp does not prove that everything else is in order. [RGV, art. 12](https://www.boe.es/buscar/act.php?id=BOE-A-1999-1826#a12). [RGV, art. 13](https://www.boe.es/buscar/act.php?id=BOE-A-1999-1826#a13).
- On your bus and trailer, you must also inspect the towed unit, even if it carries only luggage. Combine the warnings at the driving position with a safe walk-round check: the bus lights may work while the trailer lights remain off because of a faulty connection.
- Your combination (other than a special vehicle combination) must carry the compulsory equipment listed in Annex XII of the RGV: a connected V-16, a high-visibility vest and approved fire-extinguishing equipment. [RGV, Annex XII](https://www.boe.es/buscar/act.php?id=BOE-A-1999-1826#anxii).
- Equipment requirements depend on the characteristics of the bus and trailer: their category, width, length, MMA (maximum authorised mass) and circumstances of use determine which devices you need. You must consult the technical data for both units, including when the luggage trailer travels empty. [RGV, arts. 13 and 16](https://www.boe.es/buscar/act.php?id=BOE-A-1999-1826#a13).
- In D+E tests, the examiner may check that you have suitable protective equipment where applicable and that you have the necessary corrective aids, prostheses or adaptations. Sunglasses or clothing of a particular colour do not prove that you have the required equipment where applicable. [RGCond, art. 57.2 and Annex VI, C.1](https://www.boe.es/buscar/act.php?id=BOE-A-2009-9481).
2Secondary safety coupling
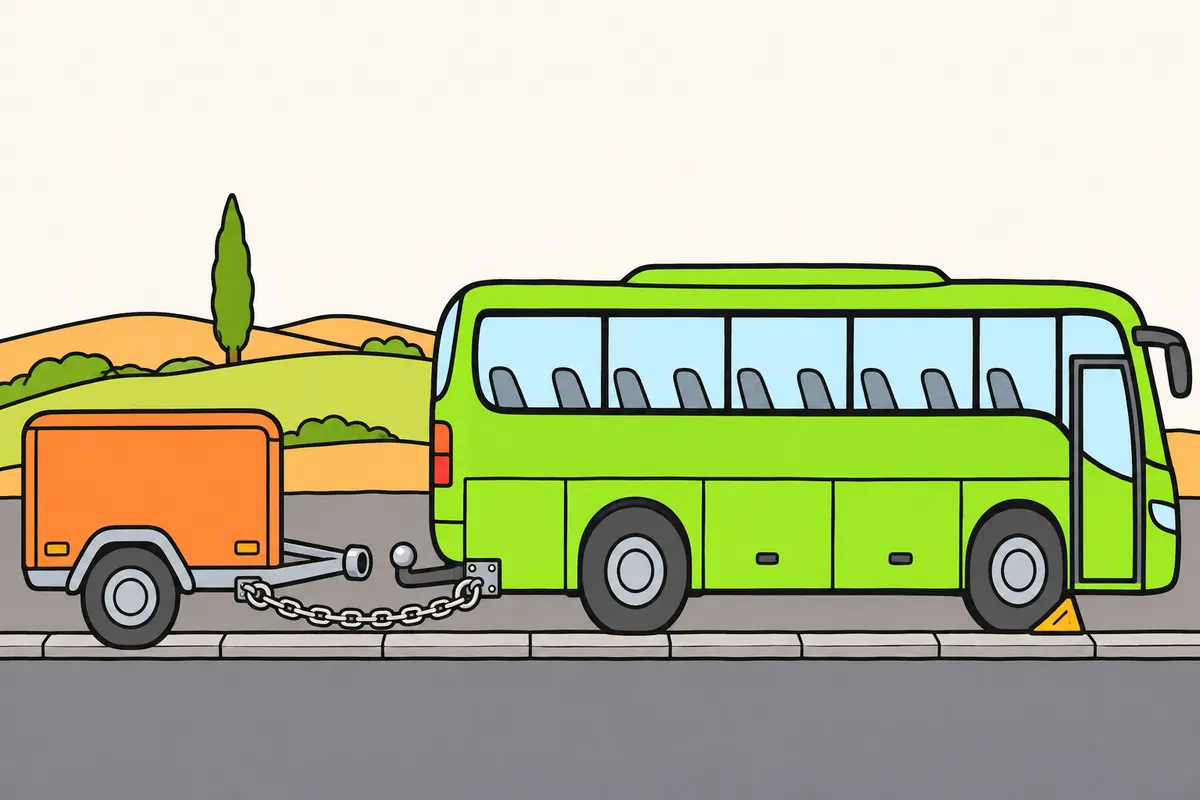
You need a secondary coupling on certain trailers without breakaway braking.
Remember
- MMA means maximum authorised mass.
- Up to 1,500 kg MMA, check whether you have breakaway braking.
- Without that braking, you must have a secondary coupling.
- It can be a chain, cable or another suitable device.
- It must keep the drawbar off the ground and retain some steering.
- If the main coupling breaks, stop the combination and request assistance.
Exam trap: Wrong: every trailer needs the same chain. Right: this duty applies up to 1,500 kg MMA, without breakaway braking.
Read the full explanation
- If you tow a trailer with an MMA not exceeding 1,500 kg without a system that ensures braking if the coupling breaks, it must have a secondary coupling in addition to the main one. The rules allow a chain, cable or another device that performs the required function; the material alone does not identify its purpose. [RGV, art. 13](https://www.boe.es/buscar/act.php?id=BOE-A-1999-1826#a13).
- If the main coupling separates, this secondary coupling must prevent the drawbar from touching the ground and retain some residual steering control of the trailer. You must immobilise the combination after this breakage and request the necessary repair or assistance. [RGV, art. 13](https://www.boe.es/buscar/act.php?id=BOE-A-1999-1826#a13).
- You must not confuse the safety chain with an anti-theft device, an electrical earth connection or a repair to the main locking mechanism. Its function comes into play when the main connection fails; you must therefore check that its anchor points and freedom of movement are suitable for the system fitted.
- The 1,500 kg limit refers to the trailer's MMA, and the requirement applies only if the breakaway braking described is absent. In D+E, you may encounter different safety arrangements depending on the trailer: identify their function and the system fitted before choosing an answer about chains or cables. [RGV, art. 13.4](https://www.boe.es/buscar/act.php?id=BOE-A-1999-1826#a13).
3Breakaway cable and automatic braking
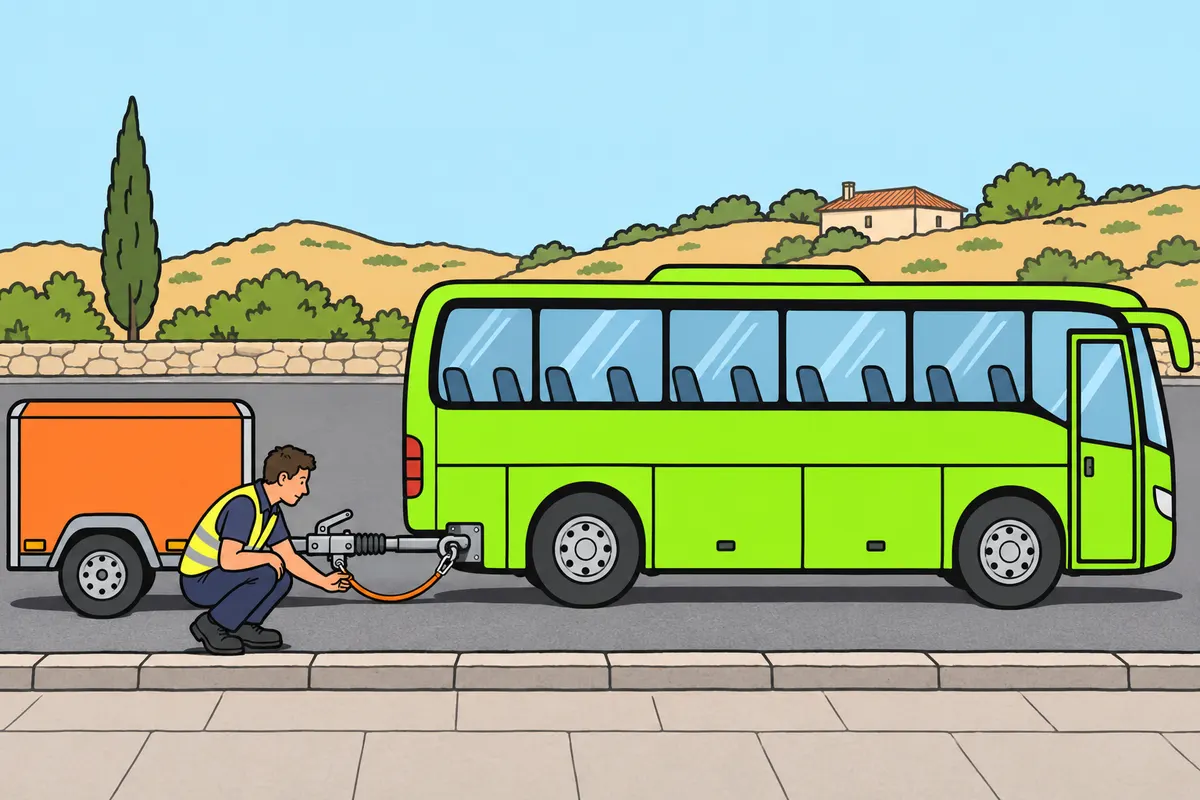
Check how your trailer brakes if it separates while moving.
| Device | Purpose |
|---|---|
| Secondary coupling | Keeps a safety connection |
| Automatic braking | Stops the separated trailer |
Remember
- Automatic braking must stop your trailer if it separates while moving.
- If you have a breakaway cable, attach it as the manufacturer instructs.
- With air brakes, identify the emergency system fitted.
- Check cables, chains, hooks and fastenings.
- Resolve faults before driving.
- Never test the system by separating the combination while moving.
Exam trap: Wrong: the chain and breakaway cable do the same job. Right: the chain keeps a connection; the breakaway cable applies the brake.
Read the full explanation
- The trailer's automatic braking devices must ensure that it stops automatically if it becomes uncoupled or the coupling breaks while travelling. The device operates the brakes; the secondary coupling maintains a safety connection. [RGV, art. 12.8](https://www.boe.es/buscar/act.php?id=BOE-A-1999-1826#a12).
- If the equipment uses a breakaway cable that applies the brake on separation, you must attach it to the designated point and route it as specified by its manufacturer. You must not attach it in any arbitrary way simply to make it look connected: it must be able to perform its function without coming loose or being activated by a normal manoeuvre.
- If the bus trailer has air brakes, identify its emergency device and the connections it needs according to the equipment fitted. A mechanical breakaway cable is not a universal description of trailer safety systems; the operation of the circuits is covered in «Trailer and combination braking». [RGV, arts. 12.8 and 13](https://www.boe.es/buscar/act.php?id=BOE-A-1999-1826#a12).
- Visually check the condition of accessible cables, chains, hooks and fastenings, looking for breaks, deformation or incorrect fitting. As a safety precaution, resolve any fault before driving and follow the system manual; do not test its operation by causing the combination to separate while moving.
4Connections and locking devices before driving
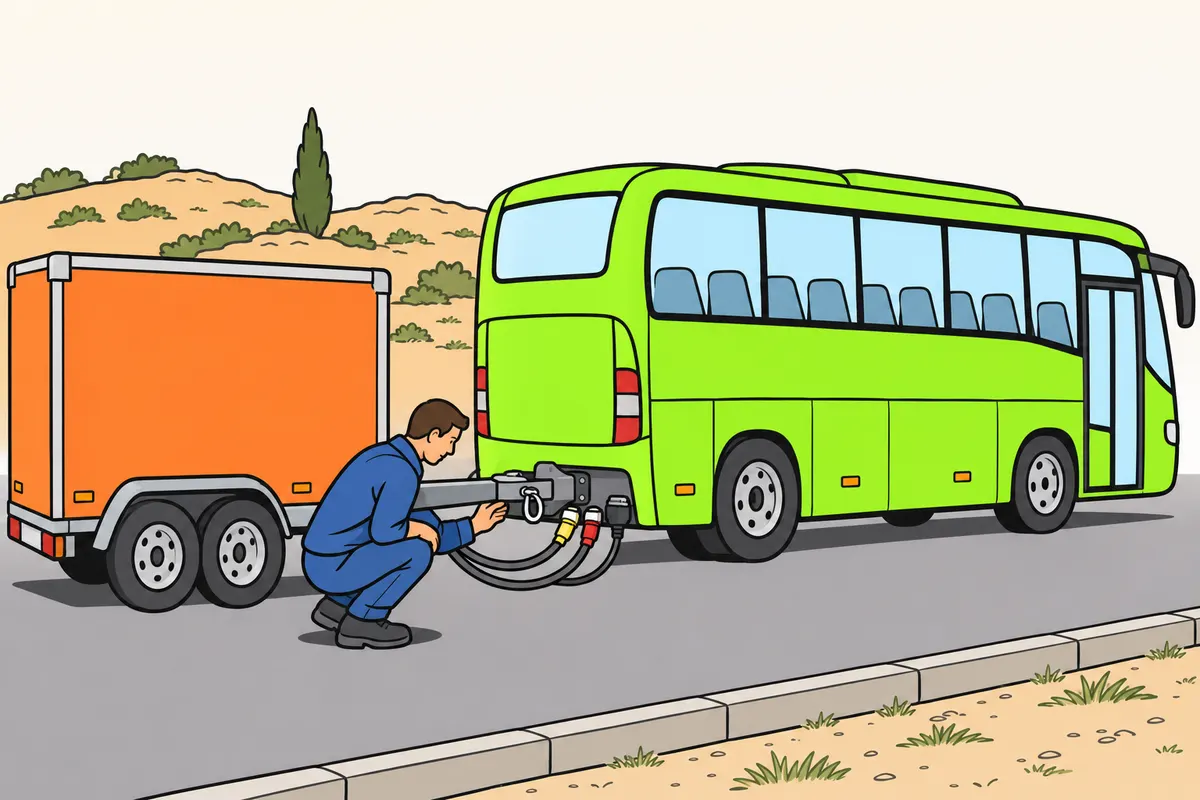
Before driving, secure the coupling, connections and retracted supports.
Remember
- Check that connections are compatible and secured.
- Check the coupling and safety lock before starting or resuming your journey.
- Do this with an empty trailer too, in any weather.
- Keep connections from dragging, catching or becoming too tight.
- Retract and secure fitted supports for travel.
- Before separating the trailer, prevent movement and stabilise its supports.
Exam trap: Wrong: parts that fit together are compatible. Right: check their technical compatibility too.
Read the full explanation
- The mechanical, pneumatic and electrical components between the towing vehicle and trailer must be compatible. You must check that each connection is correctly coupled and secured; being able to join two parts physically is not enough to prove their technical compatibility. [RGV, art. 13.1](https://www.boe.es/buscar/act.php?id=BOE-A-1999-1826#a13).
- Before moving off or resuming your journey, check that the coupling is fully closed and that its device for preventing uncoupling is engaged. Check its connections and auxiliary devices with the trailer empty or loaded and in all weather conditions; preparing documents, fuel, climate control or the public address system belongs to other checks. [RGV, art. 13.3](https://www.boe.es/buscar/act.php?id=BOE-A-1999-1826#a13).
- Leave enough freedom of movement in the connections for the combination to articulate, preventing them from dragging, becoming trapped or being put under undue tension. Check that they are secured and, depending on the equipment fitted, that the jockey wheel or other supports are retracted and secured for travel.
- Before detaching the trailer, secure it against movement and stabilise its supports according to the instructions. The full procedure is covered in «Safe coupling and uncoupling»; here, relate each device to its purpose: the brake immobilises the wheels and the support holds up the part of the trailer that needs it. [RGV, art. 12.8](https://www.boe.es/buscar/act.php?id=BOE-A-1999-1826#a12).
5Position lights and number plate lighting
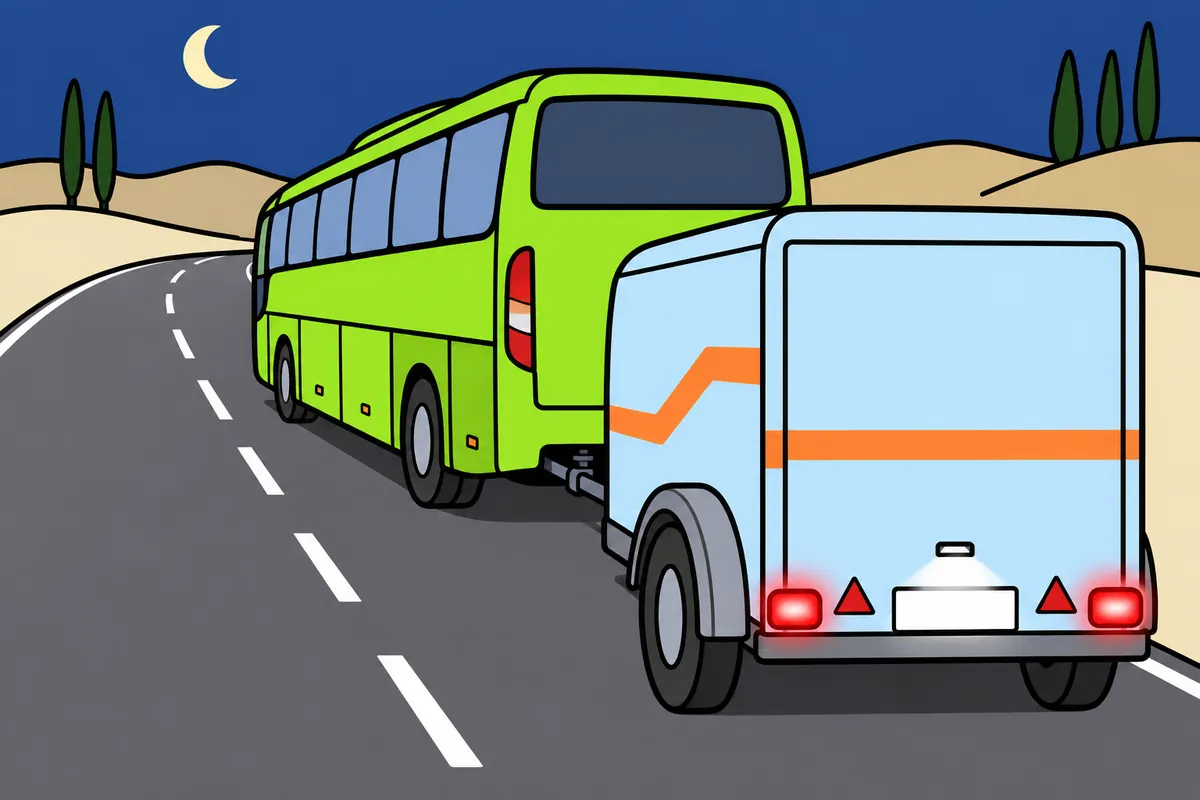
Check your trailer's position lights and number plate lighting.
| Lights on non-agricultural trailers | Requirement |
|---|---|
| Rear position | Two red lights, compulsory |
| Front position: wider than 1.60 m | Two white lights, compulsory |
| Front position: up to 1.60 m wide | Optional |
| Rear number plate | White lighting, compulsory |
Remember
- Check your two red rear position lights.
- The two front position lights are white.
- Use position lights at night, in poor visibility, tunnels and underpasses.
- Check the white lighting for your rear number plate too.
Exam trap: Wrong: exactly 1.60 m requires front position lights. Right: they are compulsory only when your trailer exceeds that width.
Read the full explanation
- Your non-agricultural trailer must have two red rear position lights. You must check that they are visible from behind and indicate the vehicle's presence and width. It is not enough for the bus lights to be visible if the trailer body obscures them. [RGV, art. 16.5](https://www.boe.es/buscar/act.php?id=BOE-A-1999-1826#a16). [RGV, Annex X](https://www.boe.es/buscar/act.php?id=BOE-A-1999-1826#anx).
- The towed unit's front position lights are two white lights; they are compulsory when its width exceeds 1.60 m and optional if it is equal to or less than this. Pay attention to which way the inequality goes: exactly 1.60 m is not more than 1.60 m. [RGV, Annex X](https://www.boe.es/buscar/act.php?id=BOE-A-1999-1826#anx).
- The towed unit must have white lighting for the rear number plate. You must check that it allows the plate to be identified without being obscured by mud, open doors, brackets or accessories. The number plate and the light illuminating it are separate components, and both must retain their function. [RGV, art. 16.5](https://www.boe.es/buscar/act.php?id=BOE-A-1999-1826#a16). [RGV, Annex X](https://www.boe.es/buscar/act.php?id=BOE-A-1999-1826#anx).
- When you drive at night, in significantly reduced visibility or through tunnels and underpasses, you must keep the combination's corresponding position lights on. The rear number plate must be illuminated in the circumstances required by the regulations; the towing vehicle's daytime running lights alone do not prove that all this lighting is on. [RGC, art. 99](https://www.boe.es/buscar/act.php?id=BOE-A-2003-23514#a99). [RGC, art. 103](https://www.boe.es/buscar/act.php?id=BOE-A-2003-23514#a103).
6Brake lights, indicators and hazard warning lights
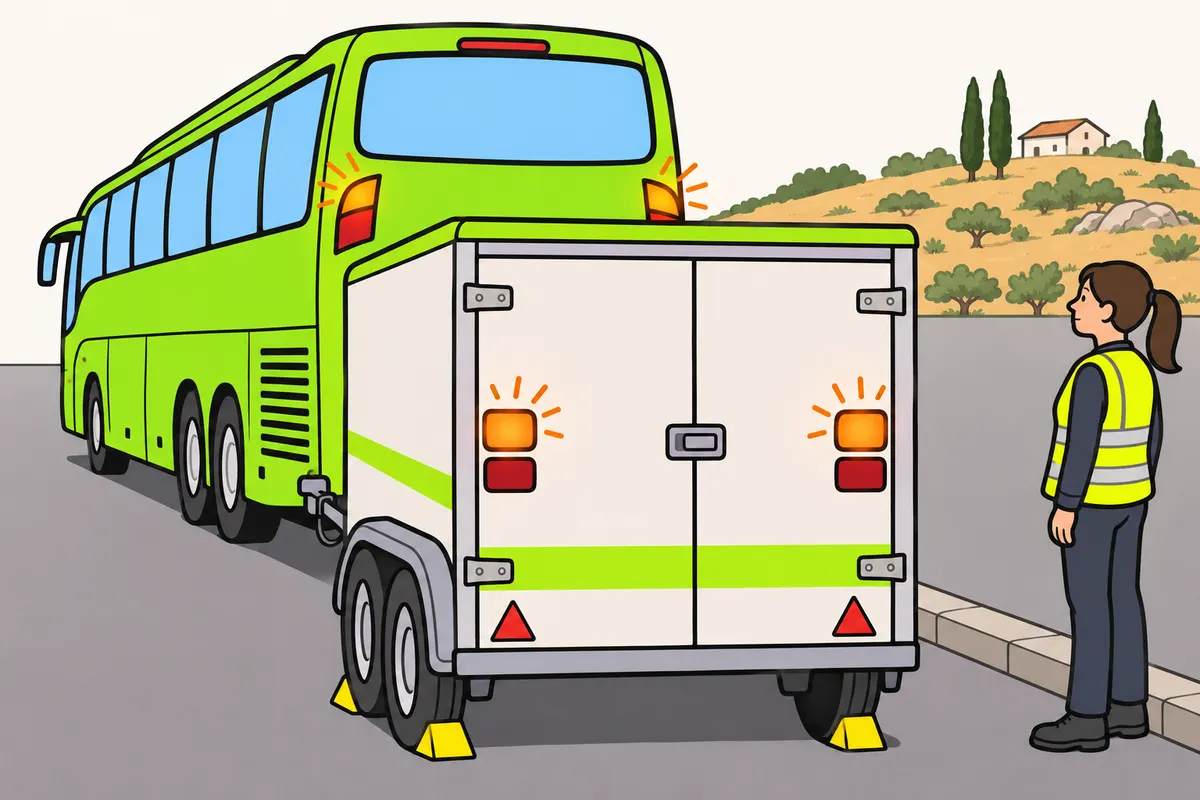
Check indicators, hazard warning lights and brake lights separately.
| Function on non-agricultural trailers | Requirement |
|---|---|
| Rear indicators | Even number, amber |
| Hazard warning lights | Use indicators on bus and trailer |
| Braking | Two red lights |
Remember
- Check both sides of your bus and trailer.
- Check the two red brake lights by pressing the brake pedal.
- Do not confuse brake lights with position lights.
- Keep your combination stationary during checks.
- Anyone helping must watch from a safe place.
Exam trap: Wrong: pressing the hazard switch proves the trailer lights work. Right: check the trailer lights themselves.
Read the full explanation
- Your non-agricultural trailer must have amber rear direction indicators, fitted in an even number. You must check both sides: a fault on one side may leave precisely the manoeuvre you need to make when joining traffic or changing course without a warning. [RGV, art. 16.5](https://www.boe.es/buscar/act.php?id=BOE-A-1999-1826#a16). [RGV, Annex X](https://www.boe.es/buscar/act.php?id=BOE-A-1999-1826#anx).
- The hazard warning signal uses the direction indicators, with the same colour and arrangement. You must check that they work on both the towed unit and the towing vehicle; switching on the hazard warning lights does not prove that the lamps at the rear end are receiving power. [RGV, Annex X](https://www.boe.es/buscar/act.php?id=BOE-A-1999-1826#anx).
- The towed unit has two red brake lights according to the general table in Annex X. You must check their response when you apply the brake, distinguishing them from the position lights: they share the same colour but warn of different situations, and you cannot consider one function checked by looking only at the other. [RGV, Annex X](https://www.boe.es/buscar/act.php?id=BOE-A-1999-1826#anx).
- For a practical check, use someone observing from a safe place or a method that genuinely allows you to verify each function. Do not position anyone between the units or behind a combination that could move. You must carry out the check with the vehicle immobilised and the controls operated in a controlled manner.
7End-outline marker lamps: recognising width
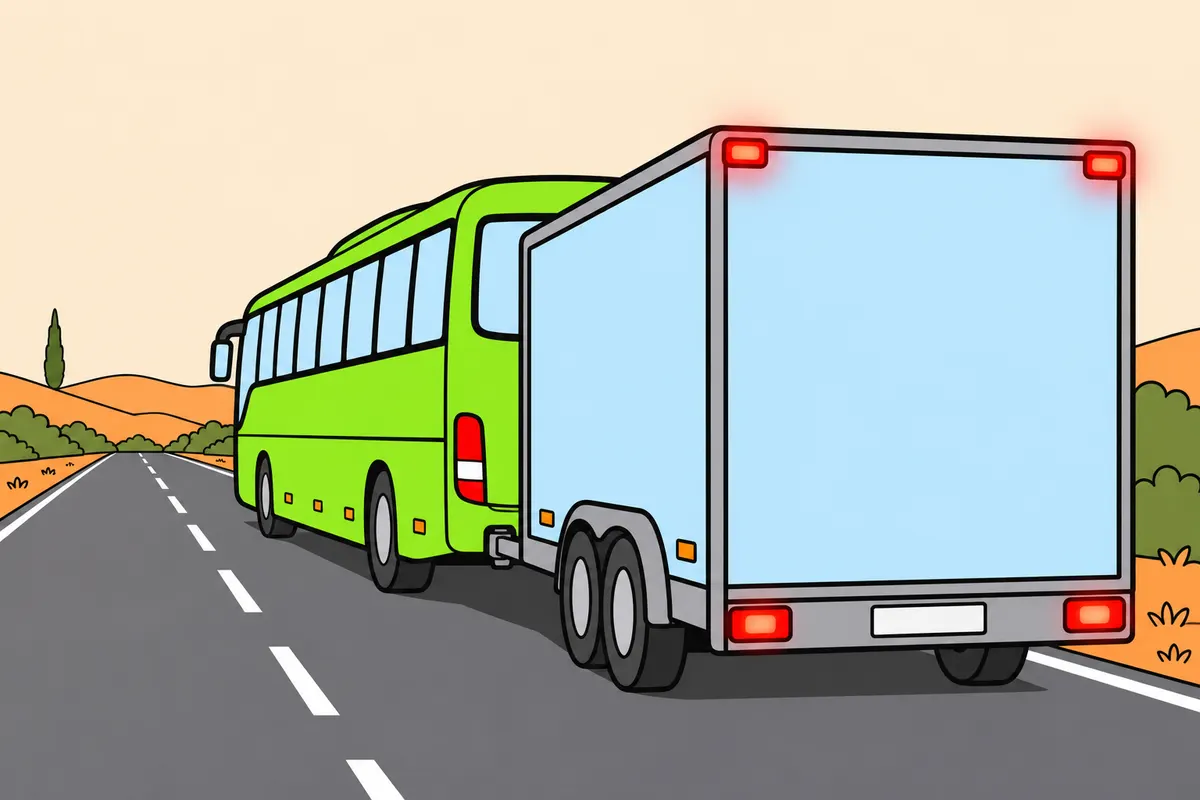
Check whether your trailer's width requires end-outline marker lamps.
| Trailer end-outline marker lamps | Colour |
|---|---|
| Front | White |
| Rear | Red |
Remember
- You have two white lamps at the front and two red lamps behind.
- Check the lamps high on your trailer.
- Use required marker lamps with position lights at night and in poor visibility.
- Also use them in tunnels, underpasses and sections signed as tunnels, even by day.
Exam trap: Wrong: exactly 2.10 m requires end-outline marker lamps. Right: your trailer must exceed that width.
Read the full explanation
- If your trailer is more than 2.10 m wide, it must have end-outline marker lamps. Associate them with width, rather than mass or the need for D+E. A width of exactly 2.10 m does not meet the condition of exceeding that width. [RGV, art. 16.5](https://www.boe.es/buscar/act.php?id=BOE-A-1999-1826#a16).
- End-outline marker lamps are white at the front and red at the rear, with two front and two rear lamps in the equipment specified for trailers. Their position allows others to recognise the upper extremities of the vehicle. [RGV, Annex X](https://www.boe.es/buscar/act.php?id=BOE-A-1999-1826#anx).
- You must switch on the required end-outline marker lamps together with the position lights between sunset and sunrise, when visibility is significantly reduced and when driving through tunnels, underpasses or sections signed as tunnels. This obligation also applies when you pass through during the day. [RGC, art. 99](https://www.boe.es/buscar/act.php?id=BOE-A-2003-23514#a99).
- During your exterior inspection, look at the high points of the trailer and check that no lamps are missing, obscured or damaged. With a tall body, checking only the lower light clusters leaves unchecked precisely those devices that help others judge its size.
8Side marking of the trailer
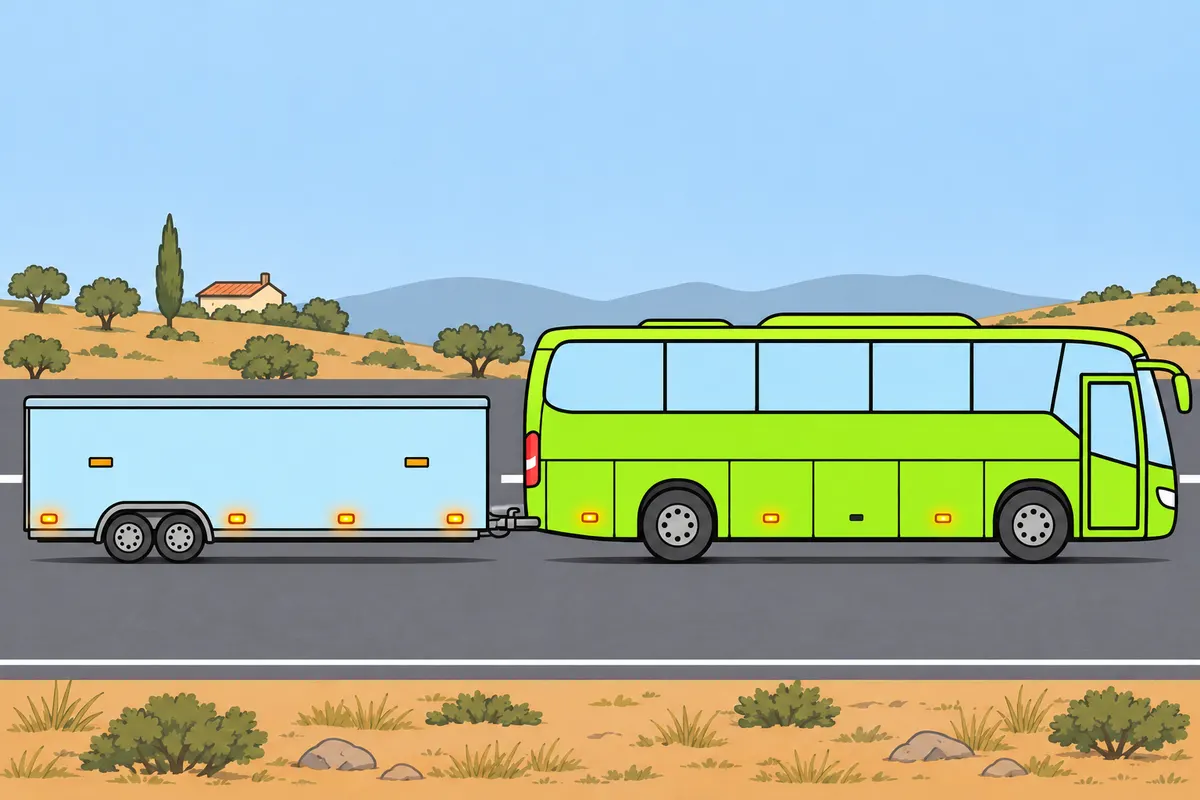
Distinguish your trailer's side lights from its side reflectors.
| Equipment on non-agricultural trailers | When compulsory |
|---|---|
| Side-marker lamps | Length over 6 m |
| Non-triangular side reflectors | At any length |
Remember
- On your non-agricultural trailer, side lights depend on its length.
- They are compulsory if your trailer exceeds 6 m.
- Side lights are amber.
- You need non-triangular side reflectors even when your trailer does not exceed 6 m.
- Check both sides and keep them uncovered.
Exam trap: Wrong: side reflectors are compulsory only above 6 m. Right: that threshold applies to side-marker lamps.
Read the full explanation
- Side position lights are compulsory on non-agricultural trailers more than 6 m long. Therefore, in an exam scenario involving a 7 m luggage trailer, you must answer that they are compulsory; check the length of the towed vehicle when applying this condition. [RGV, art. 16.5](https://www.boe.es/buscar/act.php?id=BOE-A-1999-1826#a16).
- They are amber, and their number depends on the length of the trailer under the installation requirements. These are active lights that indicate its presence from the side, especially when the combination crosses another road user’s path or manoeuvres in poor lighting. [RGV, Annex X](https://www.boe.es/buscar/act.php?id=BOE-A-1999-1826#anx).
- Non-triangular side reflectors are compulsory on non-agricultural trailers; article 16.5 does not make them subject to the 6 m threshold. Avoid applying the length requirement for side lights to all reflective devices along the sides. [RGV, art. 16.5](https://www.boe.es/buscar/act.php?id=BOE-A-1999-1826#a16).
- As part of your inspection, walk along both sides: a check from behind may miss side lights and reflectors. Make sure toolboxes, tarpaulins, dirt or repairs do not obscure them.
9Fog and reversing lights
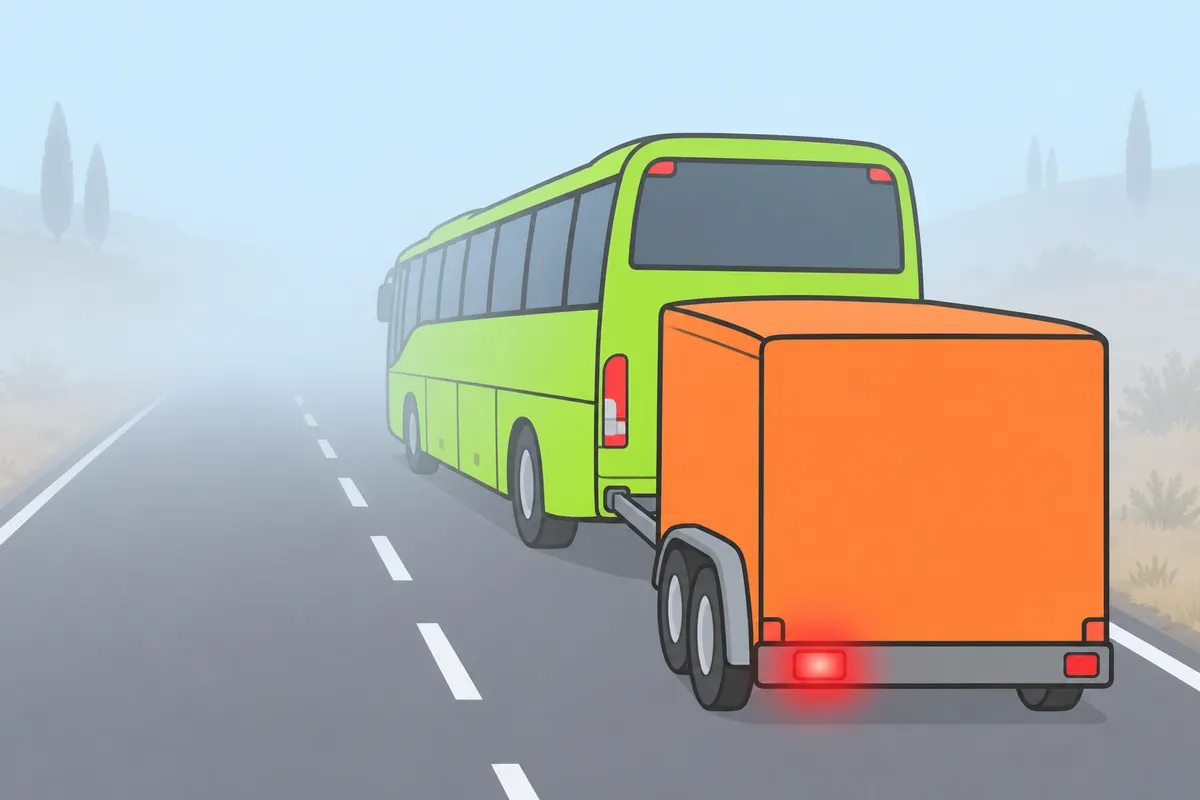
Use your rear fog light only in particularly bad conditions.
| Light on non-agricultural trailers | Colour | Installation |
|---|---|---|
| Rear fog | Red | One or two, compulsory |
| Reversing | White | One or two, optional in the general table; follow technical approval |
Remember
- Use it in thick fog or very heavy rain.
- Also use it in heavy snowfall or dense dust or smoke.
- Check each fitted lighting function separately.
- Do not remove lights required by your trailer's technical approval.
- When reversing, check mirrors and the areas they do not show.
Exam trap: Wrong: any rain allows rear fog lights. Right: use them only in particularly adverse conditions.
Read the full explanation
- Your non-agricultural trailer must have a red rear fog lamp; the table in Annex X specifies one or two. You must check this function specifically, because the position lights or brake lights coming on does not establish that it is present and working. [RGV, art. 16.5](https://www.boe.es/buscar/act.php?id=BOE-A-1999-1826#a16). [RGV, Annex X](https://www.boe.es/buscar/act.php?id=BOE-A-1999-1826#anx).
- You must only switch on the rear fog lamp in particularly adverse weather or environmental conditions, such as thick fog, very heavy rain, heavy snowfall or dense clouds of dust or smoke. Do not use it simply because it is night or you are driving a large vehicle. [RGC, art. 106.2](https://www.boe.es/buscar/act.php?id=BOE-A-2003-23514#a106).
- The general table in Annex X lists one or two white reversing lights as optional equipment for trailers. You must interpret that table together with the technical type-approval requirements applicable to the specific vehicle; you must not remove or disable equipment required or installed on your trailer. [RGV, Annex X](https://www.boe.es/buscar/act.php?id=BOE-A-1999-1826#anx).
- If your combination has reversing lights, you must check that they indicate this manoeuvre and cannot be confused with a red braking signal. They help warn others of movement, but do not show that the area is clear or replace looking in your mirrors and checking blind spots. [RGC, art. 109.2](https://www.boe.es/buscar/act.php?id=BOE-A-2003-23514#a109).
10Reflectors: shape and colour
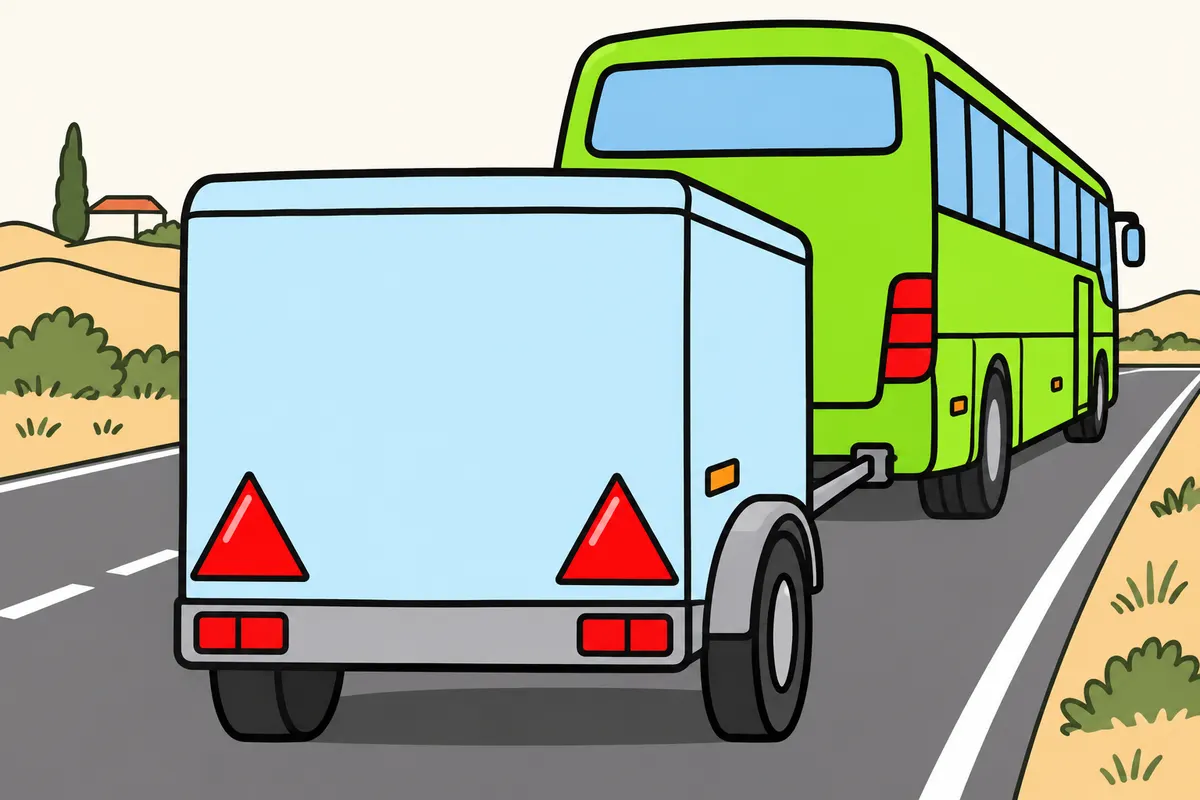
Recognise your trailer's reflectors by their shape and colour.
| Trailer reflectors | Shape | Usual colour |
|---|---|---|
| Front | Two, non-triangular | White |
| Rear | Two, triangular | Red |
| Sides | Non-triangular | Amber; colour exception when grouped with rear signals |
Remember
- Reflectors return the light they receive.
- Keep them clean and undamaged.
- Do not replace rear triangles with rectangular reflectors.
- Side reflectors grouped with rear signals have a colour exception.
- Do not use reflectors instead of compulsory lights.
Exam trap: Wrong: a reflector produces its own light. Right: it reflects light received.
Read the full explanation
- Your trailer must carry two red triangular rear reflectors. Their shape identifies the towed vehicle; you must keep them intact and in their prescribed shape. [RGV, art. 16.5](https://www.boe.es/buscar/act.php?id=BOE-A-1999-1826#a16). [RGV, Annex X](https://www.boe.es/buscar/act.php?id=BOE-A-1999-1826#anx).
- Your trailer has two white, non-triangular front reflectors. They differ from front position lights because they reflect the light falling on them and do not depend on you connecting or switching on the lighting circuit. [RGV, Annex X](https://www.boe.es/buscar/act.php?id=BOE-A-1999-1826#anx).
- Side reflectors are non-triangular and amber, with the colour exception provided for those grouped with rear signalling devices. First learn the basic arrangement: white at the front, red at the rear and amber along the sides. [RGV, Annex X](https://www.boe.es/buscar/act.php?id=BOE-A-1999-1826#anx).
- A reflector does not itself produce the light that makes it visible. You must therefore keep it clean and intact even when the entire electrical system works. Likewise, reflectors do not replace compulsory lights or allow you to drive with an unresolved connection fault.
11Checking lighting and visibility
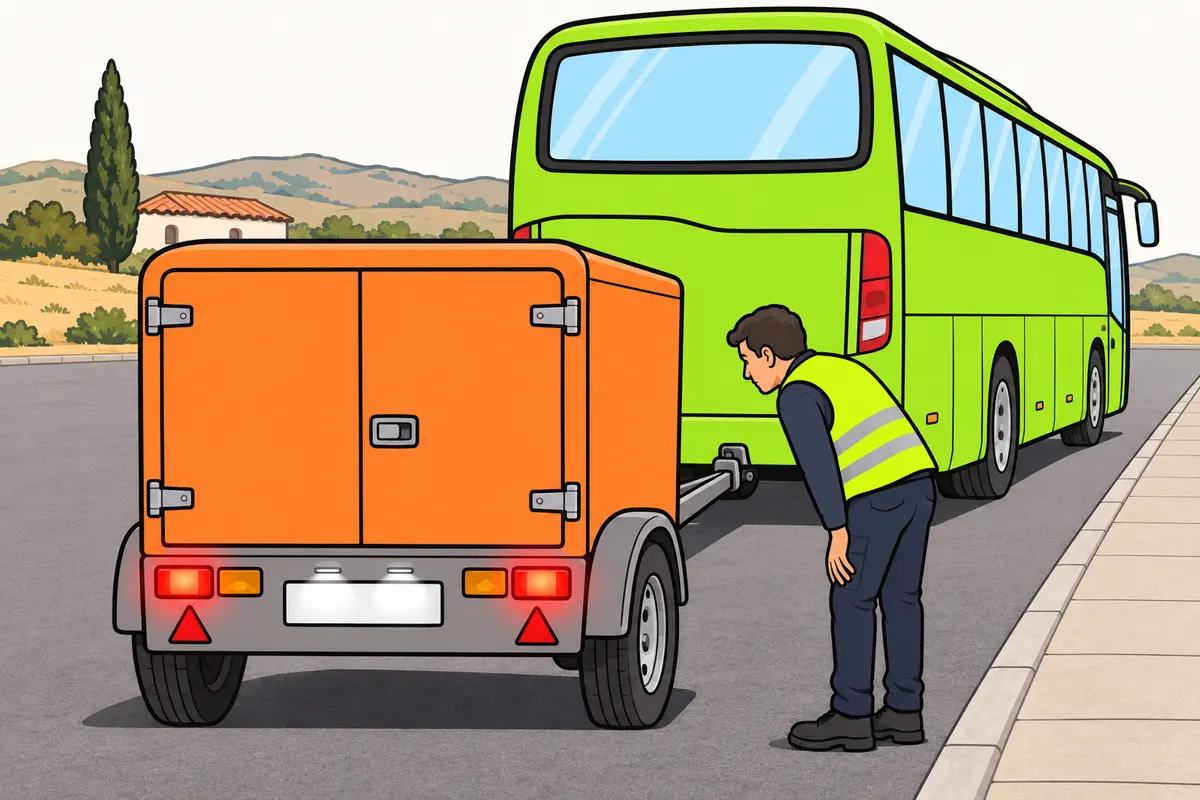
Check each lighting function before you set off.
Remember
- Check each light separately and keep windows and mirrors clean.
- Paired lights with the same purpose must match in colour and intensity.
- Check their symmetrical position too.
- Resolve faults preventing correct signalling before your journey.
- If an unrepairable fault forces reduced lighting during your journey, slow down.
- You must be able to stop within the lit area.
Exam trap: Wrong: one lit lamp proves everything works. Right: check each function in the light cluster.
Read the full explanation
- Paired devices serving the same purpose must match in colour and intensity and be positioned symmetrically as required by the regulations. Avoid improvised repairs that change the colour or leave a signal difficult to interpret; a lamp emitting light does not necessarily fulfil its prescribed function. [RGV, art. 15.1](https://www.boe.es/buscar/act.php?id=BOE-A-1999-1826#a15).
- Check the position lights, number plate lights, indicators on each side, hazard warning lights, brake lights, end-outline marker lamps and side position lights where applicable, as well as the other installed functions, in turn. An orderly inspection prevents you from mistaking an illuminated light cluster for a check of every function it contains.
- Keep windows, mirrors, lights and reflectors clean so that you can see and be seen. Interior cab lighting does not replace exterior lighting. As a safety guideline, if you detect a fault that prevents you from correctly signalling the presence or manoeuvres of the combination, resolve it before starting your journey. General checks of doors, brakes, tyres, fuel and documentation are covered in «Maintenance and inspection of the vehicle combination» and «Driver and vehicle combination documentation».
- If a fault that cannot be repaired en route forces you to drive with reduced lighting intensity, you must reduce your speed until you can stop within the illuminated area. This rule does not turn every loss of trailer signalling into permission to continue: assess the fault and arrange the necessary repair or assistance. [RGC, art. 107](https://www.boe.es/buscar/act.php?id=BOE-A-2003-23514#a107).
12Two number plates at the rear
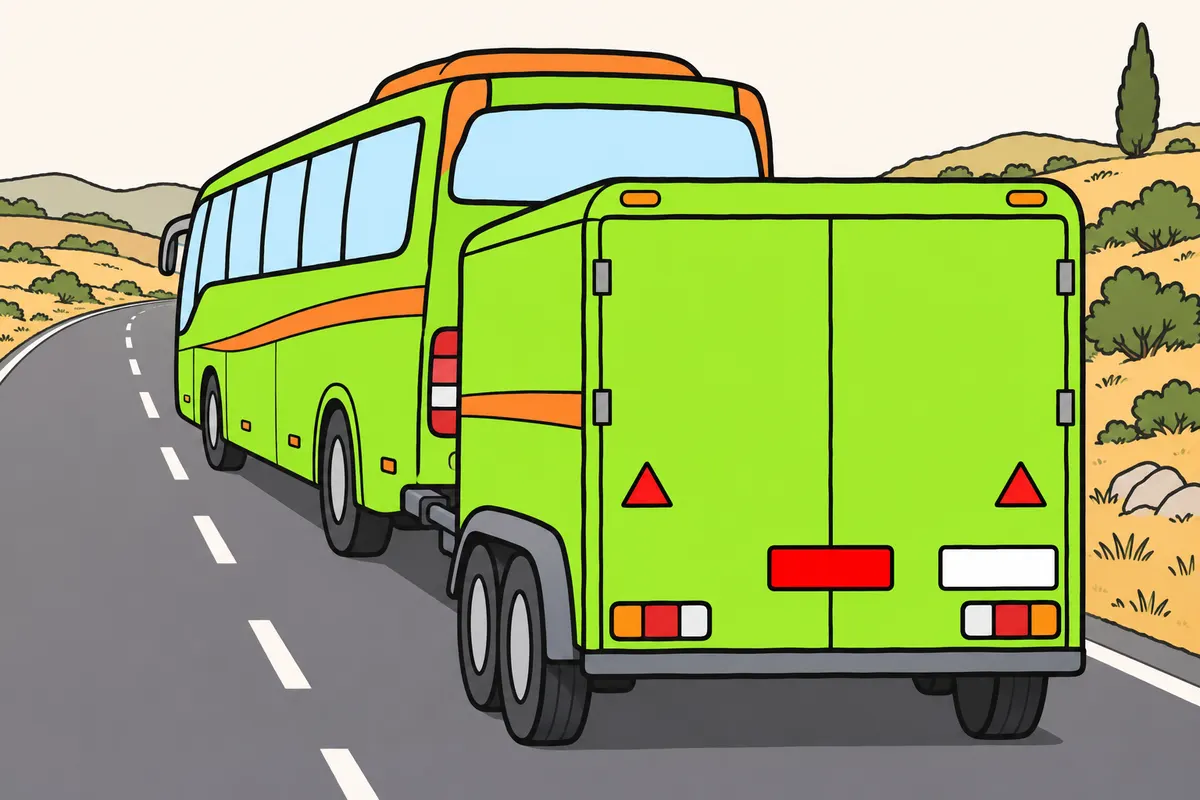
Your trailer needs both rear number plates when its MMA exceeds the threshold.
| Plate on trailers above 750 kg MMA | Rear position |
|---|---|
| Trailer's own plate | Centred |
| Plate showing towing vehicle registration | Right-hand side |
Remember
- Identify your trailer's own plate and the plate showing your bus registration.
- Your trailer's own plate must be vertical or nearly vertical.
- It has a red background and black characters.
- If you change buses, check the plate showing the bus registration.
- Keep both plates clean, visible and firmly attached.
Exam trap: Wrong: any plate arrangement is enough. Right: above 750 kg MMA, centre the trailer's own plate and put the towing vehicle's plate on the right.
Read the full explanation
- If your trailer has an MMA (maximum authorised mass) exceeding 750 kg, it must carry its own number plate at the rear and another showing the towing vehicle’s registration number. In your D+E combination, you must recognise both identities: one belongs to the trailer and the other to the vehicle towing it. [RGV, Annex XVIII, section III.4](https://www.boe.es/buscar/act.php?id=BOE-A-1999-1826#anxviii).
- Your trailer’s own number plate must be vertical or nearly vertical and on its median longitudinal plane. The plate reproducing the towing vehicle’s registration number is placed on the right-hand side. Pay attention to the location and do not answer that any arrangement is sufficient as long as there are two plates. [RGV, Annex XVIII, section III.4](https://www.boe.es/buscar/act.php?id=BOE-A-1999-1826#anxviii).
- An ordinary trailer number plate has a red background and black characters. The ordinary plate corresponding to the towing vehicle carries its own prescribed identification; avoid confusing the red of the trailer’s number plate with a hazard or load warning sign. [RGV, Annex XVIII](https://www.boe.es/buscar/act.php?id=BOE-A-1999-1826#anxviii).
- If you change the vehicle towing the same trailer, check the plate reproducing the towing vehicle’s registration number: it must match the vehicle forming the combination. As part of your inspection, also check that the plates are secure and clean and that nothing obscures the characters before setting off. [RGV, Annex XVIII, section III.4](https://www.boe.es/buscar/act.php?id=BOE-A-1999-1826#anxviii).
13Long vehicle rear plate
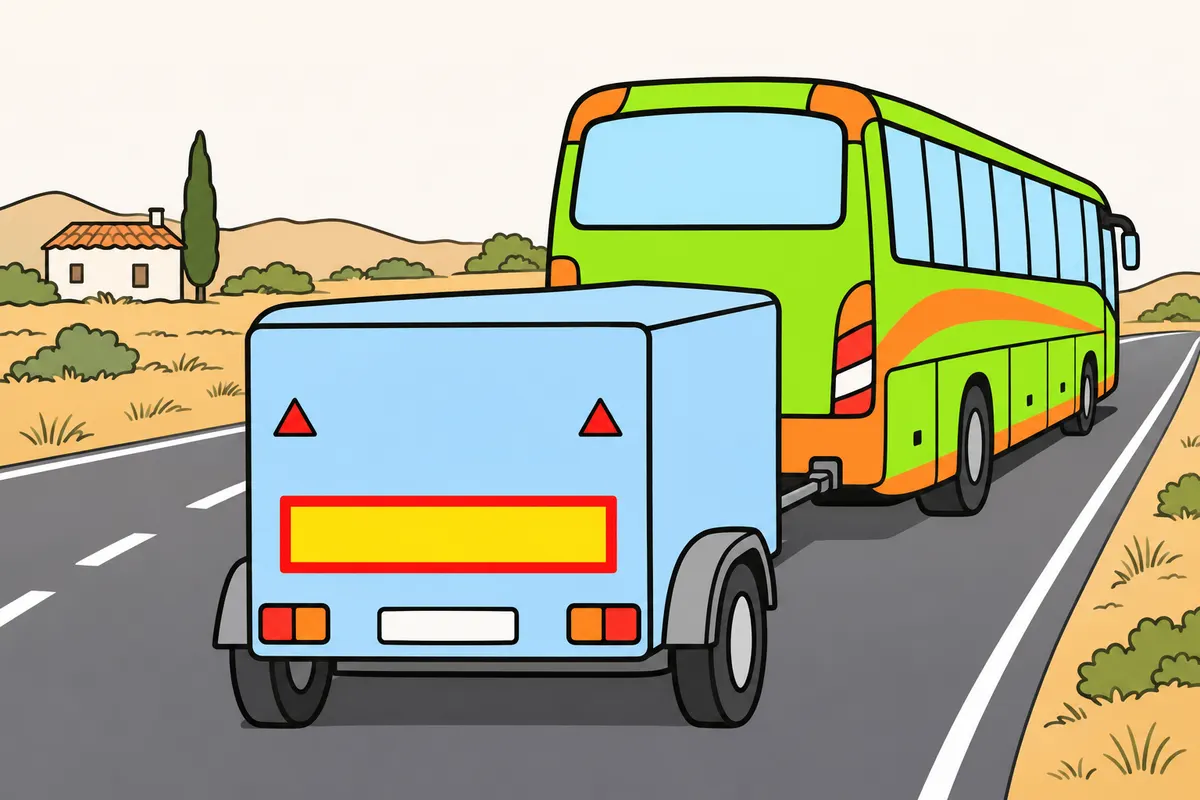
Use the V-6 sign when your whole vehicle or combination exceeds 12 m.
Remember
- Measure the whole combination, not just your trailer.
- Fit the V-6 at the rear, centred on the centreline.
- Alternatively, you can fit two plates symmetrically near the edges.
- Follow the mounting height rules and use approved plates.
- Recognise the yellow reflective and red fluorescent material.
Exam trap: Wrong: exactly 12 m requires V-6. Right: the vehicle or combination must exceed 12 m.
Read the full explanation
- The V-6 sign, Vehículo largo (long vehicle), indicates that the vehicle or combination exceeds 12 m in length. You must consider the entire combination: you may need it even if each unit separately is shorter. Exactly 12 m does not mean a length exceeding 12 m. [RGV, Annex XI, V-6](https://www.boe.es/buscar/act.php?id=BOE-A-1999-1826#v-6).
- You must fit it at the rear, centred on the vehicle's centreline. Where this makes fitting easier, you may use two similar plates positioned symmetrically on either side of the centreline and as close to the edges as possible. [RGV, Annex XI, V-6](https://www.boe.es/buscar/act.php?id=BOE-A-1999-1826#v-6).
- You must fit it at a height of between 500 and 1,500 mm above the ground. The sign has yellow reflective material and red fluorescent material and must be type-approved. Its purpose is to warn of the combination's length. [RGV, Annex XI, V-6](https://www.boe.es/buscar/act.php?id=BOE-A-1999-1826#v-6).
- Distinguish the V-6 from number plates, the trailer's triangular reflectors and the warning panel for a projecting load. Each item has its own purpose and requirement; carrying one does not exempt you from carrying the others that apply. Load marking is covered in «Safe luggage and loads».
14Reflective contour markings
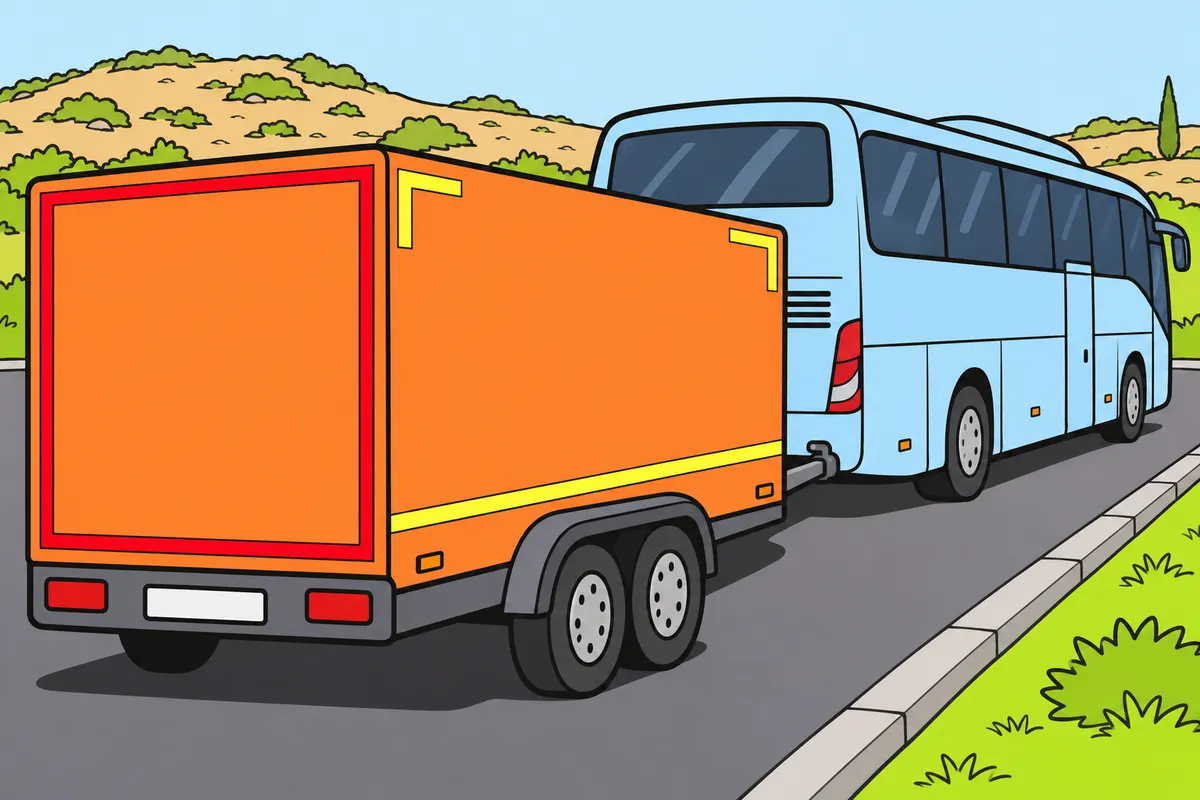
Keep the reflective markings required for your trailer.
Remember
- V-23 helps others recognise your vehicle's outline.
- Its requirement depends on category, maximum mass and length.
- Check that the material and its position meet technical approval requirements.
- Check that mud, damage or repairs do not cover the strips.
- Check your lights too.
Exam trap: Wrong: any decorative strip will do. Right: keep the approved markings required for your vehicle.
Read the full explanation
- The V-23 sign, Distintivo de vehículos de transporte de mercancías (goods vehicle marking), consists of reflective markings intended to make the vehicle's overall size easier to recognise. When driving a D+E combination, you must assess the equipment on the luggage or goods trailer according to its category; using a bus as the towing vehicle does not turn contour strips into lights or number plates. [RGV, Annex XI, V-23](https://www.boe.es/buscar/act.php?id=BOE-A-1999-1826#v-23).
- The requirements for rear and side markings depend on maximum masses, lengths and categories under UNECE Regulation 48, to which the Reglamento General de Vehículos (General Vehicle Regulations) refers. You must not conclude that every small trailer needs full contour markings or that any decorative strip meets the requirement. [RGV, Annex XI, V-23](https://www.boe.es/buscar/act.php?id=BOE-A-1999-1826#v-23).
- The material must be type-approved under UNECE Regulation 104 and must be installed in accordance with the specified technical conditions. As the driver, you must maintain the layout required for the vehicle and check that repairs to the bodywork or tarpaulins have not left it incomplete. [RGV, Annex XI, V-23](https://www.boe.es/buscar/act.php?id=BOE-A-1999-1826#v-23).
- As a practical check, inspect the strips from different angles during your walk-round check. A strip covered in mud or damaged becomes less effective even if it is still attached to the vehicle. You must also check the lights: reflective markings help others judge the vehicle's overall size and do not replace the lights' electrical power supply.
15Mirrors on the towing bus
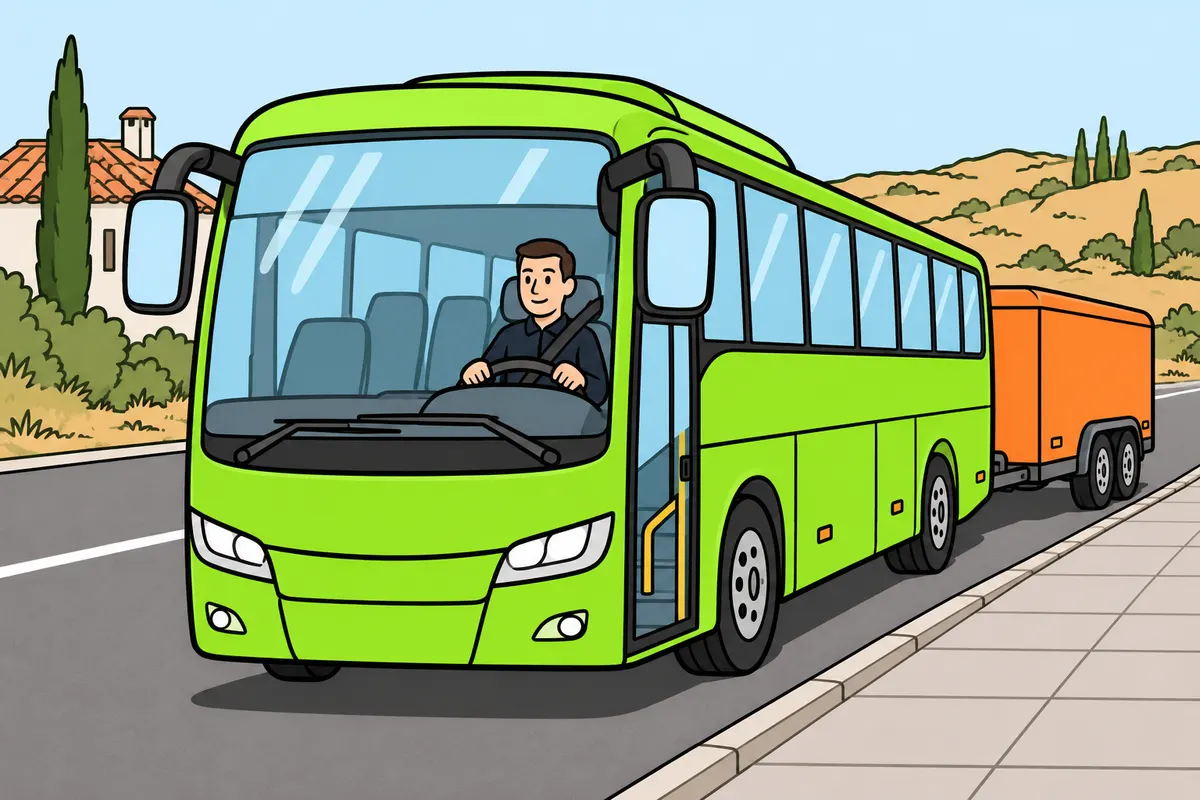
Adjust your mirrors and keep those required for your bus.
| Mirror on M2 and M3 buses | Rule |
|---|---|
| Main, Class II | Two exterior mirrors, compulsory |
| Wide-angle, Class IV | Optional under the table |
| Close-proximity, Class V | Optional; every part, adjustment point and attachment above 2 m, fully laden, in every adjustment position |
| Front, Class VI | Optional; mirror and supports at least 2 m high, at technically permissible maximum mass, in every adjustment position |
| Proximity or front mirror below required height | Installation prohibited |
Remember
- On M2 and M3 buses, you need a main exterior mirror on each side.
- Your passenger mirror does not replace exterior mirrors.
- Adjust mirrors from your seat with your combination stationary.
- Keep mirror glass clean and supports secure.
- Also keep mirrors required by your bus's technical approval.
Exam trap: Wrong: proximity and front mirrors have the same minimum height. Right: proximity requires more than 2 m; front allows exactly 2 m. Meet each loading and adjustment condition.
Read the full explanation
- On buses in categories M2 and M3, you must have two class II main exterior mirrors, one on the left and one on the right. The mirror that lets you monitor the passenger compartment does not replace the legally required field of vision to the rear and sides. [RGV, Annex III](https://www.boe.es/buscar/act.php?id=BOE-A-1999-1826#aniii).
- Class IV is the wide-angle mirror and class V is the close-proximity mirror. For M2 and M3, the table in Annex III lists one optional mirror of each of these classes, subject to the specified conditions for the close-proximity mirror; you must also retain the equipment required by your bus's specific type approval. [RGV, Annex III](https://www.boe.es/buscar/act.php?id=BOE-A-1999-1826#aniii).
- The class VI front mirror lets you see the area immediately in front of the bus; on M2 and M3 vehicles it is optional under UNECE Regulation 46. If you fit one, no part of the mirror or its supports may be less than 2 m above the ground in any adjustment position, with the vehicle at its technically permissible maximum mass; if the cab height prevents you from meeting this condition, you must not fit it. [UNECE Regulation 46, paragraphs 15.2.1.1.1 and 15.2.2.7](https://www.boe.es/doue/2010/177/L00211-00262.pdf).
- You must ensure that class V close-proximity mirrors are more than 2 m above the ground in all adjustment positions, including adjustment points and mountings, with the vehicle fully loaded. If you cannot meet this condition, you must not fit them under Annex III. [RGV, Annex III](https://www.boe.es/buscar/act.php?id=BOE-A-1999-1826#aniii).
- You must adjust the mirrors with the combination stationary, after positioning yourself correctly in the seat. Check both sides and nearby areas, keep the mirror glass clean and check that the supports do not vibrate or move out of position. Poor adjustment reduces the information available to you even in daylight.
16Extending mirrors and blind spots
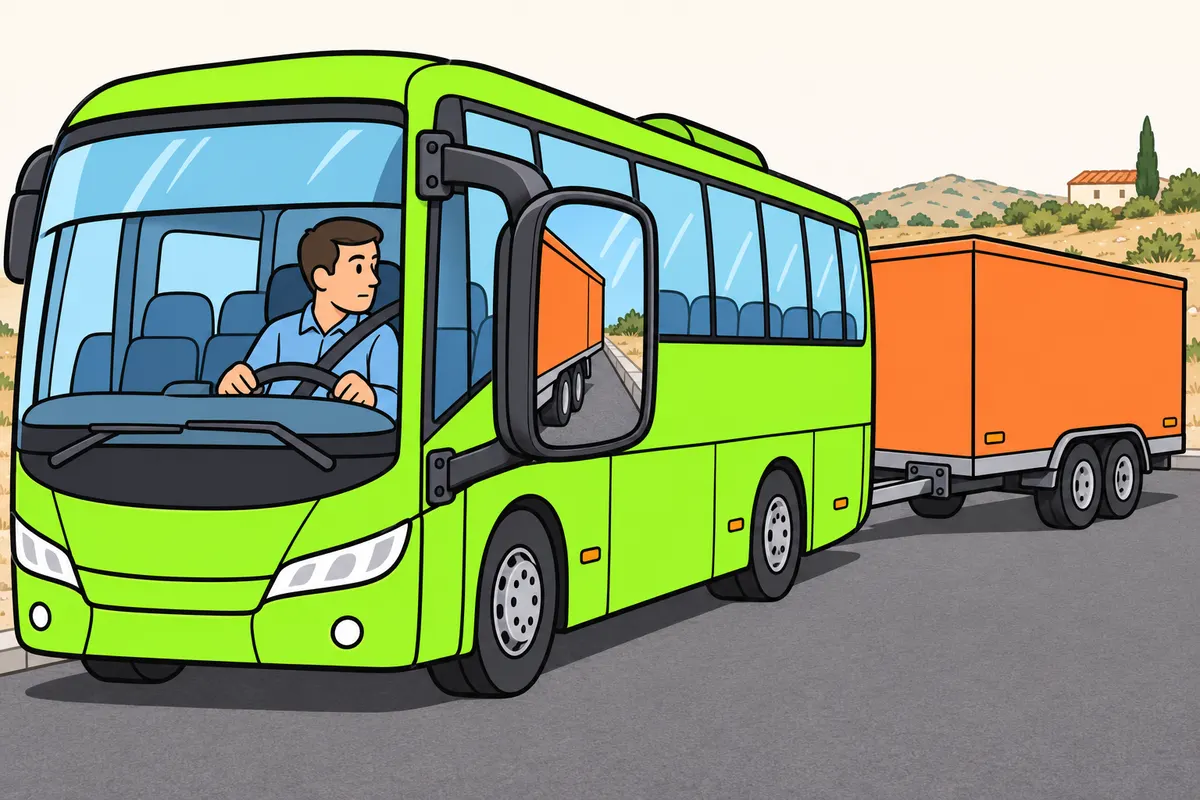
Check that you can see properly with your trailer coupled.
Remember
- If your trailer blocks the required view, use a suitable approved solution.
- Extending mirrors may help if you need them.
- Check their adjustment with your trailer actually coupled.
- Your mirror view changes as your combination turns.
- If you lose a necessary reference point, stop and check your surroundings safely.
Exam trap: Wrong: disappearing from your mirror means leaving danger. Right: remember the areas your mirrors do not show.
Read the full explanation
- If the trailer obstructs the necessary field of vision, you must use a suitable indirect vision solution that meets the vehicle's technical requirements. Extending or supplementary mirrors can provide the necessary view; you must not fit them automatically simply because you are towing a trailer. [RGV, art. 11.2](https://www.boe.es/buscar/act.php?id=BOE-A-1999-1826#a11). [RGV, Annex III](https://www.boe.es/buscar/act.php?id=BOE-A-1999-1826#aniii).
- When adjusting the mirrors, check the field of vision with the trailer actually coupled. An adjustment that works when driving the towing vehicle alone may be inadequate with a wider trailer body or one in a different position. Secure supplementary mirrors so that they retain their alignment and do not create dangerous projections.
- Mirrors help you monitor the sides, the trailer and the surrounding space, but you must know which areas they do not show. As the combination articulates, the view in each mirror changes; do not assume that a road user has left the danger zone just because they have disappeared from the mirror.
- If you lose a reference point you need for manoeuvring, stop and check your surroundings safely. Keep observing continuously even after adjusting the equipment.
17Wheel chocks on a significant gradient
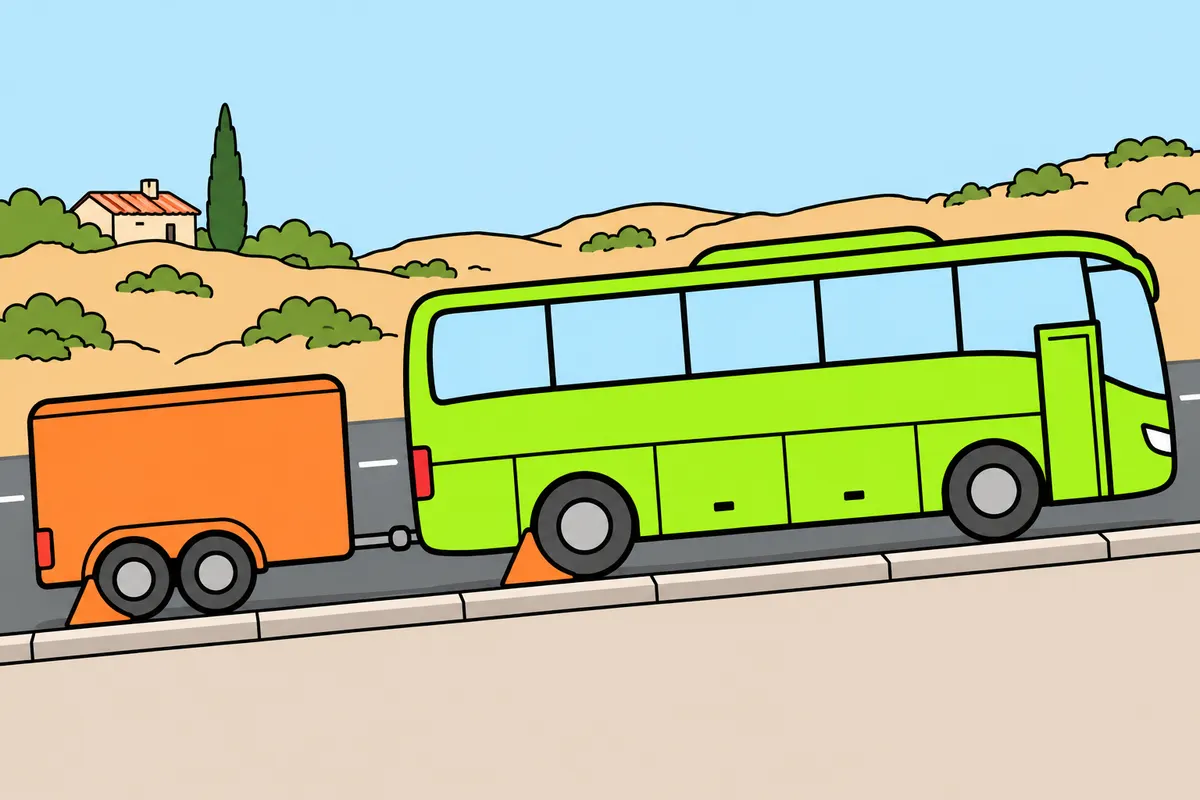
On a significant gradient, secure your combination beyond the normal parking measures.
| Combination on significant gradient with suitable kerb | Wheel direction |
|---|---|
| Facing uphill | Towards the centre of the carriageway |
| Facing downhill | Outwards, away from the carriageway |
Remember
- When halting or parking on a significant gradient, secure your combination against rolling.
- Use suitable chocks or rest a steered front wheel against a suitable kerb.
- Without a suitable kerb, you cannot use that alternative.
- Never use stones or improvised objects.
- The brake does not remove this extra precaution.
- Remove and store chocks before driving again.
Exam trap: Wrong: any stone can serve as a chock. Right: use purpose-made chocks or a steered front wheel resting against a suitable kerb.
Read the full explanation
- If you halt or park a combination on a significant gradient, you must secure it properly against rolling in addition to taking the usual immobilisation measures. This requirement also applies to vehicles with an MMA (maximum authorised mass) exceeding 3,500 kg and to buses; your bus with a trailer is covered on both counts. [RGC, art. 92.3](https://www.boe.es/buscar/act.php?id=BOE-A-2003-23514#a92).
- You may do this using chocks specifically designed for the purpose or by resting one of the steered front wheels against the kerb. If you use the latter method, turn the wheels towards the centre of the carriageway when facing uphill and outwards when facing downhill. There must be a kerb against which the wheel can rest. [RGC, art. 92.3](https://www.boe.es/buscar/act.php?id=BOE-A-2003-23514#a92).
- You must not use stones or other objects not specifically designed for chocking vehicles. You must use a chock suitable for the equipment, position it according to the instructions and check that it performs its function. Applying the parking brake and selecting a gear do not remove the need for the additional precaution required on a significant gradient. [RGC, art. 92.3](https://www.boe.es/buscar/act.php?id=BOE-A-2003-23514#a92).
- Article 92.3 does not set a general percentage to define a significant gradient. When a scenario specifies this circumstance, take the additional precaution without inventing a numerical threshold. Remove the chocks you use from the road before moving off again and stow them for reuse. [RGC, art. 92.3](https://www.boe.es/buscar/act.php?id=BOE-A-2003-23514#a92).
18Parking brake and supports
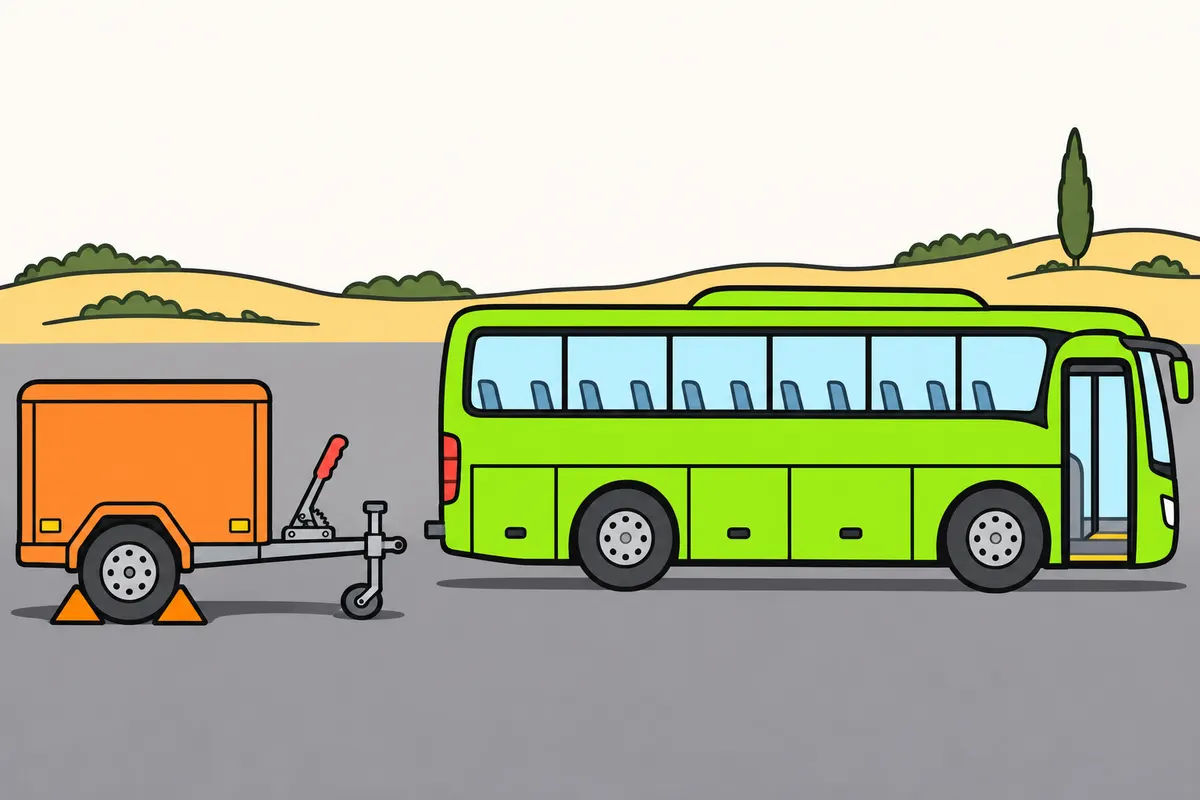
Apply your trailer's parking brake and stabilise its supports.
| Parking with a manual gearbox | Gear to leave selected |
|---|---|
| Uphill | First |
| Downhill | Reverse |
Remember
- When leaving your seat, stop the engine and switch off the ignition.
- Apply the parking brake; prevent unauthorised use if you move away from the vehicle.
- Apply your trailer's brake before separating it.
- Check that its supports are stable.
- Before driving, retract and secure supports; check the coupling and connections.
- Remove chocks once your combination is secured.
Exam trap: Wrong: the jockey wheel replaces the brake. Right: it supports the trailer but does not prevent movement by itself.
Read the full explanation
- When leaving the driving position, you must stop the engine, switch off the ignition and leave the parking brake applied. If you move away from the vehicle, you must prevent unauthorised use. With a manual gearbox, you must leave first gear engaged when facing uphill and reverse gear when facing downhill; with a system that provides a parking position, select that position. [RGC, art. 92.3](https://www.boe.es/buscar/act.php?id=BOE-A-2003-23514#a92).
- The trailer's parking brake keeps it stationary even when it is uncoupled. You must make sure it is applied before the trailer ceases to depend on the towing vehicle. Do not confuse the operation of the brakes while driving with securing the trailer against movement once detached. [RGV, art. 12.8](https://www.boe.es/buscar/act.php?id=BOE-A-1999-1826#a12).
- The trailer's jockey wheel or supports hold up the parts they are designed to support, but do not replace the parking brake or other means of preventing movement. Check that the support is stable before moving the bus away, and keep people clear of any area where the trailer could fall or move.
- Before driving again, check that the coupling is secured, the connections are in place and the supports are retracted and secured; remove the chocks once the combination is secured.
19Rear underrun protection
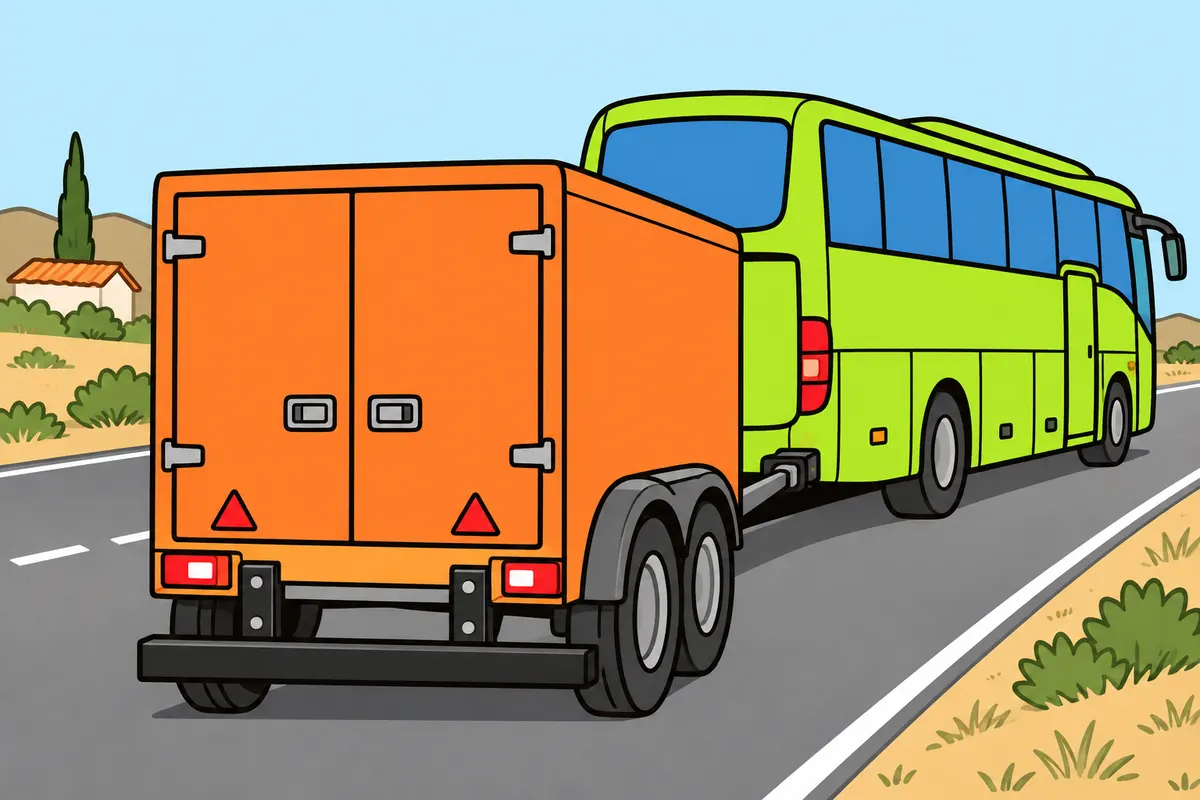
Check rear protection according to each vehicle's category.
| Vehicle or category | Rear protection |
|---|---|
| M2 or M3 bus | Compliant rear shape, device or alternative height condition |
| Alternative height condition for the bus and O2 trailer | Unladen clearance at most 550 mm; protected width at most 100 mm narrower per side than rear axle, excluding tyre bulging near ground |
| Your O2 luggage trailer | Alternative height condition or device specified in its documentation |
Remember
- Rear protection stops another vehicle going underneath yours from behind.
- It can be a device or a suitable rear structure.
- Check its attachments and look for damage.
- Any justified exemption must appear in your documentation.
- Put movable devices in their correct travel position before driving.
Exam trap: Wrong: your luggage trailer follows any heavy-trailer rule. Right: for your O2 trailer, apply the alternative height and width conditions or the device specified in its documentation.
Read the full explanation
- Vehicles, including trailers, must provide effective rear protection against other vehicles running underneath them. This can be achieved through a dedicated device or through the shape and structural strength of their rear end. You must maintain its strength, fixings and the configuration approved for the vehicle. [RGV, art. 11.16](https://www.boe.es/buscar/act.php?id=BOE-A-1999-1826#a11). [RGV, Annex IV](https://www.boe.es/buscar/act.php?id=BOE-A-1999-1826#aniv).
- For an M2 or M3 bus, Annex IV allows a rear-end shape that complies with the technical regulations or the alternative condition of an unladen ground clearance of no more than 550 mm. Under this alternative, the protected width must not be more than 100 mm narrower on each side than the width of the rear axle, disregarding tyre deformation close to the ground; a device complying with point 2.1.1 is also permitted. [RGV, Annex IV, 2.2](https://www.boe.es/buscar/act.php?id=BOE-A-1999-1826#aniv).
- Your D+E luggage trailer is O2: it must meet the alternative 550 mm condition in point 2.2 or have the device specified in its documentation. The height and width conditions stated for the bus in the previous point also apply to a trailer in this category. Any incompatibility with its use that justifies an exemption must be recorded in the documentation. [RGV, Annex IV, 2.2 and 3.3](https://www.boe.es/buscar/act.php?id=BOE-A-1999-1826#aniv). [RGV, Annex IX, 4.1.2.3](https://www.boe.es/buscar/act.php?id=BOE-A-1999-1826#anix).
- As a checking guideline, check that the bar or structure is not deformed or detached and that its anchor points are not damaged. If a device can be moved for working purposes, follow the instructions to put it in its road-going position.
20Side and front protection
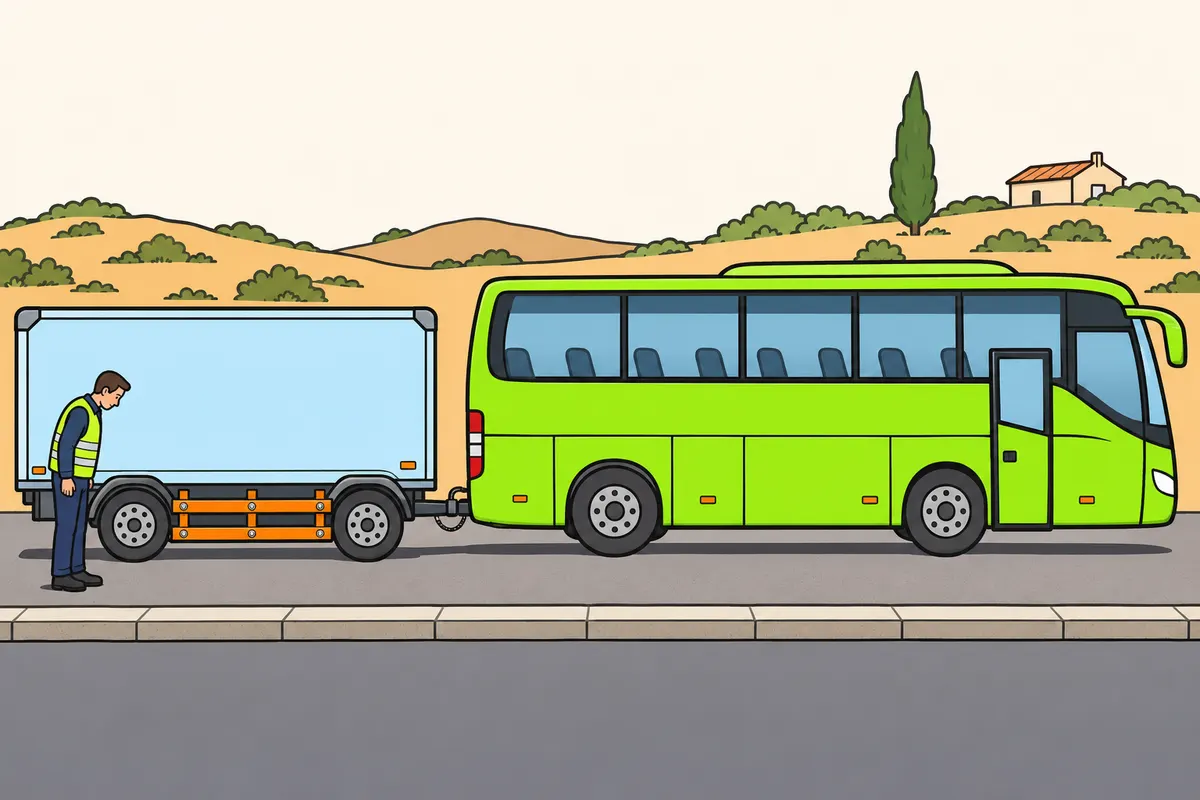
Keep the protection required by each unit's technical approval.
| Protection | Requirement to check |
|---|---|
| Luggage trailer side protection | Trailer category and technical approval |
| Bus front protection | Bus's own technical approval |
Remember
- Check the side protection required for your luggage trailer.
- Check its condition, continuity and fastenings.
- Do not remove it to gain space.
- Do not assume a toolbox can replace it.
- Check technical documents and report defects for repair.
Exam trap: Wrong: towing luggage requires lorry front protection on your bus. Right: follow your bus's own technical approval.
Read the full explanation
- On a trailer intended to carry luggage or goods, you must maintain the side protection required by its category and type approval. Article 11.17 covers goods vehicles and their trailers when their technical regulations require it; a D+E licence does not, by itself, determine the equipment required for that unit. [RGV, art. 11.17](https://www.boe.es/buscar/act.php?id=BOE-A-1999-1826#a11).
- Side protection helps prevent a road user from ending up underneath the vehicle in a side collision. As a safety guideline, check its continuity, condition and fixings. You must not remove it to gain space or assume that a toolbox fitted along the side can, on its own, replace the required protection.
- The front protection requirement in Article 11.18 applies to vehicles intended to carry goods when their regulations require it. For your bus, you must follow the requirements of its own type approval, without applying a lorry’s front protection requirements simply because you are towing luggage. [RGV, art. 11.18](https://www.boe.es/buscar/act.php?id=BOE-A-1999-1826#a11).
- To establish exactly which equipment you must maintain on your combination, you must refer to its type approval, configuration and technical documentation. Your inspection as a driver consists of identifying missing, damaged or incorrectly positioned equipment and reporting it so it can be remedied; it does not replace strength requirements with a visual assessment.
21Connected V-16 and compulsory equipment
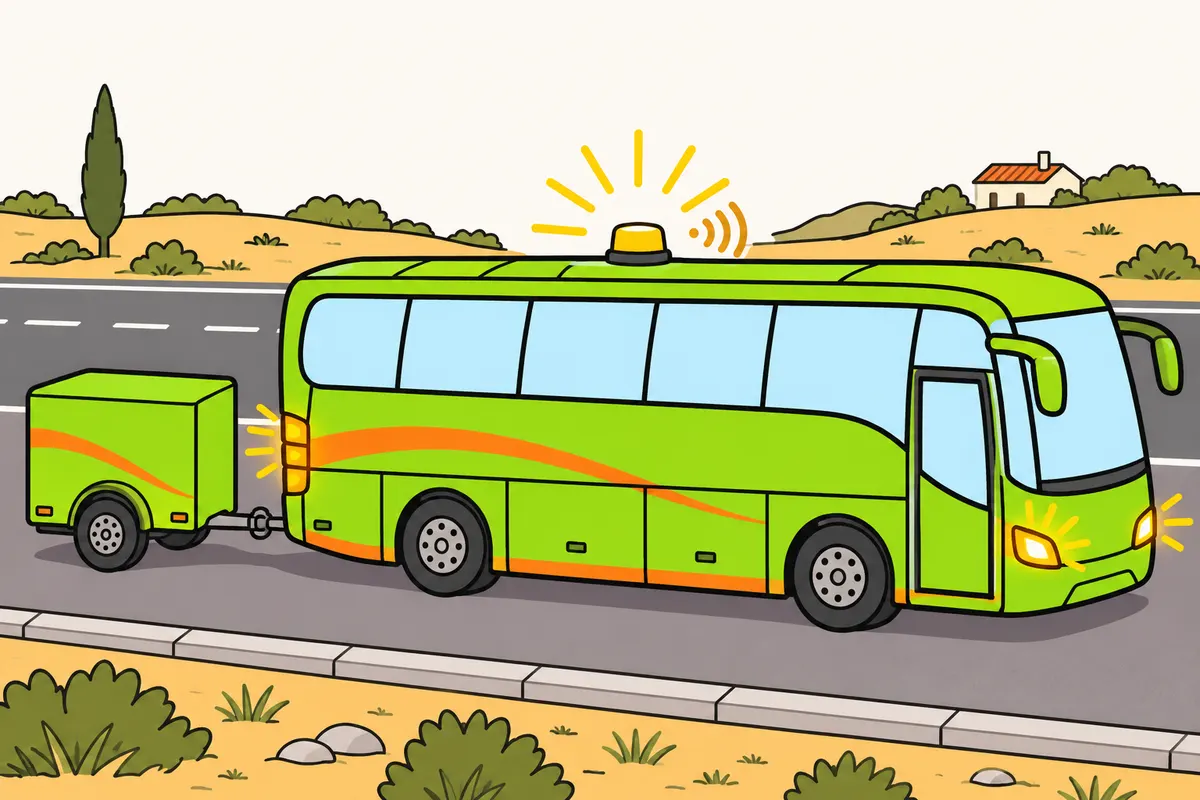
Carry a valid connected V-16 in your non-special vehicle combination.
Remember
- For your Spanish-registered combination, triangles do not replace the connected V-16.
- Check its make and model on the official DGT list.
- Check when its connectivity service expires.
- Keep it accessible from your cab and maintain its power supply.
- Its amber light complements your hazard warning lights.
Exam trap: Wrong: any beacon advertised as approved will do. Right: check its official certification and connectivity.
Read the full explanation
- You must carry a valid connected V-16 in your non-special vehicle combination. For a vehicle registered in Spain, the required hazard warning device is the connected beacon; warning triangles and beacons without connectivity do not fulfil this regulatory function on the road. [RGV, Annex XII](https://www.boe.es/buscar/act.php?id=BOE-A-1999-1826#anxii). [DGT, V-16 devices](https://www.dgt.es/muevete-con-seguridad/tecnologia-e-innovacion-en-carretera/Dispositivos-de-presenalizacion-V16/).
- The V-16 emits amber light and must provide maximum visibility when placed as high as possible on the immobilised vehicle. This portable warning signal supplements the bus’s hazard warning lights. [RGV, Annex XI, V-16](https://www.boe.es/buscar/act.php?id=BOE-A-1999-1826#v-16).
- You must check that the make and model appear on the official list of certified devices published by the DGT. A commercial label saying it is approved, or an appearance similar to another beacon, is not enough. Also check the expiry date of the connectivity service shown on the device. [RGV, Annex XI, V-16](https://www.boe.es/buscar/act.php?id=BOE-A-1999-1826#v-16).
- Keep the beacon somewhere accessible from the cab and maintain its power supply according to the instructions. You must be able to use it when your vehicle becomes immobilised, without having to search for it among the load or walk along the arcén (hard shoulder) to a distant compartment. [DGT, V-16 devices](https://www.dgt.es/muevete-con-seguridad/tecnologia-e-innovacion-en-carretera/Dispositivos-de-presenalizacion-V16/).
22What the beacon must do
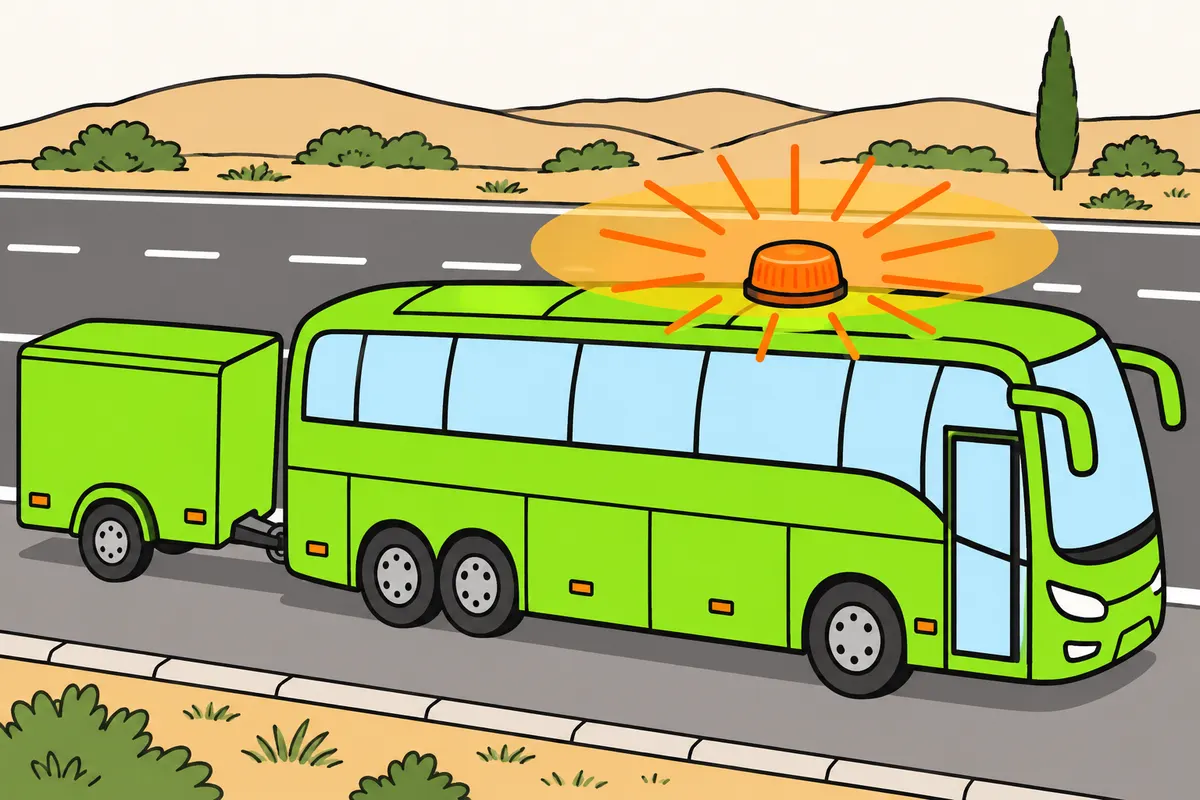
Check your beacon's capabilities; it does not request assistance for you.
Remember
- Your V-16 reports activation, deactivation and location.
- You do not need a mobile app for it to communicate.
- The price includes communications for the minimum period.
- Sending your location is different from your call for assistance.
- Your beacon does not brake the combination or put out fires.
Exam trap: Wrong: you can switch it off after 30 minutes despite continuing danger. Right: that is a minimum capability, not permission to switch it off.
Read the full explanation
- The V-16 has a horizontal light coverage of 360 degrees and must maintain its required light intensity for at least 30 minutes. These 30 minutes describe a minimum performance requirement for the device, not permission to switch it off while a situation requiring a warning persists. [RGV, Annex XI, V-16](https://www.boe.es/buscar/act.php?id=BOE-A-1999-1826#v-16).
- The beacon reports its activation, deactivation and location to the national access point for traffic and mobility. Location information is sent every 100 seconds and stops after deactivation is reported. You must distinguish this communication from any call you may need to make to request assistance. [RGV, Annex XI, V-16](https://www.boe.es/buscar/act.php?id=BOE-A-1999-1826#v-16).
- The cost of communications must be included in the price and guaranteed for at least 12 years. The operating and communication components must be inside the casing, without relying on an external mobile app. [RGV, Annex XI, V-16](https://www.boe.es/buscar/act.php?id=BOE-A-1999-1826#v-16).
- The V-16 is intended to make a vehicle involved in an accident visible and transmit its location, with no additional functions. You must keep the other equipment available: the beacon does not secure the combination against movement, extinguish a fire or make it safe to step out into an area used by traffic. [RGV, Annex XI, V-16](https://www.boe.es/buscar/act.php?id=BOE-A-1999-1826#v-16).
23Placing the V-16 on a bus
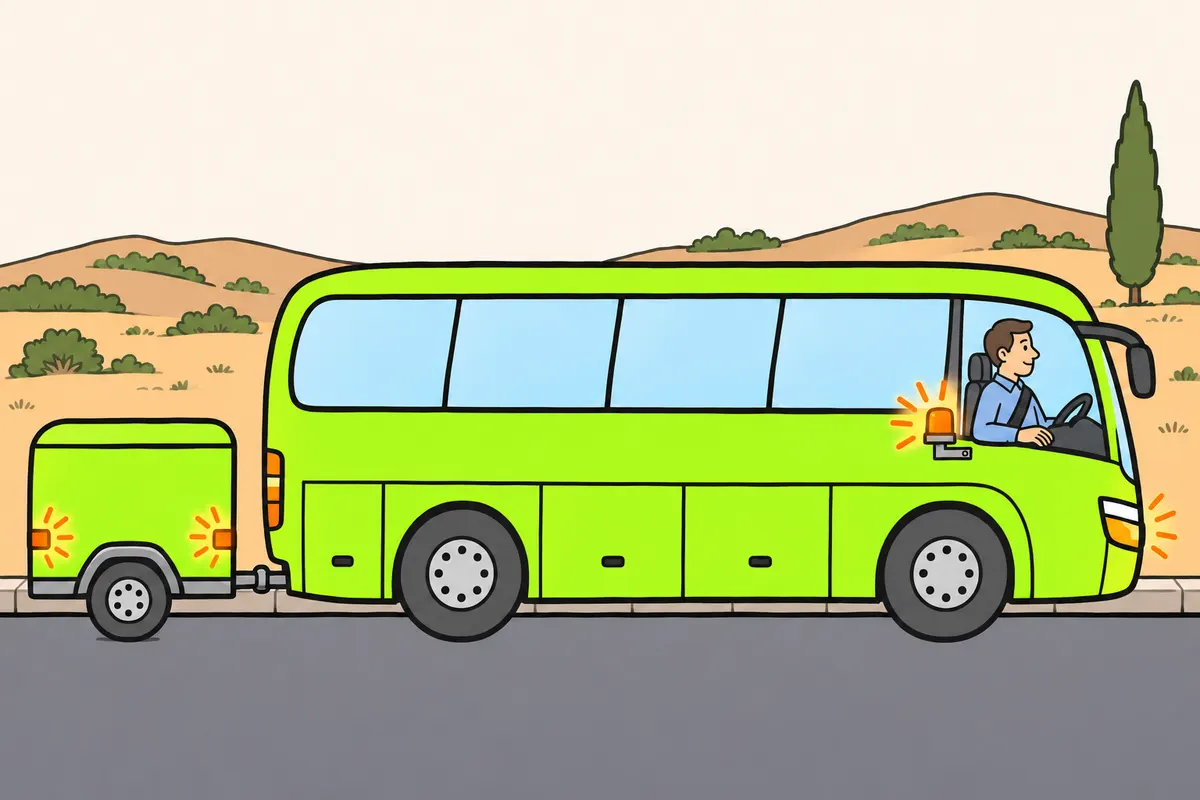
Place your V-16 where it is visible without exposing yourself to traffic.
| When you cannot resume driving | What you must do |
|---|---|
| You can exit safely and there is a safe place off the road platform | Exit away from traffic; avoid lanes and hard shoulders |
| You cannot exit safely | Stay inside with your seat belt fastened |
Remember
- If immobilised on the road in danger, you must use the regulatory connected V-16.
- Place it as high as possible without risking yourself to reach the roof.
- If you cannot reach the roof, use an accessible door or side.
- If hidden, place it behind only when you can get out safely.
- Use hazard lights and, where required, position lights and end-outline marker lamps.
- If you cannot get out safely, stay inside with your seat belt fastened.
Exam trap: Wrong: always get out to place it behind. Right: only exit safely; otherwise use the highest accessible exterior point.
Read the full explanation
- You must place the V-16 as high as possible and where it is most visible, without exposing yourself to danger to reach the cab roof. When the height prevents access to that area, the DGT allows you to attach it to the driver’s door or an accessible part of the side of the vehicle. [RGV, Annex XI, V-16](https://www.boe.es/buscar/act.php?id=BOE-A-1999-1826#v-16). [DGT, placement on heavy vehicles](https://www.dgt.es/muevete-con-seguridad/tecnologia-e-innovacion-en-carretera/Dispositivos-de-presenalizacion-V16/).
- With the bus parked, identify an attachment point compatible with your beacon that you can reach safely. If the bodywork obscures the light, the DGT allows placement at the rear only when you can leave the vehicle safely; if you cannot get out, use the highest accessible exterior part, the door or the side, depending on what the vehicle allows. [DGT, placement on heavy vehicles and buses](https://www.dgt.es/muevete-con-seguridad/tecnologia-e-innovacion-en-carretera/Dispositivos-de-presenalizacion-V16/).
- In the event of an accident or breakdown, you must use the V-16 to warn others of the vehicle and switch on the hazard warning lights if fitted; where appropriate, also keep the position lights and end-outline marker lamps on. The bus and trailer lights continue to fulfil their function while the combination is immobilised. [RGC, art. 130.4](https://www.boe.es/buscar/act.php?id=BOE-A-2003-23514#a130).
- If you cannot resume driving and there is a safe place beyond the carriageway and hard shoulders, you must leave the vehicle on the side away from traffic, without remaining in or walking along traffic lanes or hard shoulders. If you cannot get out safely, you must remain inside with your seat belt fastened; the full procedure is covered in “Responding to accidents and breakdowns”. [RGC, art. 130.3](https://www.boe.es/buscar/act.php?id=BOE-A-2003-23514#a130).
24High-visibility vest
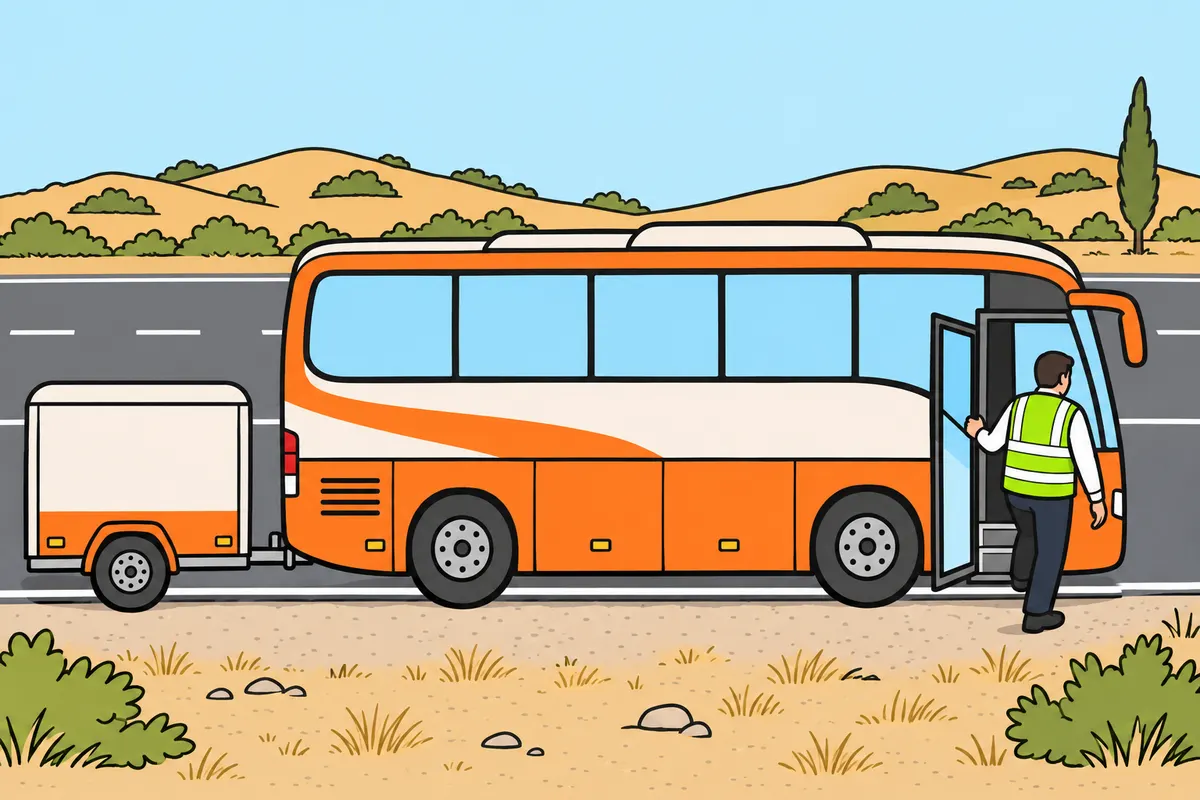
Wear your vest when outside on an interurban road's carriageway or hard shoulder.
Remember
- Carry a regulation vest in your non-special vehicle combination.
- Keep it accessible in your cab to put on before getting out.
- Keep its strips and fabric in good condition.
- Wear it even when getting out to check a light in that situation.
- Avoid exposure to traffic even with your vest on.
Exam trap: Wrong: wearing a vest lets you stay on the hard shoulder. Right: follow the rules for exiting and reaching a safe place.
Read the full explanation
- You must carry a high-visibility reflective vest as part of the equipment of your non-special vehicle combination. It must meet the regulatory requirements for personal protective equipment; you must not replace it with a light-coloured garment or any clothing with a small reflective strip. [RGV, Annex XII](https://www.boe.es/buscar/act.php?id=BOE-A-1999-1826#anxii).
- As the driver of a bus or a non-agricultural vehicle combination, you must wear it if you leave the vehicle and enter the carriageway or hard shoulder of an interurban road. You must associate the duty to wear it with that situation, even if you get out to check a light rather than deal with an accident. [RGC, art. 118.4](https://www.boe.es/buscar/act.php?id=BOE-A-2003-23514#a118).
- As a preparation guideline, keep the vest accessible in the cab so you can put it on before getting out. Keep its strips and fabric in good condition. Keeping it in a compartment you can only reach by walking along the hard shoulder makes it harder to obtain the very protection you need when leaving the vehicle.
- The vest improves your visibility, but you must continue to avoid exposure to traffic. It does not authorise you to remain beside the trailer on the hard shoulder or cross lanes to check its lights. You must also apply the rules for leaving the vehicle and staying in a safe place in the event of a breakdown. [RGC, art. 130.3](https://www.boe.es/buscar/act.php?id=BOE-A-2003-23514#a130).
25Fire extinguishers on a bus with a trailer
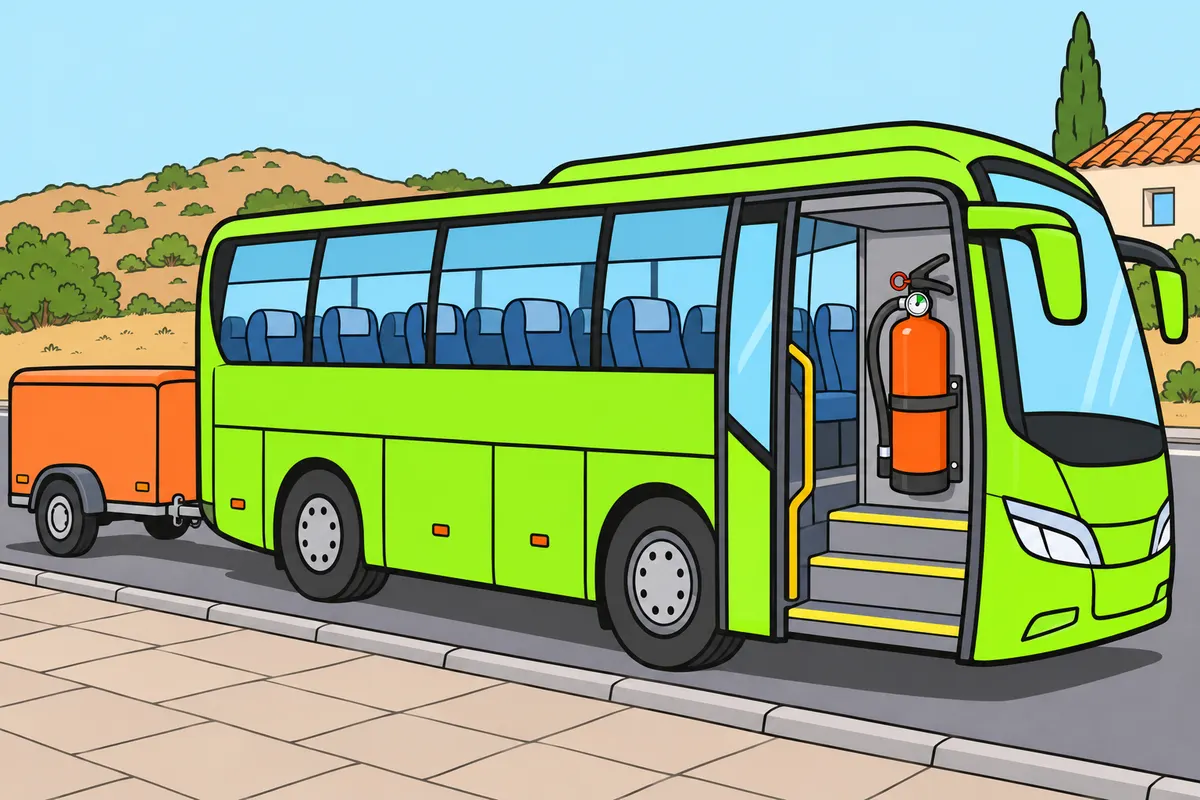
Choose your extinguisher by your bus's seating capacity, including the driver.
| Category D bus seats, including driver | Minimum equipment |
|---|---|
| Up to 23 seats | One 8A/34B extinguisher |
| More than 23 seats | One 21A/113B extinguisher |
Remember
- Count seats even when you drive empty.
- The numbers and letters show performance, not kilograms.
- Carry suitable approved equipment in working order.
- Before service, check access, fastening, seal and instructions.
- Follow periodic inspections and required maintenance.
- Check any extra requirements for your particular service.
Exam trap: Wrong: choose by passengers present or the goods-vehicle table. Right: for your passenger bus, count its seats, including the driver.
Read the full explanation
- You must carry suitable, approved firefighting equipment in working order. Annex XII covers both buses and non-special vehicle combinations; this requirement forms part of the safety equipment for passenger services and does not depend on whether the trailer is loaded. [RGV (General Vehicle Regulations), Annex XII](https://www.boe.es/buscar/act.php?id=BOE-A-1999-1826#anxii).
- For a motor vehicle used to carry people, the minimum provision depends on its seating capacity, including the driver: up to 23 seats, one extinguisher rated 8A/34B; more than 23 seats, one rated 21A/113B. The category for up to 9 seats requires a different rating, but does not describe a category D bus. Use the vehicle’s seating capacity, rather than the number of passengers present that day. [Order of 27 July 1999, second.a](https://www.boe.es/buscar/act.php?id=BOE-A-1999-16887#segundo). Your extinguishers must comply with this table and undergo periodic inspections. [Order of 27 July 1999, first](https://www.boe.es/buscar/act.php?id=BOE-A-1999-16887#primero).
- A bus with 23 seats, including the driver, falls into the category requiring one 8A/34B extinguisher; with 24 seats, it falls into the category requiring one 21A/113B extinguisher. Carrying fewer passengers or driving without any does not change the seating capacity you use to apply the table. The letters and numbers express certified firefighting performance, rather than a quantity of extinguishing agent in kilograms. [Order of 27 July 1999, second.a](https://www.boe.es/buscar/act.php?id=BOE-A-1999-16887#segundo).
- The table based on MMA (maximum authorised mass) for vehicles and combinations carrying goods and other items does not replace the seating-capacity classification for a passenger bus. If you use a configuration subject to additional specific requirements, you must also comply with those regulations and the equipment provision approved for the vehicle. Check the requirements for the particular service whenever special regulations apply. [Order of 27 July 1999, first and second](https://www.boe.es/buscar/act.php?id=BOE-A-1999-16887).
- Your extinguishers must be portable and manually operated, with an extinguishing agent appropriate to the vehicle’s characteristics, preferably dry powder or another suitable agent. You must check them regularly and carry out the prescribed minimum maintenance tasks; before the service, check access, mounting, seal, condition and operating instructions. Keep the equipment easy to locate and available without having to unload the trailer. [Order of 27 July 1999, first](https://www.boe.es/buscar/act.php?id=BOE-A-1999-16887#primero).
Check the trailer’s lighting and markings
Check each function with the combination immobilised and the connections secured.
- Check the electrical connection and inspect the condition of the lights, reflectors, plates and contour markings.
- Switch on the position lights and also check the number plate lighting, end-outline marker lamps and side lights where required.
- Operate each indicator and then the hazard warning lights; check the rear end of the combination.
- Check the brake lights, rear fog lamp and any reversing lights fitted, with assistance provided safely.
- Rectify faults and remove anything obscuring the lighting or markings before driving.
Secure the combination on a gradient
Apply the measures in article 92.3 and check that the combination cannot move.
- Immobilise the combination and apply the parking brake.
- When leaving the driving position, stop the engine, switch off the ignition and select first gear facing uphill, reverse facing downhill or park, depending on the transmission.
- On a significant gradient, use suitable wheel chocks or rest one of the steered front wheels against the kerb as prescribed.
- If you use a kerb, turn the wheels towards the centre of the road facing uphill and away from the centre facing downhill.
- Check that the combination is secure; when you resume driving, remove the chocks from the road and stow them.
Use the V-16 from the cab
Warn others that you are immobilised while avoiding exposure to traffic.
- Immobilise the combination and use the hazard warning lights and any other lights required.
- Take the connected V-16 from its accessible storage location and activate it according to its instructions.
- Place it as high as possible with maximum visibility; if the height of the bus prevents access to the roof, use a suitable accessible point on the side.
- Put on your high-visibility vest before getting out if you are going to step onto the carriageway or arcén (hard shoulder) on an interurban road.
- Get out only if there is a safe place away from the carriageway and hard shoulder; otherwise, remain inside with your seat belt fastened.
Check what you know
Real questions from the bank on this topic. Pick an answer to see the explanation.
Finished this module?
Mark it as read and you will see your progress on the theory list.