
Theory · B+E Licence - Car with Trailer · Module 4 of 13
Safe coupling and uncoupling
You learn to couple and uncouple a ball-coupled trailer: immobilisation, closure and locking, breakaway cable or secondary coupling, electrical connection and jockey wheel. You practise a complete operating sequence and the conditions for manoeuvre M of the B+E licence test.
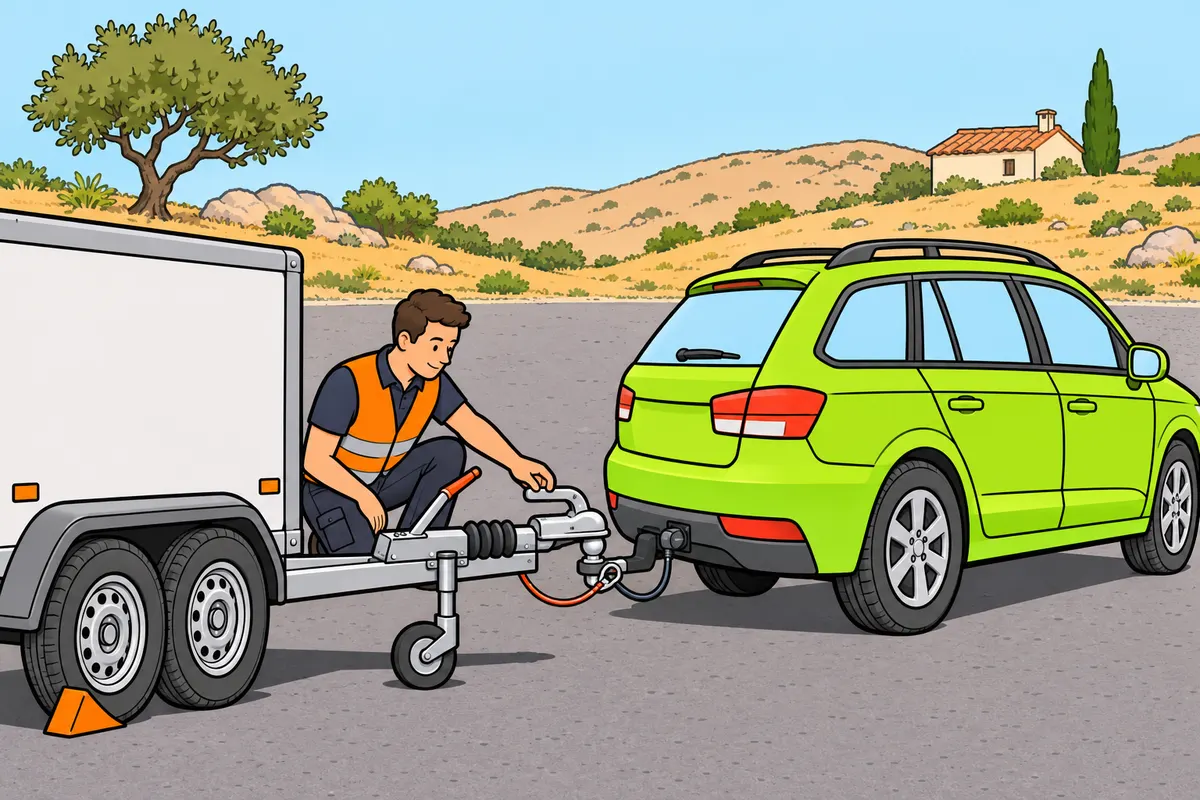
1Ball coupling components
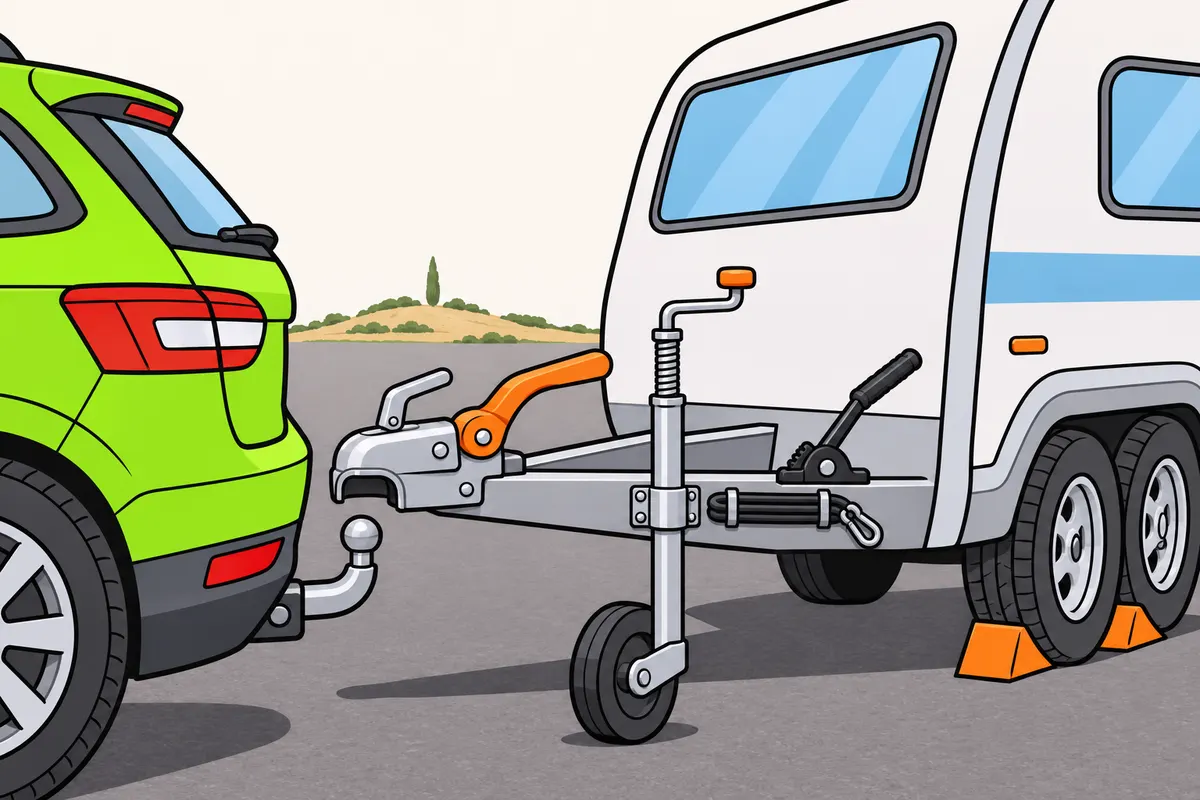
Know the coupling parts and what each one does.
| Part | Purpose |
|---|---|
| Coupling head | Fits around and holds the ball |
| Jockey wheel | Adjusts height and supports the drawbar |
| Stabiliser, if fitted | Limits movement through friction |
| Parking brake and wheel chocks | Prevent movement |
Remember
- Find the towball on your car and the coupling head on the drawbar.
- Use the jockey wheel to adjust height and support the drawbar.
- Follow the equipment instructions for controls, indicators and tests.
Exam trap: Wrong: use the jockey wheel as a brake. Right: secure your trailer with its parking brake and wheel chocks.
Read the full explanation
- In your B+E combination, you must locate the towing vehicle's towball and the coupling head on the trailer's drawbar. The coupling head fits around the towball and allows the two vehicles to articulate.
- You use the jockey wheel to adjust the drawbar height and support its front end when you uncouple the trailer. This support holds up the drawbar; the parking brake and wheel chocks prevent movement.
- The stabiliser, where fitted to the coupling head, limits movement through its friction mechanism. Its lever activates the friction mechanism; the latch retains the towball.
- The sequence in this module applies to a ball coupling. You must consult the equipment instructions to operate its controls, interpret indicators and carry out retention tests. [UNECE Regulation No. 55, paragraph 4.6](https://www.boe.es/buscar/doc.php?id=DOUE-L-2018-81011).
2Coupling compatibility and documentation
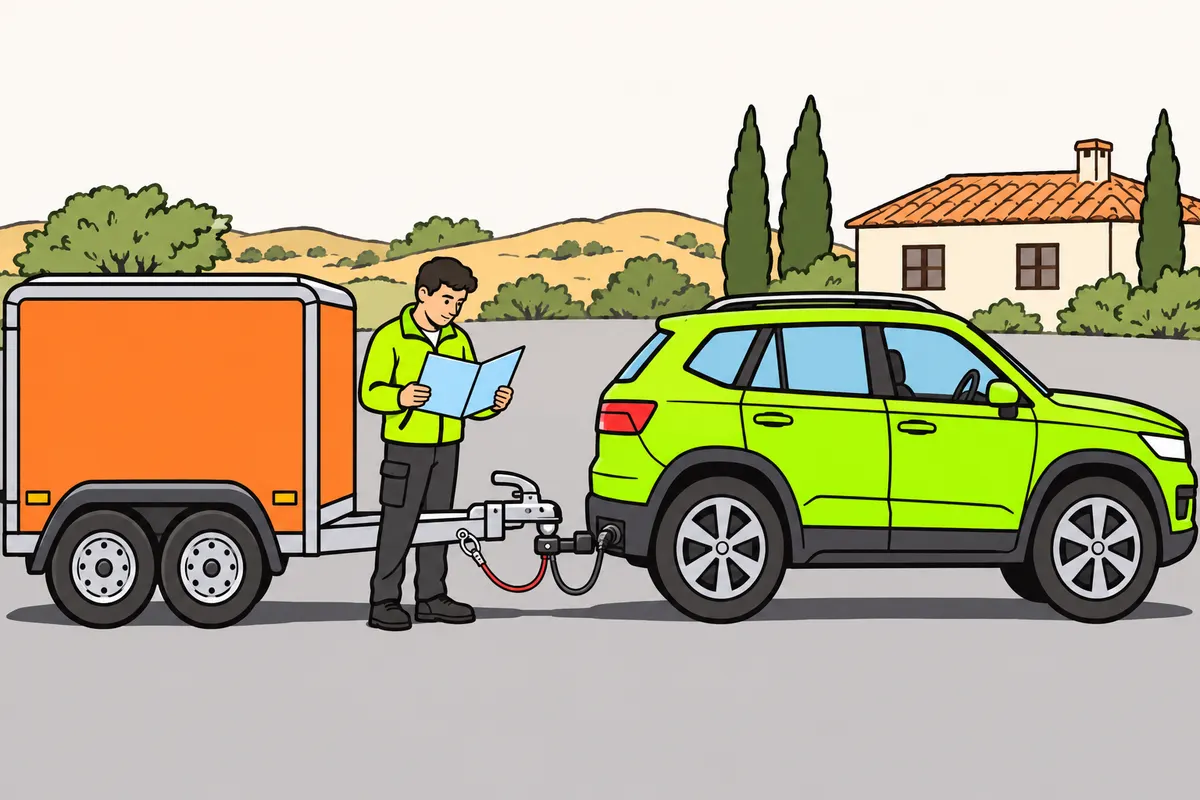
Check that the coupling is compatible and recorded on your car’s ITV card.
Remember
- Check that mechanical, electrical and air connections are compatible.
- Check your car’s towing capacity in its technical data sheet.
- Check that the coupling is recorded on the car’s ITV card.
- If installation is a modification, present your car for ITV with required documents.
- Present it within fifteen days after completing the modification.
Exam trap: Wrong: fit a coupling that counts as a modification and forget the ITV test. Right: present your car with the required documents within fifteen days after completing the modification.
Read the full explanation
- The mechanical, pneumatic and electrical connections between your towing vehicle and trailer must be compatible and meet the technical requirements applicable to the equipment. [RGV, art. 13.1](https://www.boe.es/buscar/act.php?id=BOE-A-1999-1826#a13).
- You must check the towing vehicle's ficha técnica (technical data sheet) for its towing capacity and the combination's limits; the calculations are covered in «Maximum dimensions and masses». [DGT, driving with a trailer](https://revista.dgt.es/es/educacion-formacion/conducir-mejor/2024/0620-Conducir-con-remolque.shtml).
- You must check that the coupling is recorded on the towing vehicle's tarjeta ITV (vehicle roadworthiness test card). Article 26.1.c expressly requires the compatible coupling to be recorded for trailers with an MMA (maximum authorised mass) of up to 750 kg; an installation processed as a vehicle modification is recorded on the card after a satisfactory inspection. [RGV, art. 26.1.c](https://www.boe.es/buscar/act.php?id=BOE-A-1999-1826#a26); [RD 866/2010, art. 8.3](https://www.boe.es/buscar/act.php?id=BOE-A-2010-11154#a8).
- If installing the coupling constitutes a vehicle modification, you, as the registered keeper or an authorised person, must present the vehicle for a technical inspection within a maximum of fifteen days after the modification is completed. Provide the documentation required by the vehicle modification manual. [RD 866/2010, art. 8.1](https://www.boe.es/buscar/act.php?id=BOE-A-2010-11154#a8).
3Vertical load and towball locking
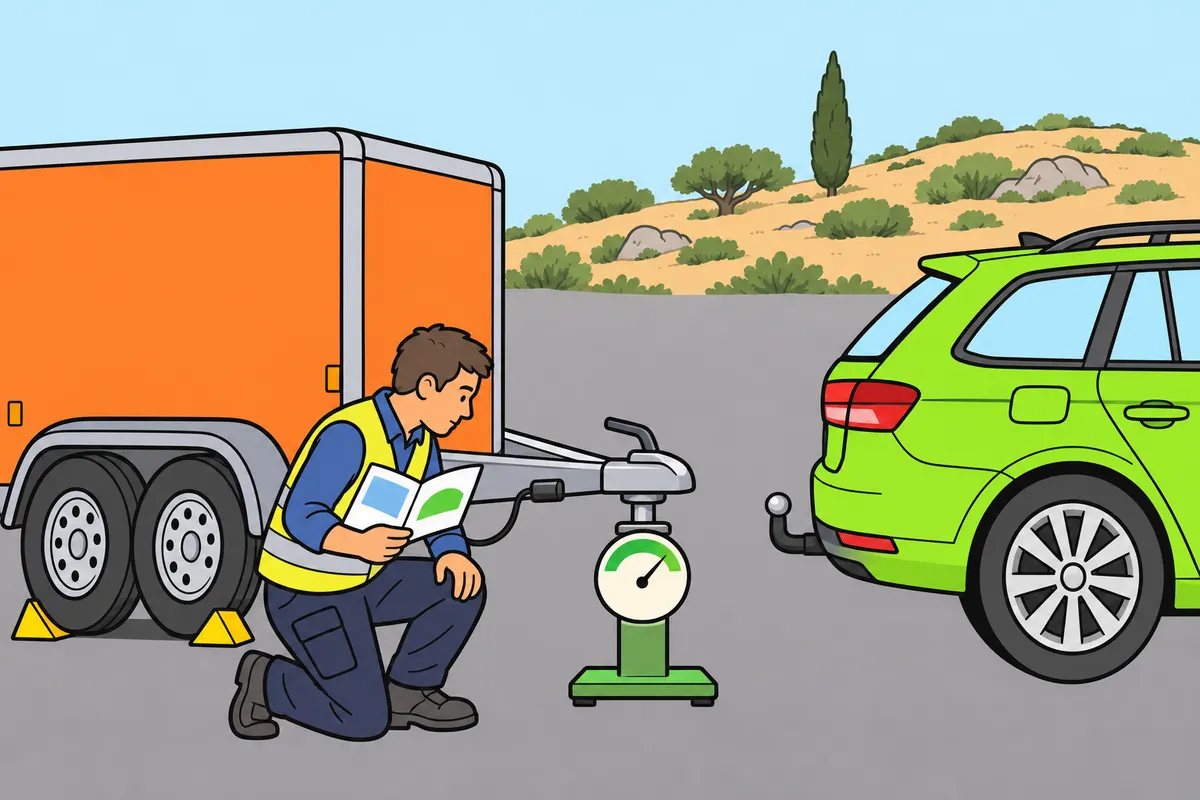
Respect the load limit on the towball and check that the ball is locked.
| Mechanism | What it joins |
|---|---|
| Detachable or retractable towball lock | Ball to car |
| Coupling head latch | Trailer to ball |
Remember
- Compare the load on the ball with the limits for the coupling and car.
- Always follow the lowest limit.
- The S value shows the allowed static vertical load.
- Check a detachable or retractable towball is locked for driving.
- Keep the load stable when changing the trailer’s support.
Exam trap: Wrong: confuse the two locks. Right: the towball lock fixes the ball to the car; the coupling head holds the trailer on the ball.
Read the full explanation
- Before coupling, you must compare the weight the drawbar transmits to the towball with the permissible vertical load of the coupling and the towing vehicle. Observe the most restrictive limit among the combination's components. [UNECE Regulation No. 55, Annex 8](https://www.boe.es/buscar/doc.php?id=DOUE-L-2018-81011).
- The S value identifies the permissible static vertical mass on the coupling. You can find it on the device's markings or in its documentation to compare it with the load on the towball. [UNECE Regulation No. 55, paragraph 2.11.3](https://www.boe.es/buscar/doc.php?id=DOUE-L-2018-81011).
- You must check that a detachable or retractable towball is secured and locked in its driving position. This lock connects the towball to the car; the coupling head latch connects the trailer to the towball.
- You must keep the load distribution stable while transferring the support. Moving goods or unloading animals can alter the balance of an uncoupled trailer; load distribution is covered in «Safe loading of your vehicle combination».
4Location and immobilisation
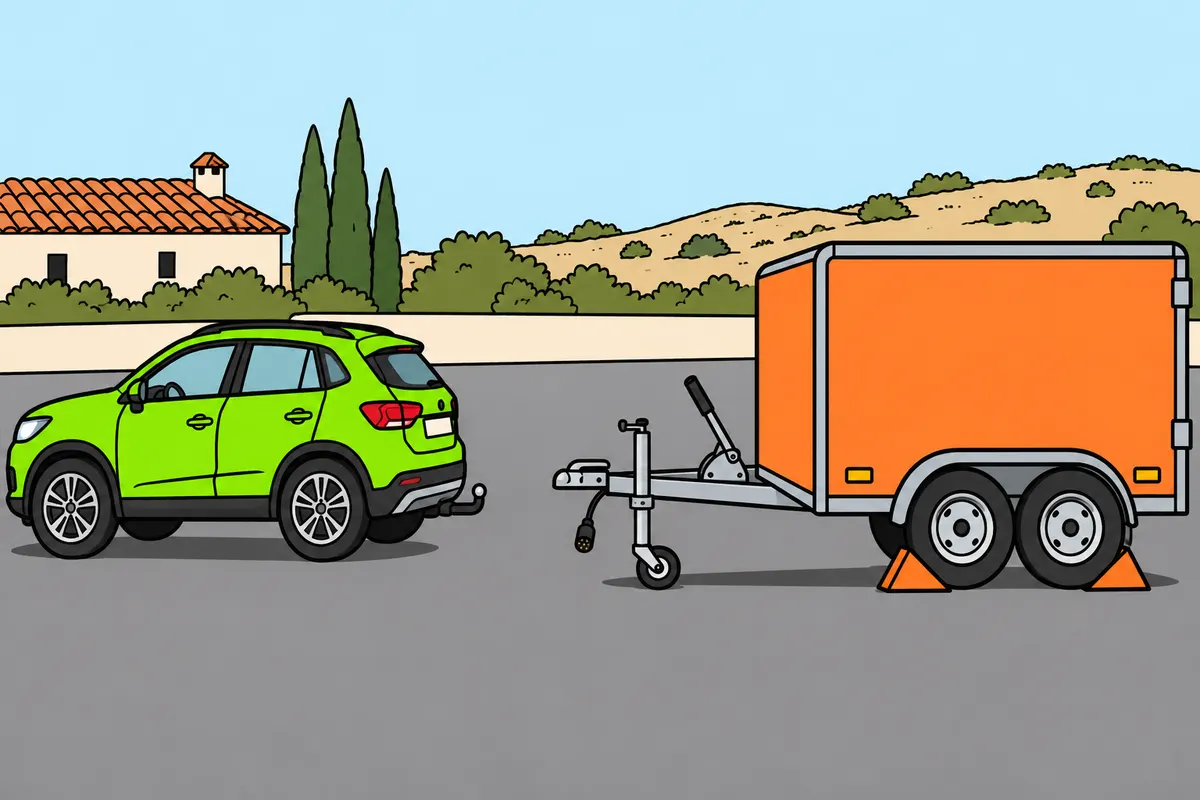
Choose firm ground and secure both vehicles before handling the coupling.
| Combination parked on a steep slope | How to secure it |
|---|---|
| Uphill | Purpose-made chocks, or a steered wheel against the kerb towards the road centre |
| Downhill | Purpose-made chocks, or a steered wheel against the kerb towards the road edge |
Remember
- Choose firm, preferably level ground with room to manoeuvre.
- Check that supports cannot sink.
- Keep the space between vehicles and the approach path clear.
- Keep anyone guiding you visible and away from places where they could be crushed.
- Stop if you lose sight of your guide.
- Brake and chock the trailer before approaching; secure your car whenever you get out.
Exam trap: Wrong: use stones as chocks. Right: use purpose-made wheel chocks and remove them from the road when you leave.
Read the full explanation
- You must choose firm, preferably level ground, with room for the towing vehicle to approach and pull away. Check that the jockey wheel or supports cannot sink when they take the weight.
- You must keep the area between the vehicles and the approach path clear. If someone guides you, they must remain visible and clear of crushing points; stop if you lose visual contact.
- You must secure the trailer with its parking brake and suitable wheel chocks before bringing the car towards it. Whenever you get out to handle the coupling, you must also secure the towing vehicle against movement.
- If you stop or park the combination on a significant gradient, you must chock it with purpose-made wheel chocks or rest a steered wheel against the kerb: turned towards the centre of the carriageway when facing uphill and away from it when facing downhill. Do not use stones, and remove the chocks from the road when you leave. [RGC, art. 92.3.d](https://www.boe.es/buscar/act.php?id=BOE-A-2003-23514#a92).
5Inspection and approach
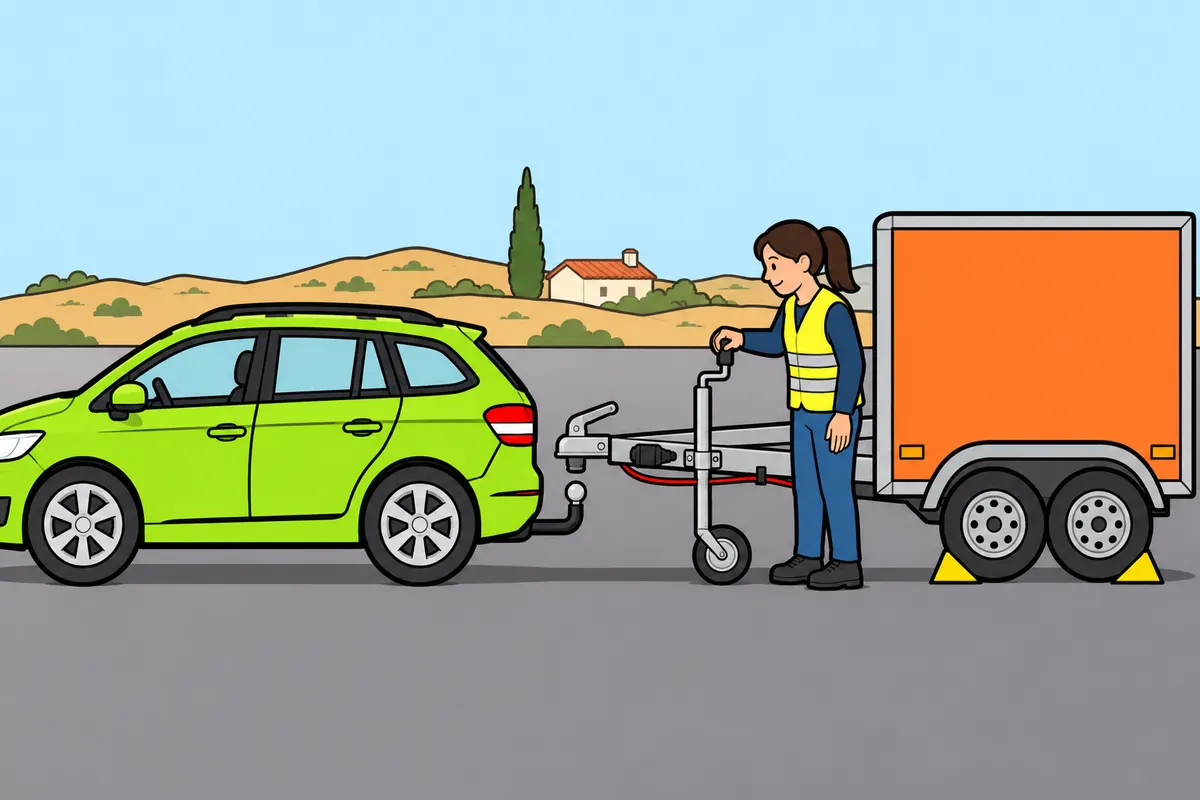
Inspect the parts and slowly bring the towball under the coupling head.
Remember
- Repair cracks, bent parts, unusual looseness or missing parts before use.
- Check cables and attachments; clean contacts and markings.
- Follow your model’s instructions for cleaning and lubrication.
- Adjust the height with the jockey wheel.
- Bring the ball slowly under the coupling head.
- Align with your car stopped; do not put fingers in the socket.
Exam trap: Wrong: grease every towball. Right: a friction stabiliser may need a grease-free ball; check your model’s instructions.
Read the full explanation
- You must inspect the towball, coupling head, drawbar and accessible fastenings: cracks, deformation, abnormal play or missing parts require repair before you use the combination.
- You must check that the safety cable and electrical cable have no cuts, crushing damage or damaged attachments. Keep the contacts and check markings clean.
- You must follow the cleaning and lubrication requirements for the coupling head. A friction stabiliser may require a clean, grease-free towball; check the treatment required for your model.
- You must adjust the height with the jockey wheel and slowly bring the towball underneath the coupling head. Correct the alignment with the towing vehicle stationary, without using the car to push the drawbar sideways or putting your fingers into the socket.
6Seating, closure and safety catch
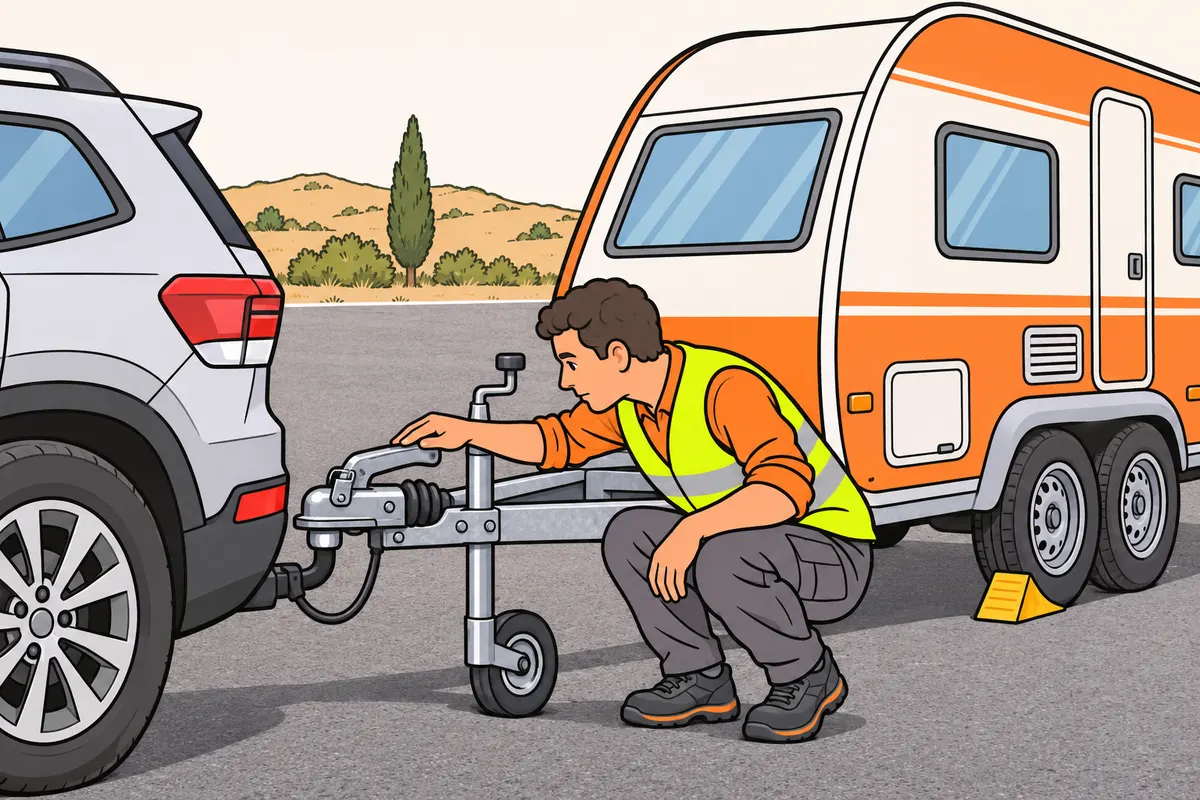
Check that the coupling head holds the ball before removing the support.
Remember
- Secure both vehicles and remove any anti-theft device blocking the coupling head.
- Open the head and lower it onto the ball with the jockey wheel.
- Check the fit, closure and safety catch against accidental opening.
- Read the coupling and wear indicators separately.
- If the maker specifies a retention test, follow its limits.
- Then engage any stabiliser; if unsure, keep the support in place and couple again.
Exam trap: Wrong: trust only the sound of engagement. Right: check that the ball is held; an intermediate or illegible indicator does not confirm this.
Read the full explanation
- With both vehicles secured against movement, you must remove any anti-theft device obstructing the coupling head, open the head and lower it onto the towball with the jockey wheel until coupling is complete.
- You must check the seating, the latch and the safety catch that prevents unintentional opening. The coupling must have a device to prevent accidental uncoupling. [RGV, art. 13.3](https://www.boe.es/buscar/act.php?id=BOE-A-1999-1826#a13).
- You must interpret the coupling and wear indicators separately. An intermediate or illegible indicator, or simply hearing a click as the coupling engages, does not confirm that the towball is retained.
- If the manufacturer specifies a retention test using the jockey wheel, you must carry it out within the manufacturer's limits. Then activate the stabiliser, if fitted; if you are unsure whether the latch is closed correctly, keep the support in place and repeat the coupling procedure.
7Breakaway cable and secondary coupling
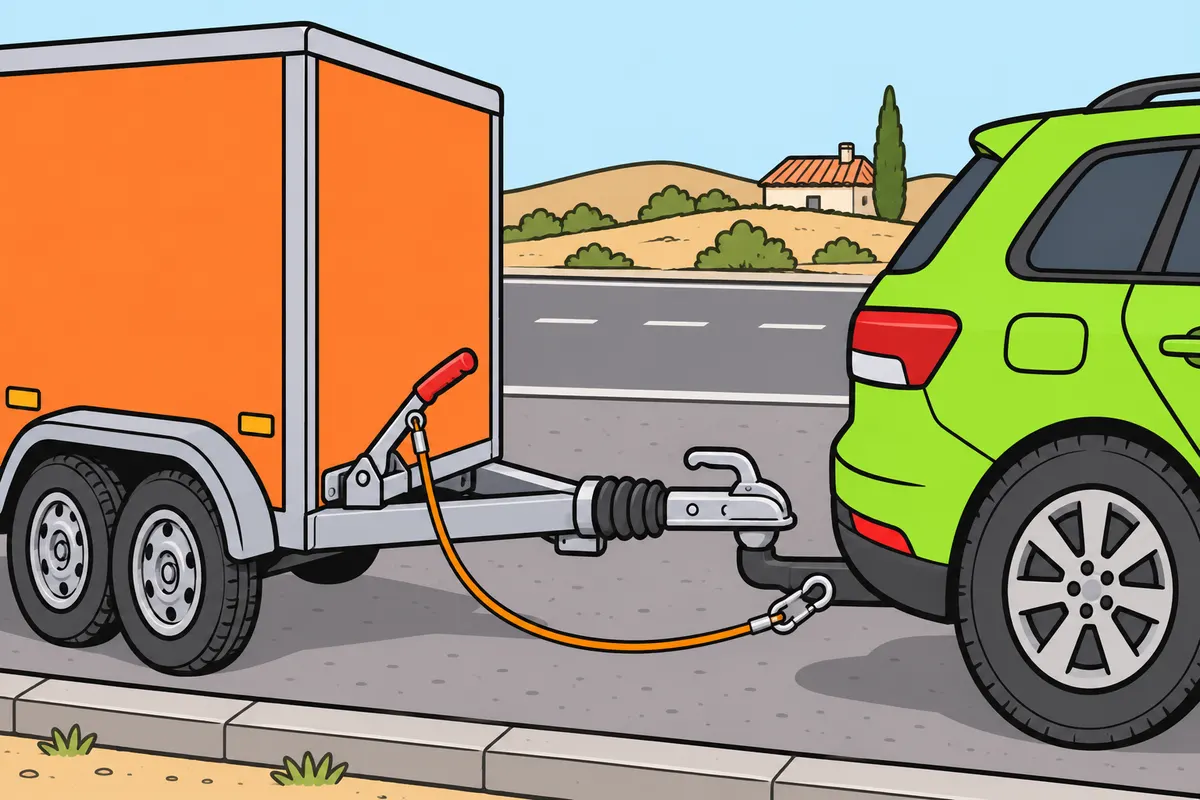
Connect the breakaway cable or secondary coupling as your trailer requires.
| Trailer equipment (only the trailers specified below) | Purpose if the coupling fails |
|---|---|
| Breakaway cable on a trailer with overrun brakes that uses one | Applies automatic braking and stops the trailer |
| Secondary coupling: trailer up to 1,500 kg MMA without braking after coupling breakage | Keeps the drawbar off the ground and maintains some trailer steering |
Remember
- If your trailer with overrun brakes uses a breakaway cable, attach it.
- This cable automatically brakes and stops your trailer if the coupling separates or breaks.
- Connect a secondary coupling: MMA up to 1,500 kg, without braking after coupling breakage.
- Attach the cable or restraint to the points specified for your equipment.
- Leave enough slack for turns without dragging or trapping the cable.
- Keep it clear of the overrun brake; keep the cable intact, without knots.
Exam trap: Wrong: require a secondary coupling based only on mass. Right: connect one if your trailer has MMA up to 1,500 kg and no automatic braking system for coupling breakage.
Read the full explanation
- If your trailer with overrun brakes uses a breakaway cable, you must connect it so that it activates automatic braking and stops the trailer if the coupling separates or breaks while you are driving. [RGV, art. 12.8.3](https://www.boe.es/buscar/act.php?id=BOE-A-1999-1826#a12).
- If your trailer has an MMA (maximum authorised mass) of up to 1,500 kg and has no system to brake it if the coupling breaks, you must connect a secondary coupling, such as a chain or cable. If the main coupling separates, this restraint must prevent the drawbar from touching the ground and maintain some residual steering of the trailer. [RGV, art. 13.4](https://www.boe.es/buscar/act.php?id=BOE-A-1999-1826#a13).
- You must attach the cable or restraint to the designated points without restricting articulation or interfering with the overrun brake. Use the anchor point specified for the equipment. [UNECE Regulation No. 55, sections 4.8 and 4.8.1](https://www.boe.es/buscar/doc.php?id=DOUE-L-2018-81011).
- You must leave enough slack to turn without the cable dragging or becoming trapped, and check that its fastening is securely closed. Keep the cable intact, without knots or improvised repairs.
87-pin and 13-pin sockets
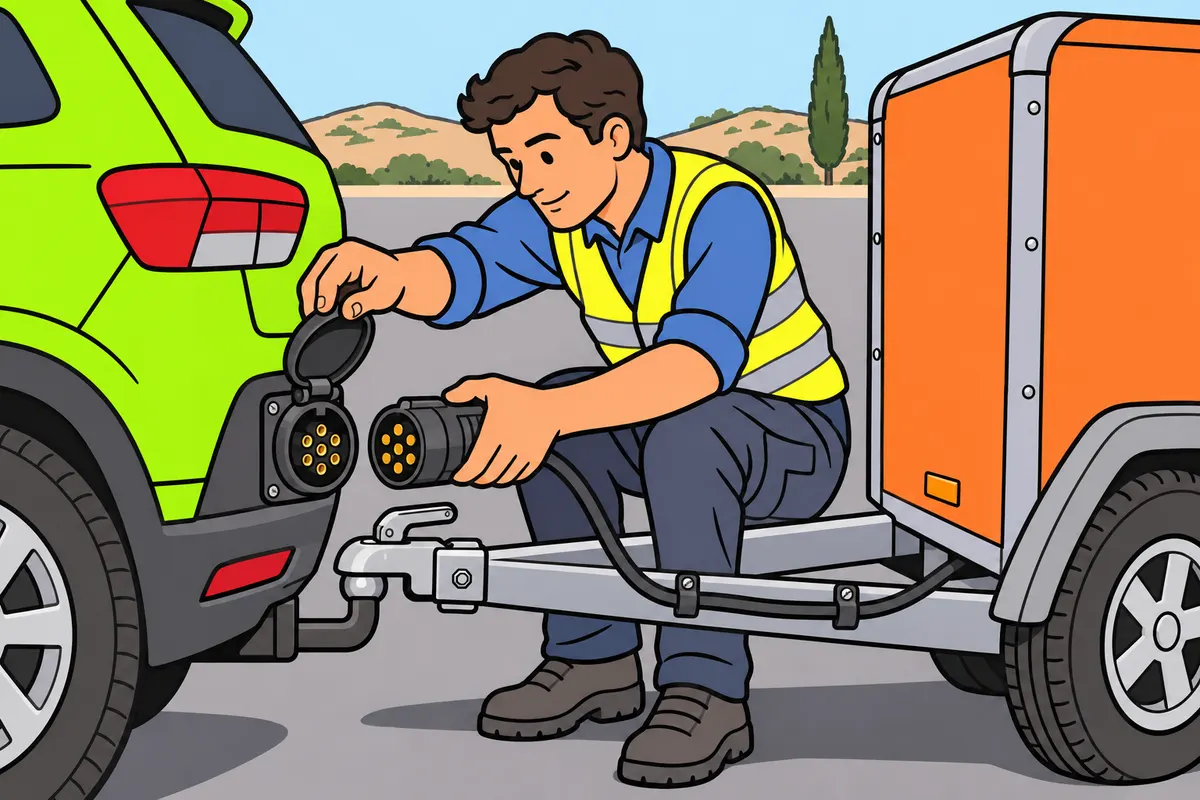
Identify the connectors and secure the electrical connection without forcing it.
| Connector | Type |
|---|---|
| 7-pin | ISO 1724 |
| 13-pin | ISO 11446 |
Remember
- Identify your car’s socket and your trailer’s plug.
- If they differ, choose and secure a compatible adaptor.
- See “Safety equipment for your vehicle combination” for available circuits and their limits.
- Align the guides and secure the plug without forcing it.
- To disconnect, release the lock and hold the plug, not the cable.
- Keep slack; protect cable and adaptor from ground, wheels, heat and impacts.
Exam trap: Wrong: assume an adaptor guarantees every function. Right: check the circuits available and their limits.
Read the full explanation
- You may encounter ISO 1724 7-pin connectors and ISO 11446 13-pin connectors. Before connecting the plug, identify the car's socket and the trailer's plug. [BOE, UNE-ISO 1724 standard](https://www.boe.es/boe/dias/2013/08/12/pdfs/BOE-A-2013-8918.pdf); [BOE, UNE-EN ISO 11446 standard](https://www.boe.es/boe/dias/2002/12/11/pdfs/A43103-43107.pdf).
- If the socket and plug differ, you must choose a compatible adaptor and secure it in place; checks on the available circuits and their limitations are explained in «Safety equipment for your vehicle combination», in the section «Electrical connection and functional checks». [RGV, art. 13.1](https://www.boe.es/buscar/act.php?id=BOE-A-1999-1826#a13).
- You must align the guides, insert the plug and secure it in place without forcing it. To disconnect it, release the lock and hold the body of the plug without pulling on the cable.
- You must route the electrical cable with enough slack for articulation, clear of the ground, wheels and hot surfaces. Any adaptor must also be secured and protected against impacts.
9Checking the connected lights
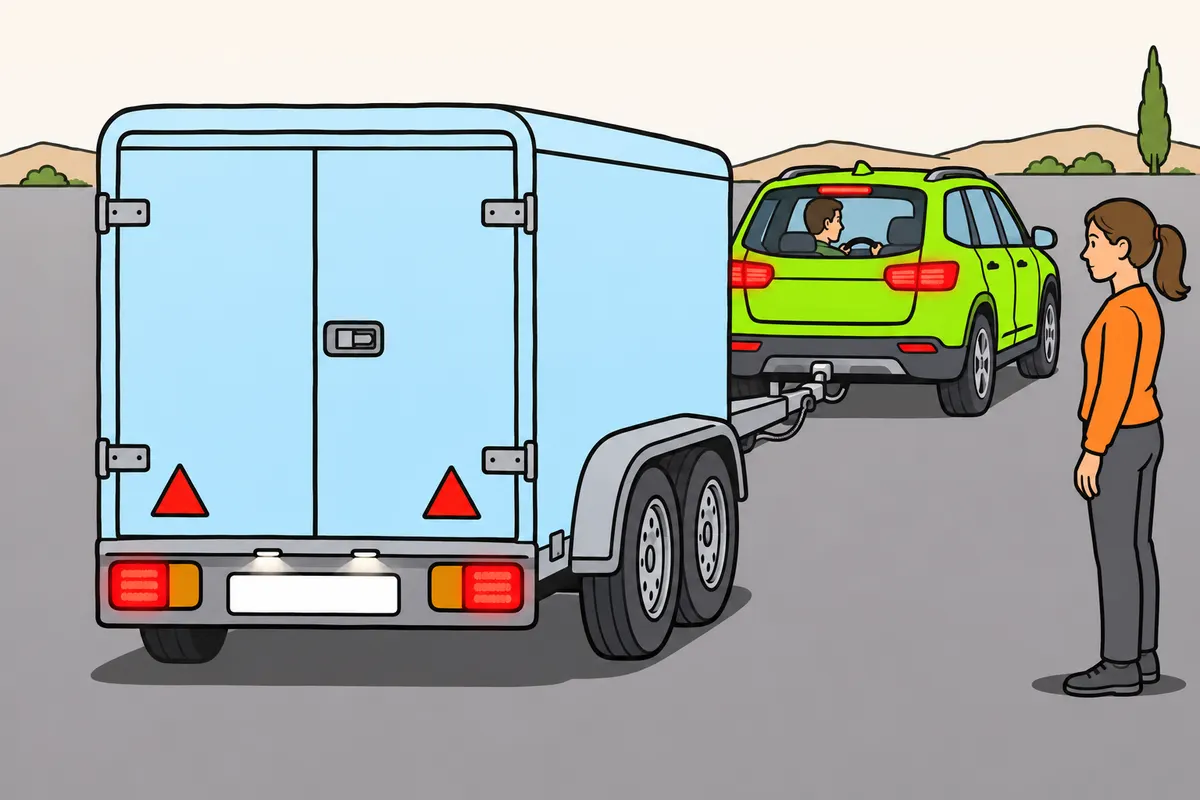
Check the trailer lights before you set off.
Remember
- Connect the plug and check the lights before removing the supports.
- Keep the combination immobilised while you check the lights.
- Agree signals with anyone helping you.
- Keep your helper clear of the combination’s paths during the check.
- If you find a fault, keep the combination immobilised until you fix it.
- Check the repair before continuing to prepare for your journey.
Exam trap: Wrong: continue with a lighting fault. Right: keep still until you fix it and check the repair.
Read the full explanation
- Once you have connected the plug and before retracting the supports, you must carry out a functional lighting check with the combination secured against movement; the functions you check and the use of adaptors are explained in «Safety equipment for your vehicle combination», in the sections «Electrical connection and functional checks» and «Rear lights you must recognise».
- If you need help to observe the lights, you must agree signals with your helper and keep them clear of the combination's paths during the check.
- If the check reveals a fault, you must keep the combination secured against movement until you correct it, and check the result of the repair before continuing your preparations to set off.
10Jockey wheel, brake and reversing
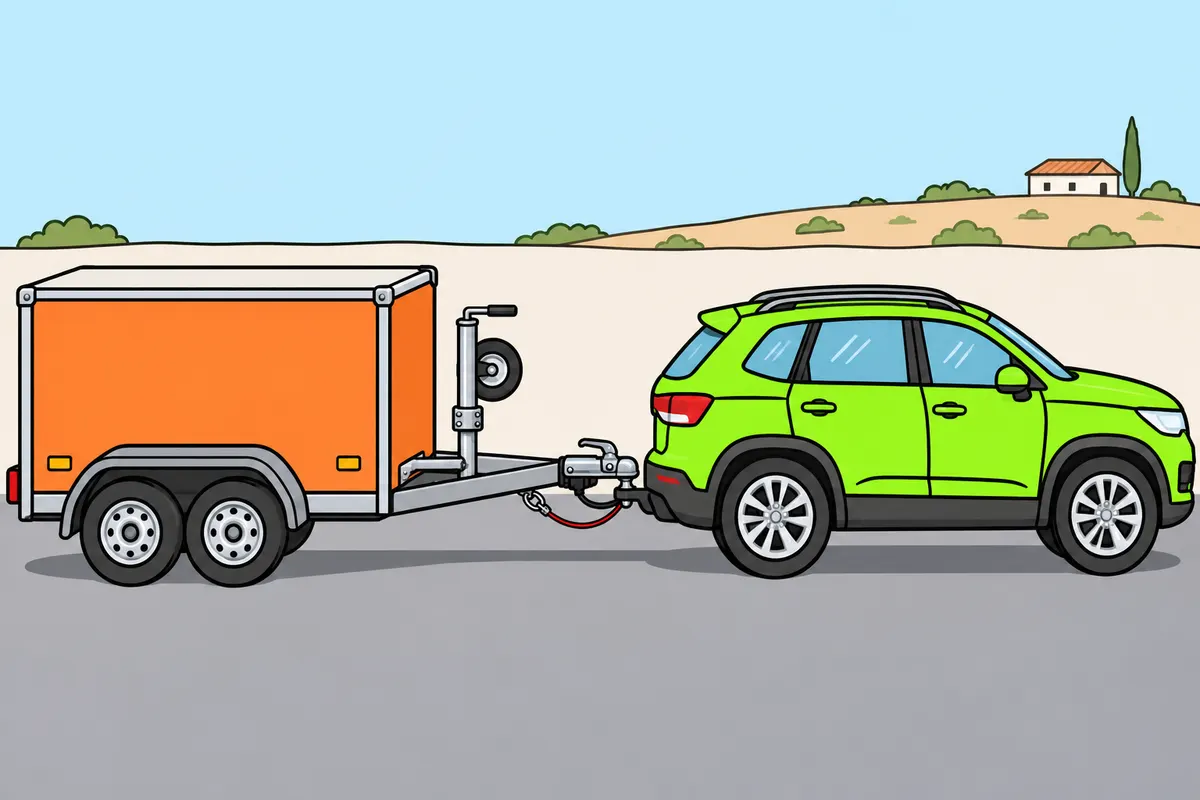
Raise the supports and prepare to move without disabling the trailer brake.
Remember
- Confirm the coupling is secure and finish connections before raising the jockey wheel.
- Lock the raised wheel; check the tube’s height and fixing.
- Raise other supports and secure their handles.
- Do not use a stabiliser leg as a jack.
- With your car secured and preparations complete, release the trailer’s parking brake.
- Remove and stow the chocks before moving.
Exam trap: Wrong: manually lock the overrun brake to reverse. Right: its reversing device operates automatically and releases when you move forwards.
Read the full explanation
- Once you have confirmed that the coupling is secure and completed the connections, you must retract the jockey wheel and lock its assembly in the travelling position. Check both that the wheel is retracted and that the tube is at the correct height and securely fastened.
- You must also retract any supports or stabiliser legs fitted to the trailer and secure their winding handles. Use each support for its intended purpose and load, without confusing a stabiliser leg with a jack.
- With the towing vehicle secured against movement and preparations complete, you must release the trailer's parking brake and remove and stow the wheel chocks before moving off.
- When you reverse, the overrun brake's reversing device operates and releases automatically when you move forwards. Do not lock it yourself. [UN Regulation No. 13 (2026/746), annex 12, section 3.4](https://www.boe.es/buscar/doc.php?id=DOUE-L-2026-80539).
11Air connections when fitted to the combination
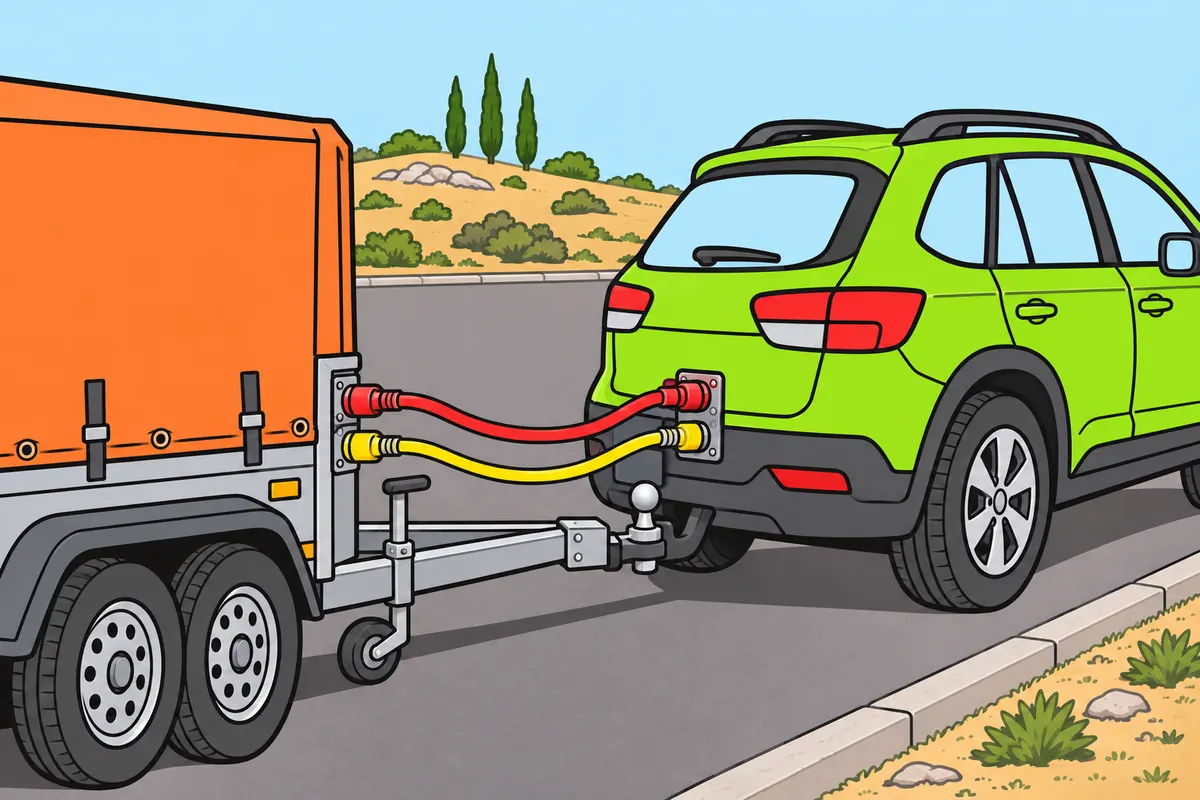
If your combination has air connections, secure them and follow the system instructions.
Remember
- Connect and disconnect air lines with both vehicles secured.
- Follow the system instructions to connect and disconnect the lines.
- Before moving, check that the connections are secure.
- Make sure the hoses can move without dragging or becoming tight.
Exam trap: Wrong: move off without checking the air connections. Right: if fitted, check they are secure and the hoses allow articulation without dragging or becoming taut.
Read the full explanation
- If the combination has pneumatic connections, you must connect and disconnect them with both vehicles secured against movement and following the system's instructions; you study the identification and function of the lines in «Trailer braking», in the section «Continuous and semi-continuous braking». [RGV, art. 13.1](https://www.boe.es/buscar/act.php?id=BOE-A-1999-1826#a13).
- Before moving the combination, you must check that the connections are secured and that the hoses allow articulation without dragging or becoming taut. Refer to the circuit checks in «Maintenance and checks for your vehicle combination», in the section «Air system where fitted». [RGV, art. 13.1](https://www.boe.es/buscar/act.php?id=BOE-A-1999-1826#a13).
12Walk-round check and test
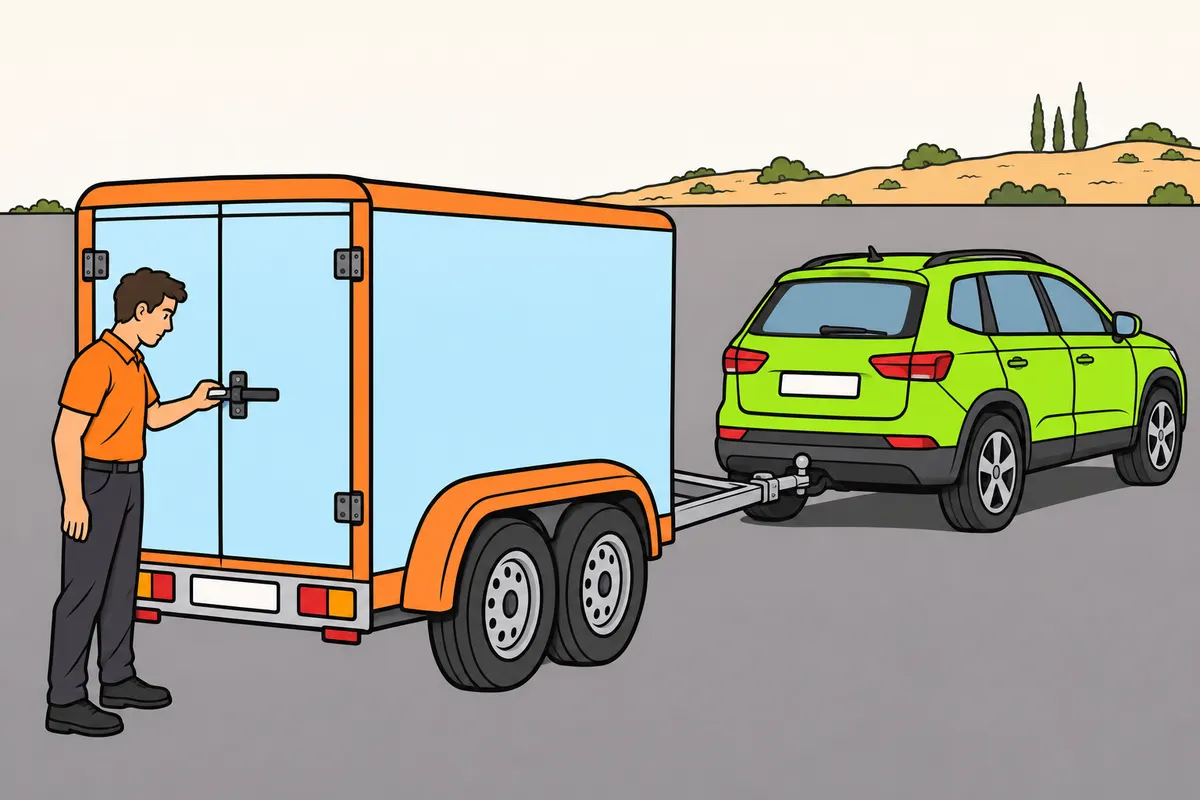
Walk around your combination and test it gently before continuing.
Remember
- Walk along both sides, around the rear and past the coupling.
- Look for loose parts, forgotten tools and supports left down.
- Check that doors, tailgates and compartments are closed.
- Check your mirrors and make sure nobody is working beside the combination.
- In a clear place, move very slowly and brake gently.
- If you notice knocks, jerking, unexpected resistance or poor braking, stop, secure and investigate.
Exam trap: Wrong: continue after abnormal jerking. Right: stop, secure the combination and find the cause.
Read the full explanation
- You must walk around both sides, the rear and the coupling to look for loose parts, forgotten tools and supports left too low.
- You must check that doors, hatches and compartments are closed. The full tyre and load checks are covered in «Maintenance and checks for your vehicle combination» and «Safe loading of your vehicle combination».
- You must check your view through the mirrors and make sure nobody is still working beside the combination before moving it.
- In a clear area, you must check the combination's response at very low speed and brake gently. If you notice knocks, abnormal jerking, unexpected resistance or a lack of braking, stop, secure the combination against movement and identify the cause.
13Uncoupling: immobilise and support
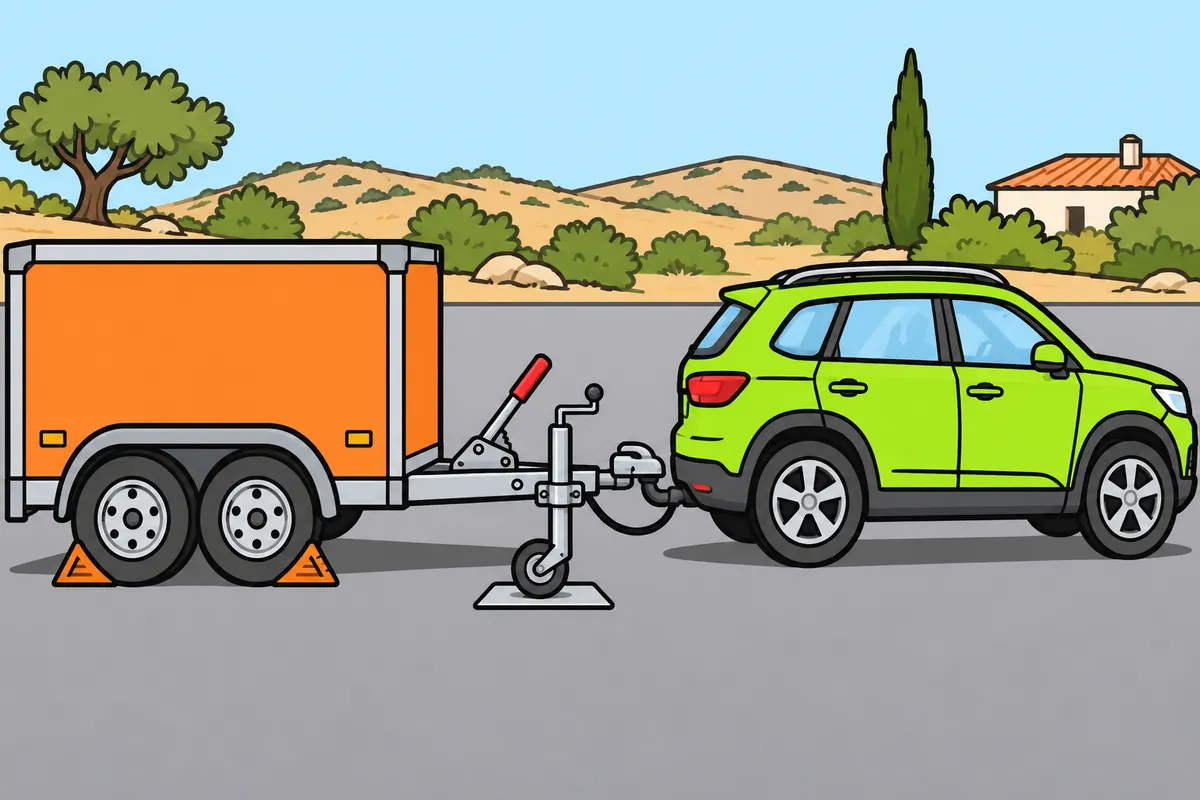
Before uncoupling, secure the trailer and prepare firm support for its drawbar.
Remember
- Choose stable ground and keep the combination in line if possible.
- Leave a clear path for moving your car away.
- Secure your car before disconnecting anything or opening the coupling head.
- Apply the trailer’s parking brake and place wheel chocks.
- Lower and secure the jockey wheel on firm ground before transferring the weight.
- Keep people away from where the drawbar could fall.
Exam trap: Wrong: rely on the car’s brake when detaching the trailer. Right: brake and chock the trailer, and prepare its support before opening the head.
Read the full explanation
- You must position the combination on stable ground and, if possible, in a straight line to avoid strain on the locking mechanism. Allow a clear path for moving the towing vehicle away.
- Before disconnecting anything or opening the coupling head, you must secure the towing vehicle against movement, apply the trailer parking brake and fit the wheel chocks. The car brake does not hold the trailer once it is uncoupled.
- You must lower and secure the jockey wheel on firm ground before transferring the weight of the drawbar onto it. If you need a load-spreading base, use a suitable, stable one.
- You must keep people clear of the area where the drawbar could fall. Do not allow anyone to use their body to hold a moving trailer or a support that is sinking.
14Uncoupling: disconnect and separate
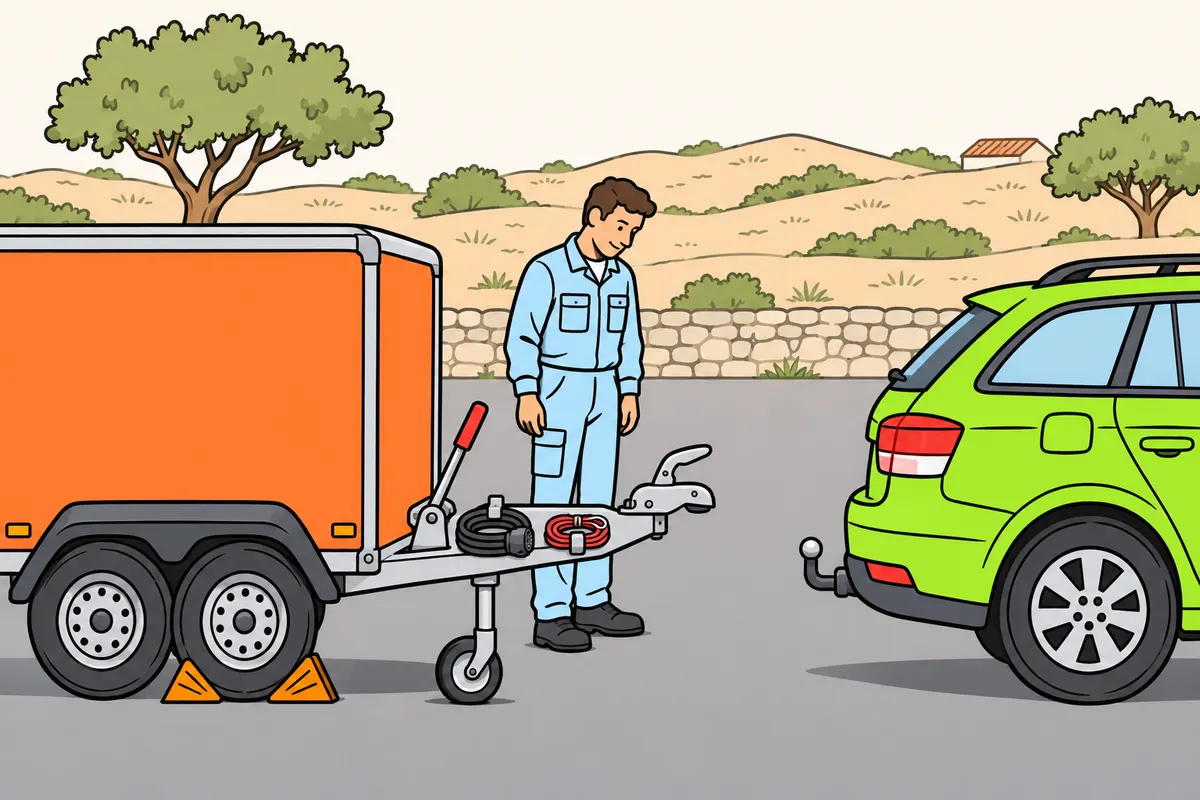
With the trailer secured, stow the connections and separate the head without force.
Remember
- With the trailer braked, chocked and supported, disconnect and stow the electrical plug.
- Then detach and stow the breakaway cable or secondary coupling.
- Release any stabiliser, then open the safety catch and coupling head.
- Raise the drawbar with the jockey wheel until it clears the ball.
- Check all connections are detached and stowed before slowly moving the car away.
- Check the trailer stays still, with stable support and protected connectors.
Exam trap: Wrong: pull a jammed coupling head free with the car. Right: if it is under tension, relieve it using the maker’s procedure, without striking it.
Read the full explanation
- With the trailer braked, chocked and supported, you must disconnect and stow the electrical plug; then detach and stow the breakaway cable or secondary coupling.
- You must release the stabiliser, if fitted, open the safety catch and coupling head, and raise the drawbar with the jockey wheel until it is clear of the towball. If the locking mechanism is under tension, relieve the load on it using the manufacturer’s procedure, without striking it.
- Before moving forwards, you must check that all connections between the car and trailer are detached and stowed. Move the towing vehicle away slowly, without using it to pull a stuck coupling head free.
- You must confirm that the trailer remains stationary, with its support stable and its connectors protected. Stow removable parts and tools in their designated storage locations.
15Manoeuvre M of the B+E licence test
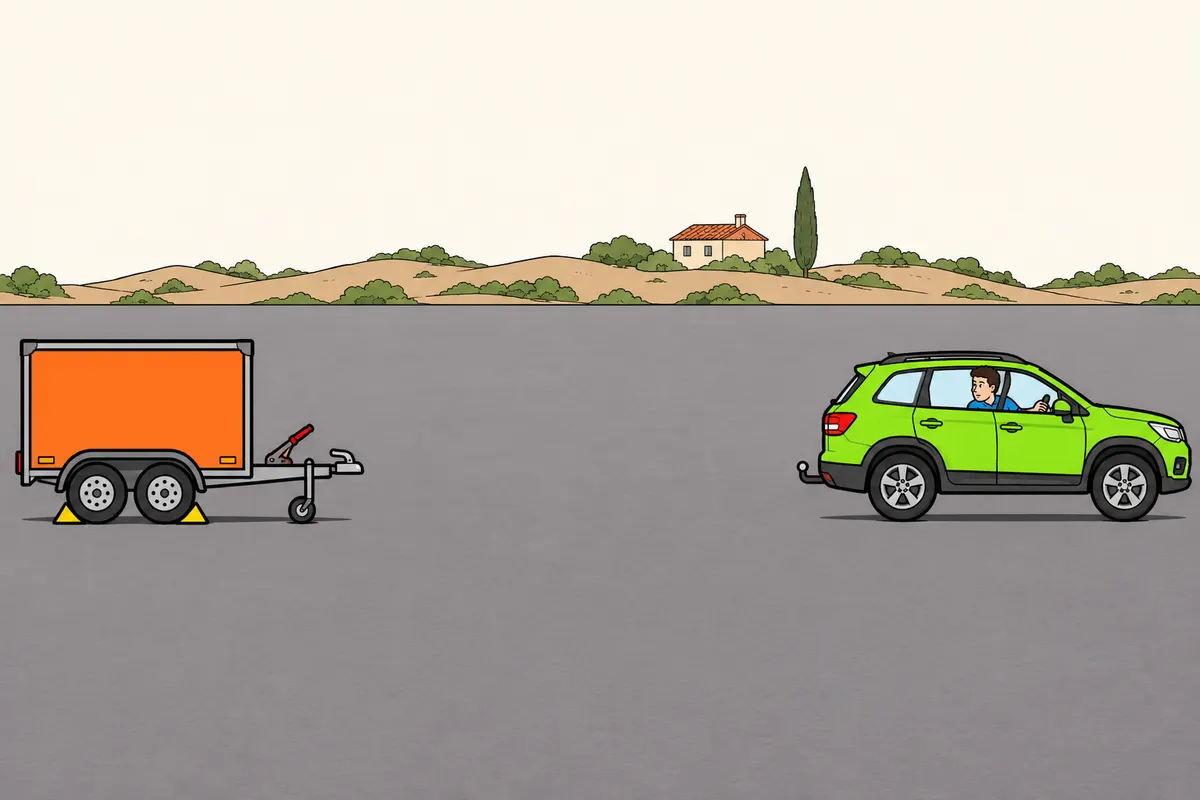
In test manoeuvre M, uncouple and recouple under the required conditions.
Remember
- Secure the combination, uncouple, then leave the car beside the trailer, out of line.
- Keep the trailer secured; leave a semi-trailer on its supports.
- Drive forward until at least 10 metres ahead, then reverse towards the trailer.
- During this approach, you may get out once to check.
- With a non-automatic coupling, you may align the drawbar by hand.
- Complete the lights and safety connections; then stow chocks and raise supports where needed.
Exam trap: Wrong: apply these conditions to everyday coupling. Right: the 10-metre minimum and single exit apply to test manoeuvre M.
Read the full explanation
- In the B+E test, you must perform coupling and uncoupling manoeuvre M. It is listed in Annex V.B.3.7 and its procedure is set out in Annex VI.C.4. [RGCond, Annex V.B.3.7](https://www.boe.es/buscar/act.php?id=BOE-A-2009-9481#anv); [RGCond, Annex VI.C.4, manoeuvre M](https://www.boe.es/buscar/act.php?id=BOE-A-2009-9481#anvi).
- You must secure the combination against movement, uncouple it and leave the towing vehicle beside the trailer, out of line with it. The trailer remains secured against movement; the semi-trailer rests on its supports. [RGCond, Annex VI.C.4, manoeuvre M](https://www.boe.es/buscar/act.php?id=BOE-A-2009-9481#anvi).
- To couple up again, you must drive forwards until the towing vehicle is in front, at least 10 metres away, and approach in reverse. During this approach, you may get out once to check; with a non-automatic coupling, you may align the drawbar manually. [RGCond, Annex VI.C.4, manoeuvre M](https://www.boe.es/buscar/act.php?id=BOE-A-2009-9481#anvi).
- You must complete the lighting connections and attach the safety devices; then remove and stow the wheel chocks used and retract the semi-trailer supports, as applicable. [RGCond, Annex VI.C.4, manoeuvre M](https://www.boe.es/buscar/act.php?id=BOE-A-2009-9481#anvi).
Ball coupling sequence
Usual sequence: keep the towing vehicle immobilised while you work on foot. Follow the specific instructions for the equipment.
- Immobilise and chock the trailer, inspect the equipment and align the towball with the coupling head.
- Lower the coupling head onto the towball.
- Check seating, closure and locking; engage the stabiliser if fitted.
- Connect the breakaway cable or secondary coupling.
- Connect the electrical plug and check the lights.
- Retract and lock the jockey wheel and any other supports.
- Complete the walk-round check, release the trailer brake and remove and stow the chocks.
- Check operation at very low speed in a safe place.
Ball uncoupling sequence
Reverse the preparation: the trailer must have its brake applied and be chocked and supported before you open the coupling head.
- Immobilise the towing vehicle and apply the trailer parking brake.
- Place the chocks and lower and secure the jockey wheel.
- Disconnect and stow the electrical plug.
- Release and stow the breakaway cable or secondary restraint.
- Release the stabiliser if fitted and open the safety catch and coupling head.
- Raise the drawbar, confirm that all connections are separated and move the towing vehicle away slowly.
- Check that the trailer remains stationary and stable.
Finished this module?
Mark it as read and you will see your progress on the theory list.