
Theory · D1+E Licence - Minibus with Trailer · Module 4 of 13
Coupling and uncoupling the trailer
You learn to couple and uncouple your minibus trailer, ensuring that it is secured against movement, supported, locked and connected at each stage. You practise a sequence of checks to detect an incomplete coupling and answer D1+E questions on coupling safety and preparation for driving.
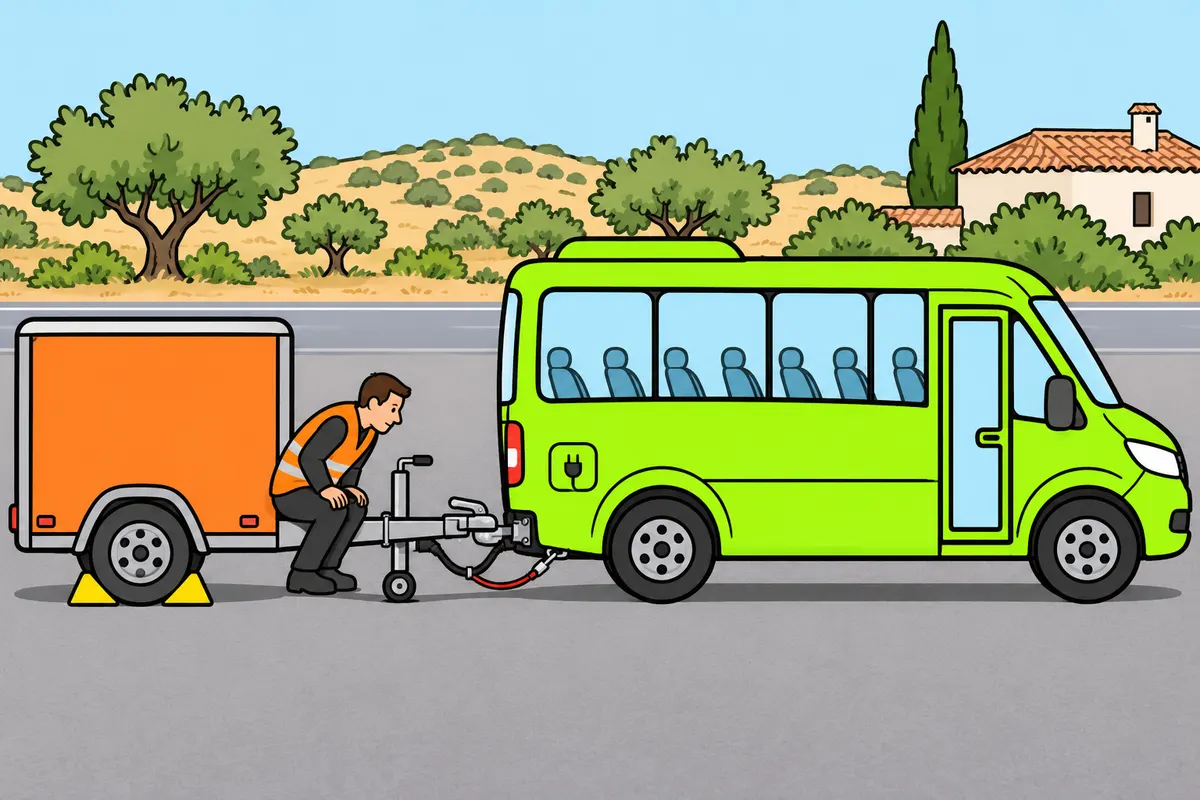
1What you must secure when coupling
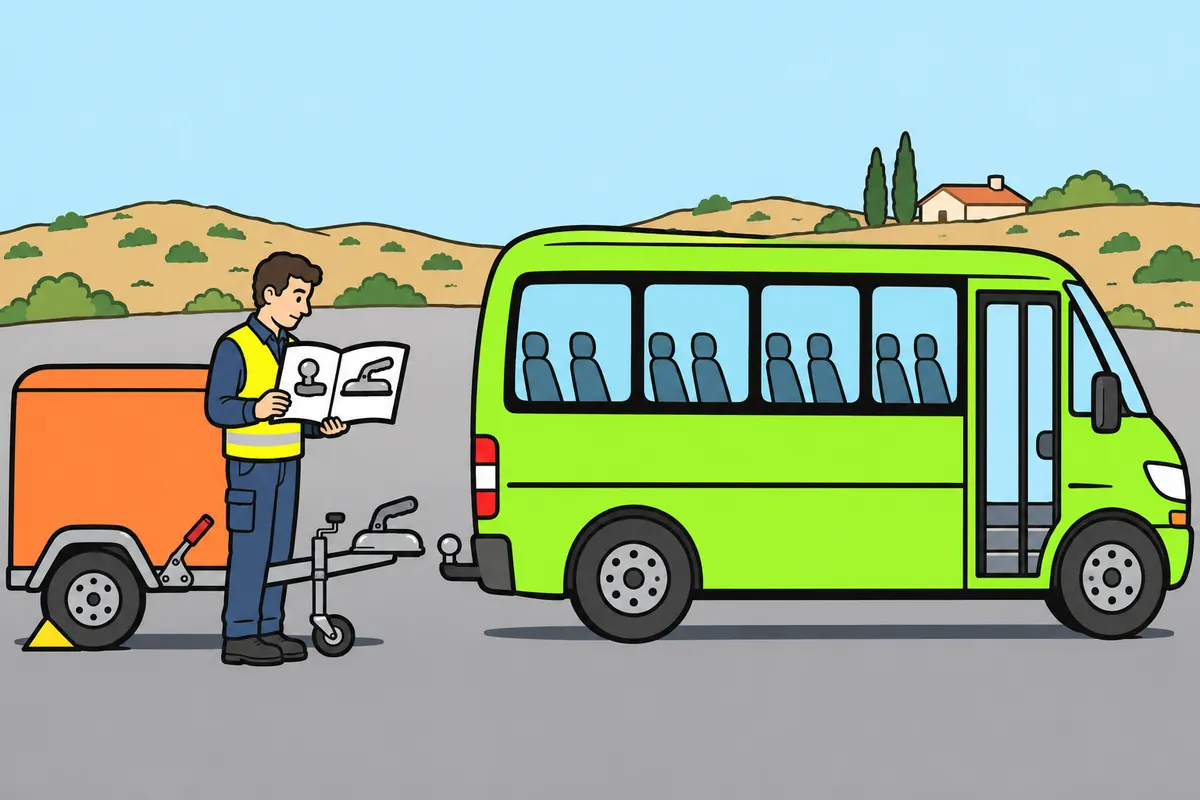
Identify your coupling and follow the manuals for your equipment.
Remember
- Locate the controls before you start.
- Follow the manuals for the minibus, trailer and coupling.
Exam trap: Wrong: assume all couplings are the same. Right: identify your equipment and follow its manuals.
Read the full explanation
- On your minibus with a luggage trailer, identify the coupling type and its controls before you begin. Follow the manuals for the minibus, trailer and coupling: the positions of levers, indicators and connections depend on the equipment.
2Compatibility before approaching
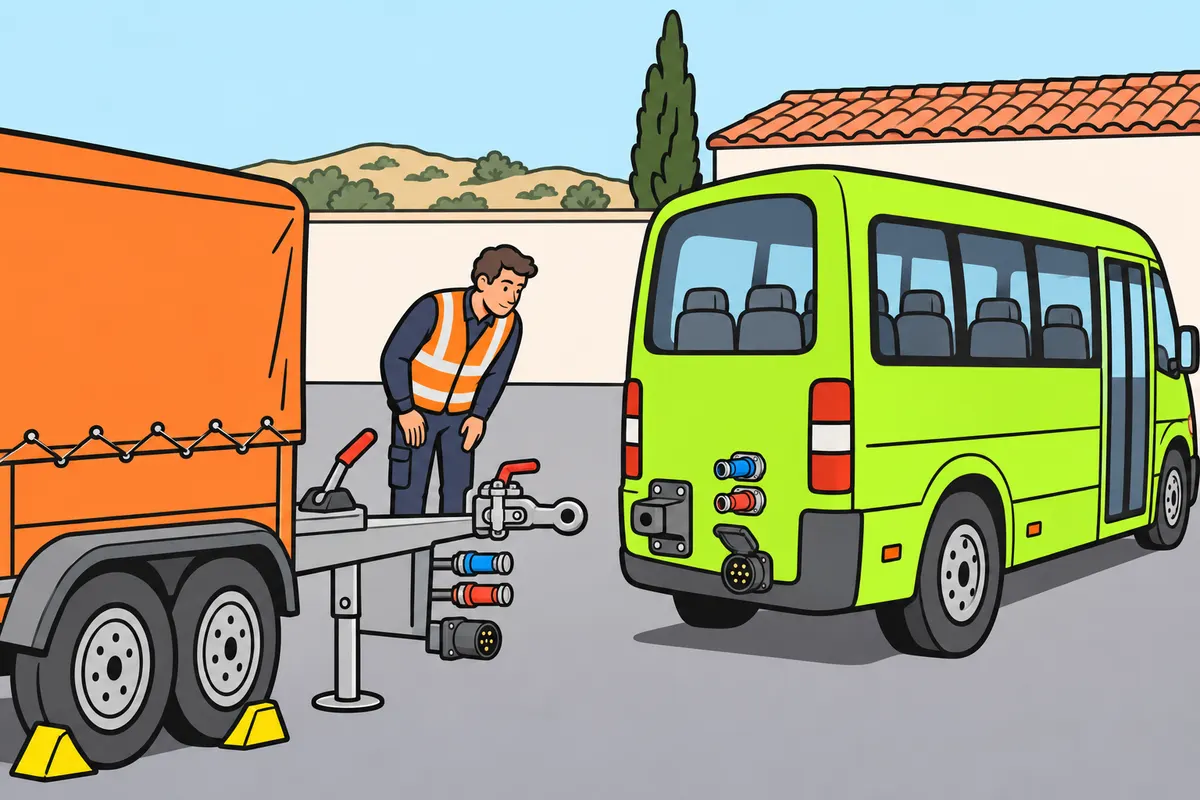
Check that your minibus and trailer can form an authorised combination.
Remember
- Check mechanical, air and electrical compatibility.
- Do not force a connector or improvise an adapter.
- Locate the locking mechanism, safety lock, brakes and supports.
Exam trap: Wrong: accept a connection because it fits. Right: check compatibility and authorisation for the combination.
Read the full explanation
- Use compatible mechanical, pneumatic and electrical connections between the towing and towed vehicles. The fact that a connector can be pushed into place or a drawbar can be brought close to the coupling does not establish compatibility; do not force connections or improvise adaptations. This requirement covers all three types of coupling components. [RGV, art. 13.1](https://www.boe.es/buscar/act.php?id=BOE-A-1999-1826#a13).
- Identify the type of locking mechanism, how to check it and the safety lock that prevents it from opening accidentally. Before reversing, also locate the towed vehicle's parking brake, supports and connection points. This allows you to complete the coupling without searching for controls between parts that are about to move.
- Confirm that the combination is authorised by the technical specifications of its components. A coupling that physically allows the vehicles to be joined may be unsuitable for that towed vehicle or for the forces it must withstand. Consult the towing masses and coupling load in «Maximum dimensions and masses».
3Location and working area
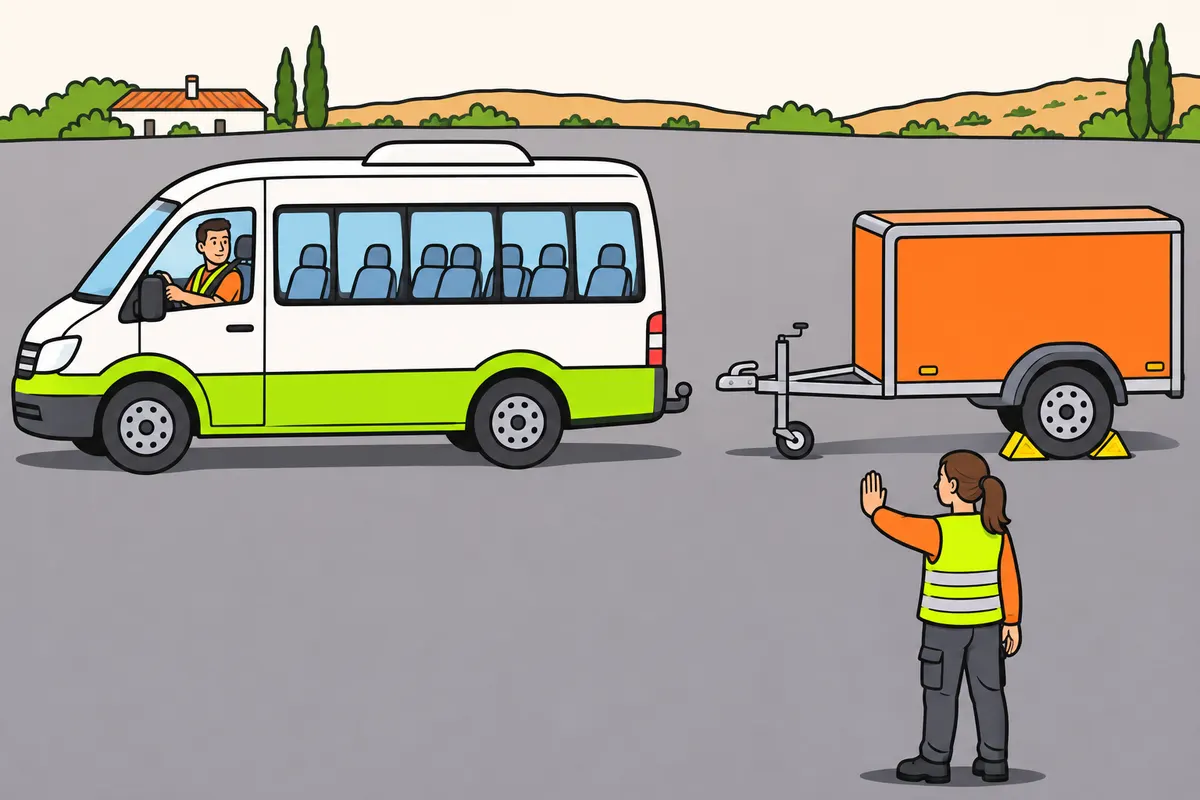
Choose a safe place and keep the coupling area clear.
Remember
- Choose firm, stable ground that is as level as possible.
- Check that the ground can hold the trailer supports.
- Leave room for the whole minibus to approach and move away.
- Keep people out from between the vehicles while either can move.
- Stop if you lose sight of your guide.
Exam trap: Wrong: check only the space for the coupling. Right: leave room for the whole vehicle.
Read the full explanation
- As a practical measure, choose a firm, stable surface that is as level as possible. Check where the jockey wheel, drawbar support or support legs will rest: the ground may support the tyres but give way under a small support. Plan how the trailer will be supported when you move the minibus away, and avoid uncoupling on ground that may sink.
- Allow enough space to align the minibus, approach slowly and move it away without hitting the trailer. Look for obstacles above, to the sides and near the ground, and consider the space the bodywork will occupy. A gap large enough for the coupling head may be too small for the rest of the vehicle during the approach.
- Keep people out of the space between the vehicles while either vehicle can move. If someone helps you, agree on clear signals and a visible, safe position for the person guiding you. Stop when you lose sight of that person; never use their proximity to the coupling as a guide to keep approaching.
4Secure against movement before getting out
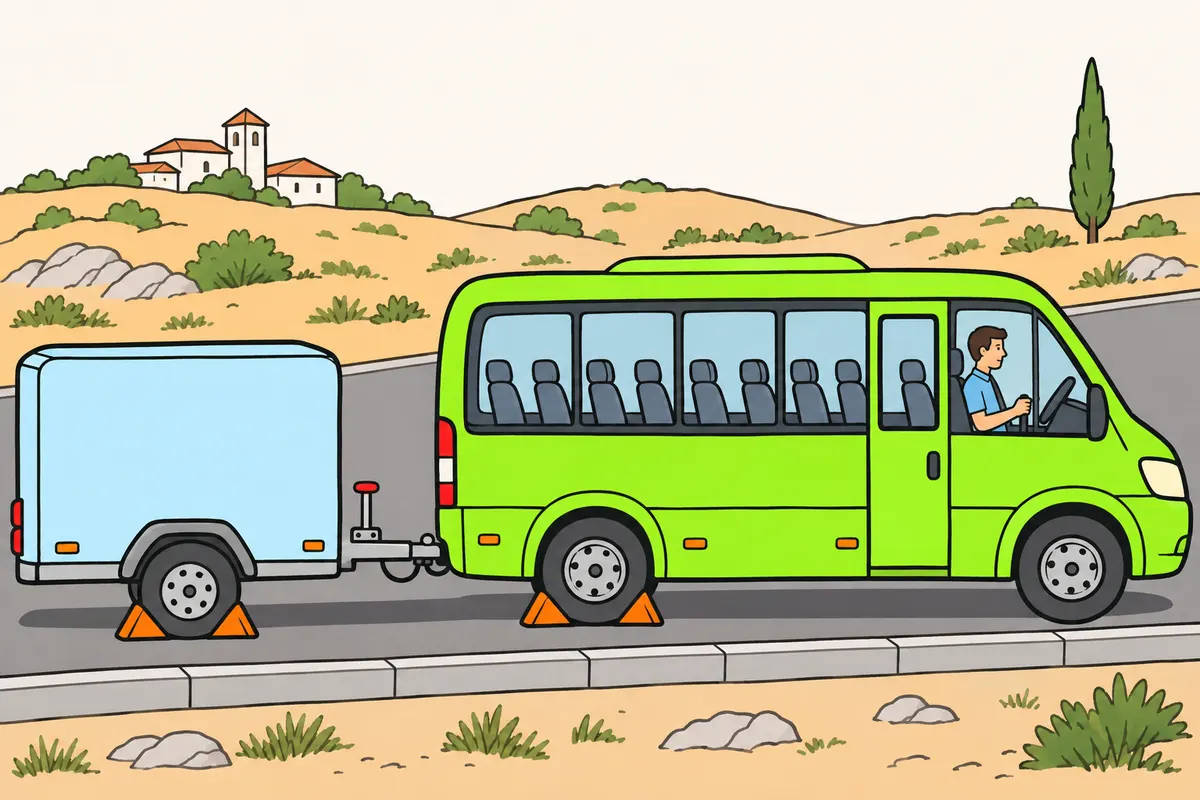
Secure both vehicles before you leave the driving seat.
| Situation | Gear when leaving your seat | Wheel direction with a kerb on a noticeable slope |
|---|---|---|
| Uphill | First gear or the appropriate parking position | Towards the centre of the carriageway |
| Downhill | Reverse gear or the appropriate parking position | Away from the centre of the carriageway |
Remember
- Apply the parking brakes on the minibus and trailer.
- Stop the engine and switch off the ignition.
- If you walk away, prevent unauthorised use.
- On noticeable slopes, use suitable chocks or a steered wheel against a suitable kerb.
- Do not use stones as chocks.
- Before separation, check the trailer retains braking, necessary chocks and stable support.
Exam trap: Wrong: assume the kerb also holds the uncoupled trailer. Right: secure it separately.
Read the full explanation
- Secure the minibus and trailer with their parking brakes before working outside the vehicle. If the air-braked trailer has a parking valve with a red button, pull it to apply the brake in the system described by the manufacturer. [WABCO, technical catalogue, sections 5.32 and 5.35](https://doc.wabco-auto.com/ProductFiles/anteros/Document/8150100343.pdf).
- When leaving the driving seat, stop the engine, switch off the ignition and apply the parking brake; if you walk away, prevent unauthorised use. Leave first gear engaged when facing uphill, reverse gear when facing downhill, or select the appropriate parking position. [RGC, art. 92.3.a-c](https://www.boe.es/buscar/act.php?id=BOE-A-2003-23514#a92).
- On a noticeable gradient, you must also secure your combination with suitable wheel chocks or rest a steered wheel against a suitable kerb. For the latter option, turn the wheels towards the centre of the carriageway when facing uphill and away from it when facing downhill. Do not use stones or improvised objects. [RGC, art. 92.3.d](https://www.boe.es/buscar/act.php?id=BOE-A-2003-23514#a92).
- A kerb holding a minibus wheel acts on that vehicle. When preparing to uncouple, assess how the trailer is held by its own wheels and how stable its supports are; the drawbar transfers weight but does not replace braking. [RGV, art. 12.8.1](https://www.boe.es/buscar/act.php?id=BOE-A-1999-1826#a12).
5Inspect the coupling components
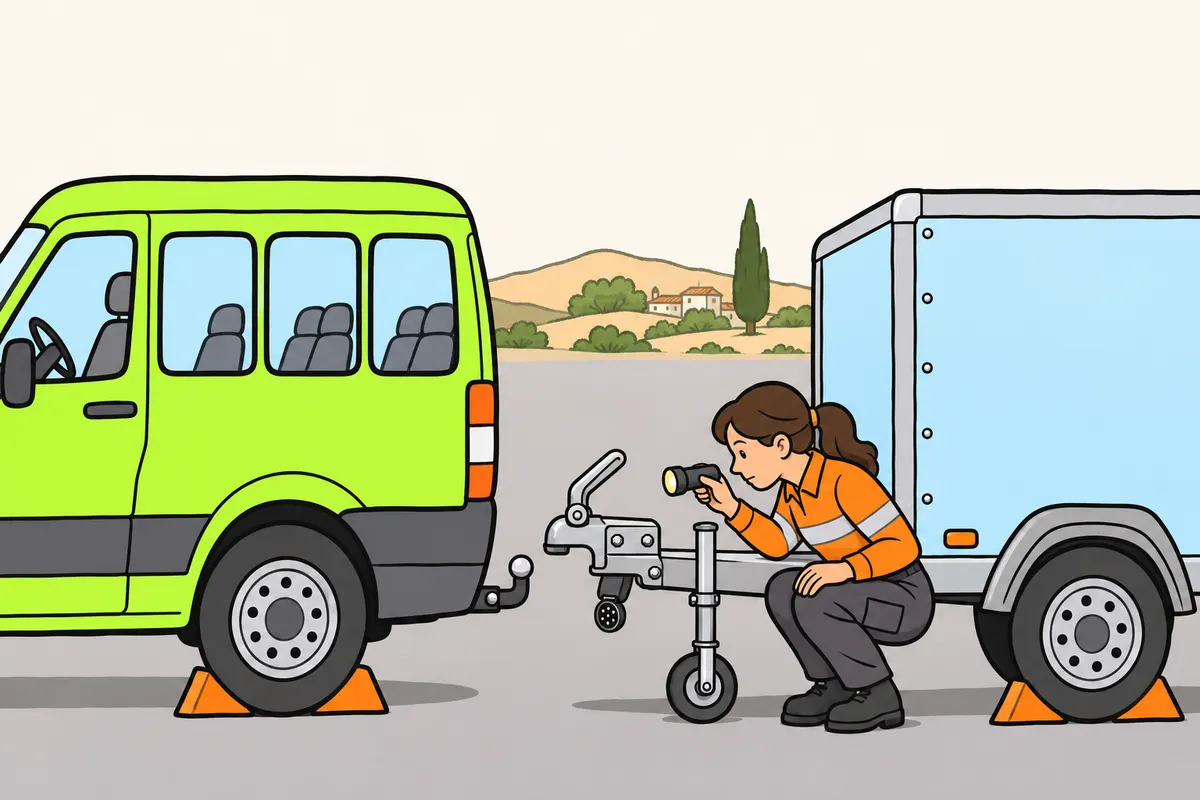
Inspect the coupling parts with both vehicles secured against movement.
Remember
- Look for cracks, deformed parts, dirt and unusual movement.
- Keep your fingers away from the closing area.
- Stop and request an inspection if a part is deformed.
- Clean and lubricate only as the manufacturer instructs.
Exam trap: Wrong: grease every surface. Right: check the manual; grease can harm parts that work by friction.
Read the full explanation
- Inspect the mountings, locking mechanisms and contact surfaces before joining them. Look for missing parts, deformation, cracks, abnormal play and dirt that prevents correct seating or locking. Do not try to deal with a deformed component by hitting it harder with the towing vehicle; stop the operation and request an appropriate inspection.
- Identify the parts that transmit the forces: the ball and coupling head socket, or the towing eye and coupling pin. Locate the release lever and its retaining mechanism without putting your fingers into the closing area. Carry out the inspection with both units secured, so that neither can move closer and turn the coupling into a trapping point.
- Maintain the surfaces according to the manufacturer's specific cleaning and lubrication instructions. Grease may be suitable for certain joints and unsuitable for components that work by friction; check which surface you are treating before applying it. Repairs and checks for wear in the mechanism are covered in «Maintaining the minibus and its trailer».
6Align the minibus and trailer
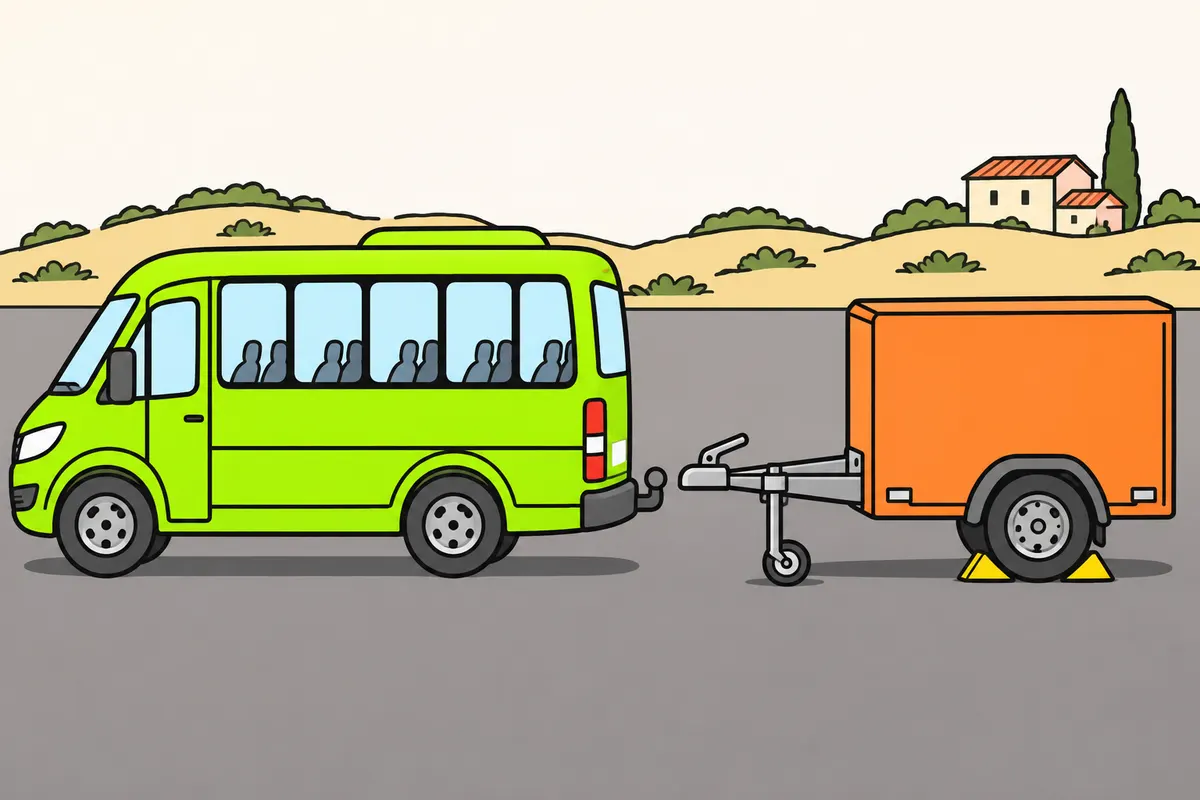
Approach slowly, with the coupling lined up in height and direction.
Remember
- Adjust height with the support provided; do not hold the weight with your body.
- Secure against movement before getting out to check the position.
- Stop if you lose your reference or feel abnormal resistance.
- Position the drawbar manually and approach with the minibus in separate stages.
- Keep passengers outside the working area.
Exam trap: Wrong: confirm locking using only the camera. Right: it helps positioning but cannot confirm the internal lock.
Read the full explanation
- Approach with the minibus aligned with the drawbar so that the coupling head or towing eye lines up with the towing vehicle's coupling without sideways forces. Use the mirrors and reference points on the vehicle, and get out to check what you cannot see from the driving seat, following the preparations in «Secure against movement before getting out». The manoeuvring camera helps you position the vehicle, but its image cannot confirm that the internal locking mechanism is closed.
- Adjust the height using the jockey wheel, drawbar support or mechanism provided, without supporting the weight with your body. The coupling must line up in both height and direction; you do not correct a misaligned drawbar by accelerating against it. There is no single height in centimetres that is valid for every minibus and trailer.
- Reverse very slowly and stop if you lose your reference point or encounter abnormal resistance. Correct the drawbar's position using the adjustment equipment provided and its designated grip areas, keeping your hands out of the pin's path. Carry out manual positioning and the minibus approach in separate stages.
- Consider the space occupied by the rear of the minibus as well as the coupling itself. The overhang, bumper and accessories may touch the drawbar before coupling is complete if the approach is incorrect. Arrange for passengers to wait outside the working area, with any luggage you intend to load into the trailer kept clear of the vehicle's path.
7Close and lock the coupling
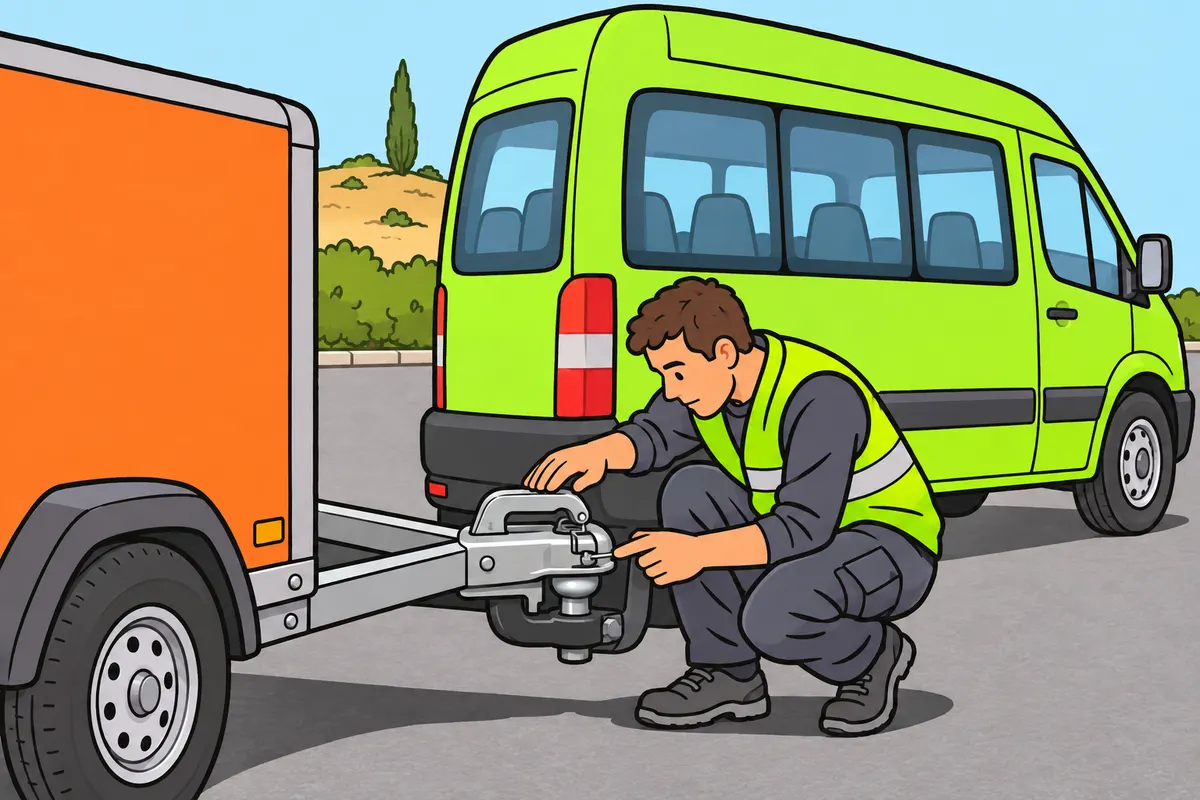
Check the locking mechanism and safety lock using the manufacturer’s method.
| System | Vehicle or equipment | What you must remember |
|---|---|---|
| Drawbar | Your minibus and trailer | Follow its coupling procedure |
| Fifth wheel | Semi-trailer | Receives the kingpin and supports the front end |
Remember
- Check the device that prevents accidental separation.
- Do not replace the safety lock with wire or disable it.
- If fitted, check the indicator and complete the required inspection.
- Use the specific procedure for your drawbar trailer.
Exam trap: Wrong: assume a clunk means the coupling is locked. Right: check the lock and safety device.
Read the full explanation
- For your trailer, check the safety device fitted to the coupling head or pin. The coupling device must have a component that prevents it from uncoupling; do not replace it with wire or disable it to make separation easier. [RGV, art. 13.3](https://www.boe.es/buscar/act.php?id=BOE-A-1999-1826#a13).
- Check the locking mechanism and its safety lock using the manufacturer’s method; the sound of coupling does not prove that it is locked. If there is an indicator or electronic warning, interpret its position and complete the prescribed inspection.
- The fifth wheel receives the kingpin of a semi-trailer and supports its front end. You may recognise this system, but for your minibus and trailer you must follow the drawbar procedure. [SAF-HOLLAND, manual, sections 6-7](https://safholland.com/mx/en/service/download-center/document/resource/environment/project1_p/documents/documentationP/Before%20Empolis%20Box%20update/TECH%20LIT%201/HOLLAND%20FW31%20NoLube%20and%20FW33%20Low%20Lube%20Series%20Fifth%20Wheels%20Owner%27s%20Manual%20XL-FW10028UM-en-US%20Rev%20B.pdf).
8Check mechanical retention
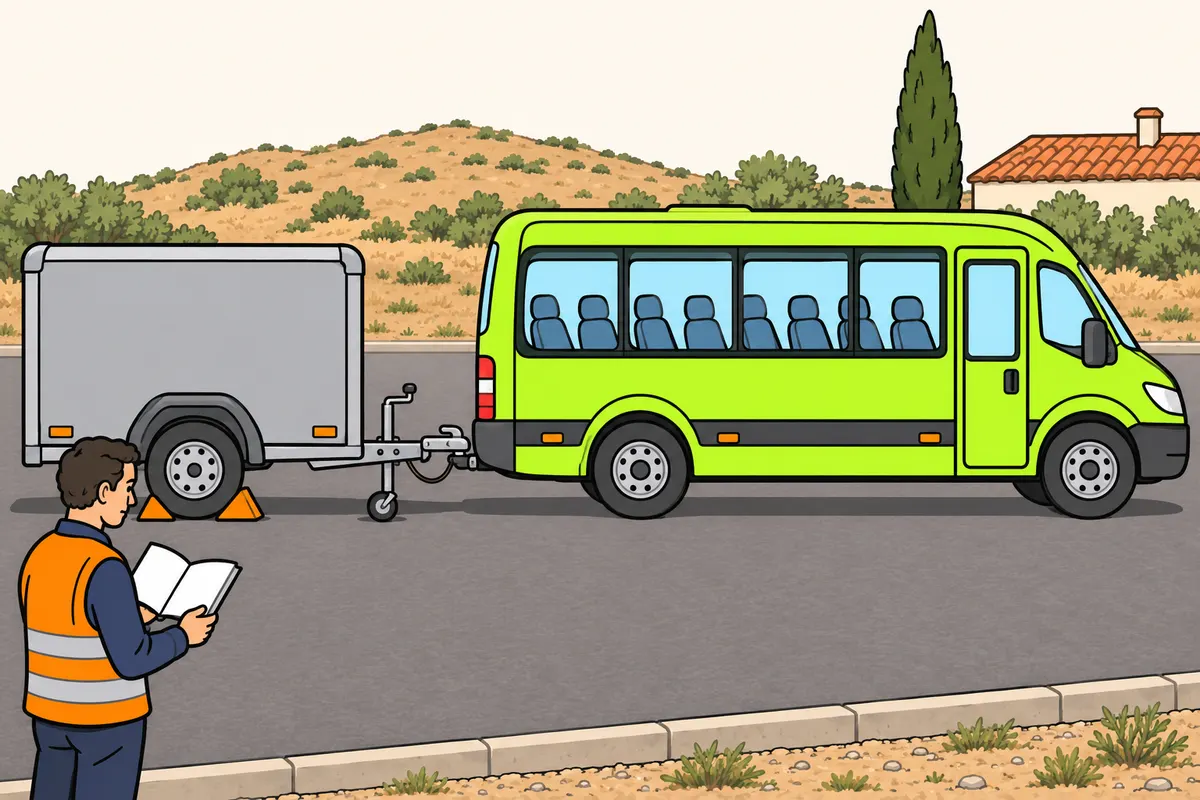
Check that the coupling holds the trailer using your coupling’s procedure.
Remember
- Keep the trailer secured and the support in the specified position.
- Stop if anything moves unexpectedly during the test.
- Do not improvise tugs or lift the combination without knowing the procedure.
- If it fails, secure and support the trailer; check alignment, height and closure.
- Get technical help if anything is faulty or you cannot confirm retention.
Exam trap: Wrong: accelerate hard to test the coupling. Right: use only the force the manufacturer specifies.
Read the full explanation
- Carry out the mechanical check prescribed for your coupling, keeping the trailer secured against movement and the support in the specified position. Some systems require a gentle pull; others use a specific coupling-head check involving the jockey wheel. Do not improvise a tug with the minibus or lift the combination without knowing the procedure and the device’s limits.
- Select the control and force specified in the manual for the retention test. Observe the coupling’s response from the control position and stop if any unexpected movement occurs. Strong acceleration can damage the supports and coupling components without providing a reliable check that the coupling is locked.
- If the check fails, keep the trailer secured against movement and supported while you check alignment, height and closure following the manual. Resolve the cause and repeat the prescribed check before driving. If there is wear, a fault or you cannot confirm retention, request technical assistance and report which indicator or component does not reach its working position.
9Drawbar and towing-eye coupling
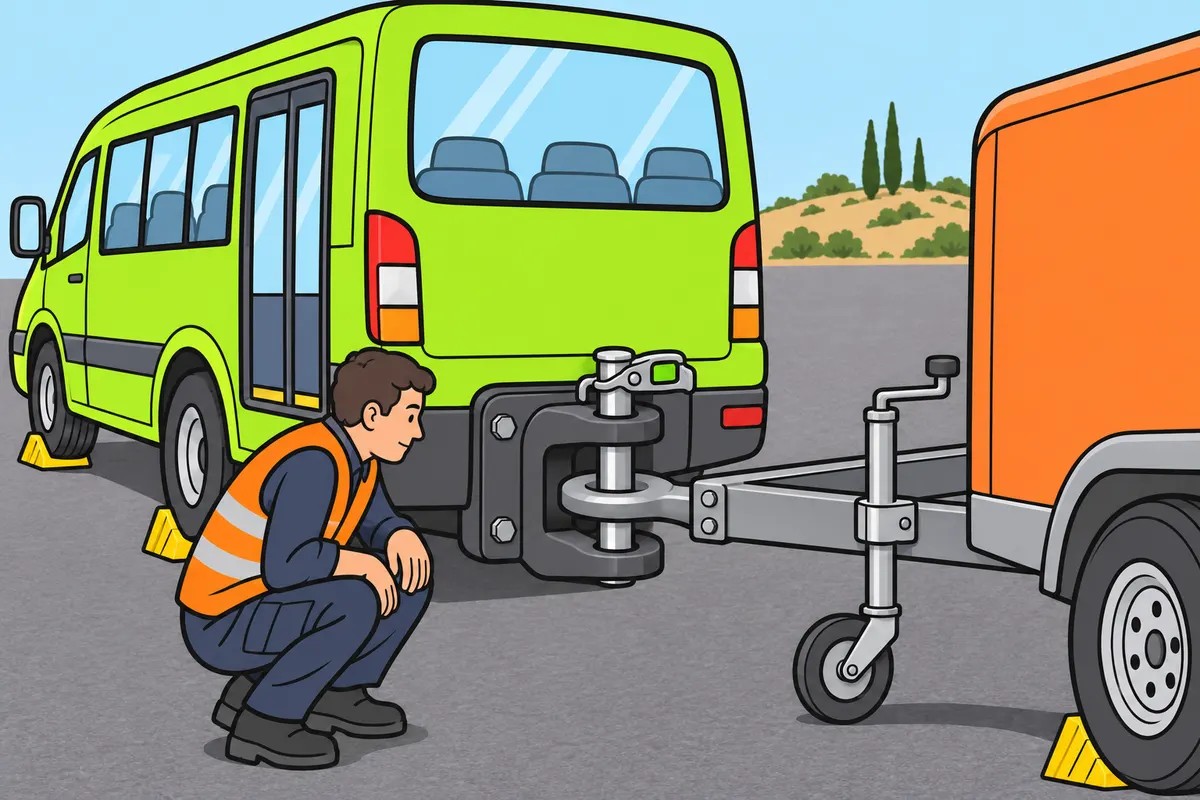
Make sure the pin fully retains the towing eye.
| Towing-eye coupling | Preparation according to its manual |
|---|---|
| Automatic | Set the lever to receive the eye, which activates the lock. |
| Manual | Insert and secure the pin according to its design. |
Remember
- Align the drawbar and adjust its height with the equipment provided.
- Position the eye opposite the centre of the coupling jaw.
- Check the pin is fully in place and secured.
Exam trap: Wrong: assume the eye is safe inside the jaw. Right: confirm the pin retains it.
Read the full explanation
- For a towing-eye coupling, position the drawbar eye opposite the centre of the coupling jaw and adjust its height using the support provided. Entry must allow the pin to pass through the eye without placing a sideways load on the mechanism. [V.ORLANDI, HD50/70, section 3.1](https://www.orlandi.it/en/download-area/category/20-installation-mainteannce-and-use-manuals.html?download=668%3Ahd5070).
- Prepare the automatic or manual coupling according to its construction. On an automatic coupling, the lever must be in the specified receiving position so that the entering towing eye activates the locking mechanism. On a manual coupling, insert and secure the pin according to its design; identify which operation requires your intervention and which the mechanism performs.
- After the towing eye enters, check that the pin is fully in its working position and secured against release. Observe the relevant locking indicator and check accessible components according to the manual. A towing eye inside the jaw is still unsafe if the pin does not retain it.
10Ball coupling head, if fitted
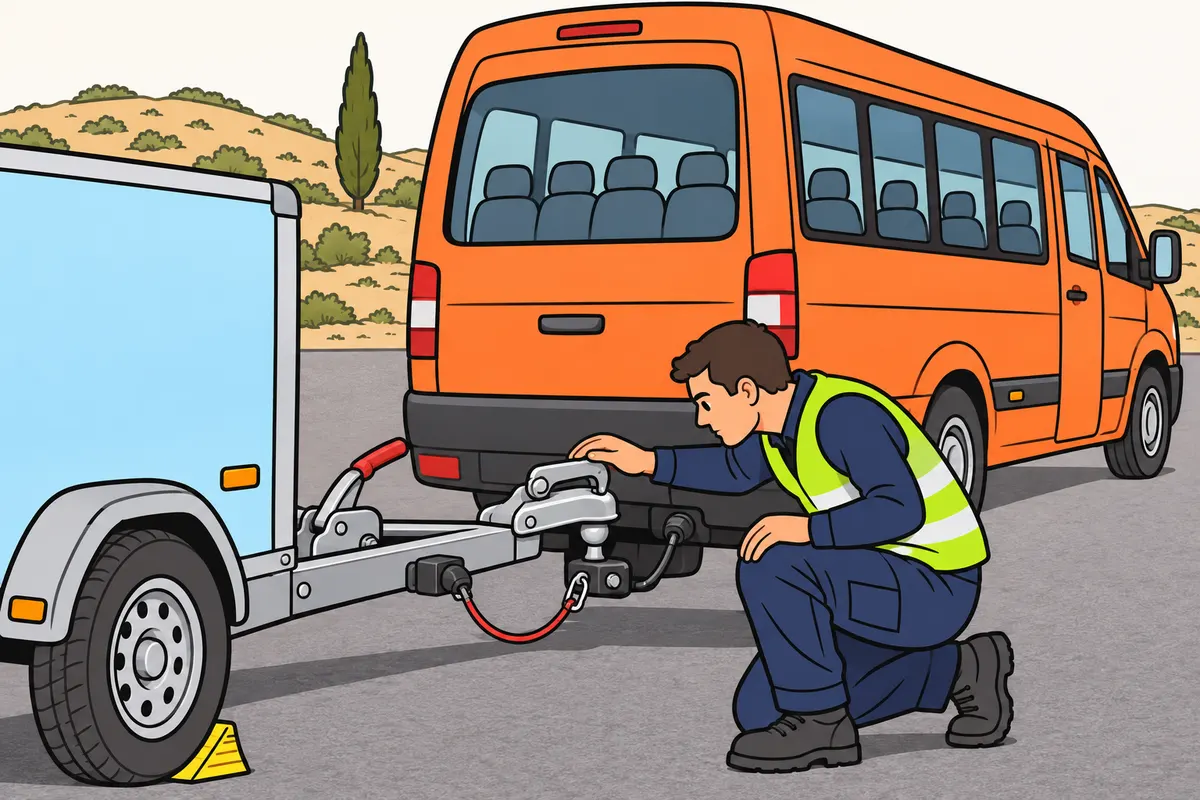
If your authorised combination uses a towball, follow that coupling’s specific manual.
Remember
- Fit the coupling head as its manual instructs.
- Check the locking mechanism, safety lock and retention.
Exam trap: Wrong: skip retention checks on a ball coupling. Right: if fitted, check closure, safety lock and retention.
Read the full explanation
- If your authorised combination uses a towball and coupling head, couple them and check the locking mechanism, safety lock and retention according to the device’s specific manual. [RGV, arts. 13.1 and 13.3](https://www.boe.es/buscar/act.php?id=BOE-A-1999-1826#a13).
11Identify the air connections
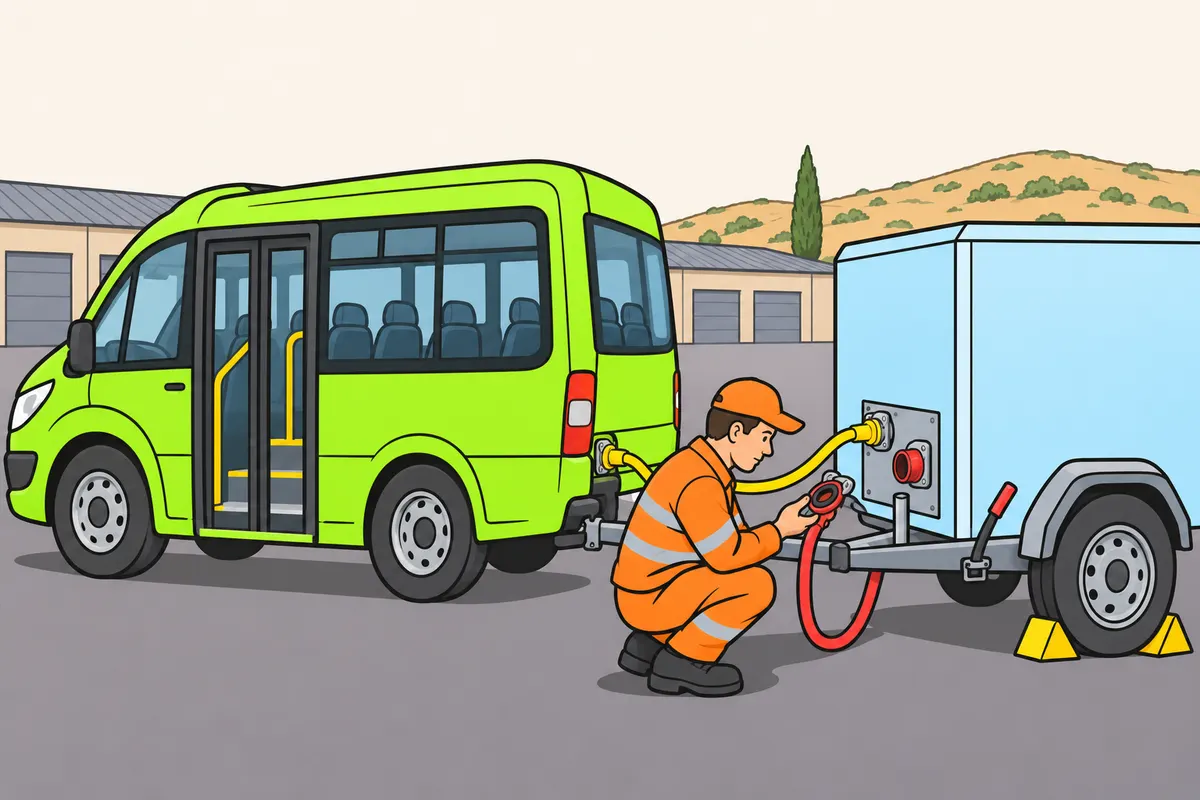
Identify the air connections and follow the order for your equipment.
| Line on combinations with conventional air lines | Function |
|---|---|
| Red | Air supply |
| Yellow | Brake control |
Remember
- If you have air lines, check seals and fastenings without forcing them.
- Secure the trailer before supplying air.
- With conventional separate connections, connect yellow first, then red.
- With an overrun brake, carry out the checks for that equipment.
- Follow the manual if you have a combined connection block.
- If a black shunting control is fitted, check its driving position after coupling.
Exam trap: Wrong: use the black button for parking. Right: in the system described, red controls parking; black releases automatic braking for shunting.
Read the full explanation
- If your combination has two conventional air lines, identify the red supply line and the yellow brake control line. With an overrun brake, carry out the checks for that equipment. [WABCO, iEBS manual, section 1.3.2](https://www.wabco-customercentre.com/catalog/docs/8150402523.pdf).
- Check the seals and contact surfaces before connecting: they must have no dirt or damage that prevents an airtight seal. Fit the coupling heads without forcing them and check that they are secured. Do not cover up a leak with an improvised joint or assume a connection is correct simply because air reaches the towed vehicle.
- The air supply can change the state of the trailer’s automatic braking. Keep its parking brake applied during connection, rather than relying on the absence of air. The full operation of the circuit is explained in «Trailer and combination braking».
- With conventional separate connections, connect the yellow line first and then the red line. Follow the specific procedure if the combination has a combined connection block. Disconnect in the order specified in «Disconnect before moving the towing vehicle away». [WABCO, iEBS, section 1.3.2](https://www.wabco-customercentre.com/catalog/docs/8150402523.pdf). [ROJO Trailer, AluHARD 500+, air connections](https://www.rojotrailer.com/wp-content/uploads/2025/08/MANUAL-ALU500-REMOLCADOR_2024_V08_ESPANOL.pdf).
- If a black release or shunting control is fitted, it allows you to release the uncoupled trailer’s automatic brakes using stored air. After coupling, check its driving position according to the manual; avoid leaving the trailer braked or releasing its brakes without an external air supply during preparation. The red button controls the parking brake and the black button has a different function. [WABCO, technical catalogue, sections 5.32 and 5.35](https://doc.wabco-auto.com/ProductFiles/anteros/Document/8150100343.pdf).
12Electrical and service connections
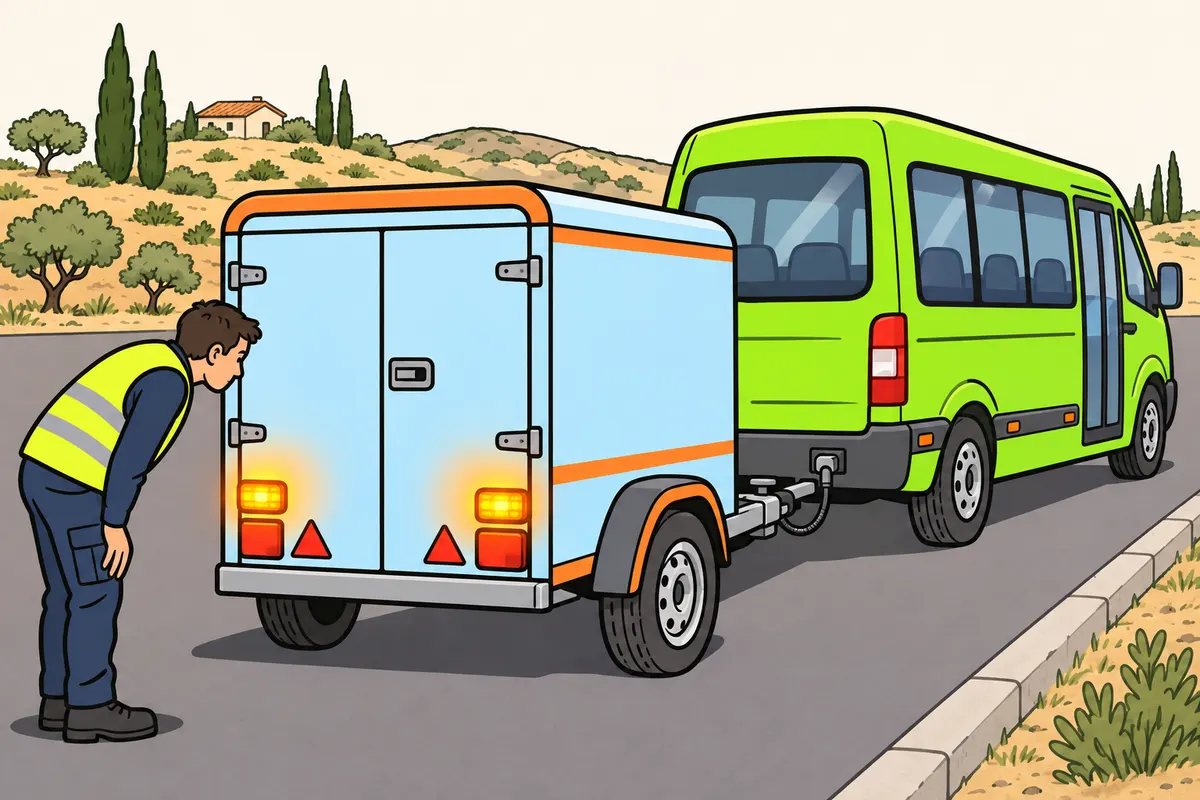
Connect and check the lights and electronic systems fitted to your trailer.
Remember
- Identify each socket by its markings and shape.
- Check contacts, covers and latches.
- Hold plugs by their bodies; do not pull on cables.
- Check that each plug is held by its latch.
- Resolve fault warnings even when the trailer is empty.
Exam trap: Wrong: assume connecting lights also connects ABS or EBS. Right: check the electronic braking connectors fitted to your combination.
Read the full explanation
- Connect the towed vehicle’s lighting and signalling system and any electronic braking connectors fitted to the combination. Do not confuse the lighting socket with the ABS or EBS power supply and communication connection. Identify each socket by its markings and construction, without inserting a connector into another socket because it looks similar in size. [WABCO, iEBS manual, section 1.3.2](https://www.wabco-customercentre.com/catalog/docs/8150402523.pdf).
- Check plugs, contacts, covers and latches, and hold the connector by its body when inserting or removing it. Do not pull on the cable or force a misaligned socket. A plug may appear to be inserted but come loose with vibration if you have not engaged its retaining mechanism.
- If a connection or braking fault warning appears when you connect the services, identify its meaning and resolve the fault. The luggage trailer needs its services even when empty. Distinguish a poorly seated connector from a fault that requires the system to be inspected; use the dashboard indications and the vehicle manual to decide what action to take.
13Allow hose movement and secure hoses
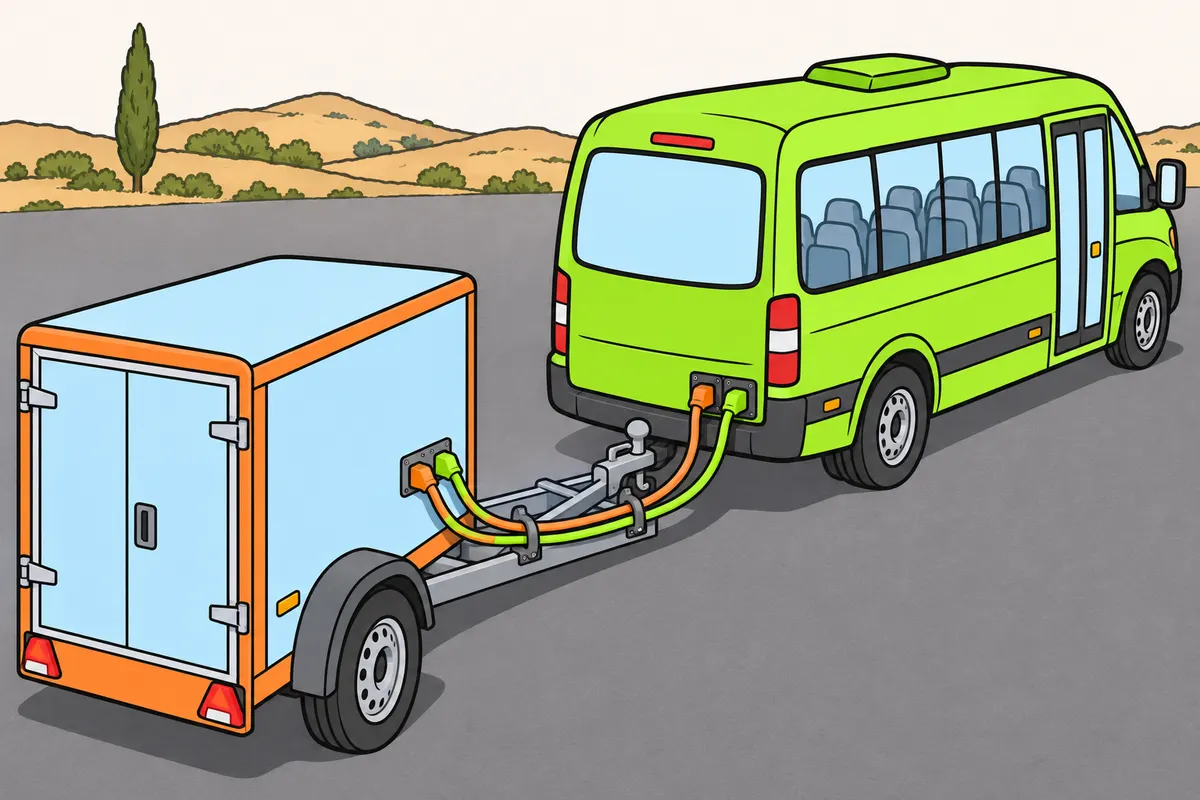
Secure cables and hoses with enough freedom for turns.
Remember
- Check their whole route.
- Leave enough length for turns and suspension movement.
- Keep lines off the ground, away from tyres and clear of trapping points.
- Secure excess length with the fittings provided.
- Keep lines clear of hot parts and sharp edges.
Exam trap: Wrong: leave lines taut because they fit when straight. Right: allow turning without dangerous hanging loops.
Read the full explanation
- Arrange the cables and hoses with enough free length for the expected turns and suspension movements. Check their route between both ends, not just the area visible from one side. A connection that is correct in a straight line can become taut as soon as the towing vehicle starts to turn.
- Prevent lines from dragging on the ground, rubbing against the tyres or becoming trapped between the coupling, chassis and trailer. Secure excess length using the fittings provided. Leaving an excessively large loop is not a safe way to allow room for articulation.
- Use the supports and guides provided to distribute the length of the lines. A coiled line needs to retain its usable extension: an overtightened cable tie can concentrate the pulling force on the plug. Pay particular attention to routes near hot parts and sharp edges, where contact can damage the insulation or hose.
14Breakaway cable and secondary coupling
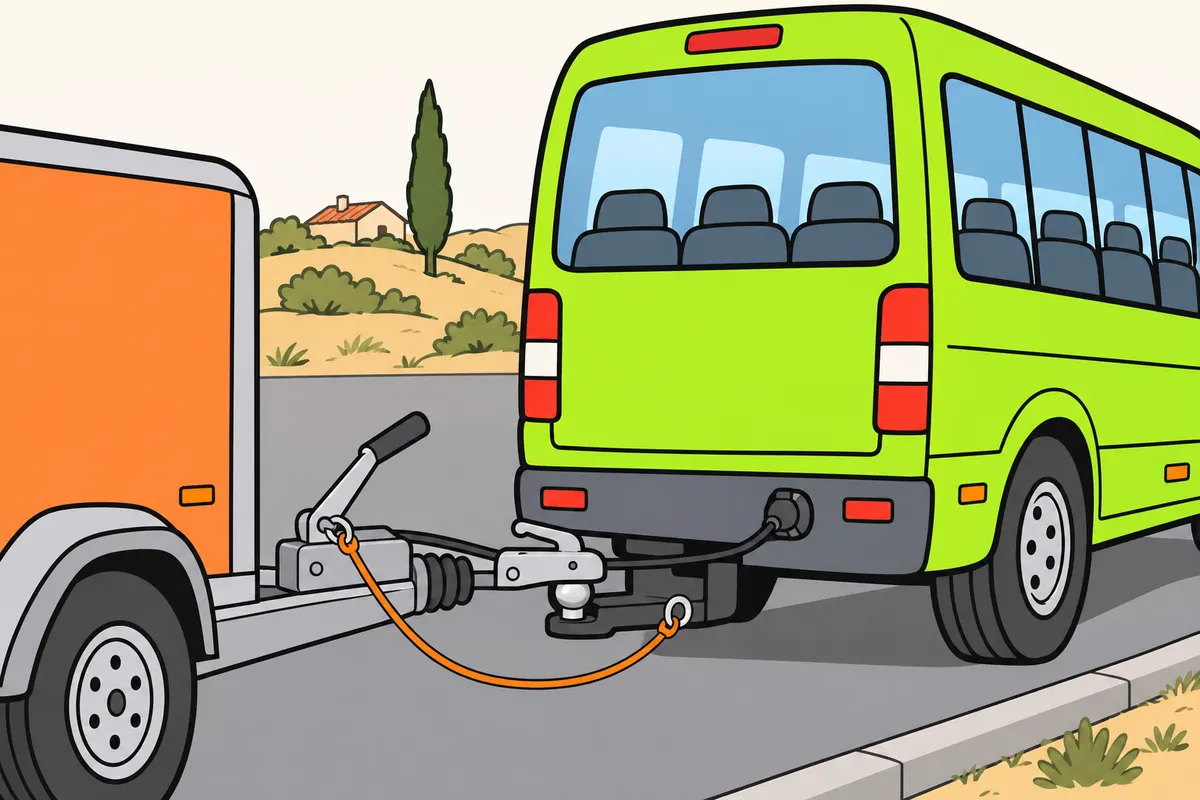
Check the safety device fitted to your trailer.
| Device, if fitted to your trailer | Function |
|---|---|
| Breakaway cable | Activates the braking designed for accidental separation |
| Secondary coupling | Keeps the drawbar off the ground and retains some steering control |
Remember
- Attach any breakaway cable to the point specified by the manufacturer.
- Also check its connection to the trailer’s braking mechanism.
- Allow turning without dragging or applying the brake.
- Do not confuse a safety chain with a device that applies the brake.
Exam trap: Wrong: require this secondary coupling on every trailer. Right: it is required with MMA not exceeding 1,500 kg and no system ensuring braking if the coupling breaks.
Read the full explanation
- If your towed vehicle has a breakaway cable, attach it to the point specified by its manufacturer and check its route. Its function is to activate the braking system designed for accidental separation. Do not confuse it with the electrical cable, an earth connection or an anti-theft device.
- Allow enough freedom for articulation without the cable dragging, snagging or applying the brake during a normal turn. Also check its attachment to the towed vehicle's mechanism. A cable attached to the towing vehicle but disconnected from the actuating mechanism cannot perform its intended function.
- Identify the secondary coupling required on trailers with an MMA (maximum authorised mass) not exceeding 1,500 kg that have no system to ensure braking if the coupling breaks. It must prevent the drawbar from touching the ground and retain some residual steering control. A safety chain is not equivalent to automatic brake application. [RGV, art. 13.4](https://www.boe.es/buscar/act.php?id=BOE-A-1999-1826#a13).
- Check the safety system actually installed on your trailer. Devices that provide automatic braking must ensure that it stops if uncoupling or breakage occurs while driving; their connection must follow the equipment's design. The operation of the different brakes is covered in the «Trailer and combination braking» module. [RGV, art. 12.8.3](https://www.boe.es/buscar/act.php?id=BOE-A-1999-1826#a12).
15Support legs and support wheel
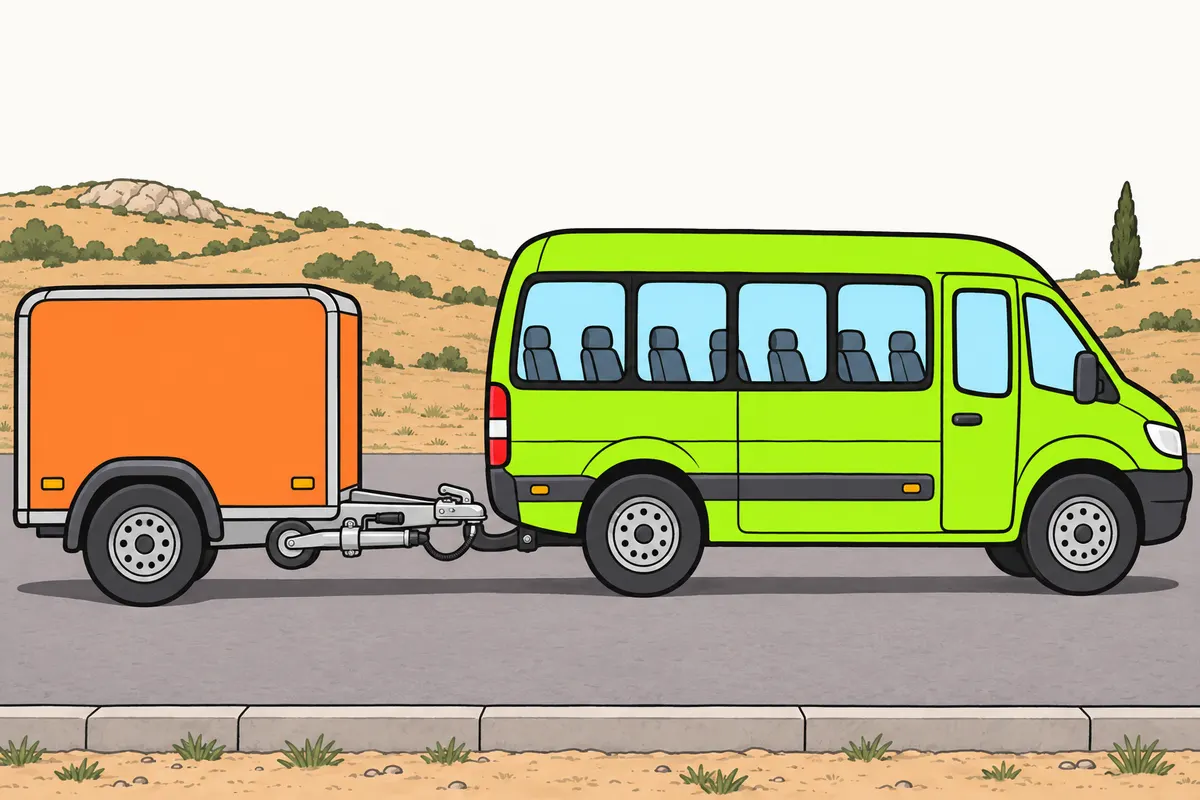
Stow supports for driving and position them before uncoupling.
Remember
- Retract supports once the coupling is secured and properly holds the drawbar.
- If support legs are fitted, check they are retracted and locked.
- Stow and secure the crank handle.
- If a jockey wheel is fitted, raise, stow and lock its mounting.
- Before releasing the coupling, adjust the support to hold the drawbar.
- Do not use the jockey wheel to lift the minibus rear unnecessarily.
Exam trap: Wrong: drive with the jockey wheel on the ground. Right: if fitted, stow and lock it before driving.
Read the full explanation
- Retract any parking supports fitted to your trailer once the coupling is secured and correctly supports the drawbar. On equipment with support legs, check that both are retracted and their mechanisms locked. A partly lowered leg can strike the ground or an obstacle when the combination moves, even if it appears to have clearance when stationary.
- Stow the crank handle and secure it in its holder to prevent it coming loose through vibration. Check its final position from a safe place and confirm that the retraction mechanisms are locked. Counting the turns when operating a support does not prove that it has reached its transport position.
- If the trailer has a jockey wheel, raise it, stow it and lock its mounting as required for that model. Check that it cannot drop, turn far enough to rub against a component or come loose through vibration. Do not treat it as a wheel intended to support the trailer while driving.
- To separate the coupling, the support must take the weight of the drawbar without the coupling head dropping or an unexpected load being placed on the release mechanism. Adjust the height using the device provided and observe how the weight is shared between the support and coupling. Avoid using the jockey wheel as a jack to lift the rear of the minibus unnecessarily.
16Final walk-round of the combination
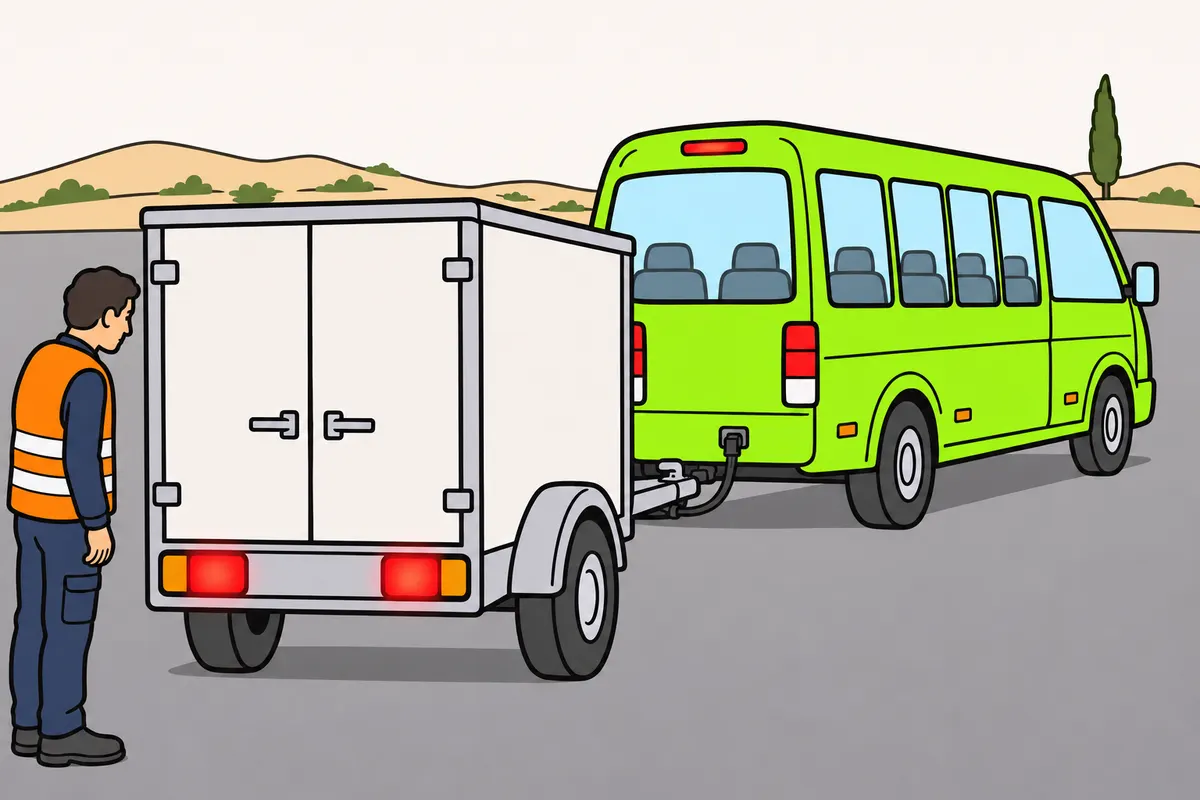
Walk around and check the combination before moving off.
Remember
- Test each fitted light and signal.
- Look for trapped cables, forgotten tools and obstacles to turning.
- Remove chocks when you can keep the combination secure without them.
- Stow the chocks; do not leave them on the road.
Exam trap: Wrong: assume all lights work because one does. Right: check every fitted function.
Read the full explanation
- Check the towed vehicle's lighting by operating the relevant functions: position lights, indicators, hazard warning lights, brake lights and any other lights fitted. Use assistance or the available checking equipment without leaving the vehicle unattended while moving. One illuminated lamp does not prove that all functions are correctly connected.
- During the final walk-round, look for pinched cables, trapped covers, tools left behind and obstacles to articulation. Check that the luggage trailer's doors are closed and that you have left no objects in the coupling area. The general inspection of both units is covered in «Maintaining the minibus and its trailer».
- Remove the wheel chocks when the combination is ready to move off and you can keep it secure without them; stow them in their proper place. Any chocks used must be removed from the road when you resume driving. Do not leave them beside a wheel or drive over them when moving off. [RGC, art. 92.3.d](https://www.boe.es/buscar/act.php?id=BOE-A-2003-23514#a92).
17Pressure and testing before moving off
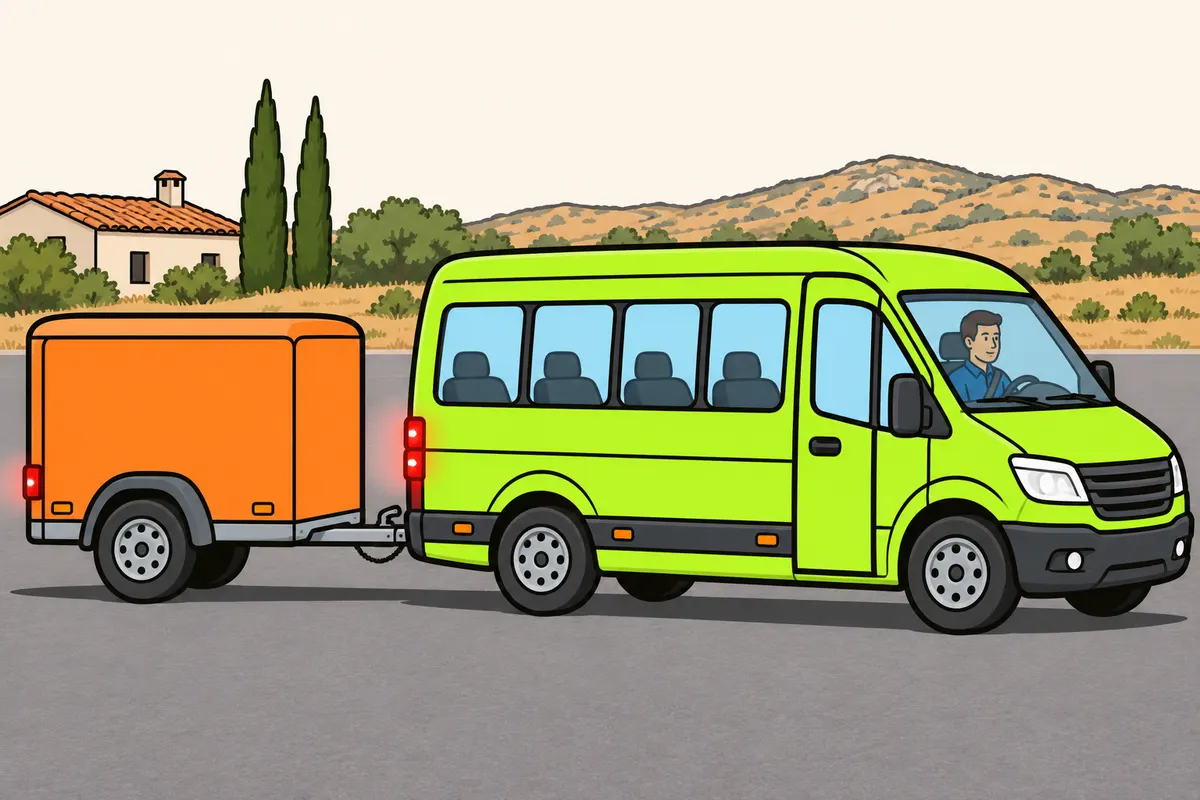
Check your equipment’s braking before moving off.
| Test | What you check |
|---|---|
| Retention | The mechanical coupling |
| Braking | The response of the brakes |
Remember
- With air brakes, wait for the pressure specified by the manufacturer.
- With an overrun brake, carry out its specific checks.
- Secure the combination and fix persistent leaks or abnormal pressure drops.
- Retract supports and remove chocks as the procedure requires before testing.
- Test braking at very low speed in a safe area.
- Stop if you feel jerking or notice abnormal responses.
Exam trap: Wrong: confuse the braking test with the retention test. Right: check both functions separately.
Read the full explanation
- If you use air brakes, wait until the operating pressure conditions specified by the manufacturer are reached and check the system warnings. The pressure required depends on the equipment fitted to the minibus and trailer. With an overrun brake, carry out the checks specific to its mechanism, which operates without these air lines. Consult «Maintaining the minibus and its trailer» for the meaning of the warnings.
- Check for leaks using the methods provided, paying attention to leaks at the connections you have just made. Do not search for a leak by putting your hands into mechanisms that may operate. If you hear a persistent leak or notice an abnormal pressure drop, secure the combination against movement and correct the fault before considering it ready.
- Carry out a functional braking test at very low speed in a safe area, once the supports are retracted and the chocks removed in accordance with the procedure. Check that the combination responds normally and stop if you feel jerking or notice any abnormalities. This test checks the braking; the retention test checks the mechanical coupling.
18Prepare for uncoupling
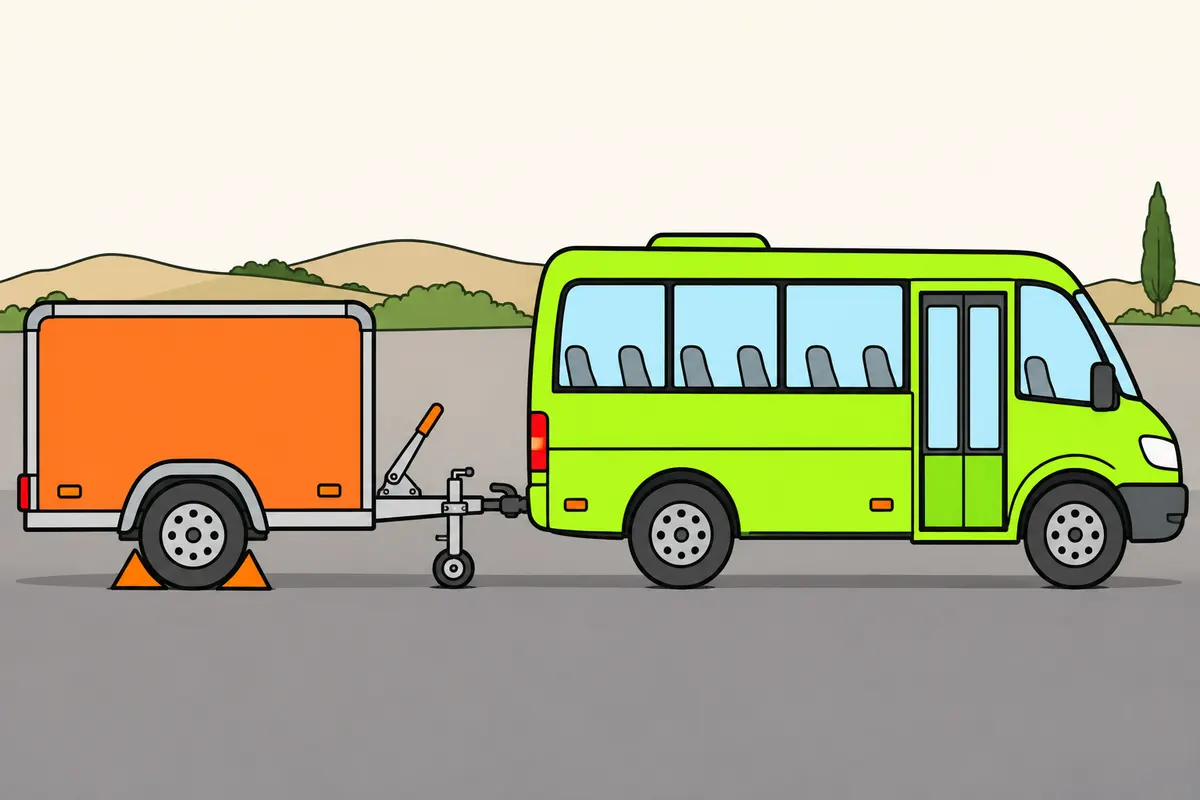
Secure the trailer’s brake and support before uncoupling.
Remember
- Choose ground that will not give way and allows recoupling.
- Check trailer stability, especially when loaded.
- Prepare to hold the trailer independently before disconnecting services.
- If a release control is fitted, keep it out of shunting position.
- Lower the necessary supports; check they do not tilt or sink.
- If adjusting suspension, stop if a support moves or loses stability.
Exam trap: Wrong: rely only on braking when disconnecting air. Right: first apply the parking brake and necessary chocks.
Read the full explanation
- Choose the separation location with the stability of the towed vehicle on its own and its future recoupling in mind. Avoid placing supports on edges, unstable covers or surfaces that may give way. If it is loaded, pay particular attention to its stability when it loses the towing vehicle's support, without improvising luggage movements to compensate for an unsuitable support.
- Prepare the trailer's independent restraint against movement in accordance with «Secure against movement before getting out» before disconnecting services. On air-braked equipment, loss of the air supply causes the circuit to operate differently from parking. Keep the release control out of the manoeuvring position, which releases the brakes using stored air. [WABCO, technical catalogue, sections 5.32 and 5.35](https://doc.wabco-auto.com/ProductFiles/anteros/Document/8150100343.pdf).
- Lower the jockey wheel or the supports the trailer needs and check that they rest firmly without tilting or sinking. If the equipment requires you to operate the suspension during preparation, watch how the height and contact with the ground change. Stop adjusting if a support starts to move or the chassis loses stability.
19Disconnect before moving the towing vehicle away
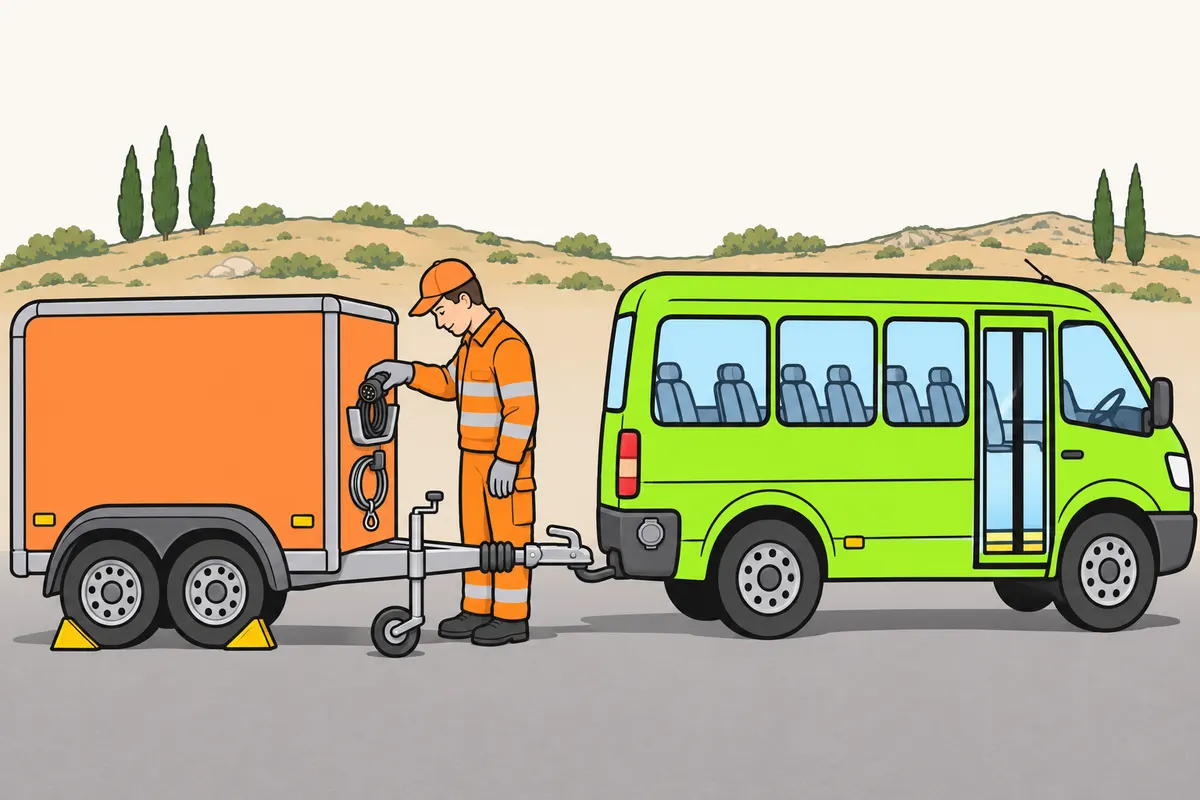
Disconnect and stow connections before moving the minibus away.
Remember
- Secure and support the trailer before disconnecting.
- With conventional separate air heads, disconnect red first, then yellow.
- Hold plugs by their bodies and release their latches.
- Protect and stow the ends in their holders.
- Release the breakaway cable or secondary coupling when the procedure specifies.
- Do not start mechanical separation while any line could still be stretched.
Exam trap: Wrong: move forwards to break the breakaway cable. Right: secure the trailer first and release the cable at the specified stage.
Read the full explanation
- Disconnect the services once you have finished securing the vehicles against movement and setting up the supports. With conventional separate air coupling heads, disconnect the red supply line first and then the yellow control line. Keep your face and eyes away from the air outlets and protect the mating surfaces from dirt. [ROJO Trailer, AluHARD 500+, p. 34](https://www.rojotrailer.com/wp-content/uploads/2025/08/MANUAL-ALU500-REMOLCADOR_2024_V08_ESPANOL.pdf).
- Disconnect the electrical and electronic braking plugs by releasing their retaining mechanisms and holding the plug bodies. Fit caps and guards where appropriate. Do not leave a line connected because it seems long enough to let the minibus move forwards: as the vehicles separate, it can be torn from its mounting or damage other components.
- Stow the ends in the designated holders, without leaving them on the ground or on the wheel arch. Also check any additional equipment connections. Do not start mechanical uncoupling until you can move the towing vehicle away without stretching any line still connecting it to the towed vehicle.
- On systems with a breakaway cable or secondary coupling, release them at the point specified in the uncoupling procedure, after securing the towed vehicle. Stow them so that they do not drag. Do not move forwards to break a cable or pull a chain taut: these are safety devices, not tools for completing routine uncoupling.
20Open the locking mechanism and separate under control
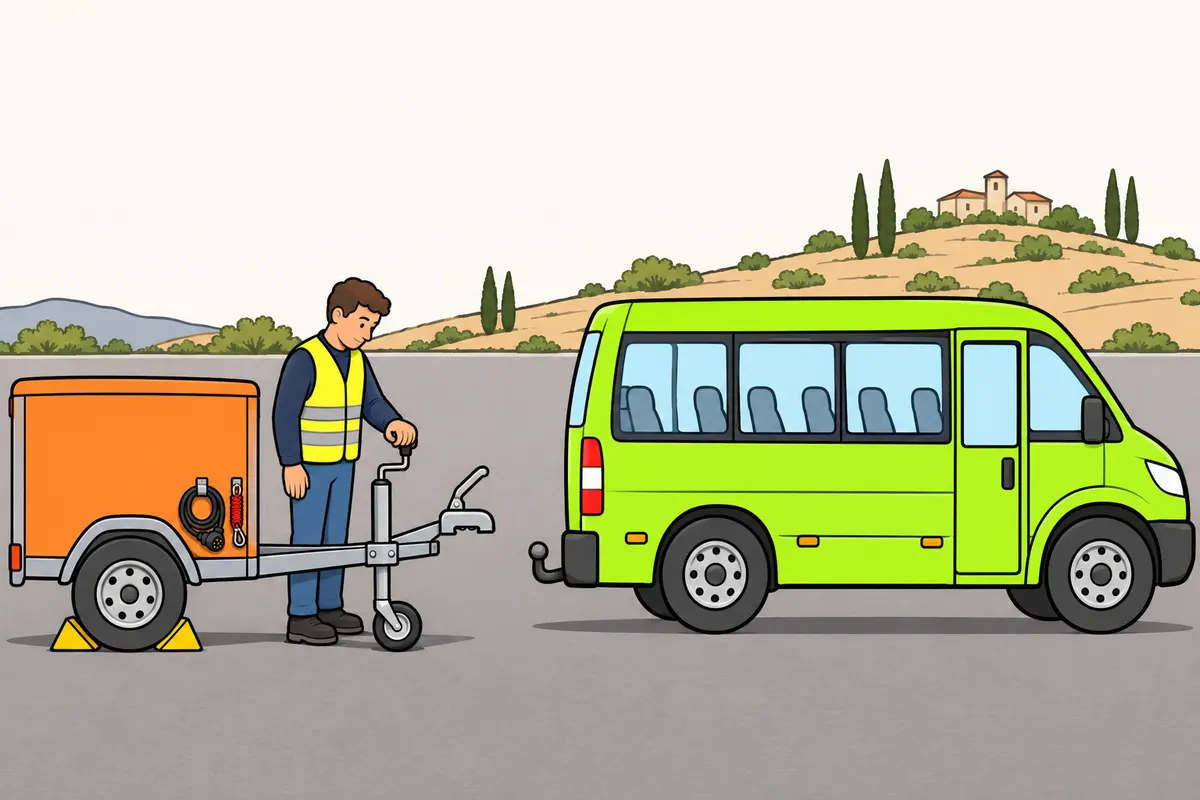
Open the coupling and move the minibus away only when the trailer is ready.
Remember
- Secure, support and disconnect the trailer as instructed before opening.
- Use the control from its designated position, keeping hands away from the lock.
- If it will not open, secure both vehicles and investigate.
- Confirm the coupling head is completely free before moving the minibus.
- Move the minibus away slowly.
- Stop if the trailer moves or a line becomes taut.
Exam trap: Wrong: strike a lock that will not open. Right: investigate with both vehicles secured and follow the manual.
Read the full explanation
- Release the safety lock and open the retaining mechanism once you have completed the preparations in the two previous sections. Operate the control from the designated position, without putting your hands between the ball and coupling head or near the pin. With a towing-eye coupling, use its opening lever as instructed in the manual. [V.ORLANDI, HD50/70, section 3.2](https://www.orlandi.it/en/download-area/category/20-installation-mainteannce-and-use-manuals.html?download=668%3Ahd5070).
- If the locking mechanism does not open, investigate the cause with both vehicles secured against movement. The coupling may be under tension or the mechanism may be faulty; do not strike it, force it or keep the safety lock disengaged as a solution. Follow the manual for any manoeuvre to relieve the load on the coupling, and keep everyone out of the danger zone.
- Use the support mechanism to separate the coupling, checking that the drawbar maintains its height and the trailer stays still. Confirm that the coupling head is completely free before moving the minibus. Move it away slowly, watching the supports and any forgotten connections, and stop if the trailer moves or a line becomes taut.
21Check the uncoupled towed vehicle
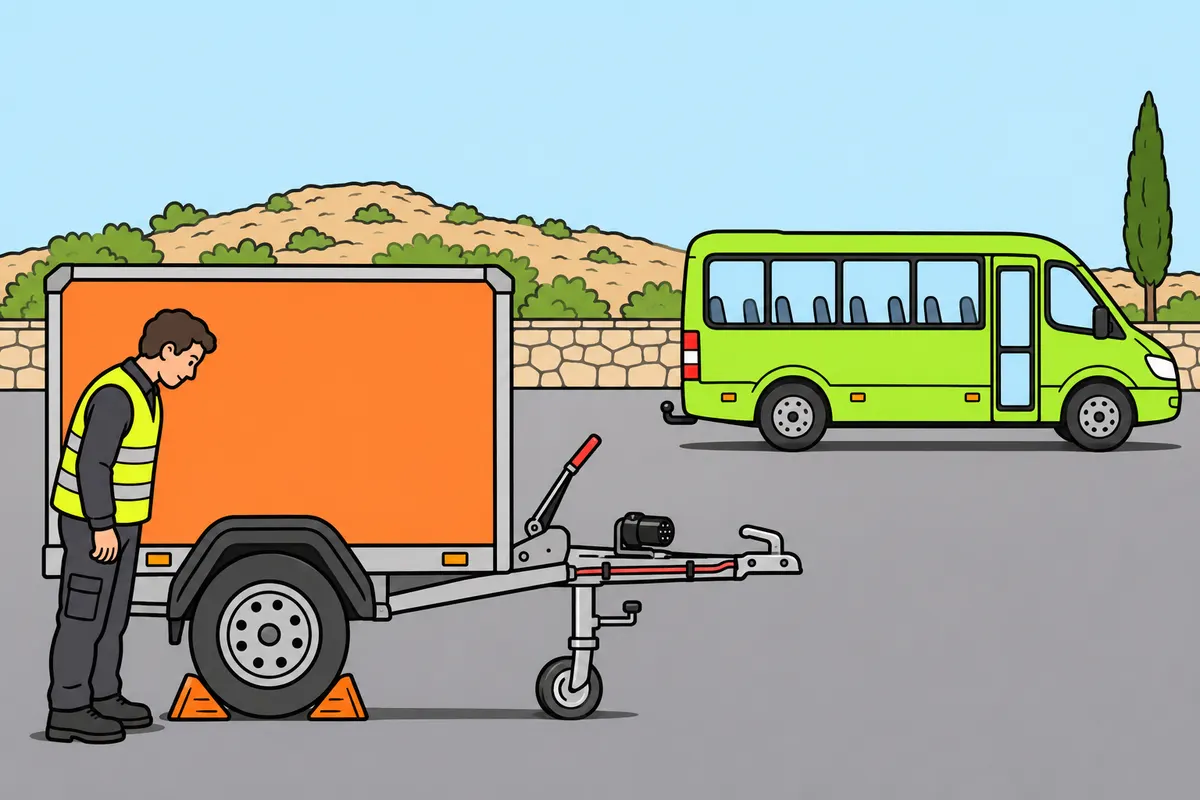
Check the uncoupled trailer and the minibus before finishing.
Remember
- Check the trailer’s tilt and how its supports rest.
- Check that supports do not tilt or sink.
- Protect connectors and stow cables and chains without creating obstacles.
- Keep controls accessible for recoupling.
- Before driving, stow the minibus lines and accessories.
- Set its coupling to the specified position for driving without a trailer.
Exam trap: Wrong: check only the uncoupled trailer. Right: also check the minibus you will move.
Read the full explanation
- Observe the trailer after moving the minibus away: the tilt of the body, how the support feet sit and any sinking of the ground help you detect a loss of stability. If you notice movement or deformation of a support, keep the area clear and seek help to correct the situation without putting yourself at risk beneath the drawbar.
- Check that the connectors are protected and that the drawbar, breakaway cable and chains are stowed without creating obstacles. Keep the controls you need for recoupling accessible. Leave the equipment in a condition that allows you to identify it and prepare for the next approach without handling parts under an unexpected load. Before driving the minibus on its own, check that its lines and accessories are stowed and that the coupling is in the position specified by the manufacturer for driving without a trailer.
22Manoeuvre M in the test
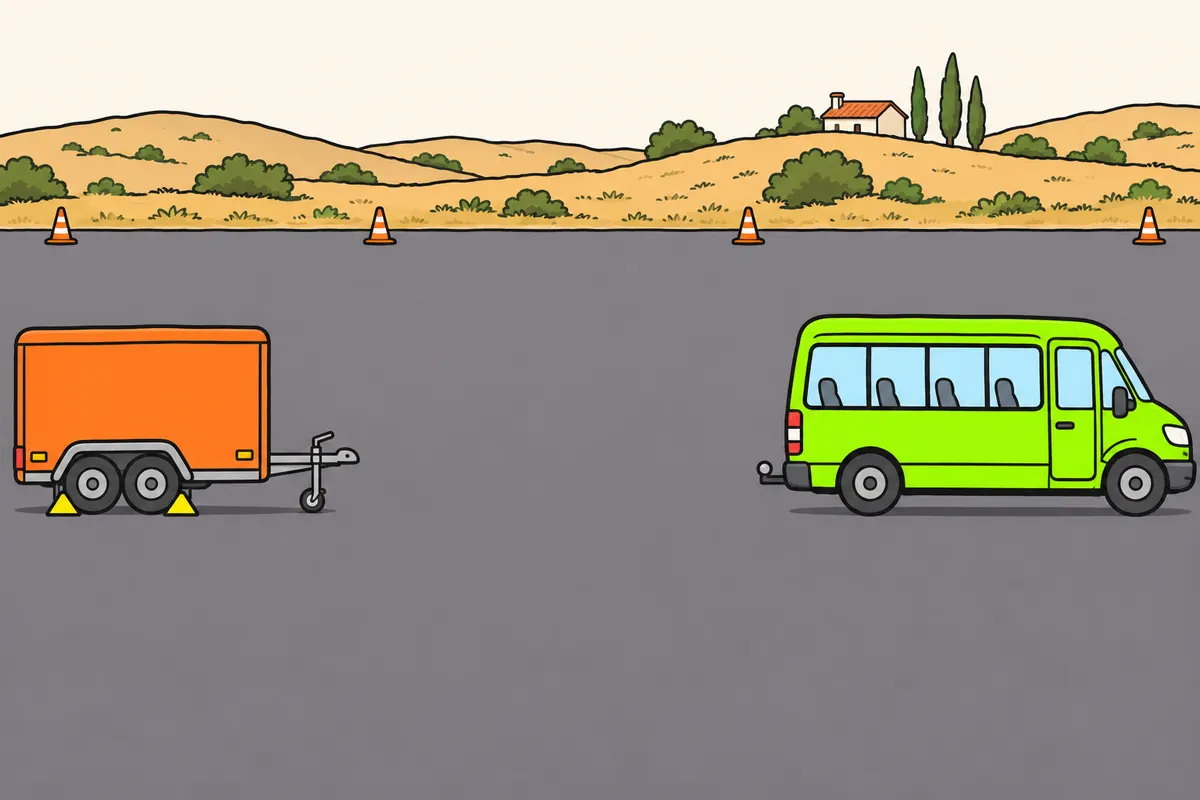
In manoeuvre M, follow the specific test conditions.
Remember
- Secure the combination against movement before uncoupling.
- Leave the minibus beside the trailer, out of line.
- To reverse up and couple, position it ahead, at least 10 metres away.
- During this test approach, you may get out once to check.
- If the coupling is not automatic, you may align the drawbar manually.
- Complete connections and safety devices, retract necessary supports and stow used chocks.
Exam trap: Wrong: always limit checks to getting out once. Right: that limit applies to the test approach; elsewhere, make all necessary safety checks.
Read the full explanation
- In manoeuvre M, uncouple after securing the combination against movement and leave the towing vehicle beside the trailer, out of line with it. Position it in front again, at least 10 metres away, to reverse up and couple. This distance describes the test; it is not a compulsory separation for every coupling operation. [RGCond (General Driver Regulations), Annex VI, manoeuvre M](https://www.boe.es/buscar/act.php?id=BOE-A-2009-9481#anvi).
- During this approach in the test, you may get out once to check and, if the coupling is not automatic, align the drawbar manually. Complete the connections and fit the safety devices, retract the supports as appropriate and stow any wheel chocks you have used. Outside this test condition, do not treat getting out once as a limit on the safety checks you need to carry out. [RGCond, Annex VI, manoeuvre M](https://www.boe.es/buscar/act.php?id=BOE-A-2009-9481#anvi).
Coupling the trailer to the minibus
Secure the locking mechanism before retracting the trailer support.
- Secure both vehicles against movement and check compatibility, components and the working area.
- Align the drawbar and adjust its height using the equipment provided.
- Couple the towing eye and pin, or lower the coupling head onto the ball, depending on the device.
- Check the locking mechanism, retention, safety lock and indicators, and carry out the prescribed mechanical check.
- Connect the services and attach the breakaway cable or secondary coupling fitted to the trailer. With separate air lines, connect yellow and then red; check that the black control, if fitted, is in the driving position specified in the manual.
- Retract and lock the jockey wheel or drawbar support and check that nothing drags on the ground.
- Check lights, brakes and connections; stow the chocks when appropriate and test the combination in a safe place.
Uncoupling while maintaining support and preventing movement
You must ensure that the towed vehicle is supported and remains stationary before releasing the coupling.
- Choose firm ground, align the combination and secure the minibus and trailer separately against movement.
- Apply the parking brake on the towed vehicle and use the necessary chocks. If it has the red and black button system described, apply the red button and avoid releasing the brakes with the black button.
- Lower the support legs or drawbar support and check that they can support the trailer during separation.
- Disconnect and stow the services as appropriate for the equipment; with conventional air lines, disconnect red before yellow.
- Disconnect the breakaway cable or secondary coupling when appropriate and confirm that no lines remain connected.
- Release the safety lock and open the mechanical locking mechanism following the manual.
- Check that the coupling head or towing eye is free and slowly move the minibus away without dragging the trailer.
- Confirm stability, braking, protected connectors and stowed accessories on both vehicles.
Finished this module?
Mark it as read and you will see your progress on the theory list.