
Theory · D1 Licence - Minibus · Module 14 of 18
Minibus brakes and retarders
You learn to distinguish the service, secondary and parking brakes, trace the flow of compressed air and interpret minibus warnings. You master the functions of ABS, EBS and retarders to answer exam questions about faults, long descents, reduced braking performance, trailer brake connections and accelerator control.
1Three braking functions
You must distinguish braking while moving, stopping after faults and keeping the minibus stationary.
| Function | What you use it for |
|---|---|
| Service | Control speed and stop |
| Secondary | Stop if the service brake fails |
| Parking | Keep the minibus stationary |
Remember
- Know the system fitted to your minibus.
- Not all minibuses use compressed air.
- Different braking functions can share parts.
- Distinguish the function, the controls and the parts that produce braking.
Exam trap: Wrong: a disc brake is always hydraulic. Right: it can also work with air.
Read the full explanation
- You use the service brake to control your speed and stop; the secondary brake allows you to stop if the service brake fails; the parking brake keeps the minibus stationary. [RGV, art. 12.8](https://www.boe.es/buscar/act.php?id=BOE-A-1999-1826#a12).
- You do not need to find three pedals or three completely separate sets of brakes. A system can share components and perform several functions through circuits and controls designed for this purpose; you must know how each function is provided in your minibus.
- Function, actuation method and braking mechanism describe different aspects. Service braking is a function; pneumatic describes how you transmit the action using air; disc or drum identifies the mechanism that produces friction. Your minibus can have pneumatically operated disc brakes without any contradiction.
- The equipment depends on the minibus: the D1 licence does not mean that every vehicle it covers has air brakes, spring brake chambers or a retarder. You may encounter hydraulic, pneumatic or combined actuation systems. Study the air circuit so that you can recognise it where fitted, without applying its checks to a model that uses a different system.
2Service brake and progressive braking
You can adjust the braking force with the service brake.
Remember
- Apply the brake gradually when you can plan your stop.
- Adjust the pressure to stop without jolts.
- When danger is immediate, brake as firmly as necessary.
- Do not drive with your foot resting continually on the brake pedal.
Exam trap: Wrong: smooth braking means braking weakly in every danger. Right: in an emergency, brake as firmly as necessary.
Read the full explanation
- You use the service brake pedal to request normal braking in the minibus. You must be able to regulate it: increase or reduce its intensity to suit the situation. The ability to regulate the braking action forms part of its legal definition. [RGV, annex VIII, section 1.2.1](https://www.boe.es/buscar/act.php?id=BOE-A-1999-1826#anviii).
- When you plan to stop, you must apply the brake progressively and adjust the pressure as you approach a standstill. This reduces passenger movement, especially for those travelling in authorised standing spaces, and helps you stop the vehicle at your chosen point without jolts.
- Smoothness does not mean braking weakly when you face immediate danger. If you need an emergency stop, you must apply the necessary braking force and maintain control; anticipation allows you to avoid many instances of heavy braking during normal service.
- You must not drive with your foot resting continuously on the pedal. Unintentional application can keep the brakes working, generate heat and wear, and reduce the remaining capacity to absorb heat that you need for subsequent braking or a descent.
3Secondary braking and circuit failure
If the service brake fails, use the available braking to stop safely.
Remember
- Secondary braking lets you adjust the braking force.
- A circuit that keeps its pressure can help you brake.
- Do not finish your route with a brake fault.
- Follow the manual when using the secondary brake control.
- If pedal response changes or braking pulls sideways, find a safe stopping place.
Exam trap: Wrong: secondary braking always keeps full effectiveness. Right: it may brake less effectively than the complete system.
Read the full explanation
- Secondary braking must allow you to stop within a reasonable distance if the service brake fails and let you regulate the braking action. This does not guarantee the same effectiveness as when all circuits are intact. [RGV, annex VIII, section 1.2.2](https://www.boe.es/buscar/act.php?id=BOE-A-1999-1826#anviii).
- In a system with several circuits, the part that retains pressure can provide residual braking when another part fails. When you receive a warning, stop safely; having redundancy does not justify completing your route with a brake fault.
- You must not assume that you can apply any parking brake lever abruptly while moving. Some controls allow progressive secondary braking, but you must follow the manufacturer's specific procedure to avoid wheel lock, loss of stability or excessive braking on particular axles.
- If the pedal response changes or the minibus veers off course when you brake, reduce the risk and find a safe way to stop. Do not try to verify the fault through repeated heavy braking in traffic or automatically attribute all symptoms to the same cause.
4Parking and securing the vehicle
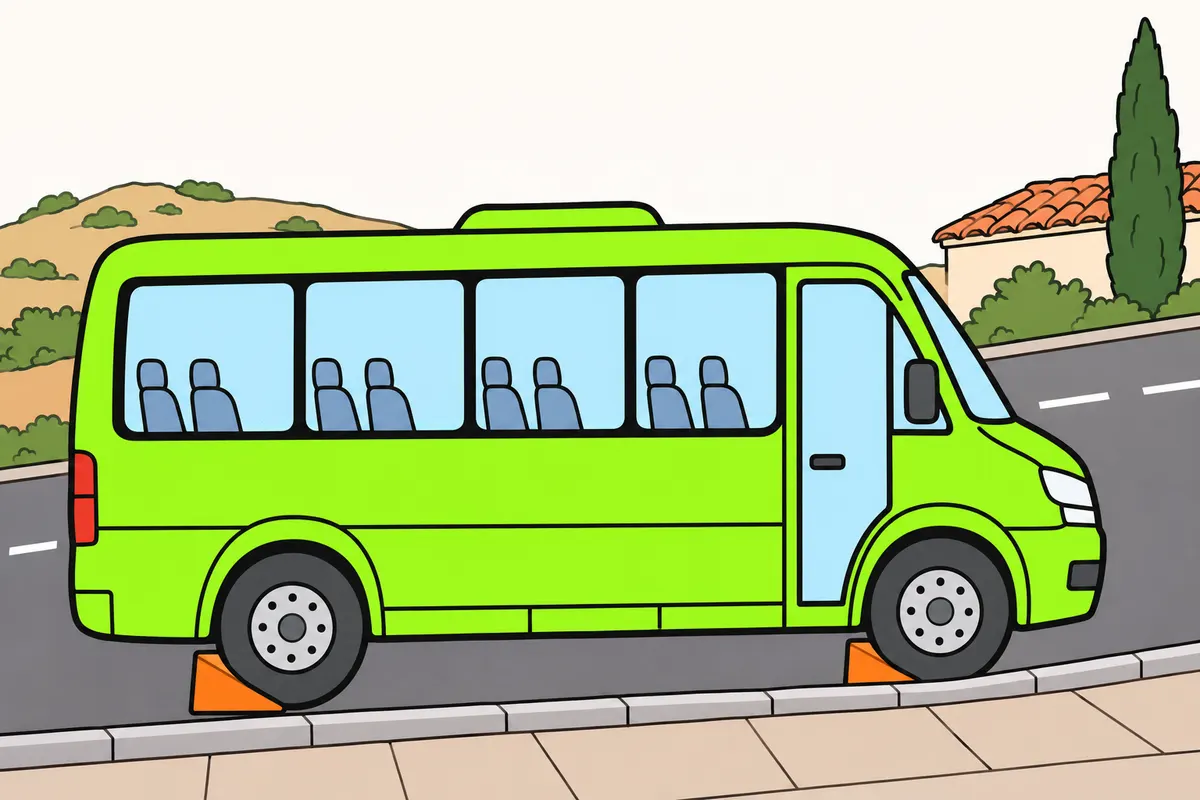
Before leaving your driving position, you must secure the minibus against movement.
| Minibus slope | Gear with a manual gearbox | Steered wheel if resting against the kerb |
|---|---|---|
| Uphill | First gear | Towards the centre of the carriageway |
| Downhill | Reverse gear | Outwards from the carriageway |
Remember
- Stop the engine, switch off the ignition and apply the parking brake.
- With an automatic gearbox, select the parking position where applicable.
- On steep slopes, add chocks or rest a steered wheel against the kerb.
- Do not use stones; remove chocks before driving again.
- As a bus, secure it even when its mass is 3,500 kg or less.
- Do not confuse a door-linked brake with the parking brake.
Exam trap: Wrong: leaving a gear engaged is enough. Right: apply the parking brake and add the measures required for the slope and gearbox.
Read the full explanation
- The parking brake must keep the vehicle stationary even without a driver, maintaining the clamping force through mechanical action. In a spring brake, the spring provides this holding force. [RGV, annex VIII, section 1.2.3](https://www.boe.es/buscar/act.php?id=BOE-A-1999-1826#anviii).
- Before leaving the driving position, you must stop the engine, switch off the ignition and apply the parking brake; with manual transmission, leave first gear engaged when facing uphill or reverse when facing downhill, or select the parking position where applicable. [RGC, art. 92.3](https://www.boe.es/buscar/act.php?id=BOE-A-2003-23514#a92).
- If you stop or park on a significant gradient, you must also secure the minibus with suitable wheel chocks or rest a steered wheel against the kerb: pointing towards the centre of the carriageway when facing uphill and away from it when facing downhill. Do not use stones; remove the chocks when you move off again. [RGC, art. 92.3.d](https://www.boe.es/buscar/act.php?id=BOE-A-2003-23514#a92).
- The bus stop brake or the automatic holding function linked to the doors, if fitted to your minibus, has its own purpose during service stops. Check its function in the manual: the fact that the minibus remains held while passengers board does not mean that you can leave it in that condition.
- You must secure the vehicle in this way because it is a bus, even if the minibus has an MMA (maximum authorised mass) of no more than 3,500 kg. The article separately includes buses and vehicles exceeding that mass; you do not need to meet both conditions. [RGC, art. 92.3.d](https://www.boe.es/buscar/act.php?id=BOE-A-2003-23514#a92).
5Discs, drums and heat
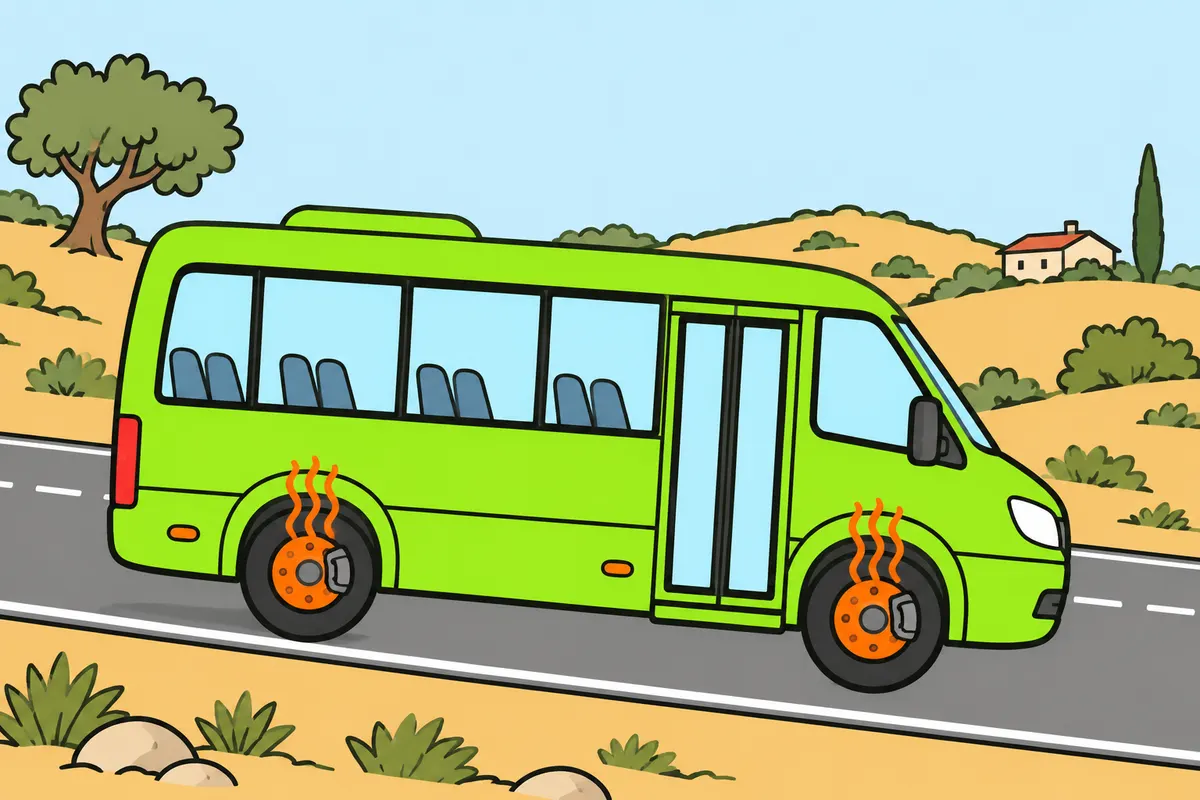
Braking produces heat, and too much heat can reduce your braking ability.
| Brake | Parts you must recognise |
|---|---|
| Disc | Calliper and pads acting on the disc faces |
| Drum | Shoes pressing against the inside surface |
Remember
- Identify brakes by their parts, not the wheel size.
- You can have normal pressure and overheated brakes.
- Pay attention to noises, vibrations, smells and brake wear warnings.
Exam trap: Wrong: normal pressure rules out overheating. Right: brakes can overheat even with enough air.
Read the full explanation
- You recognise a disc brake by the calliper and pads acting on its faces. In a drum brake, the shoes press against its inner surface. In an exam photograph, look for these parts; do not identify the brake type solely by the size of the wheel.
- When you brake through friction, you convert the energy of motion into heat. The disc or drum and its friction materials need to dissipate this heat; a single braking application and a continuous descent impose different thermal loads even when you use the same pedal and the same air pressure.
- The ability to apply a brake and its ability to dissipate heat are different. The pressure indicates the energy available in the pneumatic actuation system; the temperature of the discs, drums and friction materials affects braking effectiveness at the wheels.
- Investigate noises, vibrations, unusual smells, wear warnings on the instrument panel or differences in response. Maintenance preserves effectiveness in both dry and wet conditions; you must not wait until a descent to discover that a brake is working poorly.
6How air travels through the system
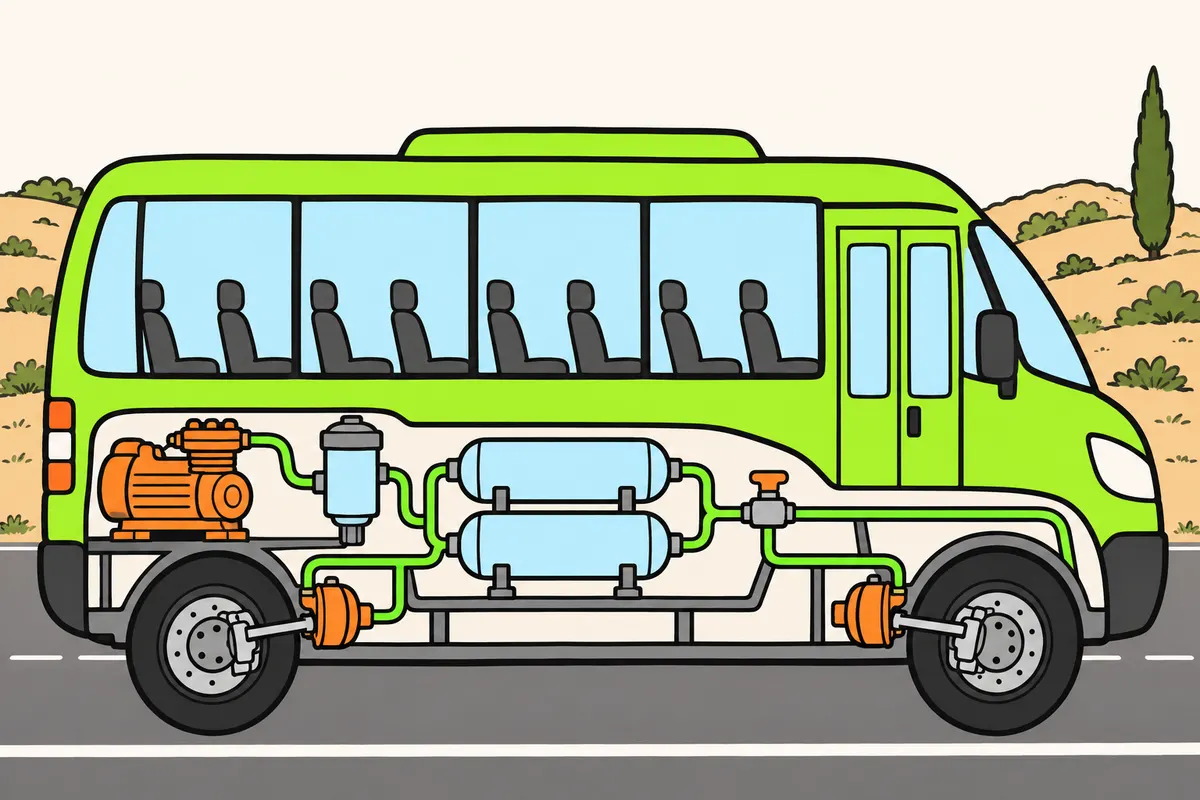
In an air brake system, air transmits the force that operates your brakes.
| Air brake system part | Function |
|---|---|
| Compressor | Produces compressed air |
| Air reservoir | Stores compressed air |
| Chamber | Turns pressure into force to operate the brake |
Remember
- Follow the path: production, treatment, storage, distribution and chambers.
- Friction at the wheels produces braking.
- Repeatedly pressing and releasing the pedal can use up your air reserve.
- The load-sensing valve adjusts rear brake pressure to the load, even without EBS.
Exam trap: Wrong: the reservoir produces air. Right: the compressor produces it and the reservoir stores it.
Read the full explanation
- In an air brake system, you must follow this functional sequence: air production, treatment, storage, distribution and actuation in the brake chambers. Air transmits energy to apply the brakes; friction between pads and discs or shoes and drums produces braking at the wheels.
- The compressor produces compressed air and the reservoirs store it. The reserve allows you to meet braking demands while the system replenishes the air.
- In a conventional system, you use the pedal to control valves that regulate the pressure sent to the brake chambers. You do not push the pads directly with the force of your leg; this allows you to obtain a high braking force without the force you apply to the pedal having to equal the force at the wheels.
- Each application and release can consume air from the reserve. If you operate the pedal repeatedly without need, especially when the compressor is not producing air, you can exhaust that reserve. The available air is finite even if the minibus has protective circuits.
- In a conventional air brake system, the load-sensing brake valve adjusts the pressure sent to the rear axle brakes to suit the weight that axle supports. You may encounter this regulation without EBS; it prevents the same pressure from being applied when the minibus is empty as when it is laden. The inspection includes the condition and adjustment of this valve. [RD 920/2017, annex I, section 1.1.17](https://www.boe.es/eli/es/rd/2017/10/23/920/con).
7Compressor and pressure regulation
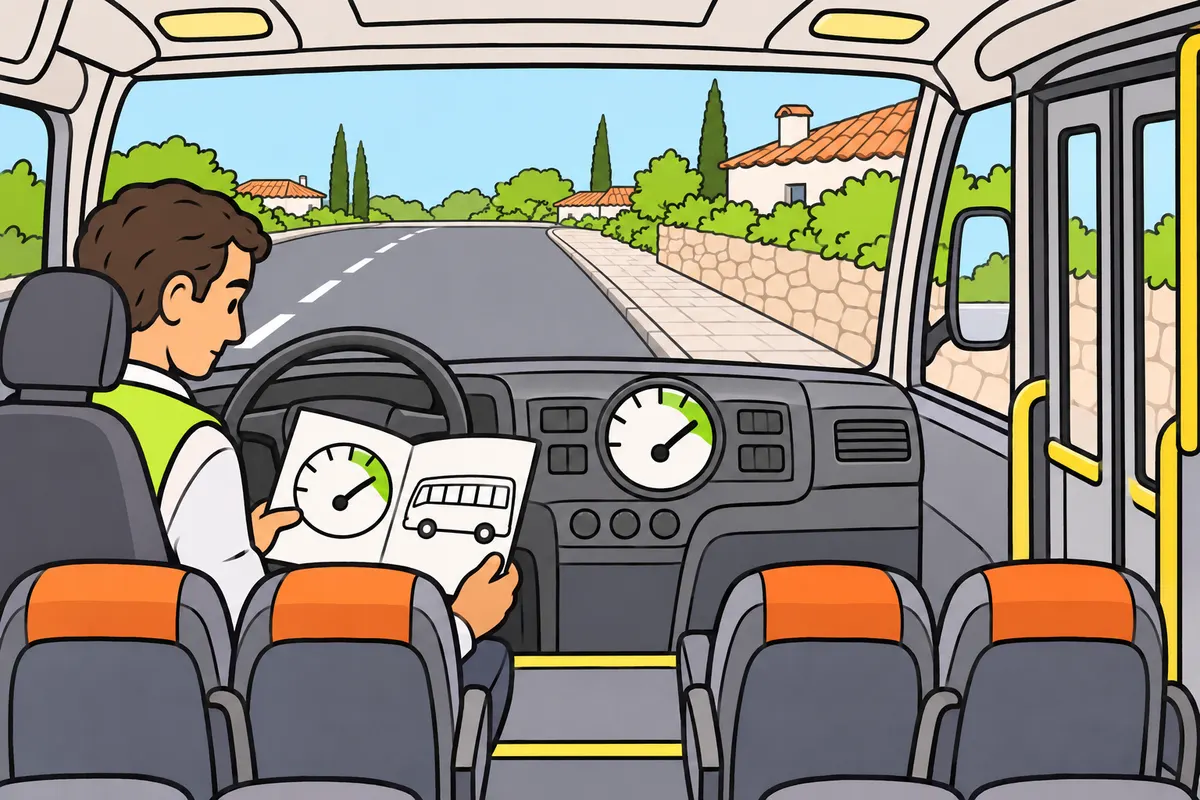
You must check pressure against your minibus manual.
| Operation | Purpose |
|---|---|
| Limiting maximum pressure | Prevent excessive pressure |
| Quick release at the chambers | Help release the brake |
| Draining the air reservoir | Remove collected water |
Remember
- The compressor supplies compressed air to the circuit.
- The regulator stops charging when the specified pressure is reached.
- Charging starts again when pressure falls sufficiently.
- Do not confuse this normal cycle with a continuous leak.
Exam trap: Wrong: all minibuses use the same operating pressure. Right: check your model's pressure values and warnings.
Read the full explanation
- The compressor draws in air and supplies it under pressure to the circuit. In a conventional installation, it may be driven by the engine; you must check your minibus's arrangement, as air production does not require every vehicle to use the same mechanical drive.
- The regulator controls the charging of the circuit within its operating limits. When the specified pressure is reached, it triggers a cut-out or unloading of useful air production; when the pressure drops sufficiently, charging resumes. This cycle alternates between charging and unloading; a persistent drop in pressure indicates different behaviour.
- The pressure relief valve that limits maximum pressure prevents excessive pressure. You must not confuse it with the chambers' quick-release valve or with the water drain on an air reservoir: all three operations can release air, but they serve different purposes.
- Check the manual for the normal pressure, the compressor's cut-in and cut-out values and the vehicle's warning thresholds. There is no single operating pressure you can apply to all minibuses: a figure in a diagram applies to that installation and does not authorise you to set off in any model.
8Dryer, moisture and draining
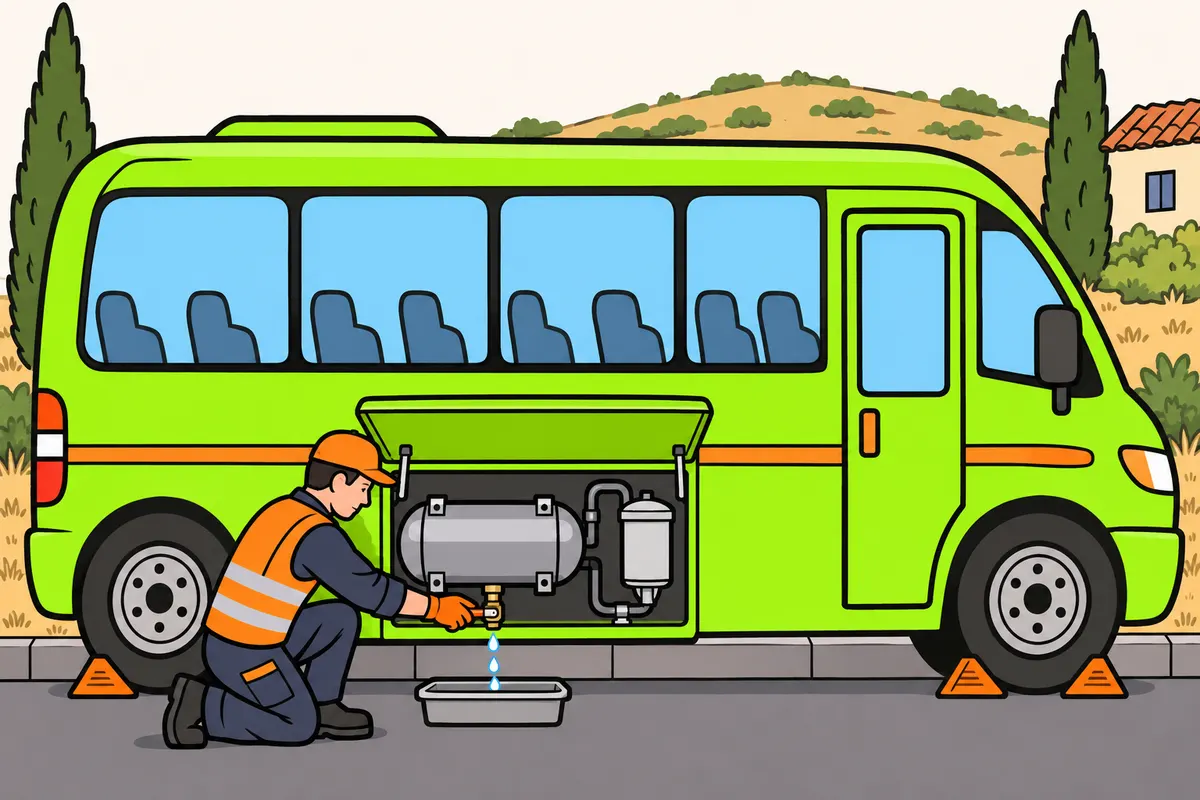
You must maintain air treatment to keep moisture and dirt out of the brakes.
| Part or operation | What you must distinguish |
|---|---|
| Filter | Traps dirt |
| Dryer | Removes moisture |
| Draining | Removes collected water |
Remember
- The dryer reduces the risk of ice inside the lines.
- Follow the manufacturer's instructions for manual or automatic draining.
- Secure the vehicle before emptying reservoirs.
- Do not add alcohol or antifreeze on your own initiative.
- Report unusual water build-up: draining it does not fix the cause.
Exam trap: Wrong: draining an air reservoir means bleeding a hydraulic brake. Right: draining removes collected water; bleeding removes bubbles from the fluid.
Read the full explanation
- The air drawn in contains moisture and can produce condensation when compressed and cooled. The dryer removes moisture and reduces the risk of ice in the pipes. [DGT, Manual VIII, air treatment](https://sede.dgt.gob.es/.galleries/permisos-de-conducir/certificacion-aptitud-profesores-formacion-vial/2024/Manual-VIII-Mecanica-2024.pdf).
- The filter traps impurities and the dryer deals with moisture. They may be integrated into an air treatment unit. Abnormal amounts of dirt, water or oil can damage valves and other circuit components.
- Draining an air reservoir means removing condensate through the device provided. Follow the manufacturer's maintenance instructions, using manual or automatic draining according to the installation; you cannot set an identical interval for all minibuses or empty reservoirs without first securing the vehicle.
- You must not add alcohol or antifreeze on your own initiative. A system designed to dispense a product and one fitted with a cartridge dryer do not necessarily accept the same treatment; you must use only products and procedures compatible with the equipment installed.
- If an abnormal amount of water accumulates, you must report it so that the air treatment system and dryer maintenance can be checked. Draining the condensate does not prove that you have repaired the cause. You must also distinguish this operation from bleeding air bubbles out of a hydraulic circuit.
9Air reservoirs and circuit protection
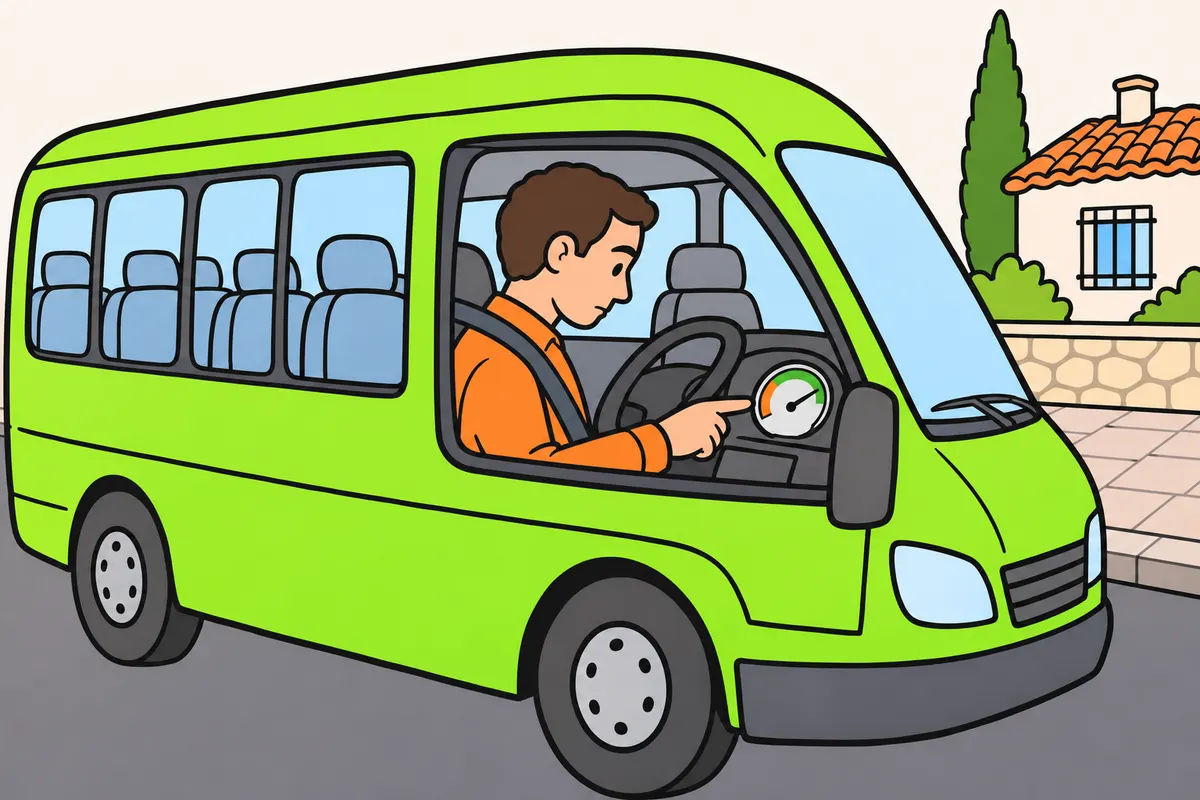
You must check the brake air reserve even if other air-powered equipment works.
| Part | Function |
|---|---|
| Air reservoir | Stores the air reserve |
| Brake chamber | Turns pressure into force |
Remember
- Air reservoirs store compressed air.
- The chamber turns pressure into force.
- The non-return valve lets air through and prevents it flowing back.
- Multi-circuit protection helps isolate a circuit that is losing pressure.
- This protection neither repairs the fault nor creates an unlimited air supply.
Exam trap: Wrong: working doors mean you can leave. Right: check brake pressure directly.
Read the full explanation
- Air reservoirs hold a reserve of compressed air for service braking and other intended functions. The reservoir stores energy, and the brake chamber converts the pressure it receives into movement and actuating force.
- The non-return valve allows flow in one direction and prevents flow back. This preserves the reserve in the protected section if pressure drops upstream.
- The multi-circuit protection valve distributes air and helps isolate a circuit that is losing pressure. A diagram may show it as a four-way valve; protecting the remaining circuits does not mean repairing the faulty circuit or creating an unlimited reserve.
- The brakes may share the air supply with the suspension, doors or other air consumers, with protection and priorities specified by the manufacturer. Check brake pressure directly; working doors or bodywork reaching its ride height are not sufficient grounds for setting off.
10Pressure gauges and low-pressure warnings
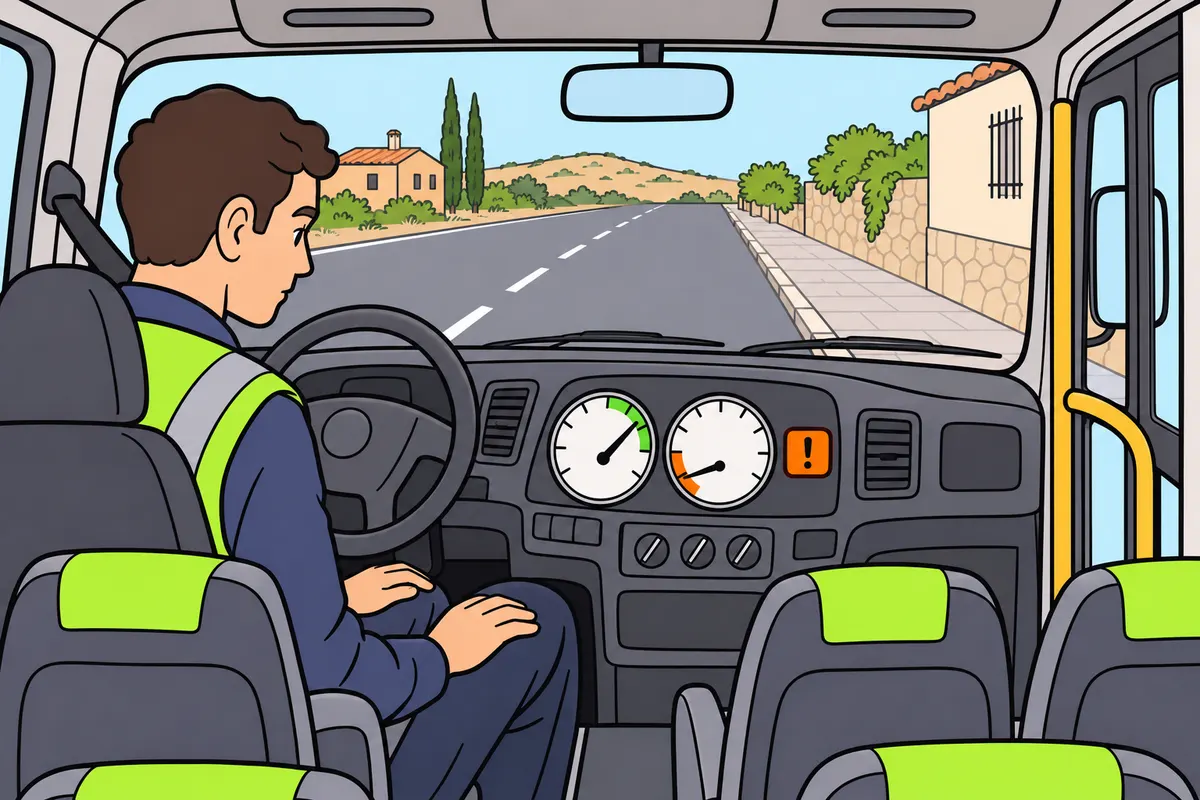
You must check every pressure indicator and act on warnings.
Remember
- Do not look only at the highest reading.
- Before leaving, wait for specified pressure and check warnings as the manual directs.
- Do not accelerate against a spring brake held on by low pressure.
- If a pressure warning appears while driving, seek a safe stop.
- Check your model's pressure and charging time.
Exam trap: Wrong: you can wait for the springs to act. Right: with insufficient pressure, seek an immediate, safe stop.
Read the full explanation
- Read all the brake circuit pressure indicators on the instrument panel. If there are two needles or two readings, do not assess only the higher one: an adequate reserve in one circuit can coexist with insufficient pressure in another.
- Before moving off, you must wait until the specified operating pressure is reached and the warnings clear in accordance with the vehicle's procedure. You must not try to use the accelerator to overcome a spring brake that remains applied because of insufficient pressure.
- A visual or audible low-pressure warning requires an immediate, safe response. If it appears while you are driving, seek to stop using the means available; do not wait for the springs to apply automatically or for the pedal to stop producing any braking at all.
- You must know the operating pressure, warning threshold and permitted charging time for your model. Do not memorise a figure from a diagram as if it were a universal rule: inspection regulations require checks of pressure, warnings and recovery time in accordance with the applicable requirements. [RD 920/2017, annex I, section 1.1.3](https://www.boe.es/eli/es/rd/2017/10/23/920/con).
11Chambers and quick release
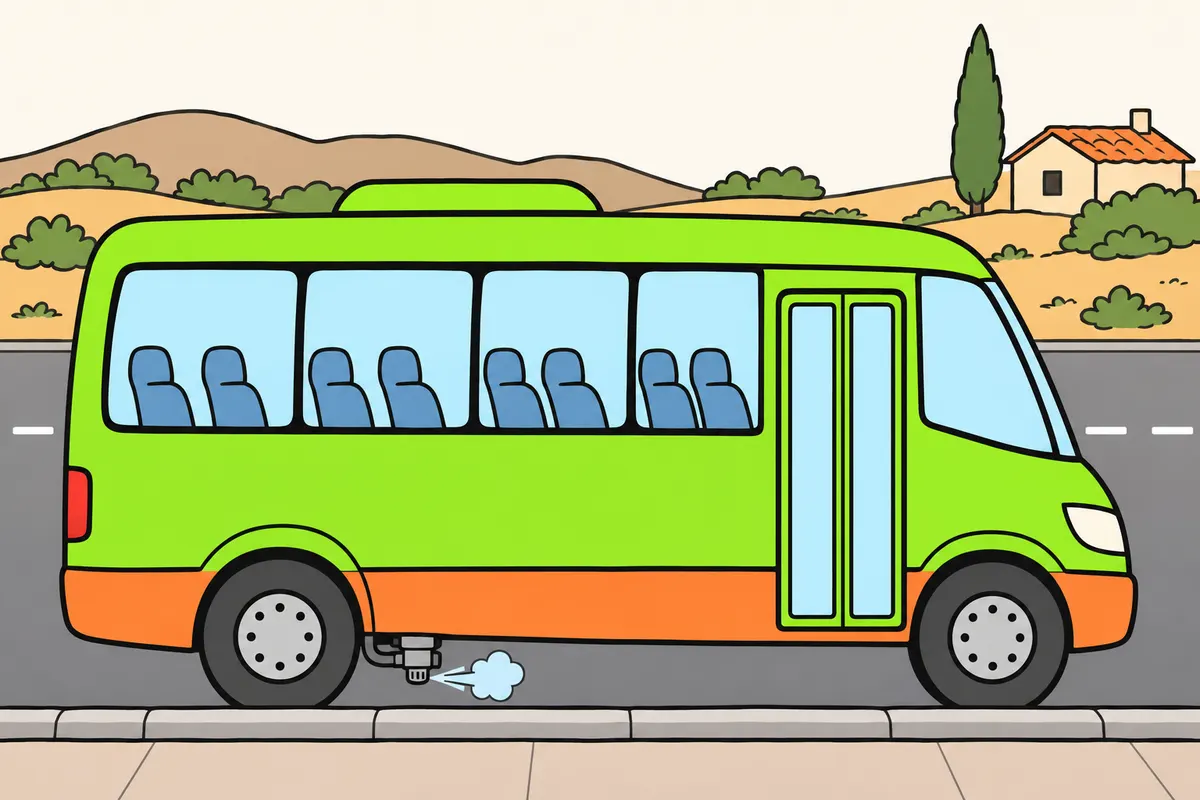
You must distinguish the braking command, the chamber's force and brake release.
| Escaping air | How you should interpret it |
|---|---|
| Brief discharge intended by the system | Can be normal |
| Persistent leak with pressure loss | You must investigate |
Remember
- In a service brake chamber, air moves a diaphragm or piston.
- When you stop braking, air escapes and the mechanism returns.
- The relay valve uses air from a nearby reservoir.
- Investigate a persistent leak that causes pressure loss.
Exam trap: Wrong: quick release removes moisture. Right: it helps air escape from the chambers to release the brake.
Read the full explanation
- In a conventional service brake chamber, air pressure moves a diaphragm or piston and actuates the brake mechanism. When you stop demanding braking, air is released and the mechanism returns.
- Quick release allows air to escape close to the chambers when you stop braking. Its function is to help the brake release; it does not remove moisture from the reservoirs or, on its own, determine the circuit's maximum storage pressure.
- Relay valves allow air from a nearby reservoir to respond to a braking command. The control signal activates the valve and the nearby reserve supplies the airflow, speeding up the response in long circuits or trailer circuits.
- A brief discharge intended by the system may be normal; a persistent air leak with a loss of pressure must be investigated. Consider the symptoms together and follow the manufacturer's procedure, without deciding that every hiss is a fault or that all air leaks are harmless.
12Spring brakes
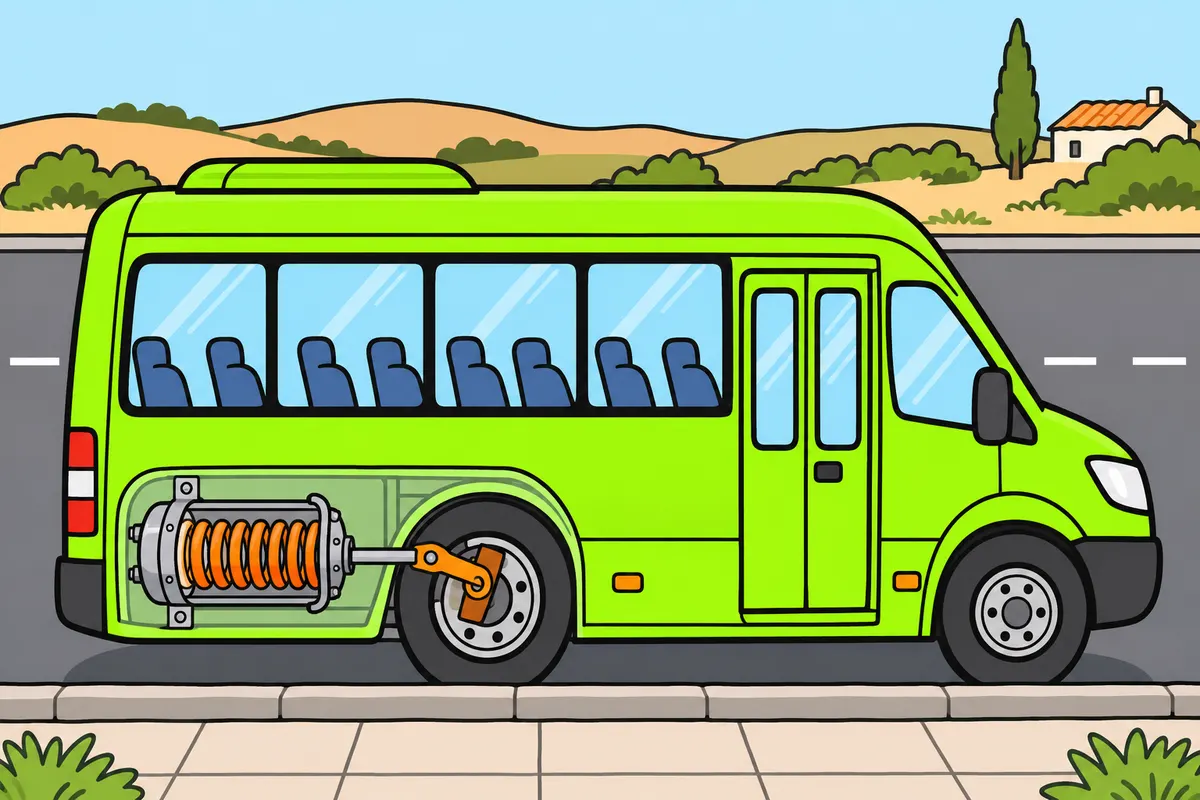
In a spring brake, the spring applies the brake and air keeps it released.
| Air brake section | Effect of air pressure |
|---|---|
| Service | Applies normal braking |
| Spring | Compresses the spring and releases the brake |
Remember
- Applying the parking brake releases air, letting the spring apply the brake.
- A major pressure loss can apply the spring brakes.
- Stop in response to warnings: do not wait until the air runs out.
- Do not open the chamber: the spring can store energy even without air.
- Mechanical release requires specialist assistance and securing the vehicle against movement.
- Do not drive with the spring disabled to bypass a fault.
Exam trap: Wrong: air applies the spring parking brake. Right: air compresses the spring to release that brake.
Read the full explanation
- In a spring brake chamber, the spring applies the brake and air keeps it released by compressing that spring. In the pneumatic service brake section, by contrast, you supply pressure to apply normal braking.
- When you apply the parking brake in this system, air is released from the corresponding chamber and the spring applies the brake. Keeping the vehicle stationary does not depend on maintaining continuous air pressure to produce the parking brake force; it depends on the spring's mechanical force.
- A major loss of pressure can cause the spring brakes to apply. You must stop when warnings appear and maintain control: this safety function does not guarantee a smooth stop or allow you to keep driving until the air runs out.
- You must not open a spring brake chamber or work on its spring. It can store dangerous energy even without air pressure. Mechanical release, where provided, forms part of a specialist recovery procedure and requires the vehicle to be secured against movement.
- You must not drive with the spring disabled to bypass a fault. If it is released mechanically for work on the vehicle, you cannot assume that the parking brake function it provided is available; you must follow the measures and limitations specified by technical assistance.
13Hydraulic actuation and bleed valve
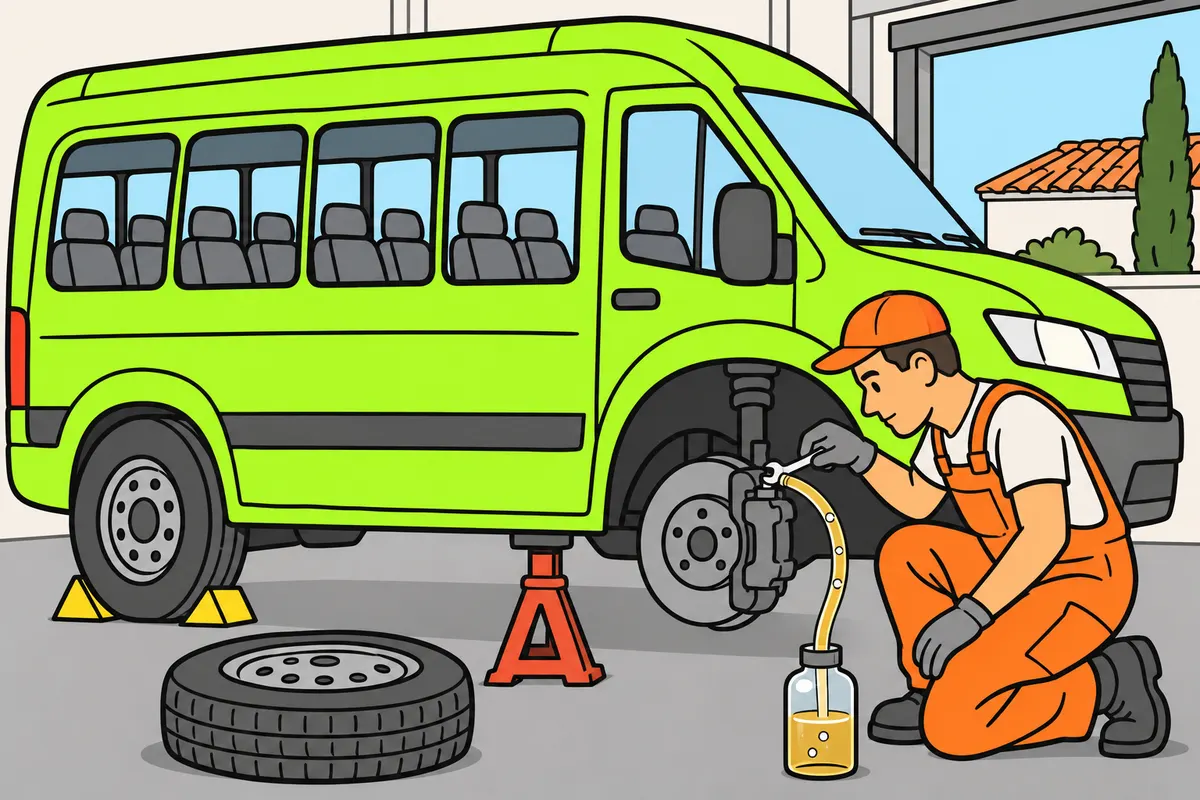
With hydraulic brakes, you transmit pedal pressure through fluid.
| Hydraulic brake fault | What you must distinguish |
|---|---|
| Loss of power assistance | Different from failure of the hydraulic circuit |
| Failure of the hydraulic circuit | Follow the procedure for that fault |
Remember
- Air in the fluid makes pressure transmission less effective.
- The bleed screw lets a workshop remove bubbles using the correct procedure.
- Use only the fluid specified by the manufacturer.
- Topping up the reservoir does not repair a leak.
- If pedal response is abnormal, you need an inspection.
Exam trap: Wrong: the bleed screw fills the circuit. Right: it removes bubbles using the workshop procedure.
Read the full explanation
- In a minibus with hydraulic brake actuation, you must understand how the pedal relates to the pressure transmitted through the fluid to the wheel brakes. Servo assistance and its warnings depend on the model fitted. Do not look for brake air reservoirs in a system that does not use compressed air for this purpose.
- Air bubbles are compressible and impair the transmission of hydraulic pressure. The bleed valve allows them to be expelled using the workshop procedure; it is neither the normal filling point nor a maximum pressure regulator like those you study in the pneumatic system.
- Use the specified fluid and follow the manufacturer's checking conditions if your vehicle has this circuit. Topping up a reservoir does not repair a leak, and mixing products because they look alike or are both called oil can damage the system.
- The procedure for dealing with a fault depends on the actuation system fitted and the specific failure. Consult the minibus's emergency instructions to find out what residual braking capacity remains and how to use it; a procedure intended for a hydraulic circuit does not automatically apply to a pneumatic one.
- Loss of servo assistance and failure of the hydraulic circuit are different faults: they can produce different pedal sensations, and you must identify the fault. An abnormally hard or spongy pedal, or one that sinks, requires inspection; you must not diagnose the cause solely by feel or continue with impaired braking capacity.
14ABS and wheel locking
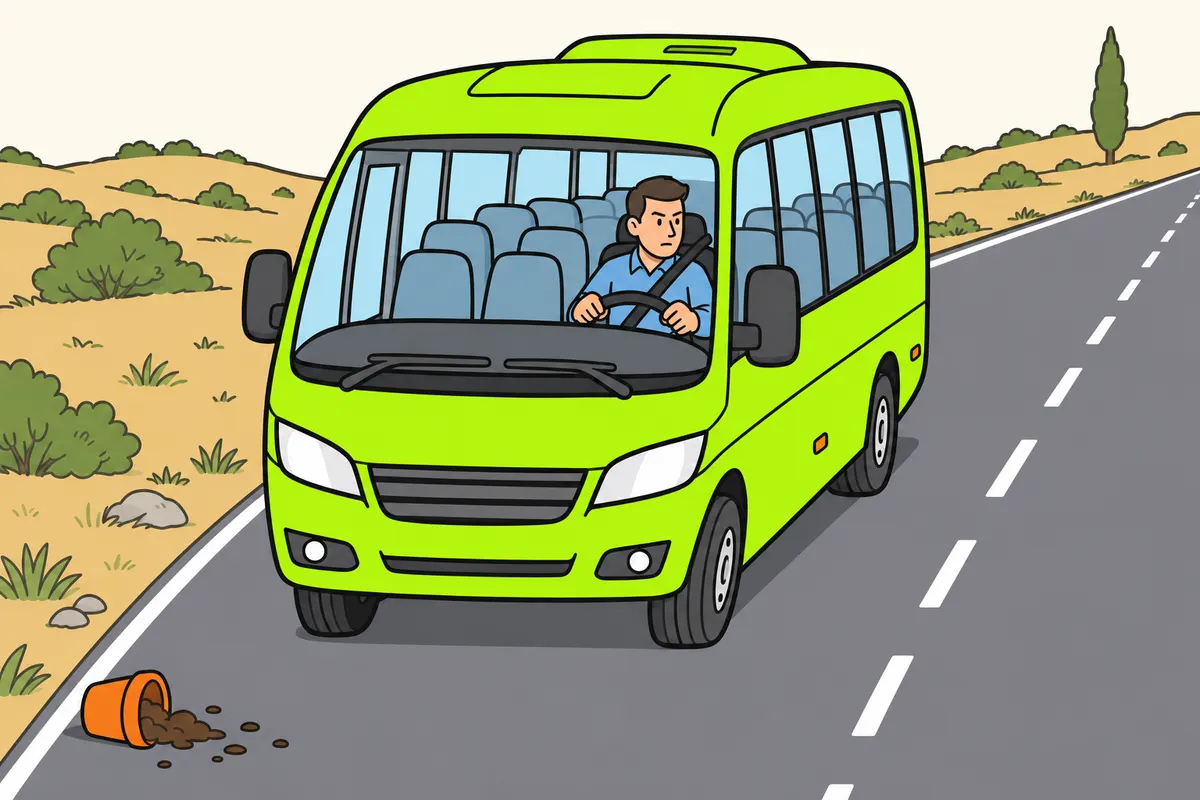
With working ABS, maintain emergency braking while steering the minibus.
Remember
- Press the brake firmly and maintain the necessary pressure.
- Do not release or pump the pedal because of normal ABS pulsations.
- You may not feel vibration through every pedal.
- ABS helps you keep steering within the available grip.
- It neither increases grip nor guarantees a shorter stopping distance.
- For a fault warning, consult the manual and follow its instructions.
Exam trap: Wrong: ABS always makes you stop sooner. Right: on loose surfaces, you may need more space.
Read the full explanation
- ABS detects a tendency for the wheels to lock using wheel rotation information and regulates braking pressure. It helps you retain steering control during heavy braking, within the available grip; it does not increase the grip provided by the road surface.
- In an emergency with ABS working, you must press the brake firmly and maintain the necessary pressure while steering the minibus along a safe path. You must not pump or release the pedal because of the system's normal pulsations. [DGT, emergency braking](https://www.dgt.es/comunicacion/noticias/20260720-reaccion-frenadas-de-emergencia/).
- The pedal sensation during ABS regulation depends on the system fitted. In some minibuses you may feel pulsations or hear noises; in others, its operation is less noticeable. The absence of noticeable vibration does not allow you to conclude that the ABS is faulty.
- ABS does not guarantee that you always stop in a shorter distance or prevent every accident. On loose surfaces, the distance may be greater than with a locked wheel, although retaining steering control can be crucial; you must adapt your driving and must not treat this electronic aid as a margin for driving faster.
- If the ABS fault warning remains on, you must check its meaning and act according to the manufacturer's instructions. Basic braking may remain available without the anti-lock function, but you must not assume that every warning allows you to continue or indicates total brake failure.
15EBS and electronic coordination
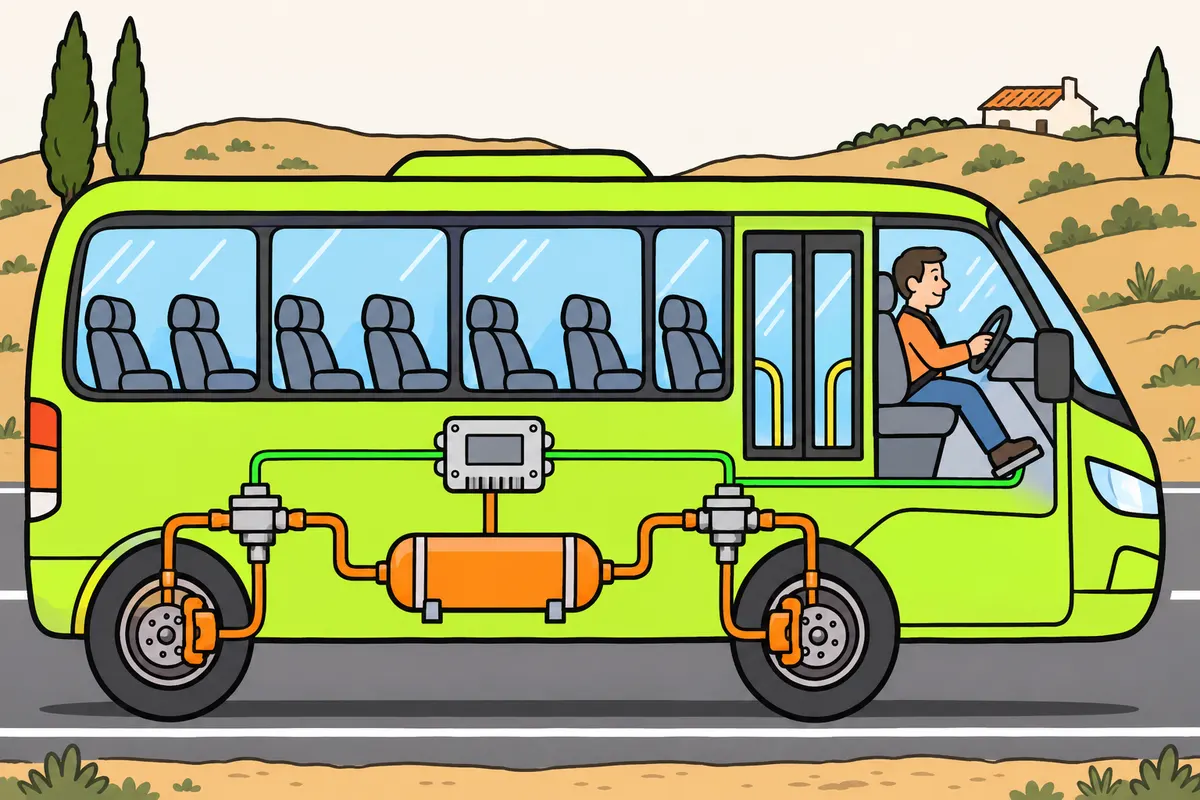
With EBS, electronic control coordinates your braking.
| System | Function you must distinguish |
|---|---|
| ABS | Prevents wheel lock under braking |
| ASR | Limits wheelspin when accelerating |
| ESP | Helps maintain stability |
| EBS | Controls braking electronically |
Remember
- In an electro-pneumatic system, commands are electronic and braking force comes from air.
- Keep checking air reserves, lines and chambers.
- Know how your equipment coordinates brakes and auxiliary braking.
- Report warnings: clearing them does not repair the fault.
Exam trap: Wrong: EBS replaces the compressor. Right: an electro-pneumatic system still needs compressed air.
Read the full explanation
- EBS is the electronic control of the braking system. It coordinates the brakes' response when you press the pedal and reduces the delays of conventional pneumatic actuation; it is neither a retarder nor the name of a friction material.
- In an electropneumatic system, the command can be transmitted electronically while the energy that applies the brakes comes from compressed air. You must therefore continue checking air reserves, pipes and chambers even if the minibus has EBS: electronics do not replace the compressor.
- ASR limits wheelspin when you accelerate; ESP helps you maintain stability. ABS and EBS perform the braking functions described in these sections. They can work together, but the abbreviations are not interchangeable and do not guarantee control at every speed or level of grip.
- Depending on the equipment fitted, the system may coordinate the service brakes and auxiliary braking. You must understand this integration before selecting controls or stages: a control unit distributing the braking demand does not remove each device's temperature, pressure or grip limits.
- You must not cover a warning lamp or clear a warning and consider the system repaired. The inspection includes the warning devices and the faults indicated by EBS; you must report the fault and follow the diagnostic procedure. [RD 920/2017, Annex I, section 1.7](https://www.boe.es/eli/es/rd/2017/10/23/920/con).
16What retarders do
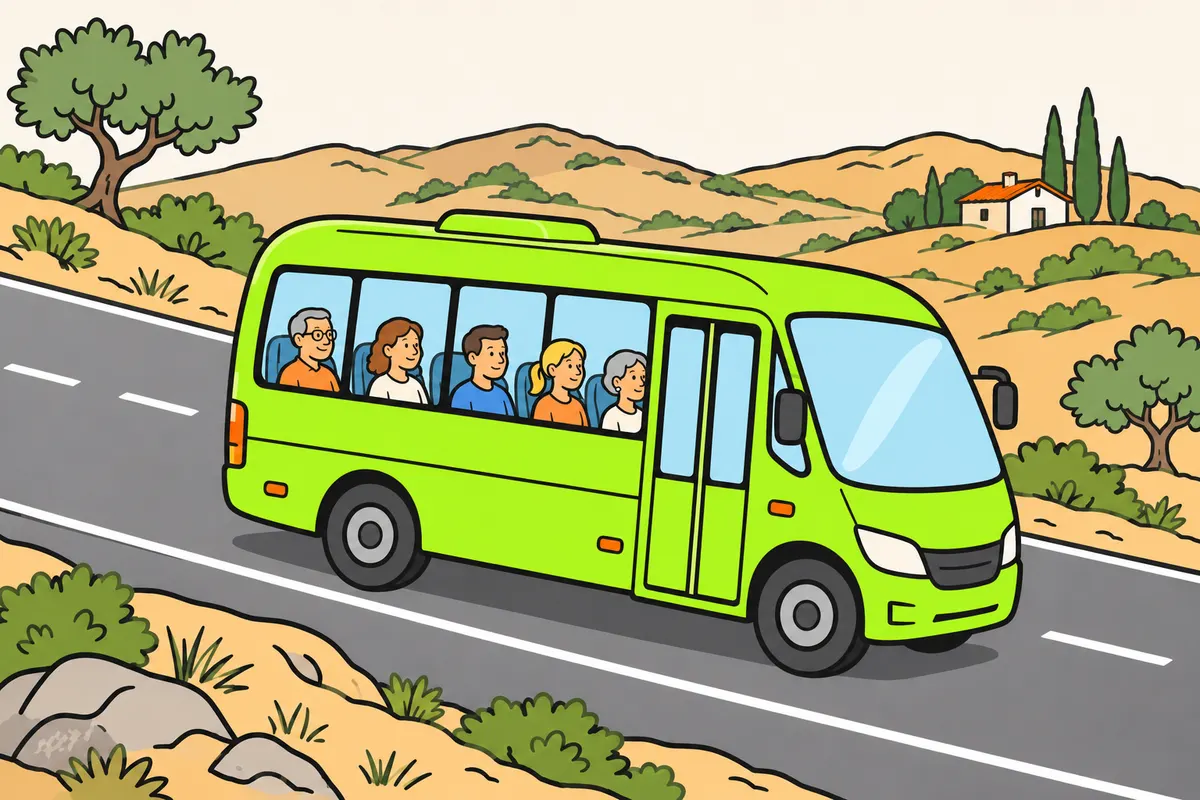
With a retarder, you reduce the work and heating of the service brakes.
Remember
- Use auxiliary braking in the conditions permitted by the manufacturer.
- Increase its strength gradually to avoid jolts.
- To stop, use the brakes intended for stopping.
- To keep the minibus stationary, use the parking brake.
Exam trap: Wrong: the retarder replaces the parking brake. Right: auxiliary braking does not keep the minibus stationary.
Read the full explanation
- Auxiliary braking limits increases in speed and reduces heating of the service brakes, especially on long descents. By absorbing some of the energy of motion, it reduces the work the discs or drums have to do. You can use it in other situations permitted by the manufacturer. [DGT, Manual VIII, retarders](https://sede.dgt.gob.es/.galleries/permisos-de-conducir/certificacion-aptitud-profesores-formacion-vial/2024/Manual-VIII-Mecanica-2024.pdf).
- The retarder provides sustained braking to control your speed; to complete a stop, you must use the brakes intended for that purpose. The retarder control regulates the reduction in speed; the parking brake control secures the vehicle against movement. [RGV, Annex VIII, section 1.2.3](https://www.boe.es/buscar/act.php?id=BOE-A-1999-1826#anviii); [UN Regulation No. 13, section 2.15](https://www.boe.es/doue/2026/746/L00001-00303.pdf).
- Select the intensity progressively to avoid jolts that could unbalance passengers, especially if you carry standing passengers in authorised spaces. The control may have several stages or be integrated with the service brake pedal, depending on the equipment; check the manual to identify how you activate and cancel retarder braking in your minibus.
17Engine braking and the exhaust brake
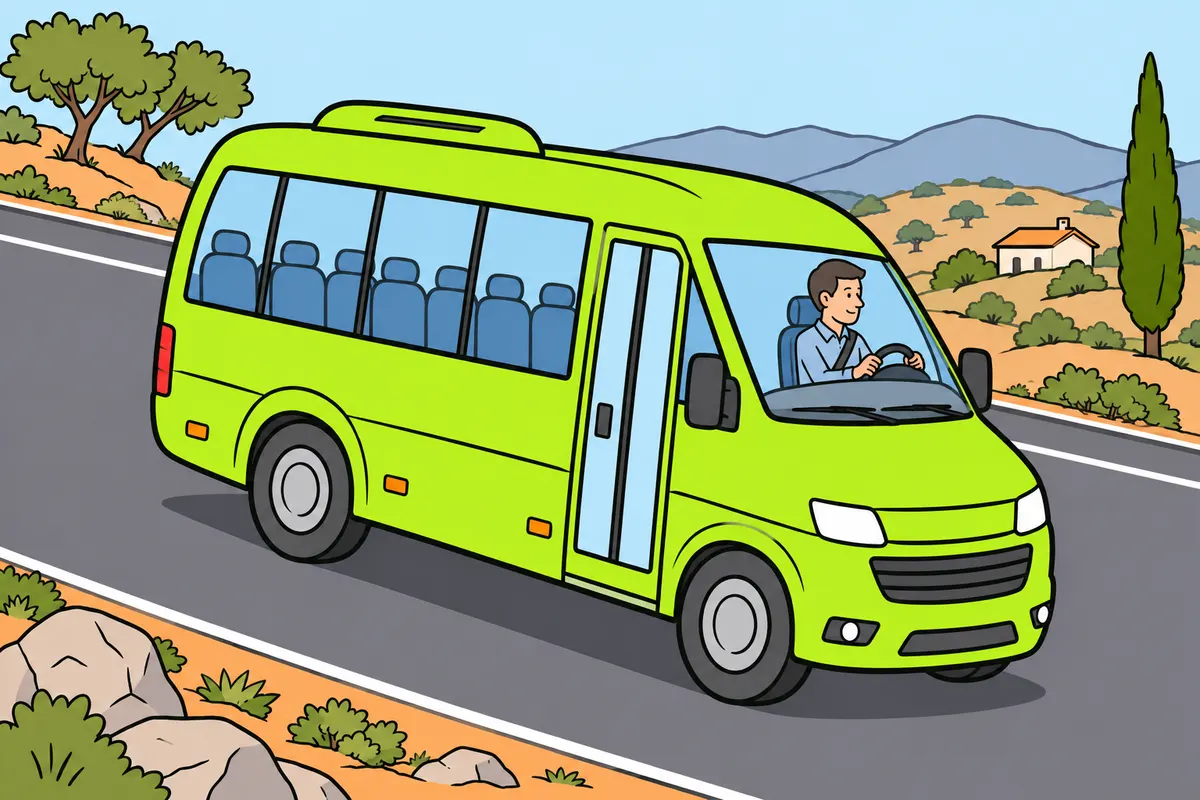
To use engine braking, keep a suitable gear engaged and the transmission connected.
Remember
- Release the accelerator with a gear engaged to use the engine's resistance.
- Too high a gear gives little engine braking.
- Downhill, keep the engine running and the transmission connected.
- The exhaust brake restricts exhaust gases and works with fuel injection cut-off.
- Know your fitted technology and keep within the specified engine speed.
- Avoid changing down if this would make the engine turn too fast.
Exam trap: Wrong: going downhill in neutral preserves engine braking. Right: you need to keep the transmission connected.
Read the full explanation
- When you release the accelerator with a gear engaged and the transmission connected, you use the engine's resistance. Select a suitable gear: too high a gear provides little engine braking.
- On a descent, you must keep the transmission connected and the engine running to retain engine braking and the auxiliary functions provided.
- The exhaust brake restricts the flow of exhaust gases to increase the engine's resistance; its control is coordinated with the fuel injection cut-off. Other engine brakes act on valve timing or compression. You must understand the technology fitted. [DGT, Manual VIII, unit 10](https://sede.dgt.gob.es/export/sites/dgt/.galleries/permisos-de-conducir/certificacion-aptitud-profesores-formacion-vial/2026/MANUAL-VIII-Mecanica.pdf).
- Observe the engine speed specified by the manufacturer and avoid downshifts that cause the engine to over-rev. Check the rev counter and the minibus's instructions.
18Hydraulic retarder
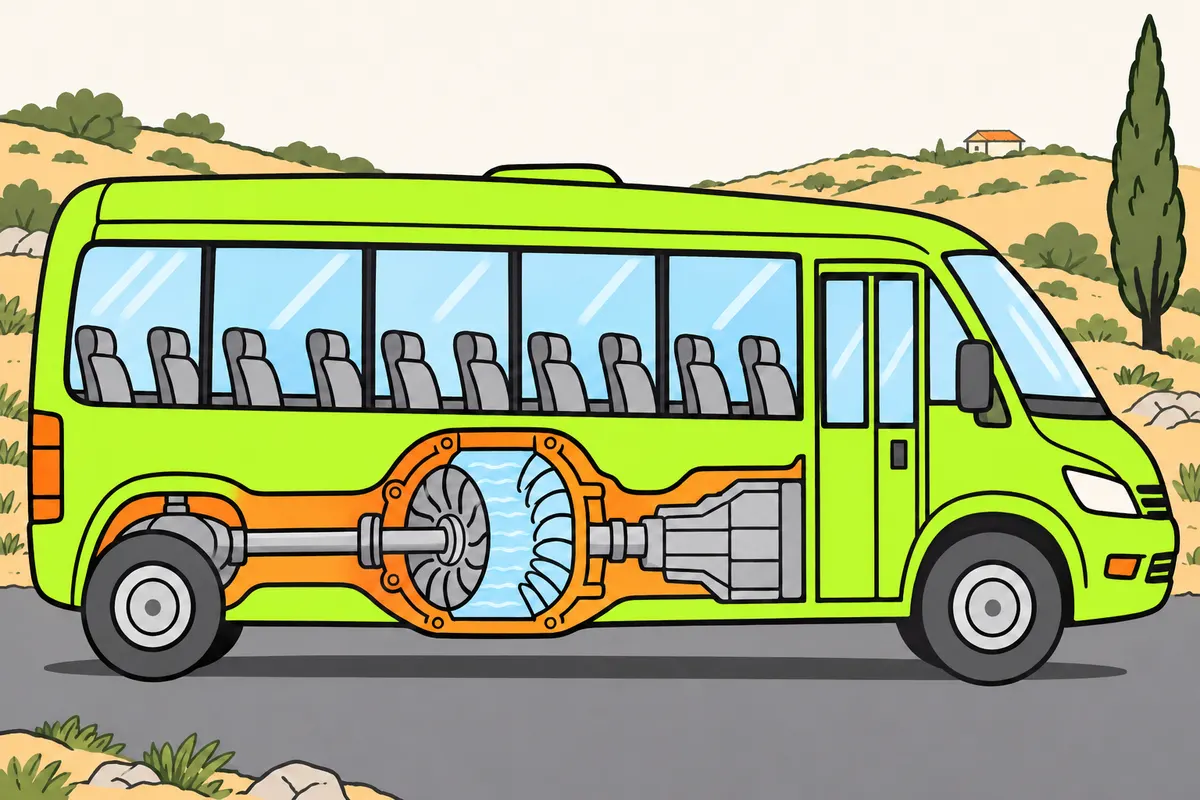
With a hydraulic retarder, fluid movement slows your vehicle.
Remember
- Fluid moves between a rotating rotor and a fixed stator.
- If connected to the transmission, it brakes the driven wheels.
- Its effectiveness depends on how fast the connected part rotates.
- Watch temperature: the equipment may reduce braking to protect itself.
- Use the specified oil for maintenance.
Exam trap: Wrong: you can use brake fluid as retarder oil. Right: these fluids are not interchangeable.
Read the full explanation
- In a hydraulic or hydrodynamic retarder, fluid moving between a rotating rotor and a fixed stator produces a resisting torque.
- If it is coupled to the transmission, it brakes the driving wheels. It may be integrated into the gearbox or elsewhere in the transmission; its effectiveness depends on the rotational speed of the component to which it is connected.
- The absorbed energy is converted into heat. Monitor temperature warnings: the system may automatically reduce its braking effect to protect itself.
- For maintenance, you must use the specified oil: its fluid is not interchangeable with the fluid in the wheel brakes' hydraulic circuit.
19Electric retarder
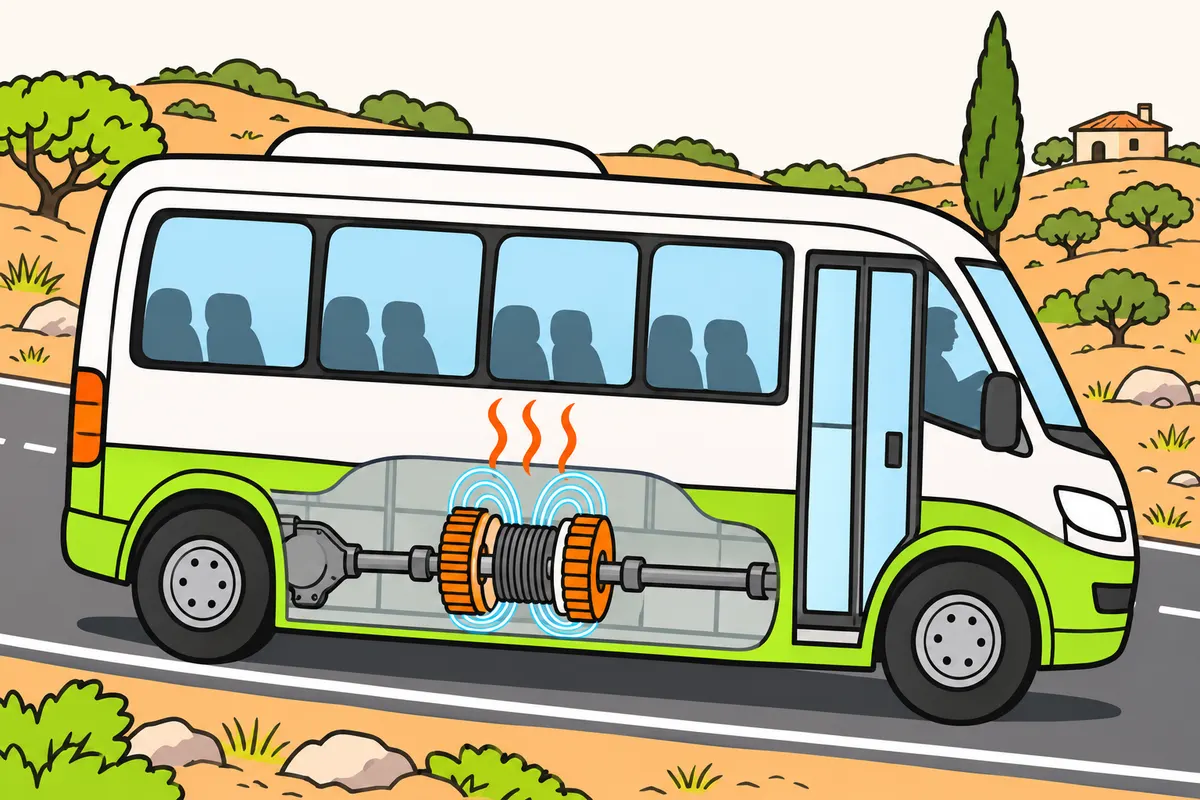
With an electric retarder, a magnetic field slows rotation.
| Retarder | Operating principle you must recognise |
|---|---|
| Electric | Magnetic field and eddy currents |
| Hydraulic | Fluid movement |
Remember
- It works without friction between the rotor and stator.
- It still produces heat and needs cooling and maintenance.
- If it acts on the transmission, it brakes the driven wheels.
- Near a stop, it becomes less effective: finish stopping with the brakes.
- Do not confuse it with energy recovery or an electric parking brake.
Exam trap: Wrong: without friction, it produces no heat. Right: it turns the energy it absorbs into heat.
Read the full explanation
- In an electromagnetic retarder, the magnetic field induces eddy currents in the rotors and produces torque opposing rotation, without friction between the rotor and stator. This electromagnetic principle allows you to distinguish it from a hydraulic retarder.
- The equipment converts the energy it absorbs into heat. Follow its cooling and maintenance requirements even though it does not wear out brake linings.
- If it acts on the transmission, it applies a retarding force to the driving wheels. Its effectiveness decreases as you approach a standstill; complete the stop using the vehicle’s brakes.
- You may find this retarder on buses and minibuses fitted with it. Its function differs from energy recovery in an electric vehicle and from an electrically operated parking brake.
20Grip and auxiliary retardation
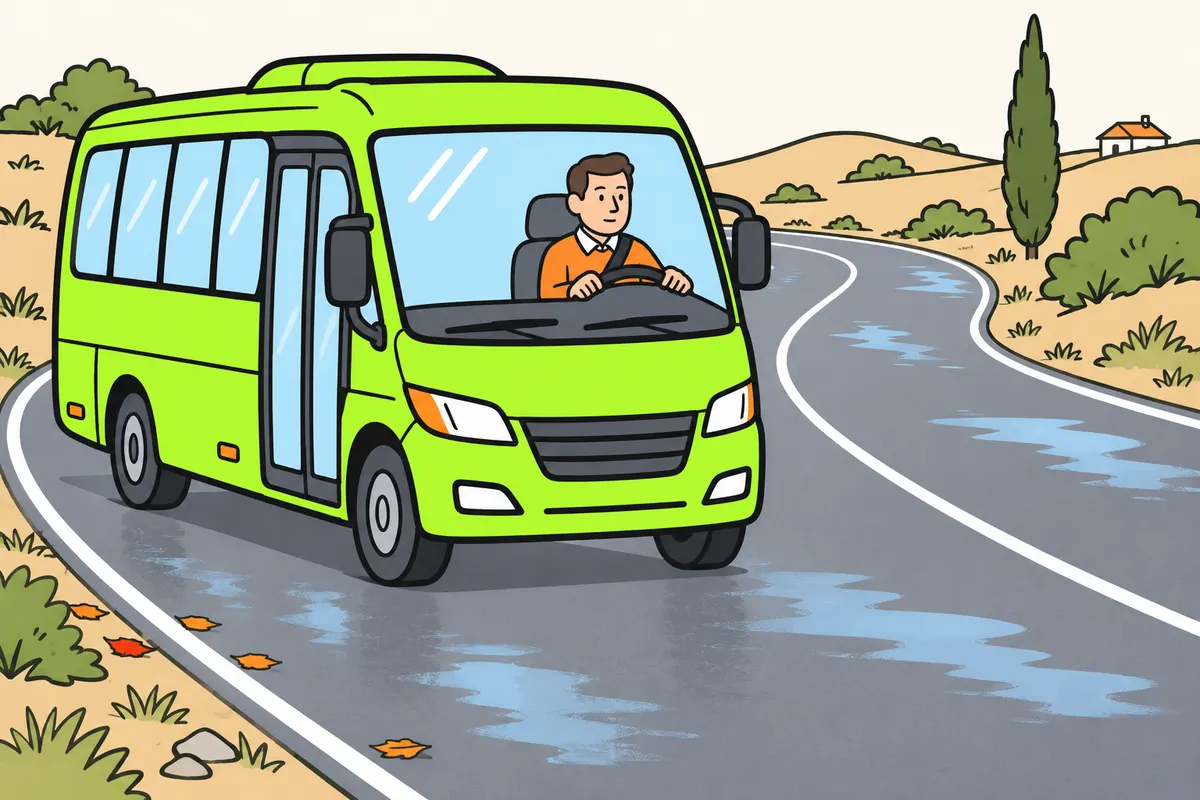
On slippery surfaces, you must use auxiliary braking with particular care.
Remember
- Braking at the driven axle can make you lose grip.
- Follow the manufacturer's restrictions for surface, load and speed.
- Apply permitted stages gently.
- Check how your retarder works with ABS and EBS.
- Keep some grip in reserve, especially on bends.
Exam trap: Wrong: electronics guarantee grip when you use the retarder on ice. Right: follow the manufacturer's restrictions.
Read the full explanation
- Retardation concentrated on the driving axle can cause it to lose grip on a slippery surface. Follow the manufacturer’s restrictions and apply the permitted stages smoothly according to the road surface, load and speed.
- Coordination between the retarder and ABS and EBS depends on the equipment fitted. Consult the manual to find out how retardation is reduced or interrupted when these controls intervene; keep a reserve of grip, especially on bends.
21Brake fade and loss of effectiveness
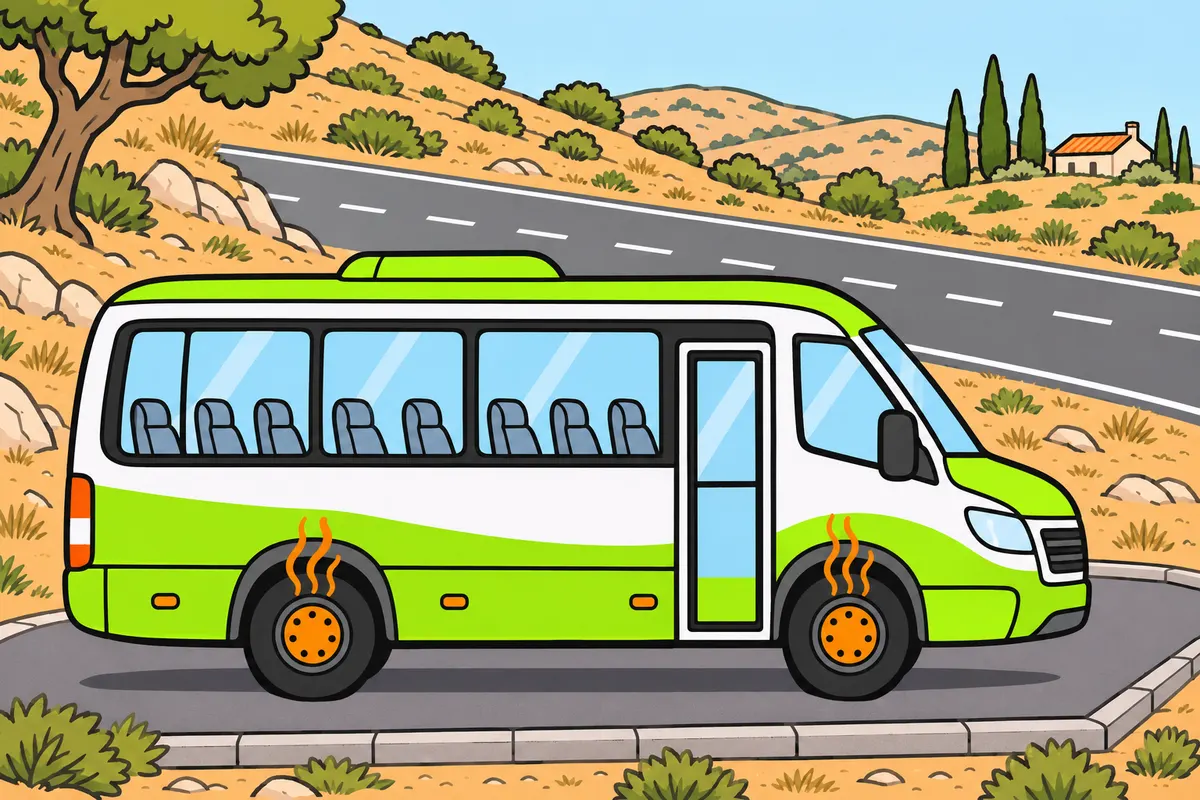
You can lose braking effectiveness through overheating even with normal air pressure.
| Problem | What you must distinguish |
|---|---|
| Brake fade | Overheated brakes, even with normal pressure |
| Insufficient pressure | Can happen with cold brakes |
| Vapour in brake fluid | Impairs hydraulic pressure transmission |
| Air in the pneumatic system | Transmits energy to operate the brakes |
Remember
- Brake fade means loss of braking effectiveness through excessive heat.
- Pressing harder does not remove the accumulated heat.
- Choose speed, gear and suitable auxiliary braking before overheating occurs.
- With weaker braking, a strong smell or temperature warning, seek a safe stop.
- Seek assistance and follow the cooling and inspection procedure.
- Do not pour water onto hot parts or continue just because the smell fades.
Exam trap: Wrong: all loss of braking means insufficient air. Right: brakes can also overheat with normal pressure.
Read the full explanation
- Brake fade is a loss of braking effectiveness due to excessive temperature, particularly in the friction materials. It can occur if you overuse the service brakes on a descent; pressing the pedal harder does not remove the accumulated heat.
- Overheating and insufficient pressure are different causes of reduced braking. You may have hot brakes with normal pressure or cold brakes with insufficient pressure; relate the dashboard warning to the vehicle’s behaviour to help you describe the fault.
- Reduce the thermal demand before symptoms appear: choose an appropriate speed and gear and use auxiliary retardation compatible with the conditions. In a laden minibus, you need to manage the energy of the descent; large wheels do not guarantee that its brakes will not overheat.
- If you notice reduced effectiveness, a strong smell or a temperature warning, find a safe place to stop and seek assistance. Follow the manufacturer’s cooling and inspection procedure; do not continue just because the smell diminishes or pour water over hot components to cool them faster.
- In hydraulic circuits, vapour can also impair the transmission of braking force if the fluid reaches unsuitable temperatures. Vapour impairs hydraulic transmission, whereas a pneumatic system deliberately uses compressed air: a fluid’s compressibility has different effects depending on the function for which the system is designed.
22Long descents
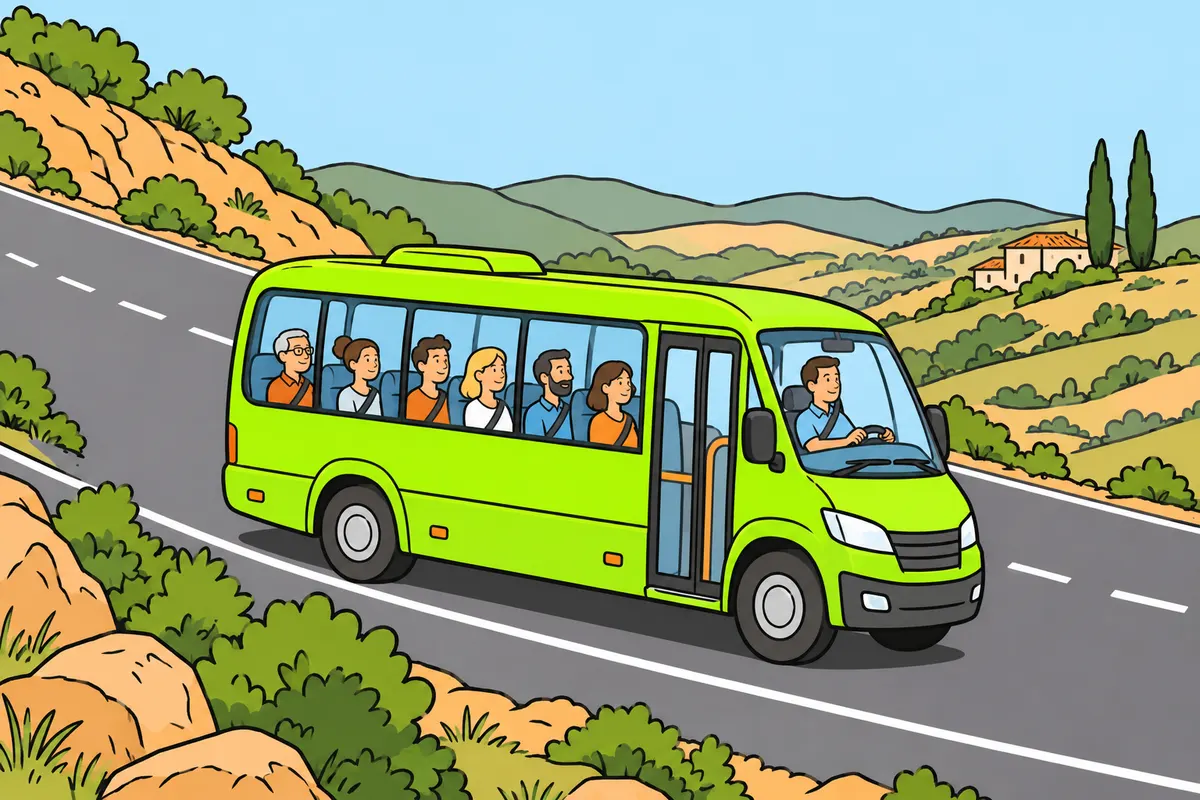
Before a long descent, prepare your speed, gear and auxiliary braking.
Remember
- Choose according to the slope, load, bends and equipment.
- Watch engine speed and temperatures.
- If auxiliary braking is insufficient, use the service brake; adjust when safe.
- Release the service brake when possible; avoid keeping it lightly applied continuously.
- If you need continuous braking, find a safe place to stop.
- For a serious failure, follow the manual and use a suitable escape lane.
Exam trap: Wrong: you must keep the brake lightly applied throughout the descent. Right: slow down with a controlled application, then release it when conditions allow.
Read the full explanation
- Before the descent, you must reduce speed and select the appropriate gear ratio. Do not wait until the minibus runs away before looking for a low gear; prepare retardation well in advance, according to the gradient, load, bends and minibus equipment.
- During the descent, you must aim to maintain a controlled speed through a combination of gear selection and auxiliary retardation. Monitor engine speed and temperatures; if the available retardation is insufficient, reduce speed using the service brakes and adjust your strategy when you can do so safely.
- When you need the service brakes, you must apply them in a controlled way that effectively reduces speed and allow them to release when conditions permit. Avoid keeping the brakes applied continuously; do not turn this recommendation into a fixed number of seconds or a fixed speed reduction for every gradient.
- Adapt your braking to bends and passengers. If you need to use the service brakes continuously, find a safe place to stop and review your descent strategy.
- If a serious failure occurs, you must use the emergency systems as directed in the manual, maintain your course and use an escape area when it is accessible and suitable. Passenger protection and assistance are covered in «Passenger safety and emergencies».
23Accelerator and propulsion control
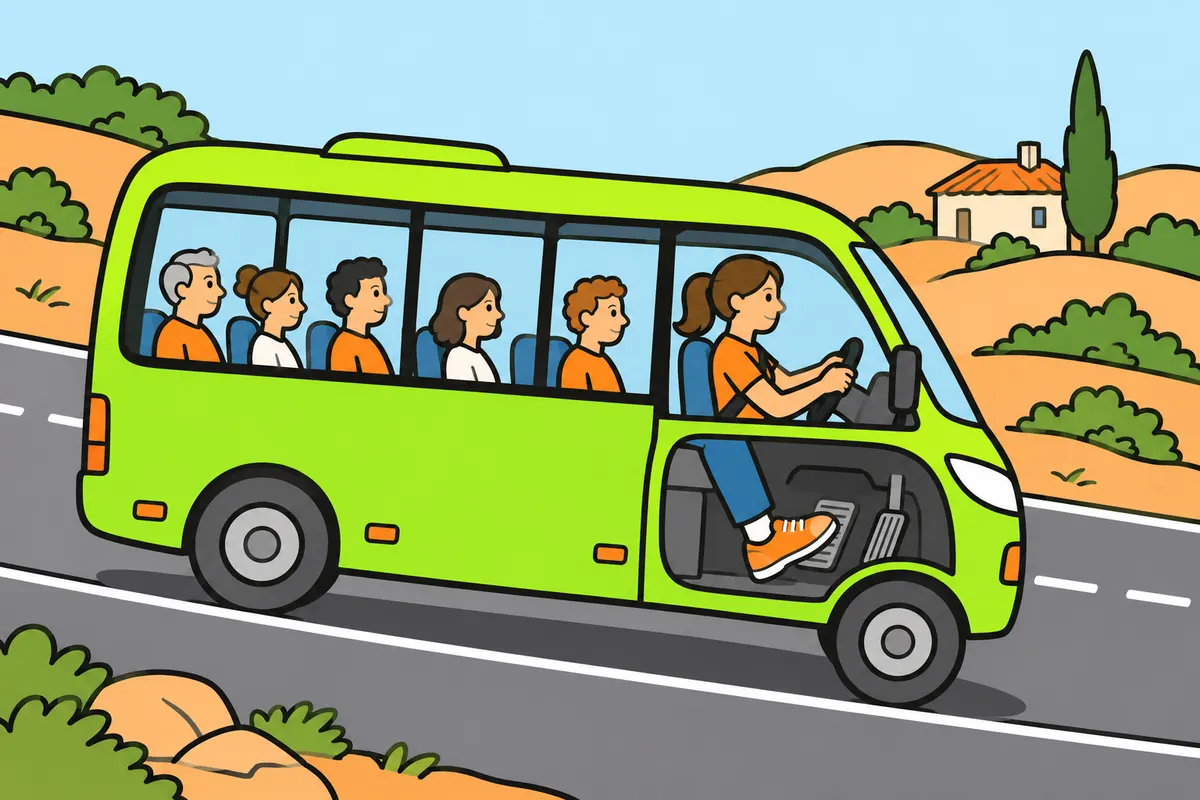
You must accelerate smoothly and know how to stop if the accelerator sticks.
| Equipment | What you can expect |
|---|---|
| Cruise control | Maintains the selected speed within its capabilities |
| Limiter | Restricts propulsion when it reaches its setting |
| Electronic injection cut-off | May act when you release the accelerator, with a gear engaged and sufficient engine speed |
Remember
- Keep pedal travel clear of objects and displaced floor mats.
- With an electronic accelerator, the pedal sends your demand to the control unit.
- Watch your speed downhill even when using a limiter.
- If the accelerator sticks, disengage the clutch or select neutral, according to gearbox type.
- Brake and steer the minibus to a safe stop.
- Do not move the pedal by hand while driving; seek repair before continuing.
Exam trap: Wrong: the limiter always brakes downhill. Right: limiting engine power does not brake unless the equipment includes that function.
Read the full explanation
- In a minibus with an electronic accelerator, the pedal sensor communicates your demand to the control unit, which regulates the engine and, in a diesel, fuel injection. Apply the pedal progressively to avoid jolting passengers; keep its travel clear of objects and displaced floor mats.
- Cruise control maintains the selected speed within its capabilities; the speed limiter restricts propulsion demand when you reach its setting. You must monitor your speed downhill: limiting propulsion does not mean braking unless the equipment includes that function. Installation is covered in «Minibus dimensions and masses» and limits in «Minibus speed and distances».
- In an electronically managed engine, releasing the accelerator with a gear engaged and sufficient engine speed may cut off fuel injection. Consult the conditions for your model; the control unit may coordinate this cut-off with auxiliary retardation.
- If the accelerator sticks and the minibus continues to propel itself, you must disengage the clutch or select neutral, depending on the transmission, brake and steer it to a safe stop. Maintain steering control and avoid trying to move the pedal by hand while driving; arrange repairs before continuing.
24Trailers and coupling lines
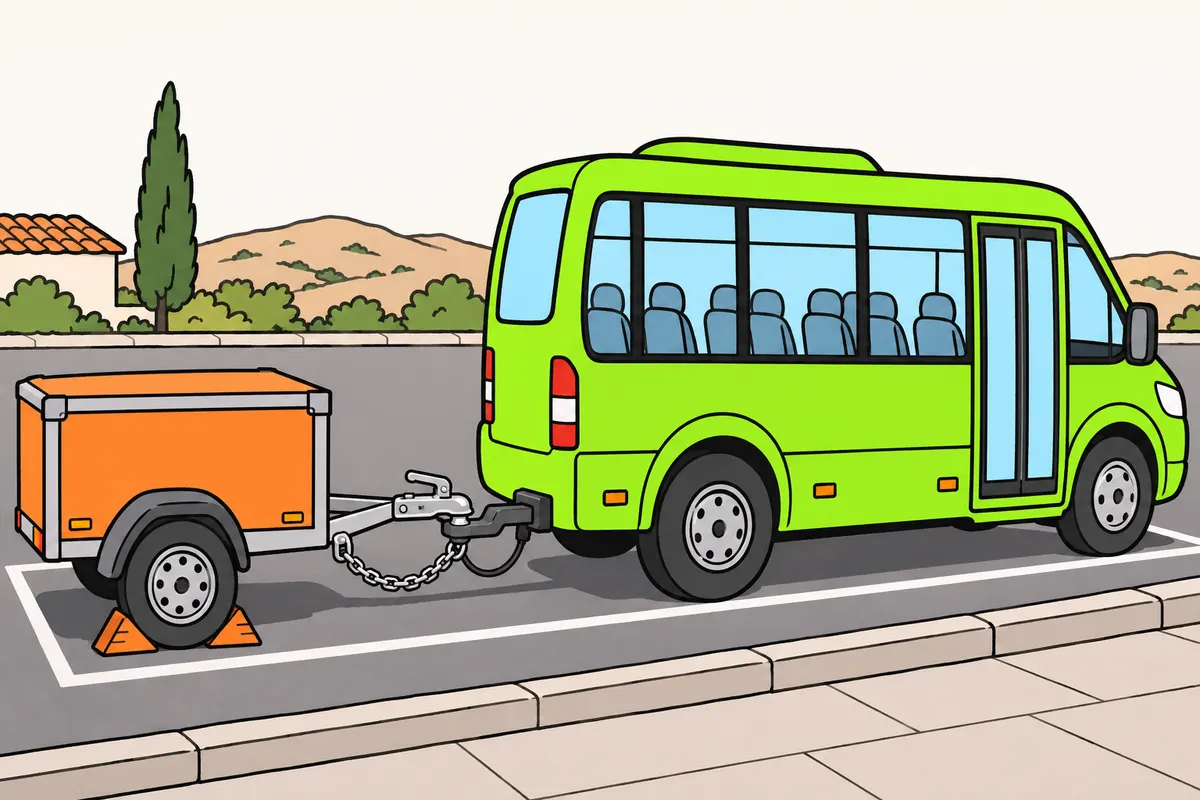
You must follow your trailer limit and distinguish each brake connection.
| Trailer line (two-line air systems) or brake function | Function |
|---|---|
| Red | Air supply |
| Yellow | Braking command |
| Automatic braking after separation | Stops the trailer if the combination separates, including after coupling failure; the rest keeps its braking effectiveness |
| Overrun braking where type-approved | The trailer's movement towards the towing vehicle applies its brakes |
Remember
- With D1, you may tow a trailer up to 750 kg MMA.
- A trailer with an MMA up to 750 kg may have no brakes.
- Up to 1,500 kg MMA, without automatic breakaway braking, you need a secondary coupling.
- It must prevent the drawbar touching the ground and provide some remaining guidance.
- Secure both vehicles before handling connections; follow the manufacturer's sequence.
- Check every connection: connecting lights does not guarantee power to ABS or EBS.
Exam trap: Wrong: air connections extend what D1 allows. Right: a trailer above 750 kg MMA requires D1+E.
Read the full explanation
- With a D1 licence, you may tow a trailer whose MMA (maximum authorised mass) does not exceed 750 kg. You study pneumatic connections to understand their function when the vehicle combination is equipped with them; their installation depends on the equipment and its type approval. For a trailer with a higher MMA, you need D1+E. [RGCond, art. 4](https://www.boe.es/buscar/act.php?id=BOE-A-2009-9481#a4).
- A trailer with an MMA of up to 750 kg may have no brakes of its own. Above that mass, it needs the brakes required for its category; the service braking system may use overrun braking where permitted by its type approval. [RGV, art. 12.8.2 and Annex VIII, section 2](https://www.boe.es/buscar/act.php?id=BOE-A-1999-1826#a12); [Annex VIII](https://www.boe.es/buscar/act.php?id=BOE-A-1999-1826#anviii).
- If the trailer has an MMA of up to 1,500 kg and has no automatic braking in the event of coupling breakage, you must have a secondary coupling, such as a chain or cable, that prevents the drawbar from touching the ground and provides some residual guidance. This requirement also applies to the light trailer you may tow with D1. [RGV, art. 13.4](https://www.boe.es/buscar/act.php?id=BOE-A-1999-1826#a13).
- On two-line pneumatic connections, you identify the trailer’s air supply by red and the braking control line by yellow. [ISO 1728:2006, section 3.4](https://cdn.standards.iteh.ai/samples/44103/9dde57923d1643f3979ac97bc5bb13f8/ISO-1728-2006.pdf).
- The air lines, the ABS or EBS electrical connection and the lighting connection serve different functions. Connecting the lights does not guarantee power to the braking electronics; you must check that each necessary connection is installed, secured and appropriate for its function.
- Before handling connections, you must immobilise both vehicles and secure the coupling according to the manufacturer’s procedure. Check seals, cleanliness, fastening and the routing of the lines; they must not be subjected to pulling, crushing or chafing during turns.
- Follow the coupling and uncoupling sequence specified by the equipment manufacturer. In a two-line installation, the supply line charges the reservoir and may allow the brakes to release; disconnecting it may trigger the intended automatic braking. You must therefore secure the trailer beforehand and must not rely on a disconnected hose as a substitute for applying the parking brake or using wheel chocks.
- Automatic braking stops the trailer if the combination separates, including through coupling breakage, while maintaining the braking effectiveness of the rest of the combination. Overrun braking uses the trailer’s movement towards the towing vehicle to apply its brakes. You can recognise each function by what triggers it. [RGV, art. 12.8.3](https://www.boe.es/buscar/act.php?id=BOE-A-1999-1826#a12); [Annex VIII, sections 1.5 and 1.6](https://www.boe.es/buscar/act.php?id=BOE-A-1999-1826#anviii).
25Checks and the decision to set off
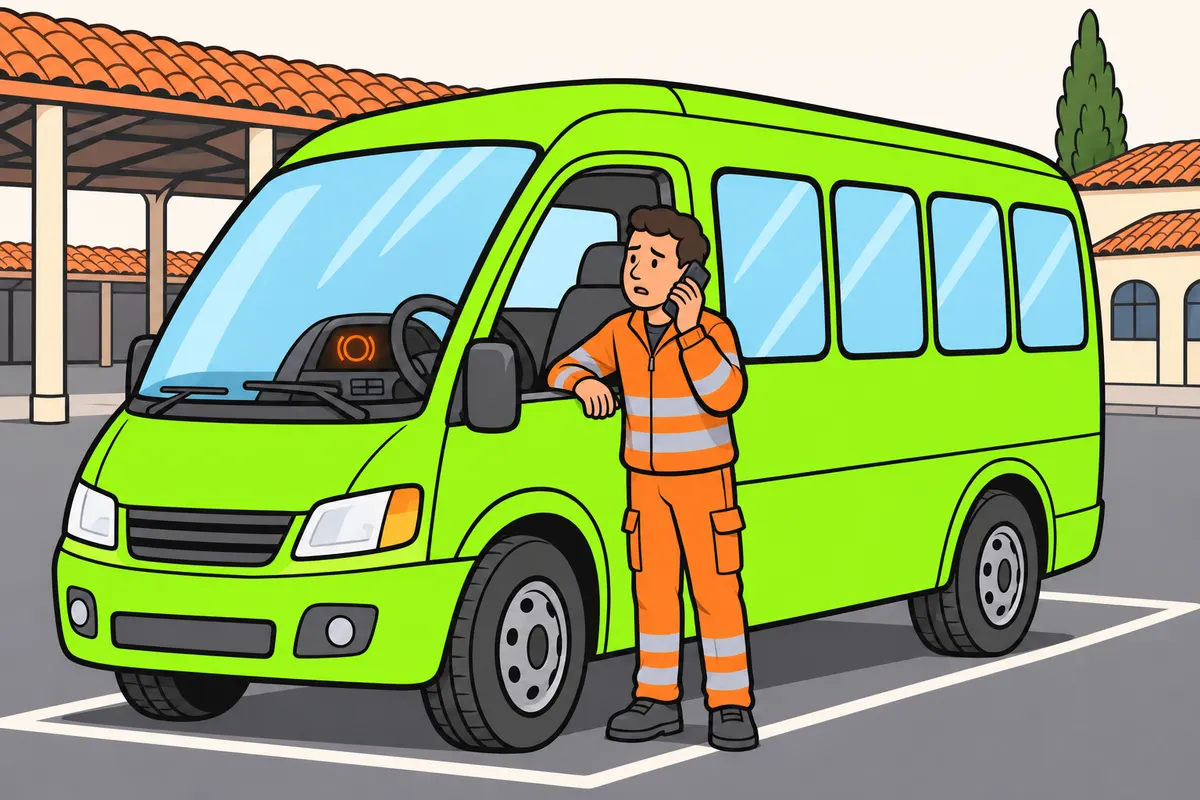
Before leaving, check your brakes and cancel departure if you find faults.
| Your minibus system | What you must check |
|---|---|
| Air brakes | Circuit charging and pressure readings |
| Hydraulic brakes | Fluid level, no leaks and brake assistance |
Remember
- Know the warning lamp test and when the lamps must go out.
- With the vehicle secured, check for persistent leaks and damaged lines.
- Do not go underneath if only air suspension supports it.
- Do not loosen pressurised connections to find leaks.
- Check brake response at low speed in a suitable space, following the procedure.
- With low pressure, sideways pulling, serious warnings or abnormal response, cancel departure and report.
Exam trap: Wrong: you can compensate for a fault by carrying passengers more slowly. Right: cancel departure and report the fault.
Read the full explanation
- Before starting the service, you must check the system fitted to your minibus. If it uses compressed air, check that pressure builds up in the circuits and that the readings are consistent; if it uses hydraulic actuation, follow its checks for fluid level, leaks and assistance. In both cases, you must know the warning lamp test and when the lamps must go out according to the manufacturer.
- With the minibus secured, you must check for persistent leaks, damaged pipes and correct operation of the controls in accordance with the authorised inspection procedure. Do not go underneath a vehicle supported only by air suspension or loosen a pressurised connection to look for a leak.
- Check the brake response at low speed in a suitable area and in accordance with the departure procedure. Check that the response is normal and controlled; a brief test does not replace an outstanding repair or guarantee how the brakes cope with heat on a long descent.
- If there is a loss of pressure, pulling to one side when braking, a serious warning or an abnormal response, you must cancel departure and report it. Do not try to compensate for the fault by driving more slowly with passengers; you must be able to stop from the start of the journey.
- Follow the manufacturer’s maintenance requirements for the brakes, air dryer and retarders, and record faults and incidents in accordance with the service organisation’s procedures. The general plan and inspections are covered in «Minibus maintenance and checks».
Check the air circuit before setting off
Follow this general sequence together with the values and tests specified by the minibus manufacturer.
- Secure the vehicle against movement and check that you can observe the gauges without creating a hazard.
- Switch on and start the system as instructed in the manual; check the warning lamp and audible warning self-test.
- Wait for the circuits to build up pressure and check all pressure readings and that warnings clear as specified for the model.
- Check for leaks and check the controls using the authorised checks, without dismantling pressurised components or using air unnecessarily.
- Carry out the low-speed response test in a suitable place; if there are any faults, do not set off and arrange an inspection.
Prepare for and control a long descent
Maintain service brake performance by sharing the work between the selected gear and the available auxiliary braking systems.
- Assess the gradient, bends, load, grip and available auxiliary braking capacity before starting the descent.
- Reduce speed and select a suitable gear without exceeding the permitted engine speed.
- Select the auxiliary braking permitted by the manufacturer and apply it progressively.
- Monitor road speed, engine speed, pressure and temperature; use the service brake when necessary to regain a controlled speed.
- If you need to brake continuously or braking performance deteriorates, look for somewhere to stop safely and reassess the situation.
Emergency braking with working ABS
Apply the braking you need and let the anti-lock system regulate it.
- Press the brake pedal firmly when faced with danger and maintain control of the steering wheel.
- Maintain the necessary pressure without pumping or releasing the pedal in response to normal ABS pulsations.
- Steer the minibus along a safe path within the available grip and avoid unnecessary sudden movements.
- Complete the stop and secure the vehicle; if there is a fault, follow the inspection and assistance procedure.
Respond to a serious brake warning
Do not wait until you lose all braking ability before taking action.
- Identify the warning without becoming distracted and check whether it concerns pressure, temperature or an electronic fault.
- Reduce the risk, maintain your course and look for a safe place to stop, using the available means as instructed in the manual.
- Avoid pumping an air brake circuit and do not abruptly apply the parking brake as a general response.
- Once stopped, secure the minibus against movement, protect your passengers and arrange an inspection or assistance.
- Do not resume service until you resolve the cause that compromises safety; the warning disappearing alone does not prove that a repair has been made.
Finished this module?
Mark it as read and you will see your progress on the theory list.