
Theory · C1 Licence - Light Truck · Module 6 of 18
Signs and their hierarchy for C1
You learn to apply the hierarchy of signs and interpret traffic officers’ signals, roadworks signs, traffic lights, upright signs and road markings. You distinguish restrictions on goods vehicles, MMA (maximum authorised mass), actual mass and dimensions that determine where you can drive your lorry and often determine the correct exam answers.
Sign library
All 620 signals of the official catalogue in force (Royal Decree 465/2025), each with its drawing and description, and a test to practise them.
1Hierarchy and compatible signs
Obey the highest-ranking sign first, and follow compatible signs too.
| Situation | What you must do |
|---|---|
| Circular green light and STOP for the same approach | Follow the traffic light. |
| Green light and no left turn | You may proceed, but you must not turn left. |
| Conflicting upright give way and painted STOP | Follow the upright give way sign. |
Remember
- Obey the officer first.
- Next, follow temporary signs, closure devices and delineation signs.
- Then follow traffic lights, upright signs and road markings, in that order.
- If signs of the same type conflict, obey the more restrictive one.
- If the traffic light is off, obey the other signs.
Exam trap: Wrong: You always choose the most restrictive sign. Right: Check rank first; choose the more restrictive instruction when signs are the same type.
Read the full explanation
- You must obey, in this order: signals and orders from officers; temporary signs and traffic guidance equipment that modify the normal traffic arrangements, delineation devices and traffic guidance signs; traffic lights; upright signs; road markings. A permanent triangular danger warning sign does not acquire the priority of temporary traffic guidance equipment. [RGC, art. 133](https://www.boe.es/buscar/act.php?id=BOE-A-2003-23514#a133).
- When two messages contradict each other, you must follow the one with higher priority. If they are of the same type, you must follow the more restrictive one. For example, if an upright STOP sign and an upright give way sign contradict each other, the obligation to stop takes priority; if an upright give way sign and a STOP road marking contradict each other, the upright sign takes priority. [RGC, art. 133](https://www.boe.es/buscar/act.php?id=BOE-A-2003-23514#a133).
- You must comply with compatible instructions at the same time. A circular green traffic light allows you to proceed, but a no left turn sign still restricts that movement: you can comply with both. [RGC, art. 133](https://www.boe.es/buscar/act.php?id=BOE-A-2003-23514#a133).
- If the circular traffic light controlling the junction allows you to proceed and there is a STOP sign for the same approach, you follow the traffic light. If it is unlit, you must follow the other signs present. [RGC, art. 133](https://www.boe.es/buscar/act.php?id=BOE-A-2003-23514#a133).
2Who each sign applies to
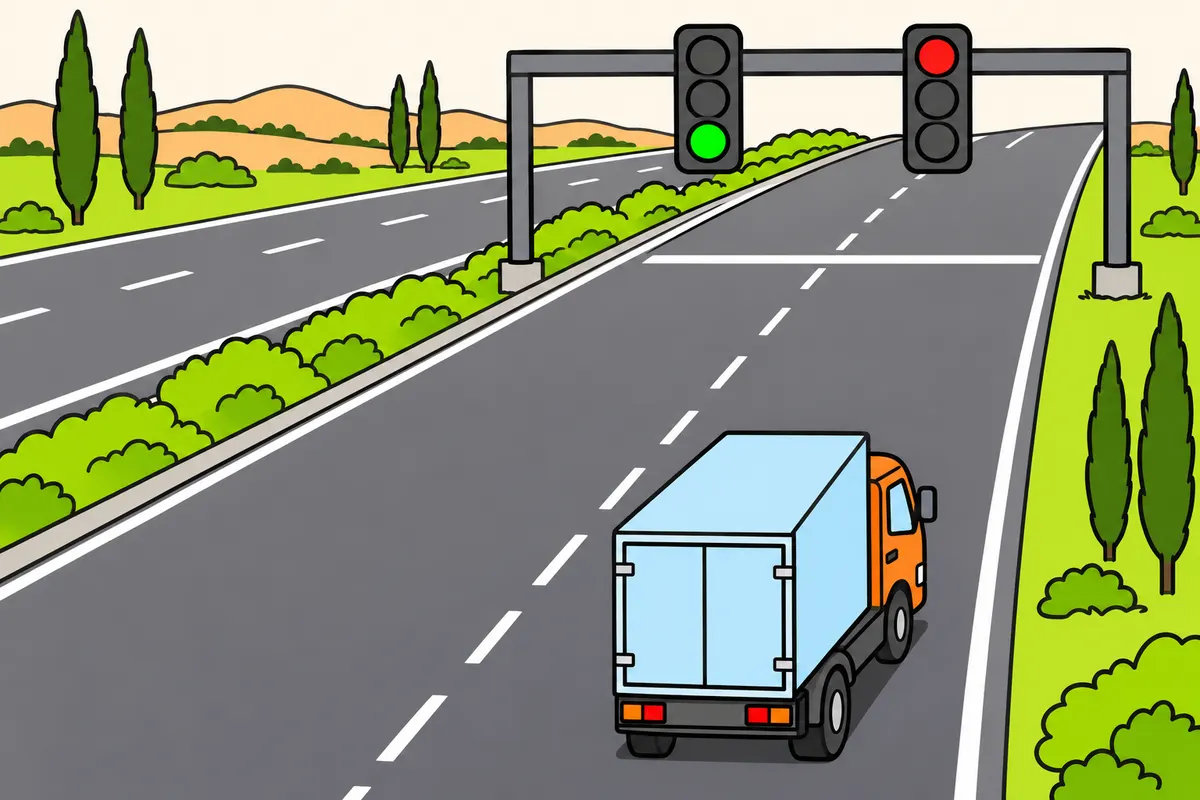
Read the whole sign and check whether it applies to your lane and vehicle.
| Situation | Which traffic lights or upright signs you follow |
|---|---|
| Signs immediately right, above the carriageway or above your lane | Follow those signs. |
| None there, and you go straight ahead or left | Follow the sign immediately to your left. |
| Right and left instructions differ; you go straight ahead or left | Follow the sign on your left. |
Remember
- Check the sign, arrows, supplementary plate and times.
- Check the vehicle category and lane affected.
- After stopping, do not move off until you meet the requirement.
Exam trap: Wrong: You only look at the main picture. Right: Also read the plate, times, vehicle category and lane affected.
Read the full explanation
- You must obey signs that impose obligations or prohibitions and adapt your behaviour to the other messages. If you must stop, you cannot move off again until you have complied with the requirement. [RGC, art. 132](https://www.boe.es/buscar/act.php?id=BOE-A-2003-23514#a132).
- You must follow traffic lights and upright signs immediately to your right, above the carriageway or over your lane. If there are none in those positions and you are going straight ahead or turning left, you follow those immediately to your left. If the instructions on the right and left differ, you obey those on the left when going straight ahead or turning left. [RGC, art. 132](https://www.boe.es/buscar/act.php?id=BOE-A-2003-23514#a132).
- You must always read the whole combination: the main sign, arrows, panel, times, vehicle category and lane. A prohibition above one lane may have a different scope from a sign applying to the whole carriageway. [RGC, art. 132](https://www.boe.es/buscar/act.php?id=BOE-A-2003-23514#a132).
3Sign categories and scope
Recognise each sign family and check where its rule starts and ends.
| Family | Usual appearance |
|---|---|
| Warning | Triangle with a red border. |
| Prohibition | Circle with a red border. |
| Mandatory | Blue circle. |
| STOP | Octagon. |
| Give way | Upside-down triangle. |
| Information | Rectangle or square; it may contain mandatory rules. |
Remember
- The rule starts at the sign, unless a plate gives a distance.
- Where it ends depends on the sign and circumstances.
- Beside the built-up area's name, the rule covers the whole built-up area.
- Some sections within that area may have different rules.
- Also read illuminated white symbols on dark backgrounds.
Exam trap: Wrong: You think rectangular signs only give information. Right: Read their content because they may contain mandatory rules.
Read the full explanation
- Danger warning signs are usually triangular with a red border; prohibitory signs are circular with a red border; mandatory signs are blue circles. STOP is octagonal and give way is an inverted triangle. Information signs are usually rectangular or square: you must interpret their symbol and content, as they may indicate a mandatory rule. [RGC, Annex I](https://www.boe.es/buscar/act.php?id=BOE-A-2003-23514).
- Regulatory signs apply from the point across the road where they are placed, unless a panel indicates the distance to where the restriction begins. Where it ends depends on each sign and the circumstances described in the catalogue. [RGC, art. 145](https://www.boe.es/buscar/act.php?id=BOE-A-2003-23514#a145).
- If a regulatory sign is beside, directly above or directly below the sign showing the name of a built-up area, you must apply it throughout that built-up area, unless different rules apply on particular stretches. [RGC, art. 145](https://www.boe.es/buscar/act.php?id=BOE-A-2003-23514#a145).
- You may encounter illuminated white symbols on a dark background under the conditions set out in the regulations. You must interpret their meaning and must not treat them as mere advertisements because of their appearance. The official catalogue sets out the details of how each category applies; goods vehicle categories, masses and clearance dimensions are especially important for your lorry. [RGC, art. 145](https://www.boe.es/buscar/act.php?id=BOE-A-2003-23514#a145).
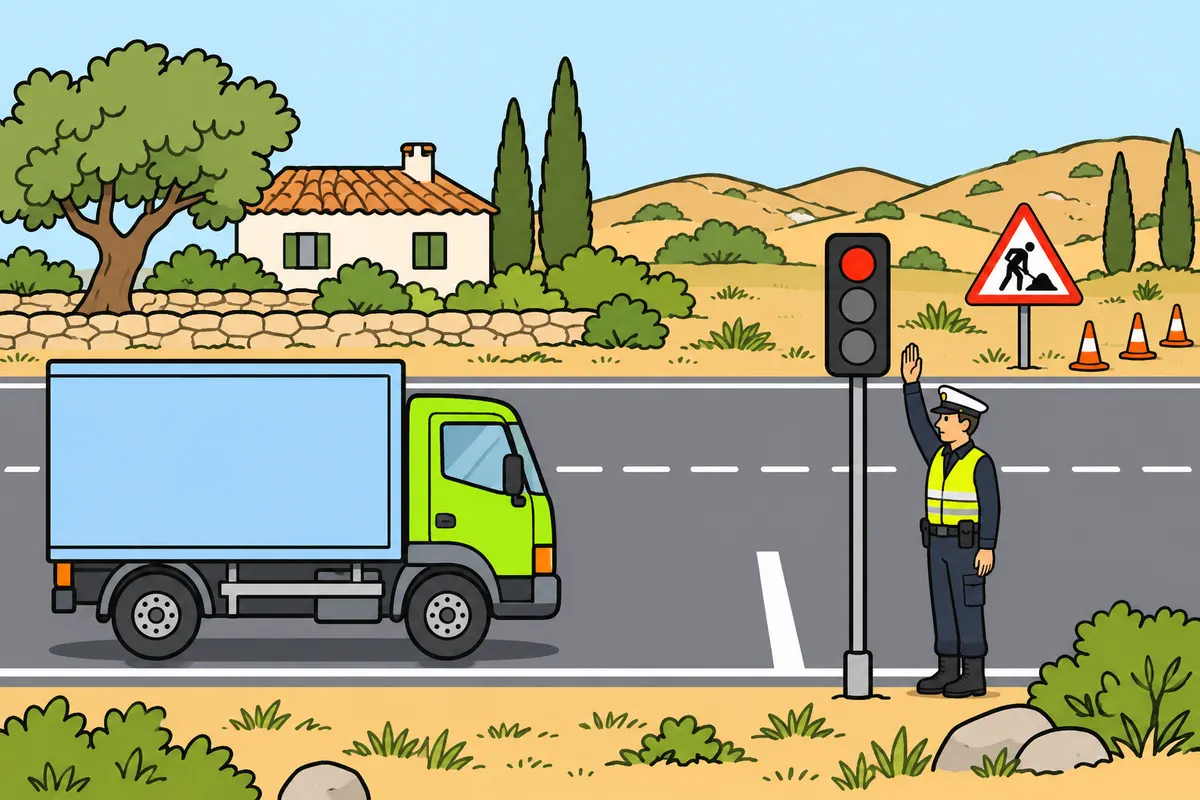
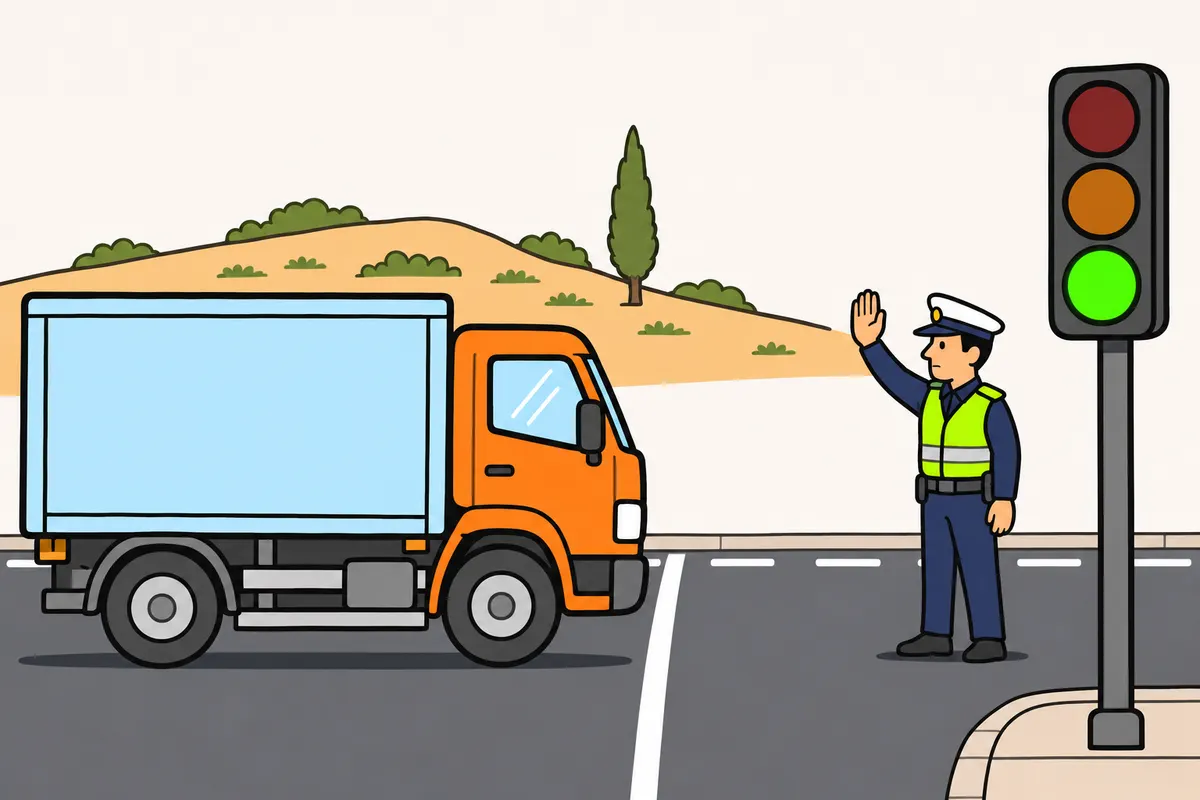
4Officers’ gestures and whistle signals
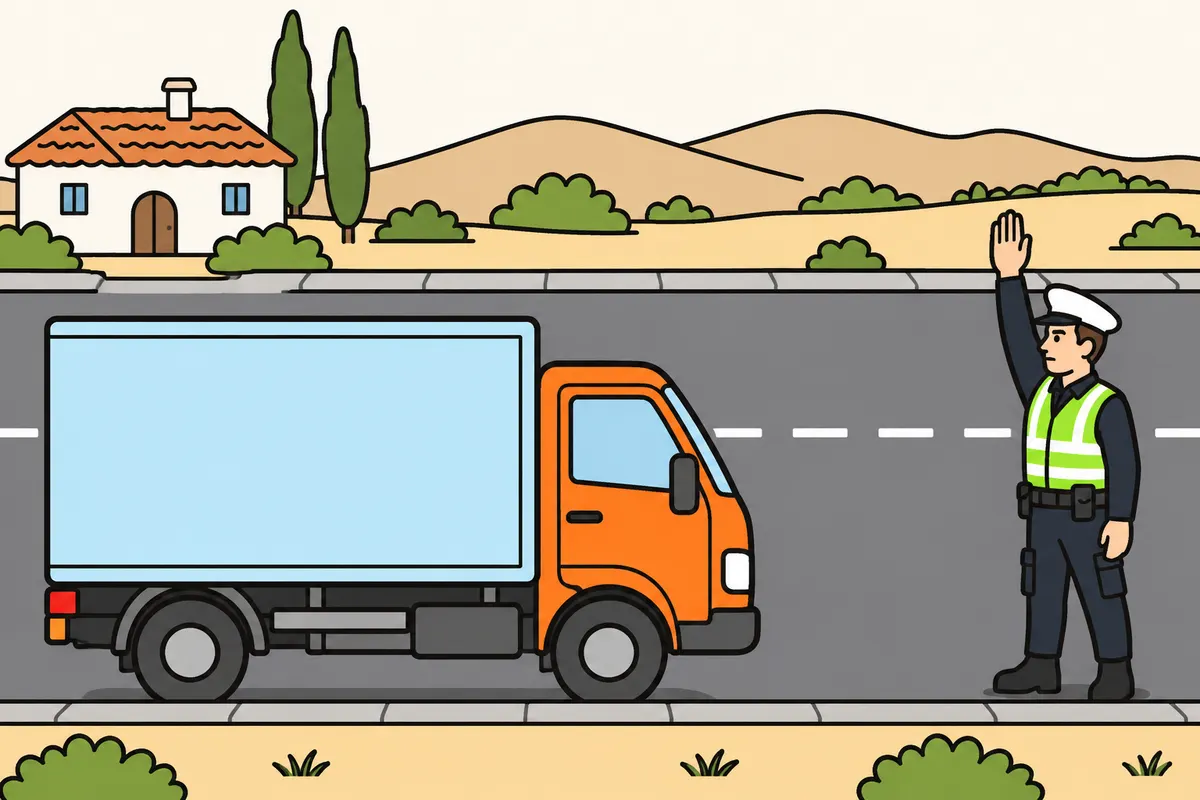
Follow officers’ gestures and recognise their whistle orders.
| Officer's signal | What you must do |
|---|---|
| Red or yellow light waved towards you | Stop. |
| Outstretched arm moving up and down | Slow down if approaching from that side, at right angles to the arm. |
| Short, frequent whistle blasts | Stop. |
| Long whistle blast | Move off again. |
Remember
- With an arm raised vertically, stop unless you cannot stop safely.
- If you already entered the junction, this gesture does not require stopping inside.
- Stop before the line; without one, before the officer or junction entrance.
- With horizontal arms, stop if your approach crosses the line of the arms.
- Stay stopped until the officer changes position or gives another signal.
Exam trap: Wrong: You move off when the officer lowers their arms. Right: Stay stopped until they change position or give another signal.
Read the full explanation
- If an officer raises an arm vertically, you must stop as you approach, unless you cannot do so safely enough. If the officer makes this gesture at a junction and you have already entered it, the order does not require you to stop inside it. You must stop before the nearest stop line or, if there is none, before reaching the officer; at a junction, before entering it. [RGC, Annex I](https://www.boe.es/buscar/doc.php?id=BOE-A-2025-12199).
- When an officer holds one or both arms out horizontally, you must stop if your line of approach crosses the line indicated by the arms, whichever direction you are travelling in. The order remains in force even if the officer lowers the arms, until the officer changes position or gives another signal. [RGC, Annex I](https://www.boe.es/buscar/doc.php?id=BOE-A-2025-12199).
- If an officer waves a red or yellow light towards you, you must stop. If the officer moves an outstretched arm up and down, you must slow down when approaching from the side of that arm and at right angles to it. [RGC, Annex I](https://www.boe.es/buscar/doc.php?id=BOE-A-2025-12199).
- Several short, frequent whistle blasts order you to stop your vehicle; one long blast orders you to move off again. Officers may also use other clear instructions when circumstances require them. [RGC, Annex I](https://www.boe.es/buscar/doc.php?id=BOE-A-2025-12199).
5Orders from vehicles and authorised personnel
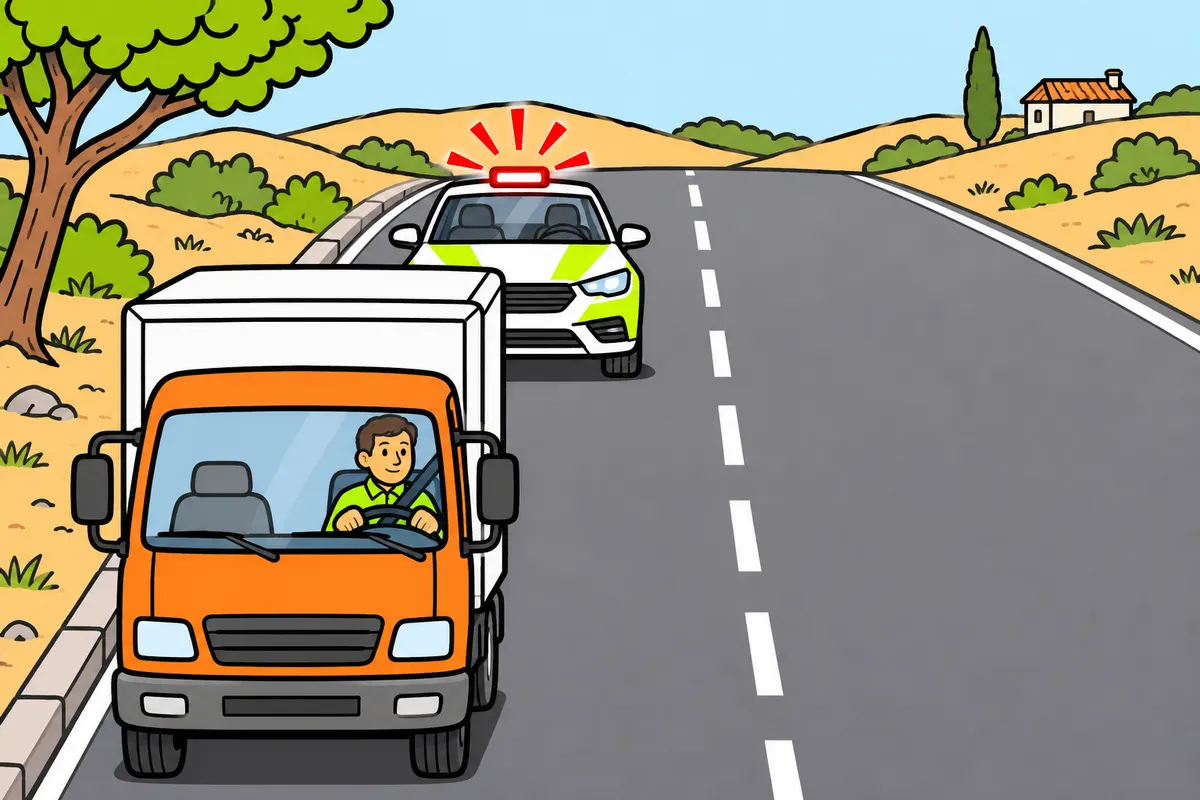
Recognise orders from vehicles and follow authorised personnel.
| Flag from a vehicle or authorised auxiliary staff | What it means |
|---|---|
| Red | Carriageway closed from its passing, except users accompanied or escorted by officers. |
| Green | Carriageway reopens when the vehicle passes. |
| Yellow | Take extra care because of danger. |
| Yellow flag from authorised auxiliary staff at authorised activities | Take extra care because of danger, even when no officer carries it. |
Remember
- An officer's still arm pointing down towards you means stop on the right.
- If ahead of flashing red police lights, stop right, ahead of the patrol.
- Choose a place without creating greater risks or inconvenience.
- Stay inside and follow the officer's instructions.
- Obey staff's sign paddles when they act within their authorisation.
- School crossing patrols may ask you to stop using paddles.
Exam trap: Wrong: You stop at any flashing yellow vehicle light. Right: Recognise the specific order; a flashing yellow light alone is not a police order to stop.
Read the full explanation
- A red flag displayed from a vehicle announces the temporary closure of the carriageway from the moment that vehicle goes by, except for road users accompanied or escorted by officers. A green flag announces that the carriageway opens from the moment the vehicle displaying it goes by. A yellow flag requires you to take extra care because of a hazard and also applies to other road users. [RGC, Annex I, section 1.2](https://www.boe.es/buscar/doc.php?id=BOE-A-2025-12199).
- If an officer in a vehicle holds an arm extended downwards at an angle and keeps it still, you must stop on the right if the signal is directed at you. A flashing red light directed forwards from a police vehicle orders you, as the driver ahead, to stop on the right in front of the patrol vehicle, where you do not create greater risks or inconvenience, following the loudspeaker instructions. [RGC, Annex I, section 1.2](https://www.boe.es/buscar/doc.php?id=BOE-A-2025-12199). You must remain inside your vehicle. [RGC, art. 69, second paragraph](https://www.boe.es/buscar/act.php?id=BOE-A-2003-23514#a69).
- Authorised auxiliary personnel carrying out traffic management, control or safety duties during cycling events or other authorised activities on the road, whether sporting or otherwise, may also use a yellow flag. It has the meaning given for that flag in this section; you must heed it even when the person displaying it is not an officer. [RGC, Annex I, section 1.2](https://www.boe.es/buscar/doc.php?id=BOE-A-2025-12199).
- You must obey the regulatory signs on paddles held by roadworks personnel and special transport escorts when they act in authorised circumstances. School patrols may use paddles to ask you to stop. Personnel authorised for approved activities may prevent access to the affected area; their duties depend on their authorisation. [RGC, art. 141](https://www.boe.es/buscar/act.php?id=BOE-A-2003-23514#a141).
- People directing traffic must wear brightly coloured clothing and retroreflective elements that allow you to distinguish them from at least 150 m away. This figure describes their visibility: you must choose where to stop your lorry according to the order you receive and the space available, without using it as a stopping distance. [RGC, art. 141](https://www.boe.es/buscar/act.php?id=BOE-A-2003-23514#a141).
6Roadworks and temporary signs
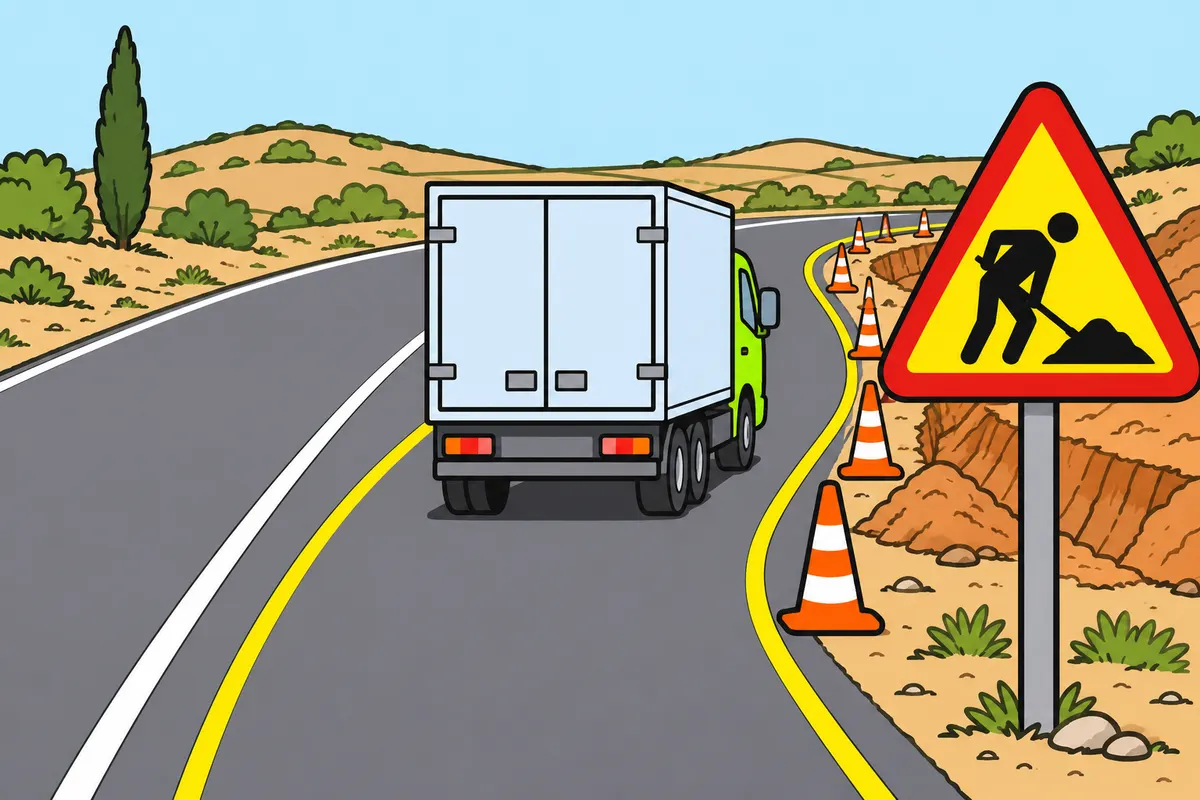
Follow temporary signs and check the diversion's restrictions for your lorry.
| Temporary signs | What you recognise |
|---|---|
| Roadworks | Added markings are yellow; white markings may still apply. |
| Upright signs for other temporary reasons | The catalogue provides for orange instead of yellow. |
Remember
- Read variable message signs: they may give mandatory instructions.
- Check height, mass and speed restrictions on the diversion.
- Road markings added for roadworks are yellow.
- Follow the diversion while it remains in force.
- Check contraflow lane conditions in “Speed and safe following distances”.
Exam trap: Wrong: You decide by colour alone. Right: Read the message and check whether it still applies.
Read the full explanation
- You must read variable message signs: they may provide information, warnings, recommendations or mandatory instructions. A temporary height, mass or speed restriction applies to your lorry according to the message displayed. [RGC, Annex I](https://www.boe.es/buscar/doc.php?id=BOE-A-2025-12199).
- Temporary changes end when their signs indicate or when the circumstances that prompted them cease. You must then follow the normal signs. While a diversion or delineated route remains in force, follow its route even if you remember a different lane layout from previous journeys. [RGC, Annex I](https://www.boe.es/buscar/doc.php?id=BOE-A-2025-12199).
- At roadworks, danger warning and regulatory signs whose normal background is white have a yellow background in the cases specified in the catalogue. P-18 warns of roadworks. Direction signs installed for the roadworks have a yellow background and black lettering; normal signs that continue to apply may retain their design. [RGC, Annex I](https://www.boe.es/buscar/doc.php?id=BOE-A-2025-12199).
- Markings added to indicate stretches with roadworks are yellow; existing white markings may remain if they still apply. For temporary signs used for other reasons, the catalogue specifies orange instead of yellow for the corresponding upright signs. You must interpret the message and its application, without relying solely on colour. [RGC, Annex I](https://www.boe.es/buscar/doc.php?id=BOE-A-2025-12199).
- When driving your lorry, you must anticipate narrow sections and check temporary clearance restrictions: a roadworks diversion may impose different conditions from your usual route. The competent authority may introduce closures, special traffic directions and compulsory routes for safety, traffic flow or environmental reasons; you must follow the signposted rules. [RGC, art. 37](https://www.boe.es/buscar/act.php?id=BOE-A-2003-23514#a37).
- Temporary signs may open a lane to traffic travelling in the opposite direction to normal; check the conditions for lorry access and use in “Speed and safe following distances”, section “Lanes with special limits”. [RGC, art. 41](https://www.boe.es/buscar/act.php?id=BOE-A-2003-23514#a41).
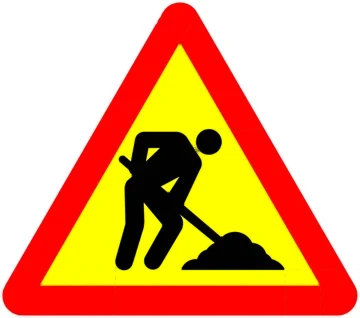 P-18
7Closure devices and guidance equipment
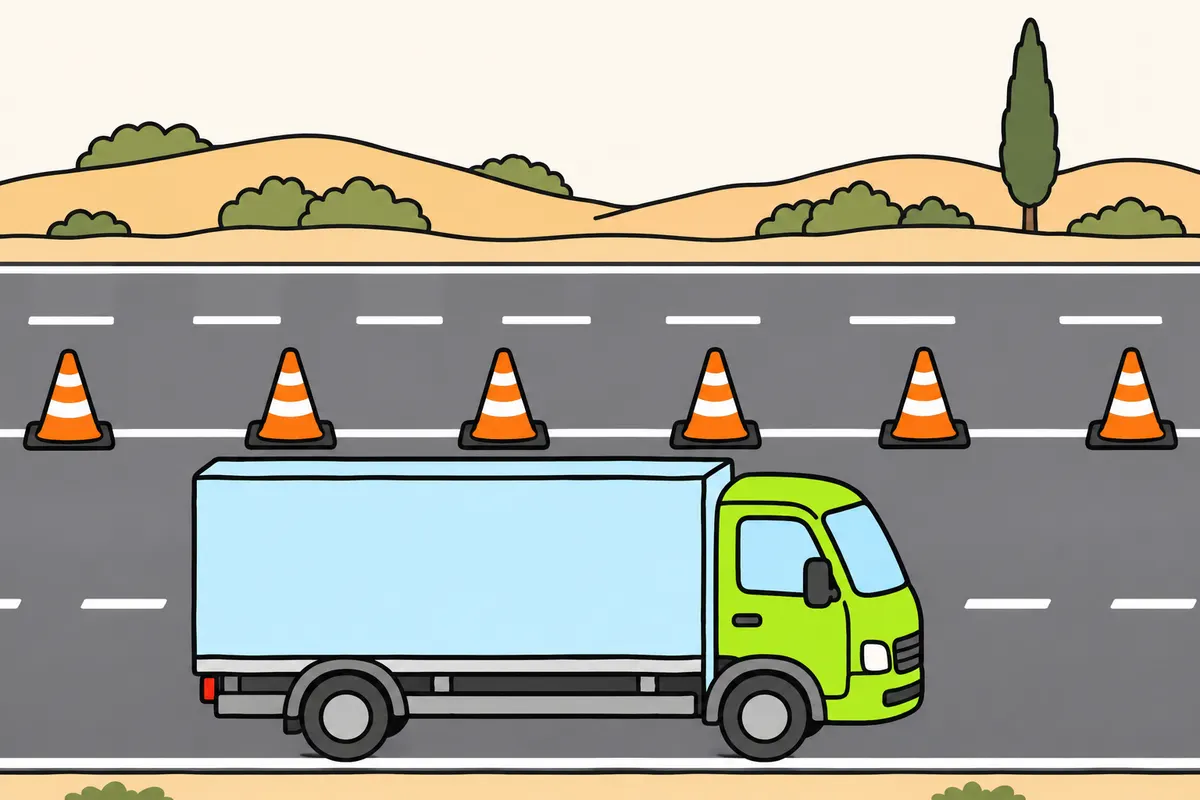
Respect delineation boundaries and use guidance equipment to anticipate your route.
| Light device | What you must do |
|---|---|
| Steady red delineation light | Do not pass: the carriageway is closed. |
| Steady or flashing yellow lights | Do not cross the imaginary line joining them. |
| Green illuminated road studs | You may cross them. |
| Orange or red illuminated road studs | You must not cross them. |
Remember
- Do not cross the actual or imaginary line joining cones or temporary delineators.
- Do not cross a temporary directional panel.
- Respect a movable barrier placed across the road.
- Marker posts and bend boards guide you without setting a speed.
- Check wind and height clearance for your lorry.
Exam trap: Wrong: You cross between cones because your lorry fits. Right: Do not cross the line joining them.
Read the full explanation
- Closure devices prohibit you from entering the part of the road they mark off. You must not cross a temporary directional panel, which indicates the direction of traffic; temporary cones and edge bollards prohibit you from crossing the real or imaginary line joining them. [RGC, Annex I](https://www.boe.es/buscar/doc.php?id=BOE-A-2025-12199).
- A steady red warning light indicates that the carriageway is completely closed. Steady or flashing yellow lights prohibit you from crossing the imaginary line joining them. [RGC, Annex I](https://www.boe.es/buscar/doc.php?id=BOE-A-2025-12199).
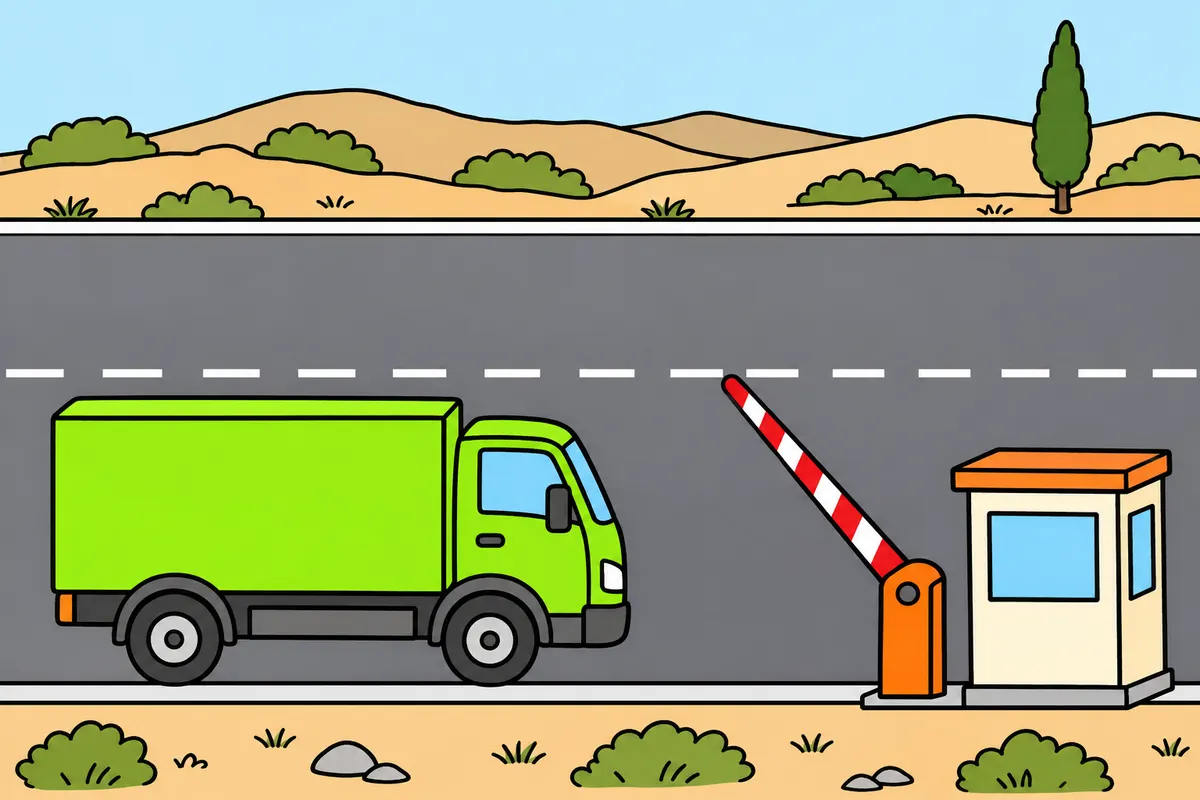
- A movable closure device placed across the road temporarily prevents you from proceeding. You must obey it at level crossings, checkpoints or toll booths for as long as it remains in that position. [RGC, Annex I](https://www.boe.es/buscar/doc.php?id=BOE-A-2025-12199).
- Edge marker posts and horizontal or vertical reflectors help guide you, especially in low light. A marker at a fork identifies the separation of two traffic streams; permanent chevron boards help you judge bends. These devices do not, by themselves, set a numerical speed for driving past them. [RGC, Annex I](https://www.boe.es/buscar/doc.php?id=BOE-A-2025-12199).
- A windsock supplements P-29 and gives you information about the wind; a height restriction gantry warns you or prevents you from proceeding if your vehicle is too high for a nearby structure. You must pay particular attention to them because of your lorry’s height and side surface area. Vehicle restraint systems aim to reduce the consequences of leaving the road and do not guarantee to prevent it. [RGC, Annex I](https://www.boe.es/buscar/doc.php?id=BOE-A-2025-12199).
- Illuminated road studs can mark out lanes, guide diversions and restrict lane changes. Of the colours green, orange and red, only green allows you to cross. Their placement on the road surface does not make them painted road markings of lower priority. [RGC, Annex I](https://www.boe.es/buscar/act.php?id=BOE-A-2003-23514).
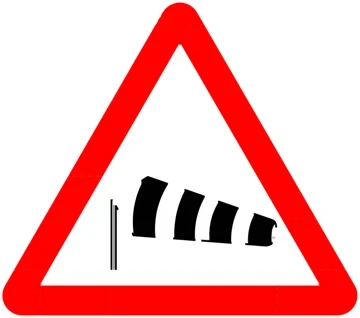 P-29
8Circular traffic lights
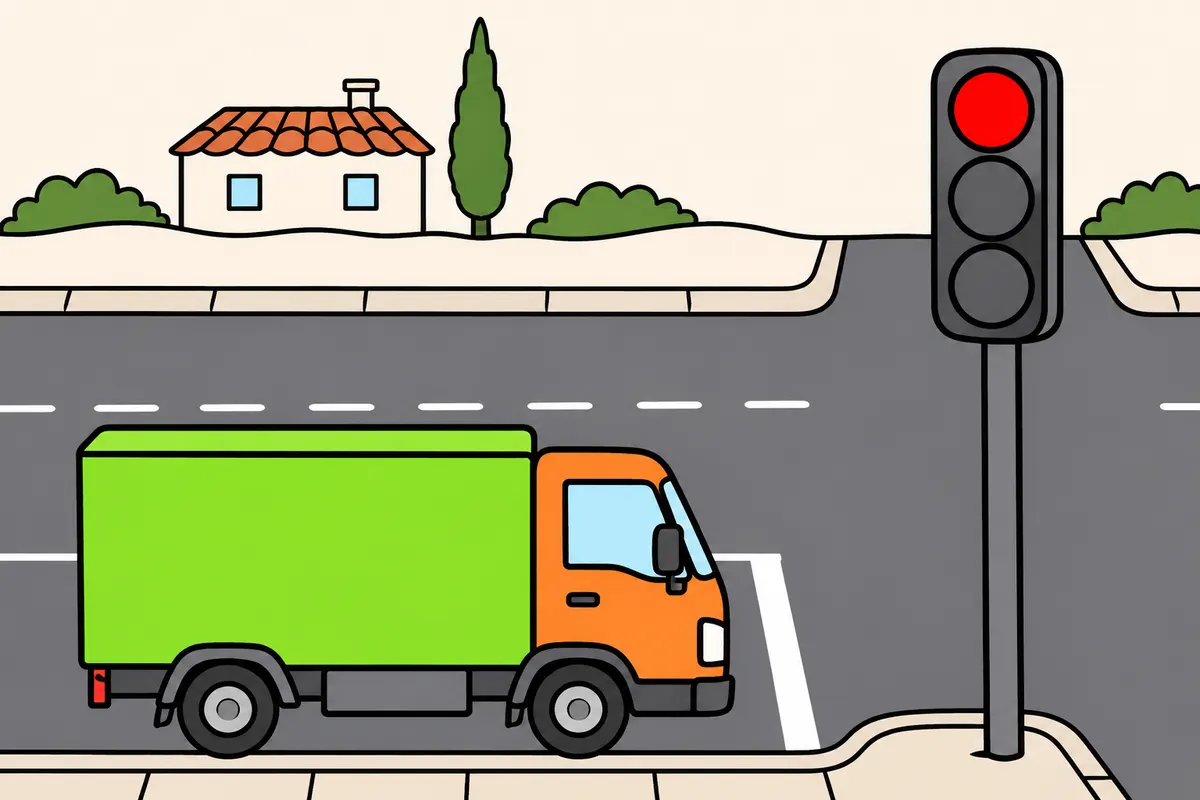
Follow each colour and distinguish steady yellow from flashing yellow.
| Vehicle light | What you must do |
|---|---|
| Steady red, one flashing red or two alternating reds | Do not pass. |
| Steady yellow | Stop, unless you are too close to stop safely when it comes on. |
| Flashing yellow | Take extra care and give way where required; still obey STOP. |
Remember
- At red, stop before the nearest preceding line or the traffic light.
- If the light controls a junction, do not enter it at red.
- On steady circular green, proceed with priority unless you would block the junction.
- Protect people crossing and obey other applicable signs.
- At signal-controlled pedestrian crossings, flashing yellow normally cannot coincide with steady pedestrian green.
- That flashing yellow must follow steady red.
Exam trap: Wrong: You ignore STOP with flashing yellow. Right: You must obey it and give way where required.
Read the full explanation
- A steady red light prohibits you from proceeding. You must stop before the traffic light or the nearest line before it; if the light is within or beyond a junction, you must not enter the junction or cross the line before it. You must plan ahead to stop your lorry and keep the crossing area clear. [RGC, Annex I](https://www.boe.es/buscar/doc.php?id=BOE-A-2025-12199).
- A flashing red light or two alternating red lights temporarily prohibit you from proceeding, for example at a level crossing, opening bridge, fire station exit or when an aircraft approaches at low altitude. [RGC, Annex I](https://www.boe.es/buscar/doc.php?id=BOE-A-2025-12199).
- A steady yellow light requires you to stop as for a red light, unless you are so close when it comes on that you cannot stop safely enough. You must assess your lorry’s position and whether you can actually stop, without confusing this exception with the meaning of a flashing yellow light. [RGC, Annex I](https://www.boe.es/buscar/doc.php?id=BOE-A-2025-12199).
- A flashing yellow light, whether single or alternating, requires you to take extra care and give way where required. It does not exempt you from obeying a STOP sign or another signal requiring you to stop. A steady circular green light allows you to proceed with priority, except in the circumstances in article 59.1; the M-7.10 box marking in the section “Reserved areas, parking and coloured markings” reminds you when you must keep the junction clear. [RGC, Annex I, section 4.2.d; RD 518/2026, sole article.26](https://www.boe.es/buscar/doc.php?id=BOE-A-2026-13889); [RGC, Annex I, section 4.2.e](https://www.boe.es/buscar/act.php?id=BOE-A-2003-23514) and [art. 59.1](https://www.boe.es/buscar/act.php?id=BOE-A-2003-23514#a59).
- At pedestrian crossings with traffic lights reserved for pedestrians, as a general rule, a flashing yellow light for vehicles cannot coincide with a steady green light for pedestrians and must be preceded by a steady red light. You obey the light and all other applicable signs and signals, and protect people crossing. [RGC, Annex I, section 4.2.d; RD 518/2026, sole article.26](https://www.boe.es/buscar/doc.php?id=BOE-A-2026-13889).
9Arrows and lane control signals
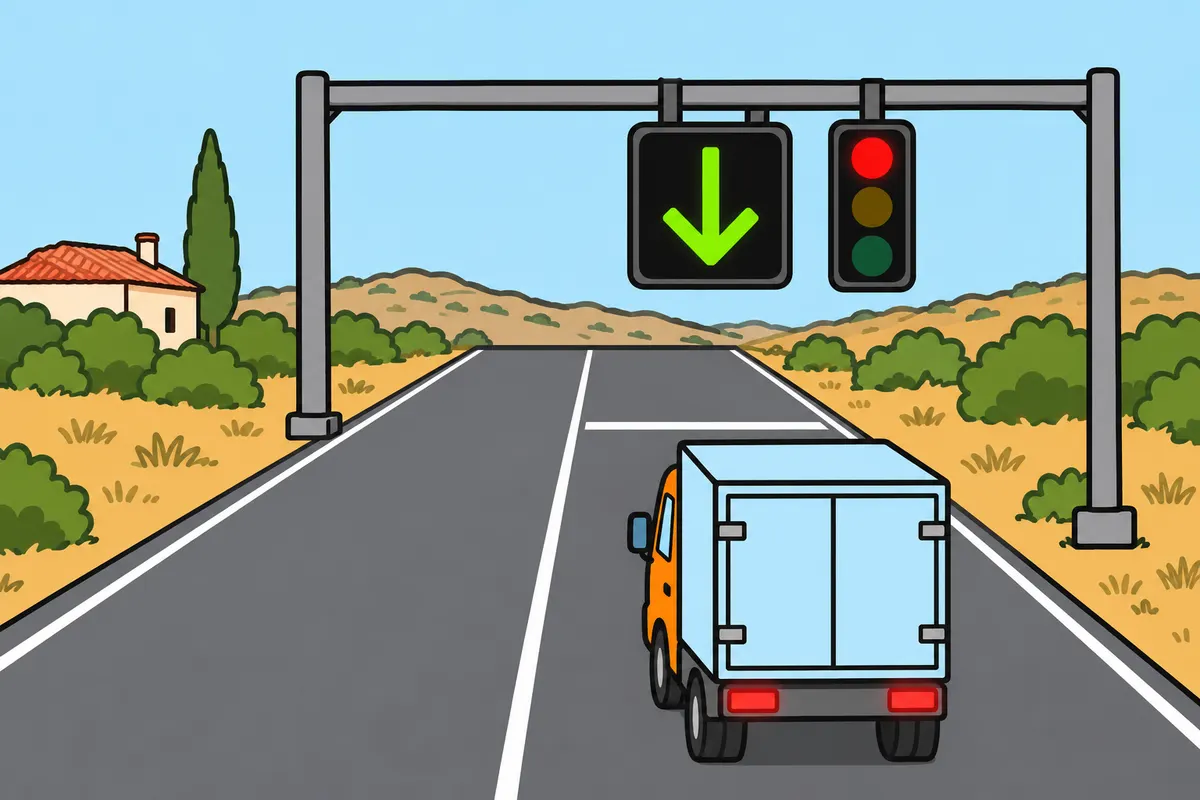
Check whether an arrow controls your movement or allows you to use a lane.
| Signal above the lane | What you must do |
|---|---|
| Red cross | Do not use the lane; leave as soon as possible if already there. |
| Downward green arrow | Use it only if your vehicle is allowed; obey other signs and priority rules. |
| Diagonal white or yellow arrow | Move safely into the indicated lane; you have no priority to change lanes. |
Remember
- A black arrow limits the colour's instruction to the movement shown.
- With a green arrow on a black circular background, proceed cautiously.
- Let traffic in your destination lane pass and protect people crossing.
- Follow the arrow if your lane must serve that movement.
Exam trap: Wrong: A downward green arrow cancels STOP. Right: It allows lane use, but you must still obey STOP.
Read the full explanation
- A black arrow on a steady red or yellow light limits that signal to the movement indicated. You must interpret the colour and direction together: the shape of a black arrow does not authorise you to turn. Other movements may be controlled by different lights, so you must check which traffic light applies to your intended path. [RGC, Annex I](https://www.boe.es/buscar/doc.php?id=BOE-A-2025-12199).
- A green arrow on a circular black background allows you to follow the indicated direction even if another light is on. You must proceed with caution, give way to traffic in the lane you are joining and avoid endangering people crossing. If you are in the lane that must be used for that movement, you must proceed in the direction of the arrow. [RGC, Annex I](https://www.boe.es/buscar/doc.php?id=BOE-A-2025-12199).
- A red cross above a lane prohibits you from using it: if you are driving in it, you must leave it as soon as possible. A vertical downward green arrow allows you to use it, but does not override a circular red light, a STOP sign, a give way sign or the general priority rules. Nor does it authorise you to enter with a lorry that is expressly excluded. [RGC, Annex I](https://www.boe.es/buscar/doc.php?id=BOE-A-2025-12199).
- A steady or flashing white or yellow diagonal downward arrow indicates that the lane is about to close and you must move safely into the lane indicated. You must prepare to move over while respecting traffic already in the destination lane. The arrow does not give you priority to move your lorry sideways. [RGC, Annex I](https://www.boe.es/buscar/doc.php?id=BOE-A-2025-12199).
10Traffic lights for other users
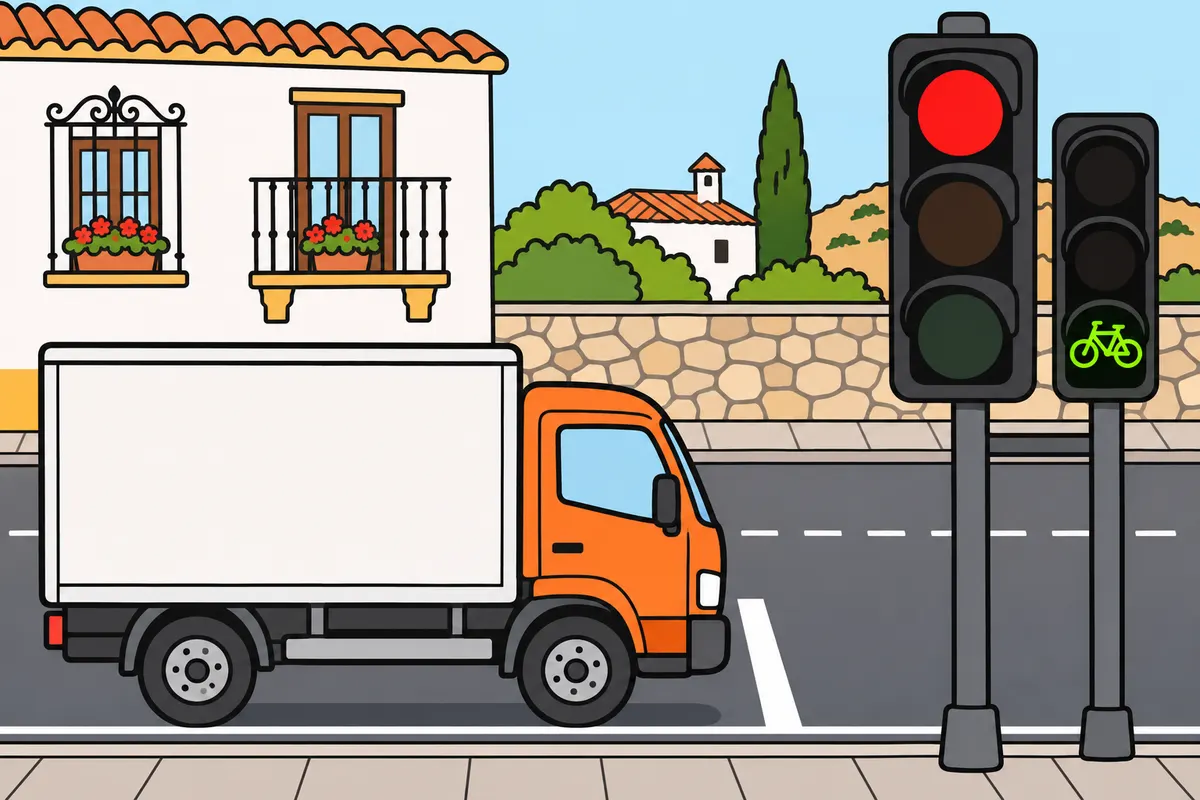
Follow your vehicle's traffic lights and do not use permissions meant for other categories.
| White bars: trams, scheduled buses or vehicles in the reserved lane | Meaning for those users |
|---|---|
| Horizontal | You must stop. |
| Vertical | You may go straight ahead. |
| Diagonal | You may turn in the direction shown. |
| Flashing | Stop unless you cannot do so safely enough. |
Remember
- A light showing a cycle symbol controls cycles only.
- In your lorry, check the signal controlling your lane.
- Carrying workers does not turn your lorry into a bus.
- When turning, check for pedestrians crossing.
Exam trap: Wrong: You follow a green cycle light in your lorry. Right: Follow the traffic light intended for your vehicle.
Read the full explanation
- Each traffic light controls its intended users: pedestrians, vehicles in general, a lane or specific categories. An illuminated cycle symbol applies exclusively to cycles. [RGC, Annex I](https://www.boe.es/buscar/doc.php?id=BOE-A-2025-12199).
- At pedestrian traffic lights, a stationary red figure prohibits you from starting to cross; a walking green figure allows you to do so. A flashing green figure warns you that the time remaining to finish crossing is running out. As a driver, you must check for pedestrians crossing when you carry out the movement permitted by your own signs and signals. [RGC, Annex I](https://www.boe.es/buscar/doc.php?id=BOE-A-2025-12199).
- White bars on a black background are intended for trams and scheduled bus services under the terms of the catalogue, or for vehicles in the corresponding reserved lane. A horizontal bar prohibits you from proceeding; a vertical bar allows you to proceed straight ahead; a diagonal bar allows you to turn in the direction indicated; a flashing bar has the same meaning as a steady yellow light. [RGC, Annex I](https://www.boe.es/buscar/doc.php?id=BOE-A-2025-12199).
- In an ordinary lorry, you must not assume that you have the right to use a reserved lane or follow its bar signals because you are transporting workers or carrying passengers. You must check the authorised category and the signal that actually controls your lane. Carrying people in the cab does not turn a goods vehicle into a bus. [RGC, Annex I](https://www.boe.es/buscar/doc.php?id=BOE-A-2025-12199).
11STOP, give way and priority road
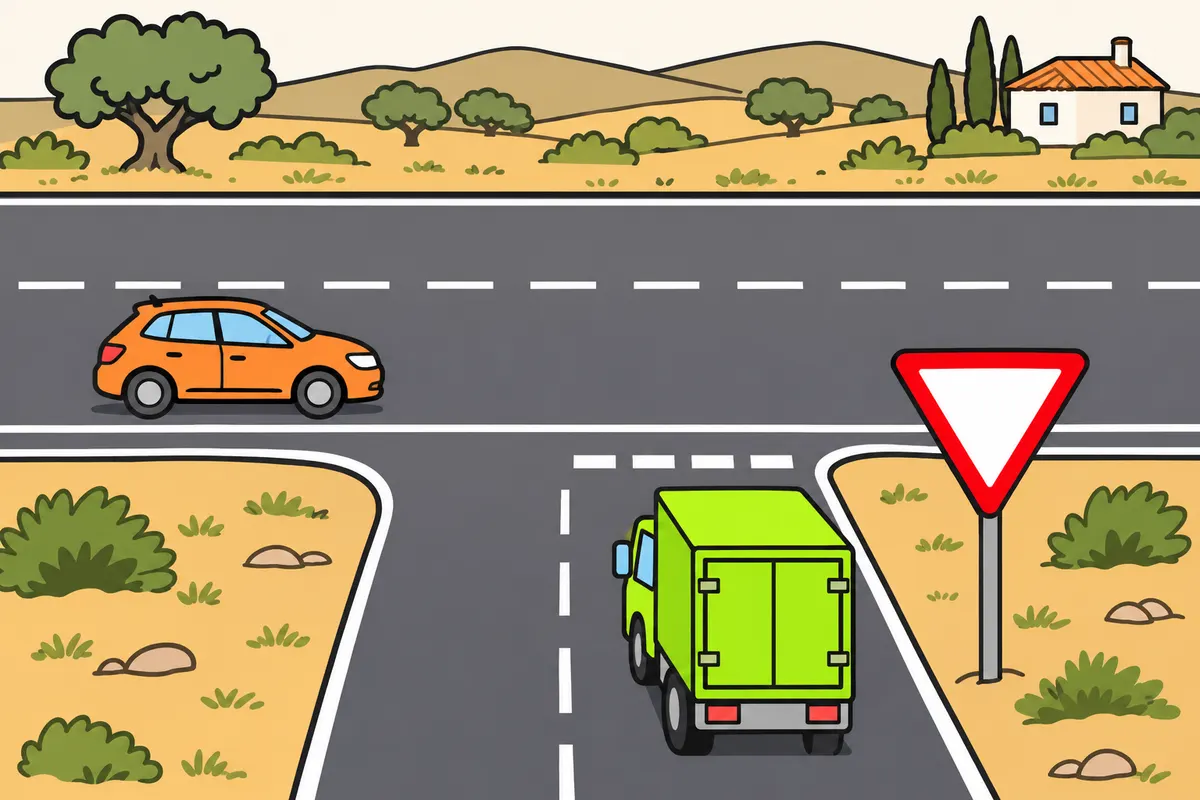
Distinguish stopping every time from giving way when necessary.
| Sign | What you must do |
|---|---|
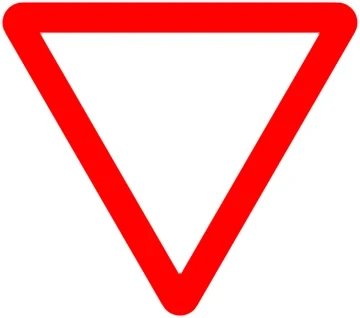
| R-1 | Give way; stop if necessary. |
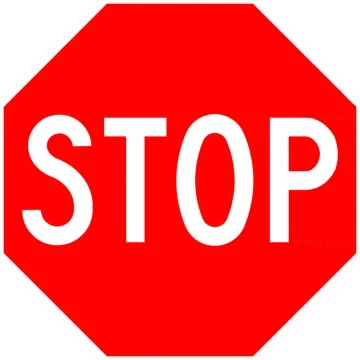
| R-2 | Stop completely, even if you see no vehicles. |
| R-3 | You have priority over crossing or joining roads. |
| R-4 | That priority ends; check the rules at the next junction. |
| P-2 | Expect a junction with priority to the right. |
Remember
- Give way to priority-road vehicles approaching from either side.
- At STOP, stop at the line or immediately before the carriageway.
- If you cannot see enough, move cautiously and stop again without causing danger.
Exam trap: Wrong: You only slow at STOP because nobody is coming. Right: Stop completely and give way where required.
Read the full explanation
- R-1, Give way, requires you to give way to traffic on the carriageway or lane you are joining, stopping if necessary. R-2, STOP, requires you to stop completely even if you cannot see any other vehicles. At both signs, you must give way to vehicles on the priority road, whether they approach from the right or the left. [RGC, Annex I](https://www.boe.es/buscar/doc.php?id=BOE-A-2025-12199).
- At R-2, you must stop at the stop line; if there is none, immediately before the carriageway you are approaching. If you cannot see well enough from this first position, you must move forward cautiously and stop again where you have a clear view, without endangering anyone. [RGC, Annex I](https://www.boe.es/buscar/doc.php?id=BOE-A-2025-12199).
- R-3 indicates that you have priority at junctions over roads that cross or join your road; R-4 indicates the end of that priority. You must check the controls at subsequent junctions: R-4 does not, by itself, require you to stop or mean that you must always give way to every vehicle. [RGC, Annex I](https://www.boe.es/buscar/doc.php?id=BOE-A-2025-12199).
- P-1 and its variants warn you of junctions or merging traffic where you have priority; P-2 warns you of a junction where priority to the right applies. These warnings are not equivalent to the instructions given by R-1 and R-2. [RGC, Annex I](https://www.boe.es/buscar/doc.php?id=BOE-A-2025-12199).
 R-1
 R-2
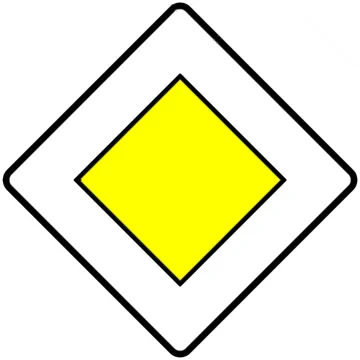 R-3
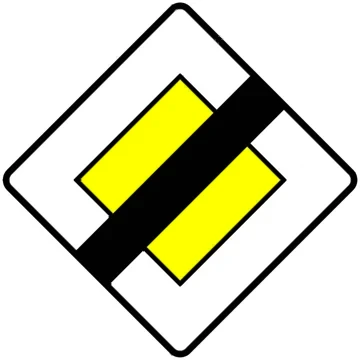 R-4
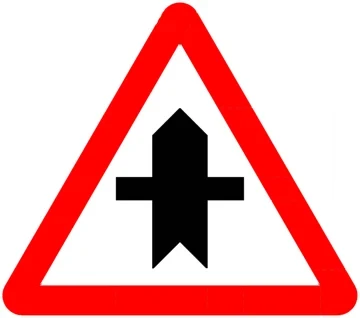 P-1
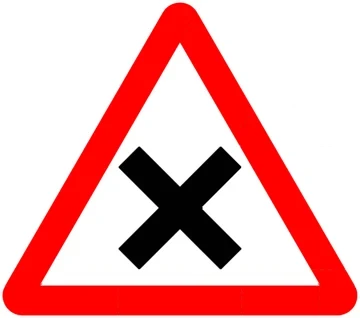 P-2
12Priority at narrow sections
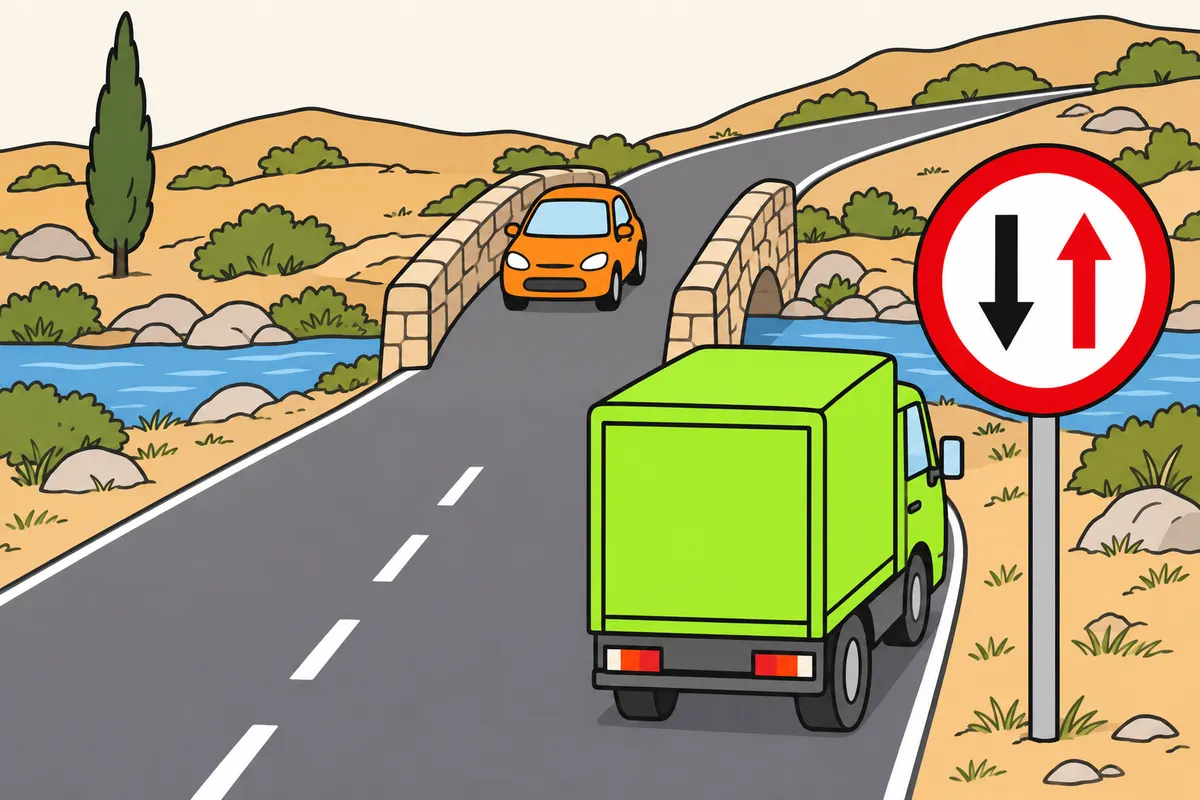
Before entering a narrow section, check who has priority.
| Situation | What you must do |
|---|---|
| R-5 | Do not enter if you would force oncoming traffic to stop. |
| R-6 | You have priority, but check you can pass safely. |
| Narrowing warning only | Do not assume the warning gives priority. |
Remember
- Before entering, check you can pass without forcing oncoming traffic to stop.
- With priority, check you can pass safely.
- Check reversing and gradients in “Manoeuvres with your lorry”.
Exam trap: Wrong: With R-6, you proceed even when another vehicle occupies the narrow section. Right: You have priority, but must avoid a collision.
Read the full explanation
- R-5, Priority for oncoming traffic, prohibits you from entering a narrow section if you cannot get through without forcing oncoming traffic to stop. You must wait before entering the restricted space. [RGC, Annex I](https://www.boe.es/buscar/doc.php?id=BOE-A-2025-12199).
- R-6, Priority over oncoming traffic, gives you priority over traffic approaching from the other end. Check that you can proceed safely and avoid a collision if another vehicle occupies the narrow section. [RGC, Annex I](https://www.boe.es/buscar/doc.php?id=BOE-A-2025-12199).
- P-17 warns you that the road narrows; P-17a and P-17b specify the right or left side. These signs warn you of a reduction in width and do not, by themselves, assign the priority indicated by R-5 or R-6. [RGC, Annex I](https://www.boe.es/buscar/doc.php?id=BOE-A-2025-12199).
- To apply the priority and reversing rules at narrow sections, bridges and gradients, consult “Manoeuvres with your lorry”, section “Narrow sections and steep gradients”.
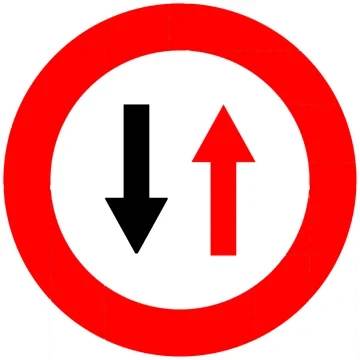 R-5
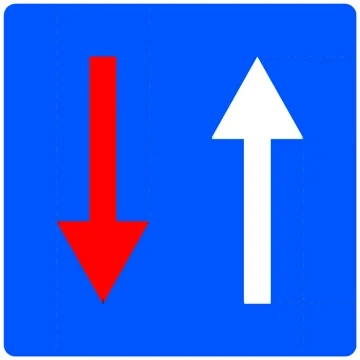 R-6
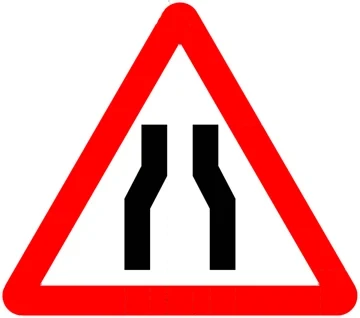 P-17
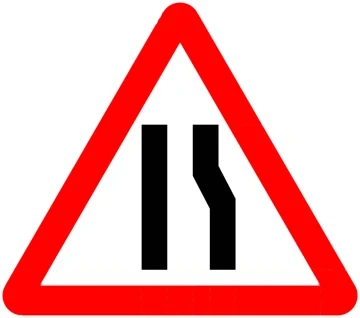 P-17a
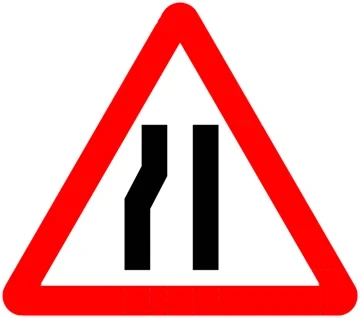 P-17b
13No entry for goods vehicles and trailers
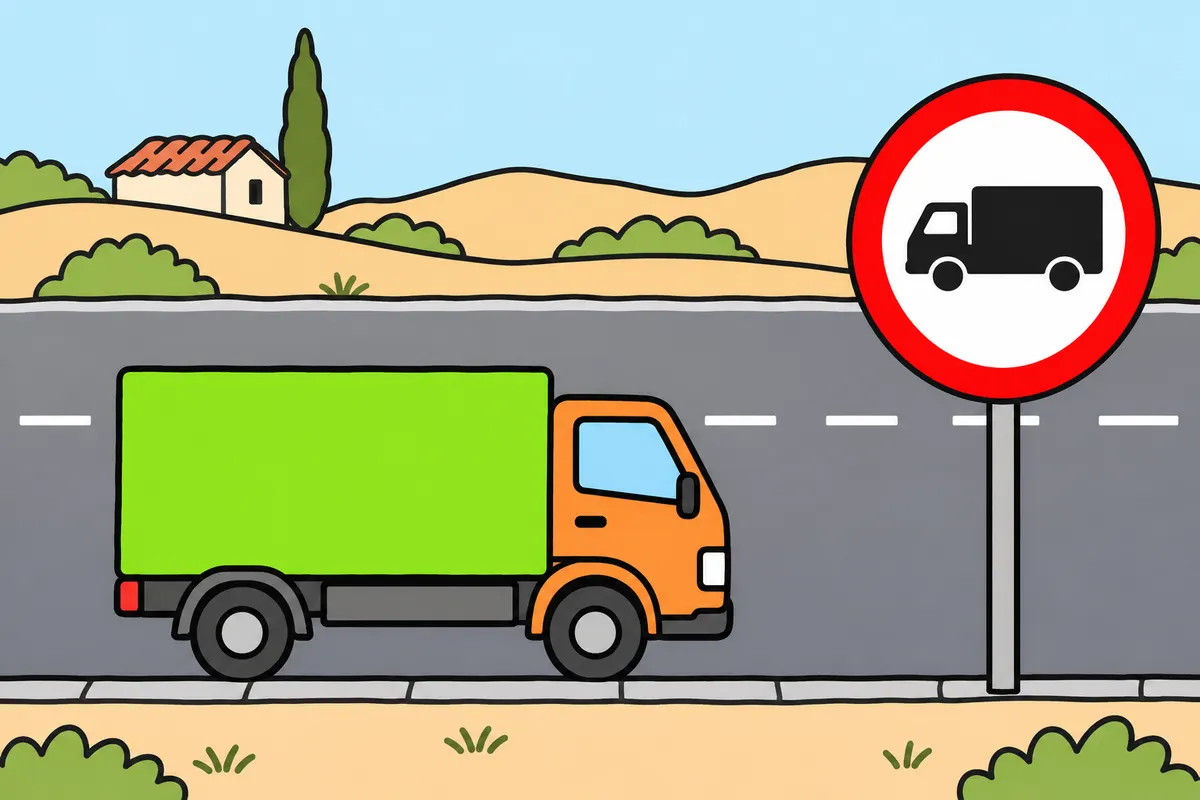
Check which vehicle category and MMA each entry prohibition uses.
| Sign | Vehicles affected |
|---|---|
| R-106 | Lorries, tractor units, goods vans and light vans, regardless of mass, even empty. |
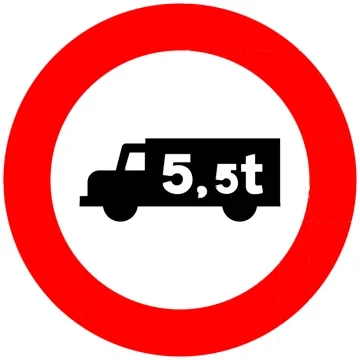
| R-107 | Goods vehicles whose MMA exceeds the figure. |
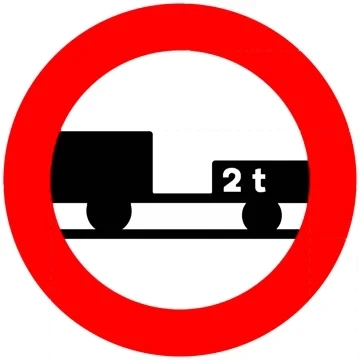
| R-112 | Motor vehicles with trailers, except single-axle trailers. |
| R-112 with tonnage | Compare the trailer's MMA; single-axle trailers remain excepted. |
Remember
- MMA (maximum authorised mass) applies even when you travel empty.
- Do not compare your lorry's mass with a figure meant for the trailer.
- A lorry without a trailer is outside the trailer prohibition.
Exam trap: Wrong: You enter empty at R-107 although your MMA exceeds the figure. Right: Compare MMA, not actual mass on this trip.
Read the full explanation
- R-106 prohibits entry by vehicles intended to carry goods: lorries, tractor units, panel vans and light vans. You must obey it regardless of mass and even when empty. The lorry pictogram does not limit this prohibition to heavy vehicles or make it a dangerous goods sign. [RGC, Annex I](https://www.boe.es/buscar/doc.php?id=BOE-A-2025-12199).
- R-107 applies the prohibition to goods vehicles whose MMA (maximum authorised mass) exceeds the figure shown. You must compare the maximum authorised mass, not the mass of the lorry on that day. With 5.5 t shown, an MMA above 5,500 kg prevents you from entering even when empty; with 3.5 t shown, a panel van with an MMA of 4 t is also affected. [RGC, Annex I](https://www.boe.es/buscar/doc.php?id=BOE-A-2025-12199).
- R-112 prohibits entry by motor vehicles towing trailers, except single-axle trailers. If a tonnage is shown, it refers to the MMA of the trailer. [RGC, Annex I](https://www.boe.es/buscar/doc.php?id=BOE-A-2025-12199).
- With R-112 showing 0.5 t, a two-axle trailer with an MMA of 750 kg exceeds the figure; one with an MMA of 500 kg does not. A rigid lorry without a trailer is outside the scope of this prohibition. The entitlement to drive the combination is covered in “C1 lorry licences and types of transport”. [RGC, Annex I](https://www.boe.es/buscar/act.php?id=BOE-A-2003-23514).
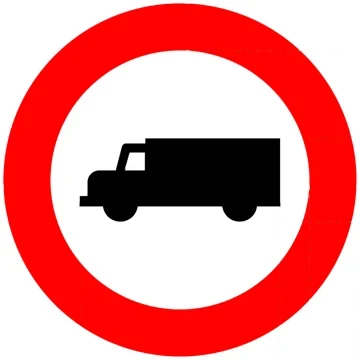 R-106
 R-107
 R-112
14Other entry prohibitions
Read which vehicles or loads each sign excludes before entering.
| Sign | Prohibition you must recognise |
|---|---|
| R-100 | Vehicle traffic in both directions. |
| R-101 | Entry at this access; oncoming traffic may approach. |
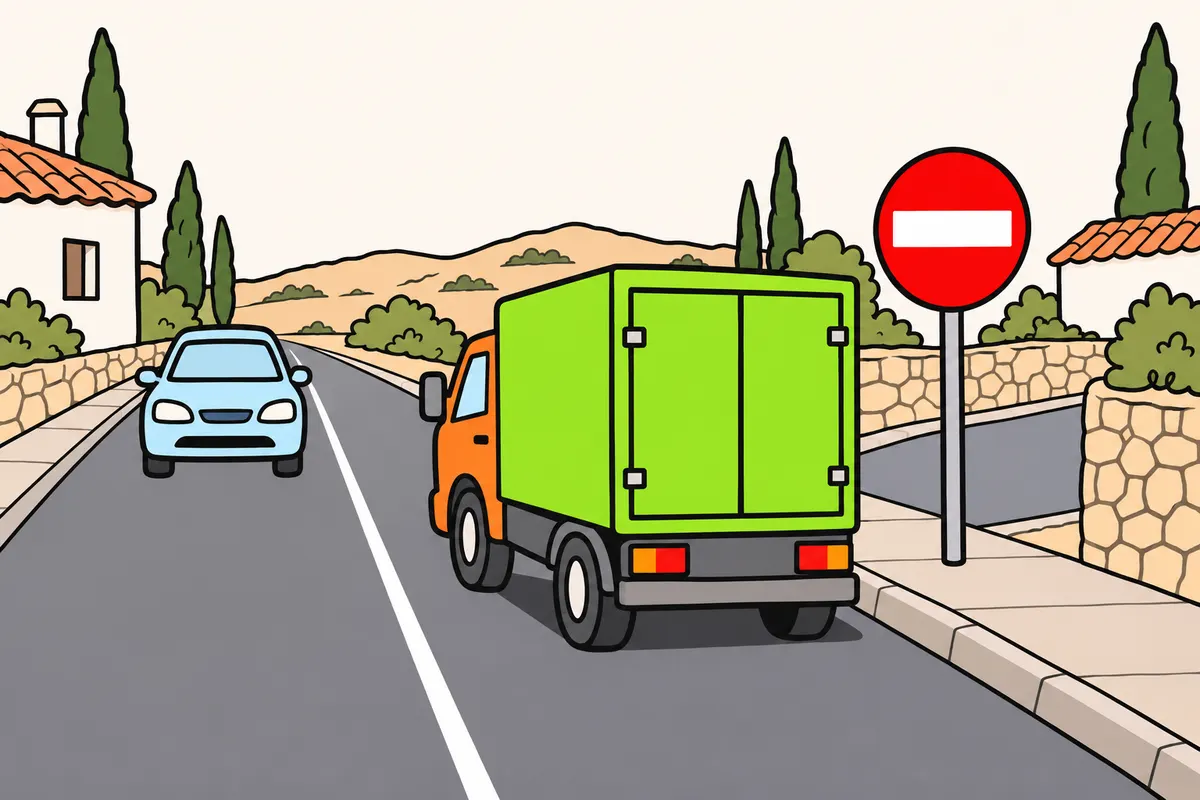
| R-102 | Entry for motor vehicles, including your lorry. |
| R-108 | Vehicles carrying dangerous goods that require specific signs. |
| R-109 | Vehicles carrying explosive or highly flammable goods that require specific signs. |
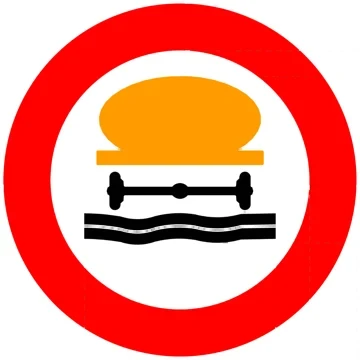
| R-110 | Access when carrying more than 1,000 litres of products capable of polluting water. |
Remember
- For environmental restrictions, read the plate, badge requirements and times.
- Being a tanker alone does not make a dangerous-goods prohibition apply.
- Even if another category is excluded, check prohibitions affecting your lorry.
Exam trap: Wrong: You read the R-110 threshold as tonnes. Right: Compare litres of products capable of polluting water; the prohibition applies only above the threshold.
Read the full explanation
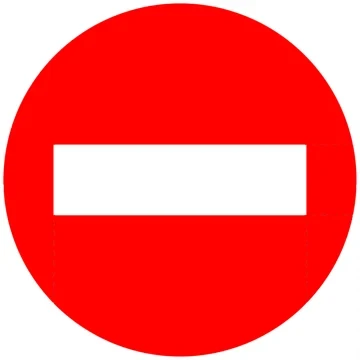
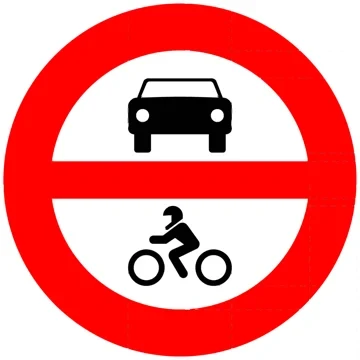
- R-100 prohibits vehicle traffic in both directions; R-101 prohibits entry at the access point where it is placed. At R-101, you may encounter oncoming traffic travelling in a permitted direction. R-102 prohibits entry by motor vehicles and applies to your lorry. [RGC, Annex I](https://www.boe.es/buscar/doc.php?id=BOE-A-2025-12199).
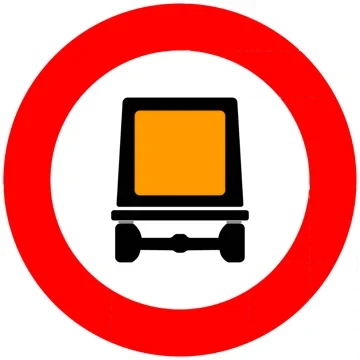
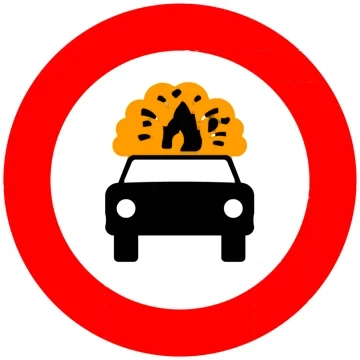
- R-108 prohibits entry by vehicles carrying dangerous goods that must display the markings required by their specific regulations. R-109 refers to explosive or readily flammable goods under those conditions. Whether the sign applies depends on the goods and the requirement to display transport markings; a tanker body alone does not determine whether you are affected. [RGC, Annex I](https://www.boe.es/buscar/doc.php?id=BOE-A-2025-12199).
- R-110 prohibits entry if you carry more than 1,000 litres of products capable of polluting water. The threshold is expressed in litres and must be exceeded: it is neither an MMA nor a mass in tonnes. Route requirements and ADR training are covered in “Dangerous goods: ADR basics”. [RGC, Annex I](https://www.boe.es/buscar/doc.php?id=BOE-A-2025-12199).
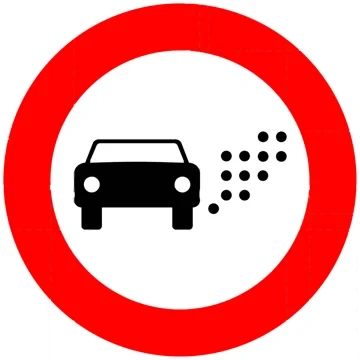
- R-120 restricts entry according to environmental badges or other environmental criteria, which you must read on the supplementary plate or information board. You cannot infer permission solely from the colour or pictogram of the sign. Permission to make deliveries and the permitted times depend on the message applying to that access point. [RGC, Annex I](https://www.boe.es/buscar/doc.php?id=BOE-A-2025-12199).
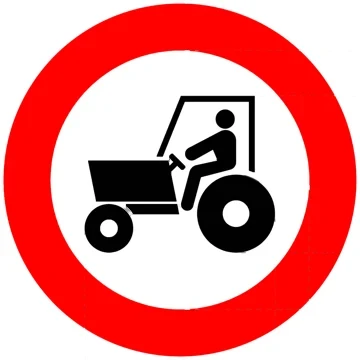
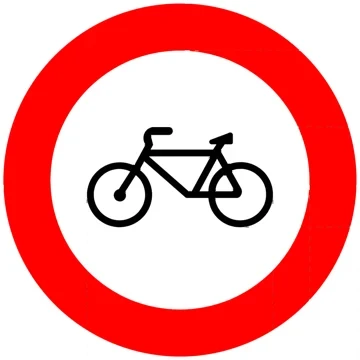
- Other entry prohibitions target specific categories: R-111, agricultural motor vehicles; R-114, cycles; R-116, pedestrians; R-118, VMP (personal mobility vehicles); R-119, cycles and VMP. A sign excluding another category does not allow you to ignore separate prohibitions that apply to your lorry. [RGC, Annex I](https://www.boe.es/buscar/doc.php?id=BOE-A-2025-12199).
 R-100
 R-101
 R-102
 R-108
 R-109
 R-110
 R-120
 R-111
 R-114
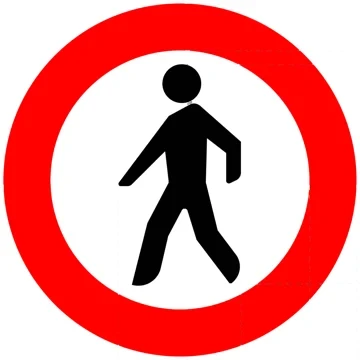 R-116
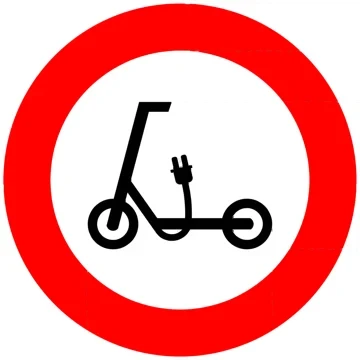 R-118
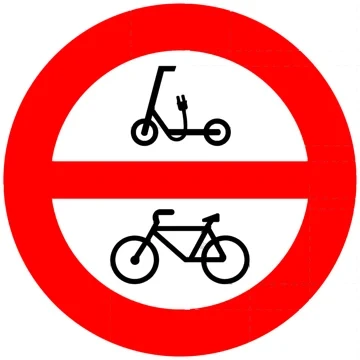 R-119
15Actual mass, axles and dimensions
Compare the correct mass or dimension and always include the load.
| Sign | What you compare |
|---|---|
| R-201 | Your vehicle's actual total mass at that moment. |
| R-202 | Mass transmitted by each axle through all its wheels. |
| R-203 | Total length of the vehicle or combination, including its load. |
| R-204 | Width, including the load. |
| R-205 | Height, including the load. |
Remember
- At R-200, stop at the checkpoint and meet its requirement before continuing.
- Include projecting loads when measuring.
- Check every restriction, even if you meet one.
- Matching a figure is not exceeding it; also check actual clearance.
Exam trap: Wrong: You compare R-201 with goods alone or MMA. Right: Compare the loaded vehicle's actual total mass.
Read the full explanation
- R-200 prohibits you from proceeding without stopping at the indicated checkpoint, such as customs, police or a toll. You must comply with its requirement before moving off again; it does not simply mean giving way at a junction. [RGC, Annex I](https://www.boe.es/buscar/doc.php?id=BOE-A-2025-12199).
- R-201 limits the laden mass, meaning the actual total mass of the vehicle at that moment. It does not refer only to the goods or use MMA as its criterion. With 5.5 t shown, you may proceed if the laden mass does not exceed 5,500 kg and you comply with all other restrictions; an MMA of 7.5 t does not in itself exclude you. [RGC, Annex I](https://www.boe.es/buscar/doc.php?id=BOE-A-2025-12199).
- R-202 limits the mass transmitted by each axle through all its wheels. You must check the axle concerned, including twin wheels, without arbitrarily dividing its load between tyres to compare it with the figure. Complying with the total mass limit does not guarantee compliance with the axle restriction. [RGC, Annex I](https://www.boe.es/buscar/doc.php?id=BOE-A-2025-12199).
- R-203 restricts the total length of the vehicle or combination, including the load. With 10 m shown, you cannot proceed if you exceed 10 m. You must take any load projecting forwards or rearwards into account and must not use only the length of the bodywork or load body to decide whether the lorry fits. [RGC, Annex I](https://www.boe.es/buscar/doc.php?id=BOE-A-2025-12199).
- R-204 restricts width, including the load. With 2.50 m shown, a lorry 2.55 m wide cannot proceed even if its width is generally permitted. R-205 restricts height, including the load: you must check the highest point of the actual combination, not just the height stated for the cab. [RGC, Annex I](https://www.boe.es/buscar/doc.php?id=BOE-A-2025-12199).
- R-205 showing 4 m prohibits heights above 4 m; showing 3.5 m, it prohibits heights above 3.5 m. Equalling a figure does not mean exceeding it, but you must check the actual clearance conditions and the other signs. [RGC, Annex I](https://www.boe.es/buscar/doc.php?id=BOE-A-2025-12199).
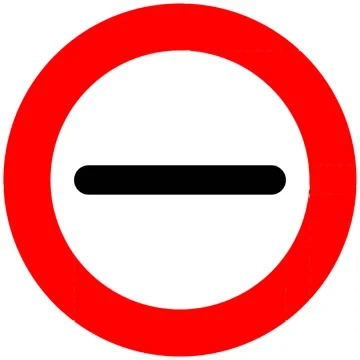 R-200
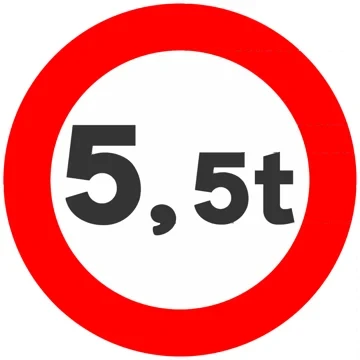 R-201
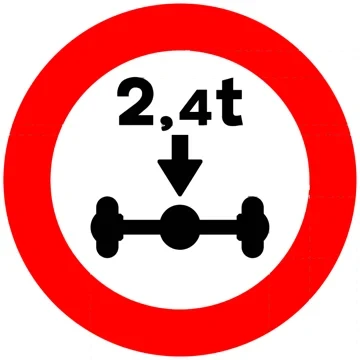 R-202
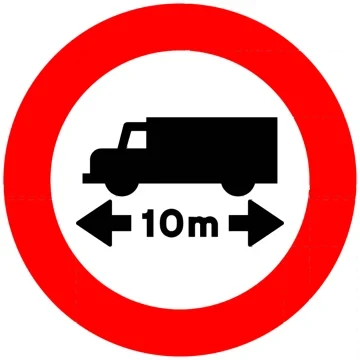 R-203
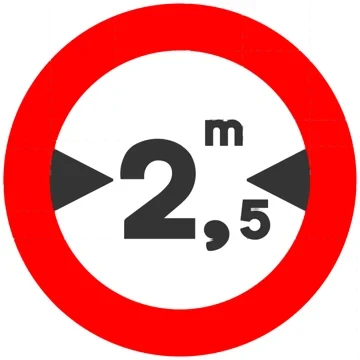 R-204
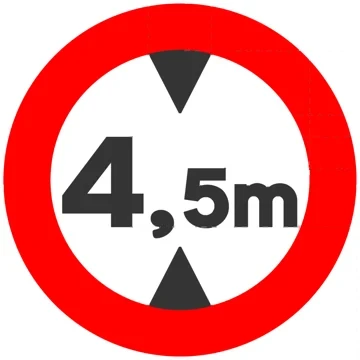 R-205
16Speed, separation and overtaking
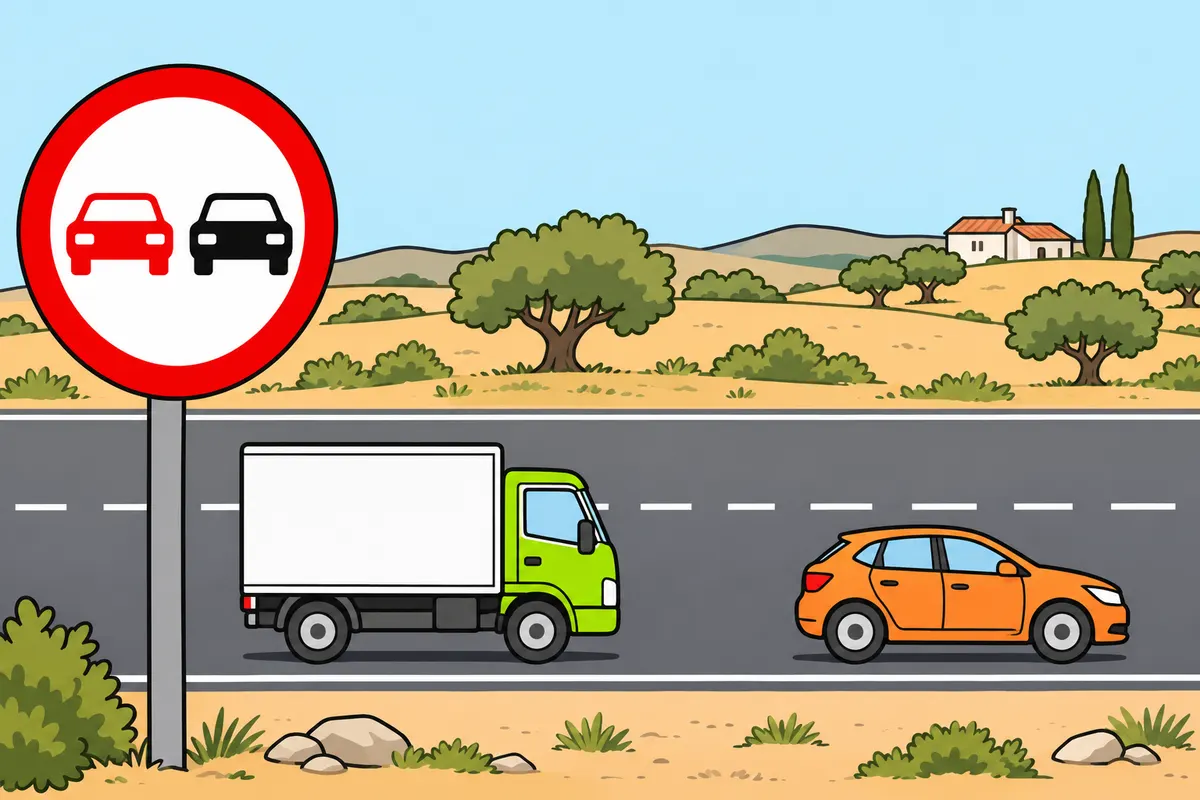
Obey the speed, separation and overtaking restrictions that apply to your lorry.
| Sign and vehicles affected | What you must do |
|---|---|
| R-300: vehicles covered by the sign | Keep at least the shown separation, except when about to overtake. |
| R-305: vehicles covered by the sign | Do not overtake motor vehicles by entering the area for oncoming traffic. |
| R-306: lorries above 3,500 kg MMA | Do not overtake motor vehicles, even without entering the opposing direction. |
Remember
- Apply the lower maximum for your lorry and the road section.
- A signposted maximum starts at the sign.
- If mounted with a warning sign, it ends when that hazard ends.
- On non-priority roads, it ends after the junction with a priority road.
- A broken line does not cancel an overtaking prohibition.
Exam trap: Wrong: You overtake a motorcycle with a lorry covered by R-306. Right: This prohibition includes overtaking motorcycles.
Read the full explanation
- R-301 sets a maximum speed in km/h. You must obey it from the location of the sign until the next different maximum speed limit or the applicable end of the restriction. If it shares a post or panel with a warning sign, it ends when that hazard ends; on a road without priority, it ends as you leave the junction with a priority road. [RGC, Annex I](https://www.boe.es/buscar/doc.php?id=BOE-A-2025-12199).
- A signed maximum speed does not allow you to exceed the limit for your lorry. You must apply the lowest effective restriction applicable to the vehicle and the stretch of road. General maximum speeds and distance calculations are covered in “Speed and safe following distances”; here you must distinguish a mandatory maximum from a recommendation. [RGC, Annex I](https://www.boe.es/buscar/doc.php?id=BOE-A-2025-12199).
- R-300 requires a gap from the vehicle ahead equal to or greater than the figure shown, except when you are about to overtake. Without a figure, it reminds you of the statutory following distance. With 70 m shown, it does not indicate a maximum distance or apply only when following cars; congestion alone does not remove the requirement imposed by the sign. [RGC, Annex I](https://www.boe.es/buscar/doc.php?id=BOE-A-2025-12199).
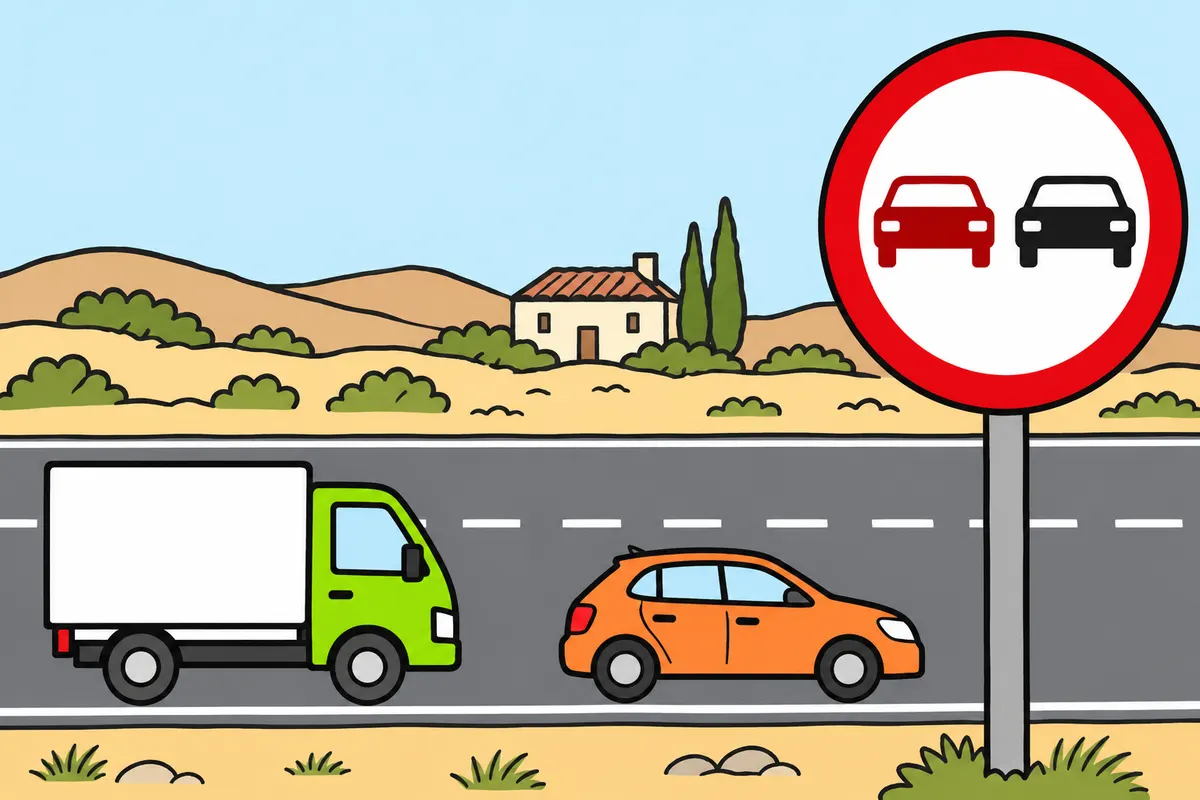
- R-305 prohibits overtaking motor vehicles when the manoeuvre involves entering the area reserved for oncoming traffic. You must also comply with the general overtaking prohibitions and road markings. A broken line does not authorise you to ignore the sign or remove the need for sufficient visibility. [RGC, Annex I](https://www.boe.es/buscar/doc.php?id=BOE-A-2025-12199).
- R-306 prohibits lorries with an MMA above 3,500 kg from overtaking motor vehicles, even without entering the area for oncoming traffic. It applies to your lorry and also to overtaking a motorcycle. [RGC, Annex I](https://www.boe.es/buscar/doc.php?id=BOE-A-2025-12199).
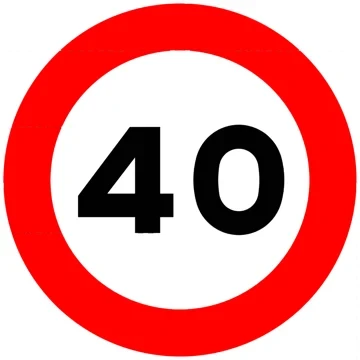 R-301
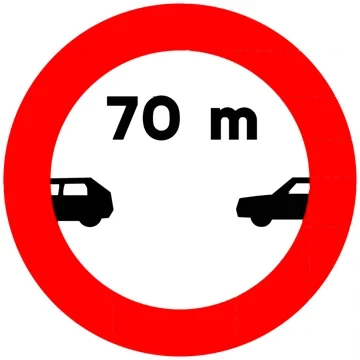 R-300
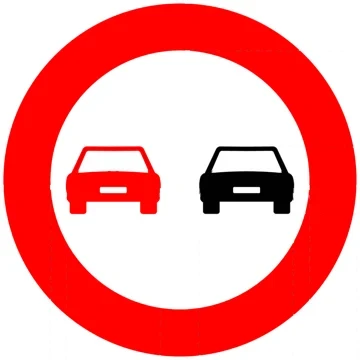 R-305
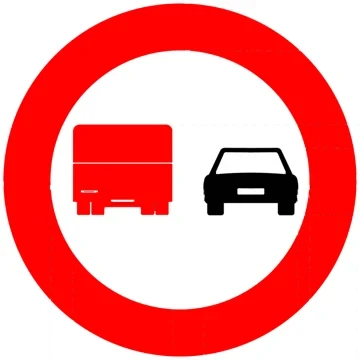 R-306
17Turns, stopping and parking
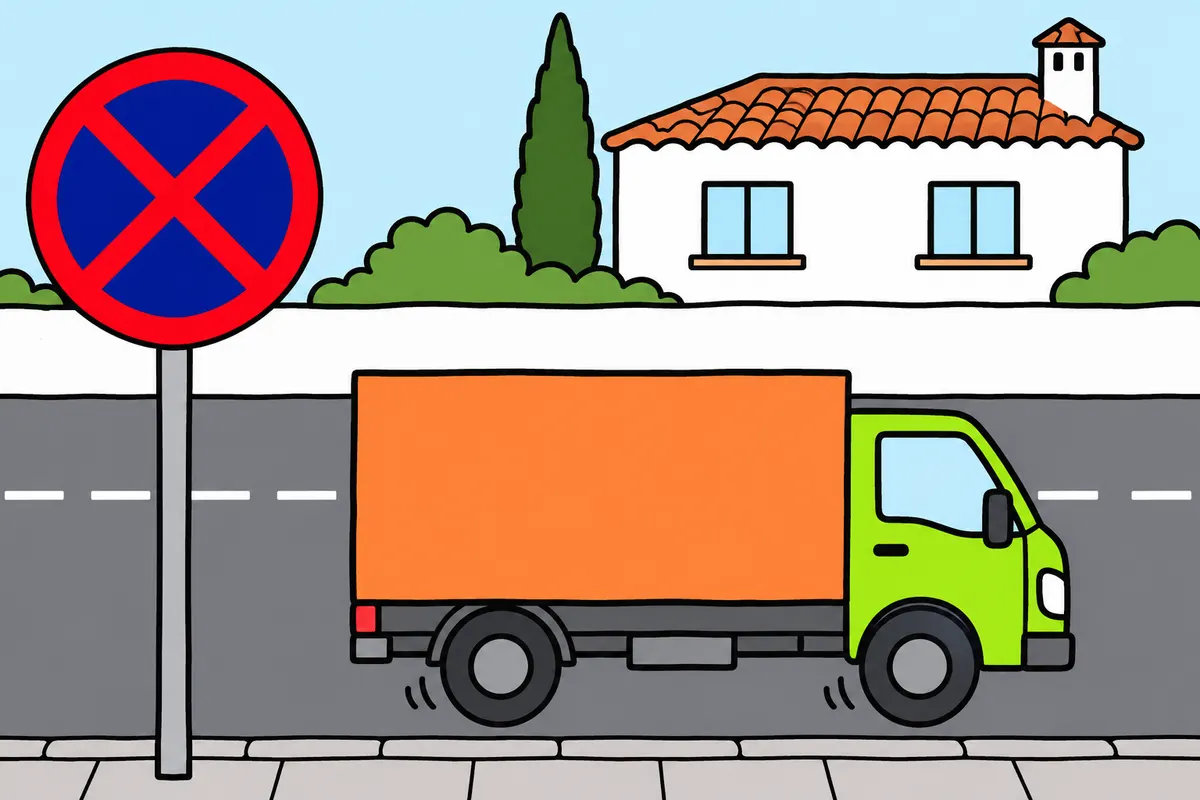
Distinguish turns, stops and parking, and check the affected side and times.
| Sign | What you must do |
|---|---|
| R-302 | Do not turn right. |
| R-303 | Do not turn left or make a U-turn. |
| R-304 | Do not make a U-turn; this sign alone does not prohibit turning left. |
| R-307 | Do not stop or park. |
| R-308 | Do not park; check whether you may stop. |
| R-308c | Do not park from 9:00 on day 1 until 9:00 on day 16. |
| R-308d | Do not park from 9:00 on day 16 until 9:00 on day 1 next month. |
| R-310 | Do not use your horn, except to avoid an accident. |
Remember
- Read arrows to check which way the prohibition extends.
- Unless stated otherwise, it runs from the sign to the next junction.
- Always check the affected side and other local rules.
- Do not park blocking an authorised vehicle access.
- Delivering goods gives you no general exemption.
Exam trap: Wrong: You assume R-308 prohibits every stop. Right: It prohibits parking; check the other rules before stopping.
Read the full explanation
- R-302 prohibits turning right; R-303 prohibits turning left and making a U-turn. R-304 prohibits making a U-turn, but does not in itself prohibit a left turn. [RGC, Annex I](https://www.boe.es/buscar/doc.php?id=BOE-A-2025-12199).
- R-307 prohibits stopping and parking on the side where it is placed; R-308 prohibits parking. Unless otherwise indicated, the restriction begins level with the sign and ends at the next junction in your direction of travel. A parking prohibition does not in itself prohibit all stopping, but you must check the other rules at that location. [RGC, Annex I](https://www.boe.es/buscar/doc.php?id=BOE-A-2025-12199).
- R-308c prohibits parking from 9:00 on day 1 until 9:00 on day 16; R-308d, from 9:00 on day 16 until 9:00 on day 1 of the following month. You must pay attention to the exact times and the side affected. These signs do not in themselves prohibit stopping. [RGC, Annex I](https://www.boe.es/buscar/doc.php?id=BOE-A-2025-12199).
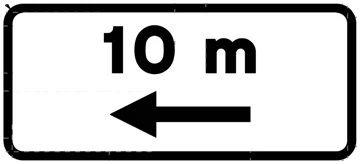
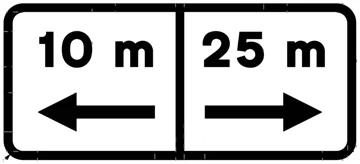
- For variants with arrows, you must check whether the prohibition extends to one or both sides of the sign and where it ends. Plates S-820 and S-821 indicate extension to the right and left; S-830, to both sides. You must not assume that an ordinary sign automatically applies to the stretch behind it. [RGC, Annex I](https://www.boe.es/buscar/doc.php?id=BOE-A-2025-12199).
- R-308e identifies a vado (vehicle access) whose entrance or exit you must not obstruct by parking; R-309 limits parking duration according to the system indicated. R-310 prohibits sounding the horn except to prevent an accident. The need to deliver goods does not give you a general exemption from these prohibitions. [RGC, Annex I](https://www.boe.es/buscar/doc.php?id=BOE-A-2025-12199).
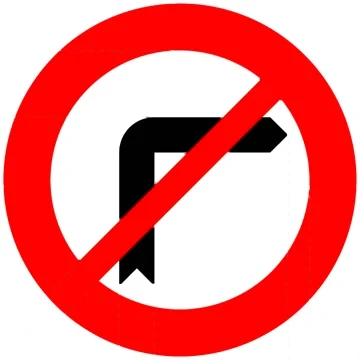 R-302
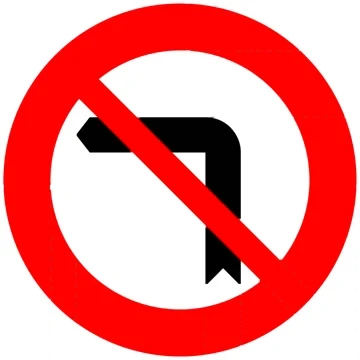 R-303
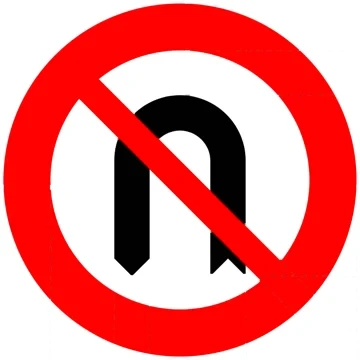 R-304
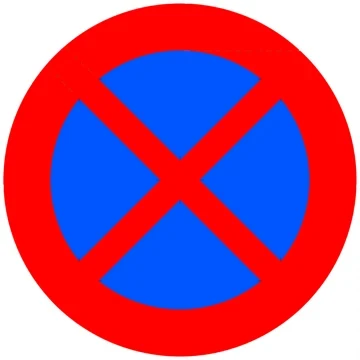 R-307
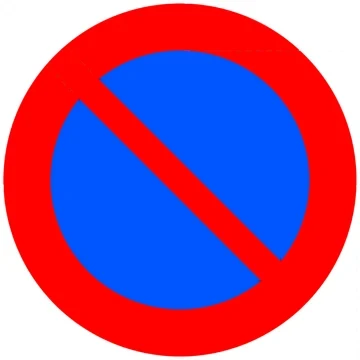 R-308
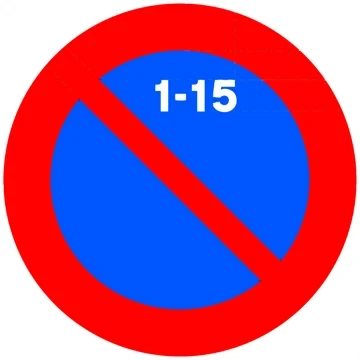 R-308c
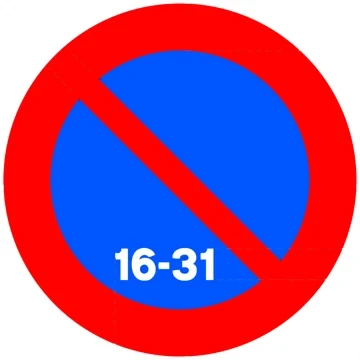 R-308d
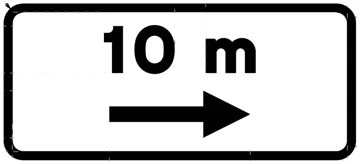 S-820
 S-821
 S-830
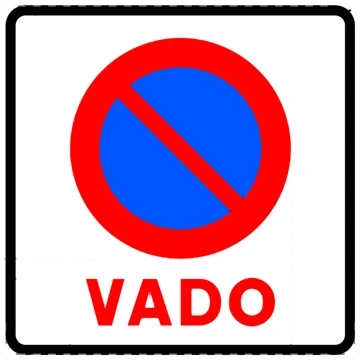 R-308e
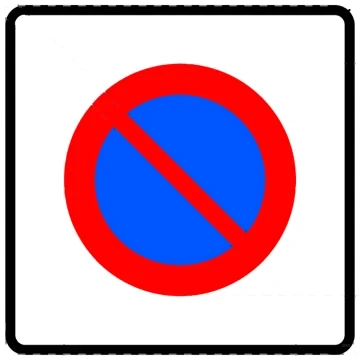 R-309
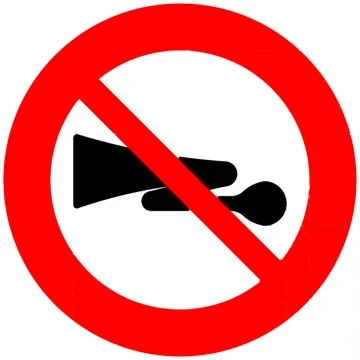 R-310
18Mandatory directions and carriageways
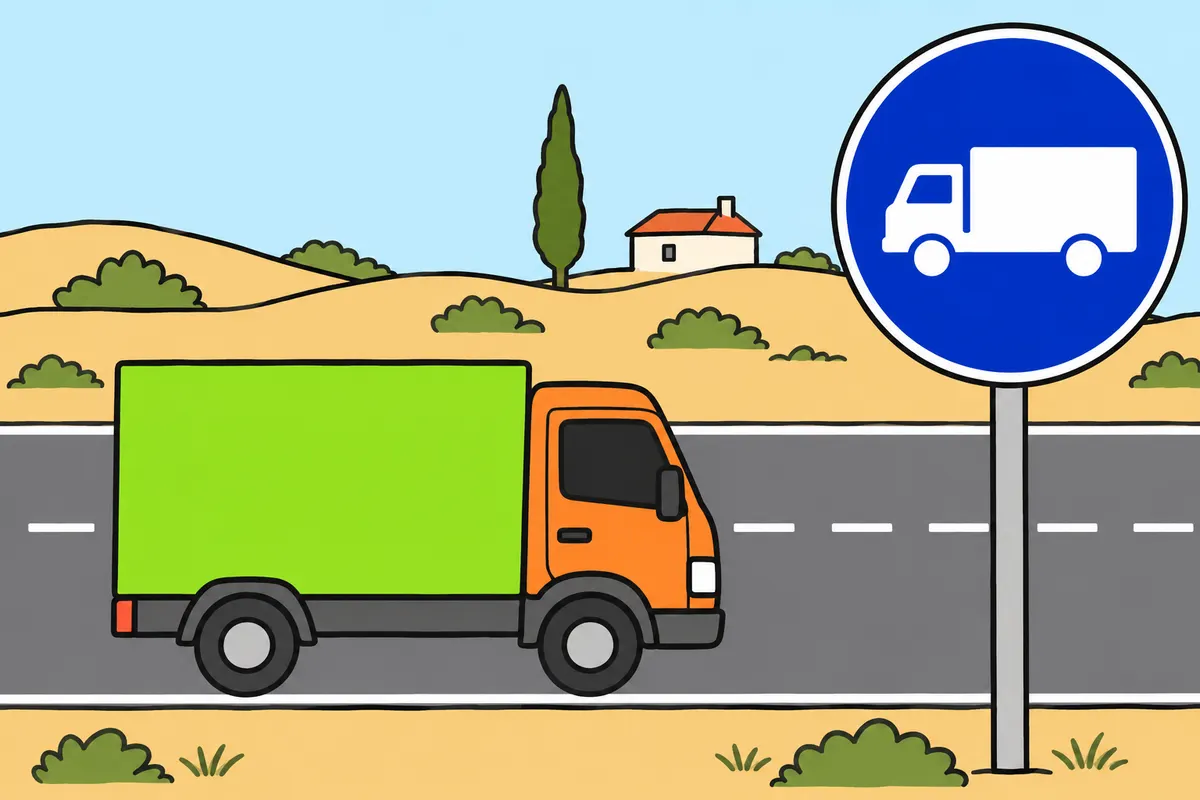
Follow mandatory directions and check which carriageway your vehicle or load must use.
| Sign | Vehicles required to use the carriageway |
|---|---|
| R-406 without tonnage | Lorries, tractor units, goods vans and light vans, regardless of mass. |
| R-406 with tonnage | Those vehicles or combinations whose MMA exceeds the figure. |
| R-414 | Vehicles carrying dangerous goods that require specific signs. |
| R-416 | Vehicles carrying explosive or highly flammable goods that require specific signs. |
| R-415 | Vehicles carrying more than 1,000 litres of products capable of polluting water. |
Remember
- Follow arrows showing mandatory directions and which side to pass.
- With R-402, keep the central island on your left.
- A mandatory direction does not give you priority to enter.
- Respect routes reserved for other categories when they exclude your lorry.
Exam trap: Wrong: Every blue lorry sign applies to you in the same way. Right: Read the symbol, load category and any tonnage.
Read the full explanation
- You must follow the arrows for mandatory direction, mandatory side to pass and the only permitted directions. R-402 requires you to circulate in the direction shown, keeping the central island on your left. A mandatory direction does not in itself give you priority when entering. [RGC, Annex I](https://www.boe.es/buscar/doc.php?id=BOE-A-2025-12199).
- R-406 requires lorries, tractor units, panel vans and light vans to use the carriageway where it is placed, regardless of their mass. If it shows a tonnage, it is mandatory only when the MMA of the vehicle or combination exceeds the figure. [RGC, Annex I](https://www.boe.es/buscar/doc.php?id=BOE-A-2025-12199).
- R-414 requires you to use the indicated carriageway when you carry dangerous goods and must display the specific markings; R-416 refers to explosive or readily flammable goods under those conditions. You must read the specific symbol: not every blue sign showing a lorry applies to the same category. [RGC, Annex I](https://www.boe.es/buscar/doc.php?id=BOE-A-2025-12199).
- R-415 requires you to use the indicated carriageway if you carry more than 1,000 litres of products capable of polluting water. You must compare the volume with that threshold, without converting it into tonnes. [RGC, Annex I](https://www.boe.es/buscar/doc.php?id=BOE-A-2025-12199).
- You must respect routes reserved for and mandatory for pedestrians, cycles, mopeds or VMP when they exclude all other vehicles. You must always check whether the sign imposes compulsory use, reserves the route, or both. [RGC, Annex I](https://www.boe.es/buscar/doc.php?id=BOE-A-2025-12199).
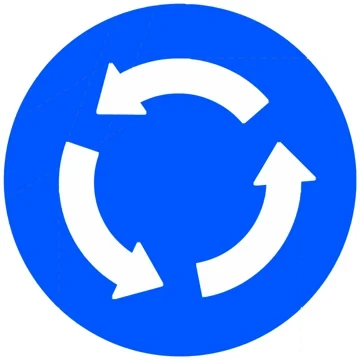 R-402
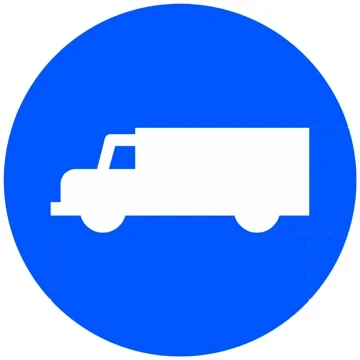 R-406
 R-414
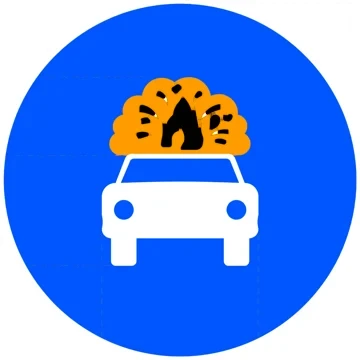 R-416
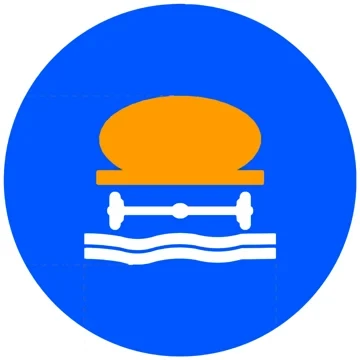 R-415
19Mandatory equipment and end signs
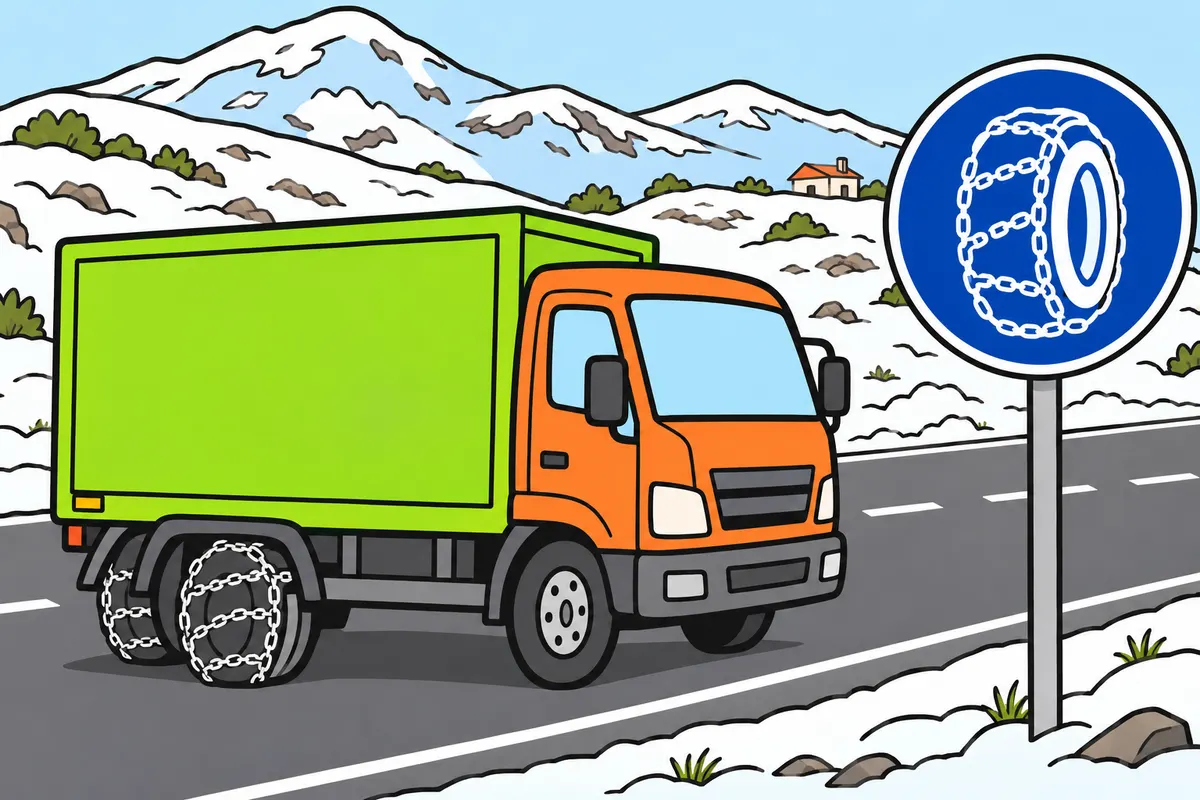
Use required equipment and remember that an ending sign leaves other rules in force.
| Sign | What you must do |
|---|---|
| R-412 | Use approved devices on at least one wheel each side of the same driven axle, or the specified special tyres. |
| R-412b | Use winter tyres. |
| R-413 | Use at least dipped beam, even in good visibility. |
| R-418 | Enter with suitable, working electronic toll equipment. |
| R-500 | Specific prohibitions for moving vehicles end; general rules and parking prohibitions remain. |
| R-501 | The signposted maximum speed ends. |
| R-502 / R-503 | The corresponding overtaking prohibition ends. |
Remember
- With a signposted minimum speed, respect the legal safety exceptions.
- Its end does not remove general minimum speeds.
- Carrying chains in storage is not the same as using them.
- Before overtaking, check markings, visibility and other conditions.
- The end of a mandatory carriageway does not permit every nearby access.
Exam trap: Wrong: You ignore all rules after an end-of-prohibitions sign. Right: Keep following general rules, other signs and parking prohibitions.
Read the full explanation
- R-411 imposes a minimum speed in km/h from its location until a different minimum speed, an R-506 end of minimum speed sign or an equal or lower maximum speed. You must observe the regulatory exceptions for safety. When the signposted minimum ends, the applicable general minimum speeds remain in force. [RGC, Annex I](https://www.boe.es/buscar/act.php?id=BOE-A-2003-23514).
- R-412 requires chains or authorised anti-slip devices acting on at least one wheel on each side of the same driven axle, or the specified special tyres. R-412b requires winter tyres. Before entering, you must have the equipment required by the sign fitted or in use: chains stored in your lorry do not meet this requirement. [RGC, Annex I](https://www.boe.es/buscar/doc.php?id=BOE-A-2025-12199).
- R-413 requires you to drive with at least dipped beam headlights on, even in good visibility. Its end does not remove other reasons why you must use them. R-418 requires suitable, working electronic toll equipment for that lane: you must check it before entering, without relying solely on number plate recognition. [RGC, Annex I](https://www.boe.es/buscar/doc.php?id=BOE-A-2025-12199).
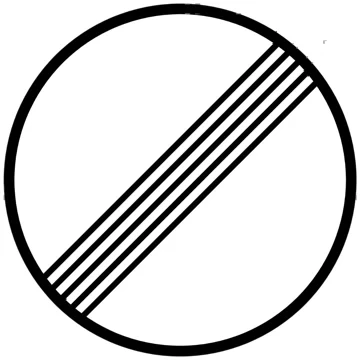
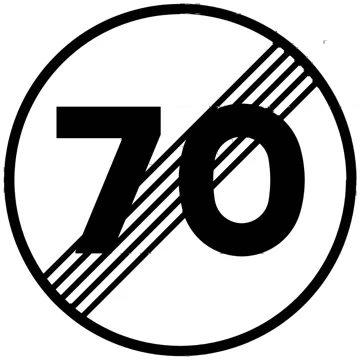
- R-500 ends the preceding specific prohibitions for moving vehicles; it does not remove general rules or parking prohibitions. R-501 ends the signposted maximum speed. You must then apply the rules that remain in force for your lorry and the road. [RGC, Annex I](https://www.boe.es/buscar/doc.php?id=BOE-A-2025-12199).
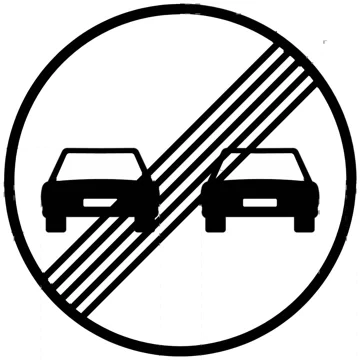
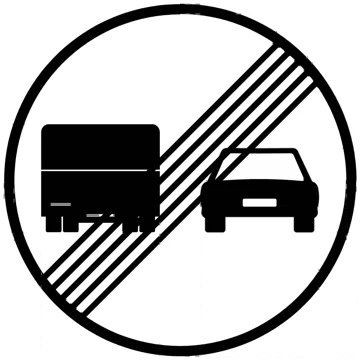
- R-502 ends the overtaking prohibition; R-503 ends the overtaking prohibition for lorries. You must still check road markings, visibility and other conditions before overtaking. R-509 ends the mandatory carriageway for lorries, tractor units, large vans and light vans; it does not make every nearby access a permitted route. [RGC, Annex I](https://www.boe.es/buscar/doc.php?id=BOE-A-2025-12199).
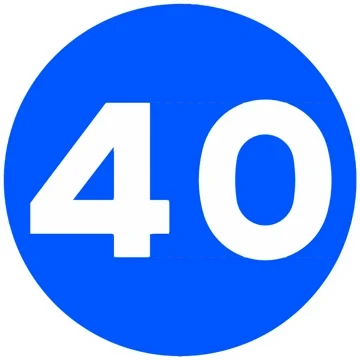 R-411
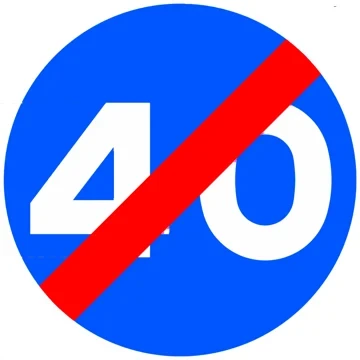 R-506
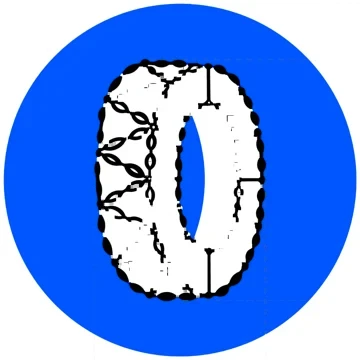 R-412
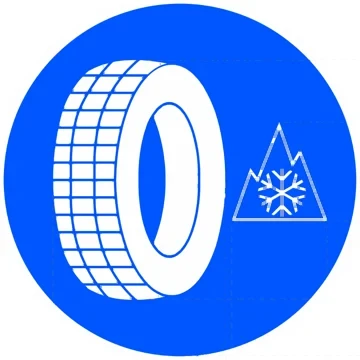 R-412b
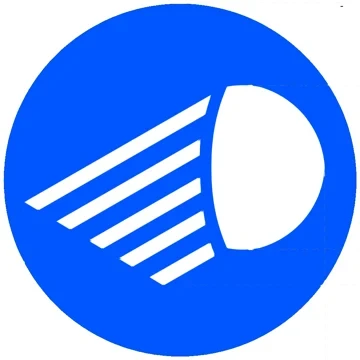 R-413
 R-418
 R-500
 R-501
 R-502
 R-503
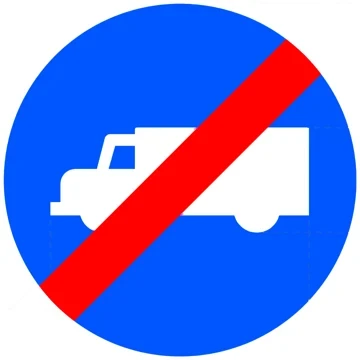 R-509
20Road information and recommendations
Distinguish road types, recommendations and reserved spaces.
| Sign | What you recognise |
|---|---|
| S-7 | Recommended maximum speed. |
| S-9 | Advisory range in favourable conditions, not a mandatory minimum. |
| S-16 | Emergency escape lane, not parking. |
| S-32 | Electronic toll payment available alongside other payment methods. |
| S-18 | Stopping and parking reserved for taxis available for hire and in service. |
Remember
- You may use motor-vehicle-only roads with your lorry unless another restriction prevents it.
- At a tunnel sign, recognise that specific rules apply.
- Adapt speed to the weather and obey any lower mandatory maximum.
- At parking areas, read reservations and conditions.
Exam trap: Wrong: You follow S-9 above your lorry's maximum. Right: Recommendations never allow exceeding mandatory limits or require that speed in poor conditions.
Read the full explanation
- S-1 identifies the start of an autopista (motorway); S-1a, the start of an autovía (dual carriageway); S-3, a road reserved for motor vehicles. You may enter the latter with your lorry if no other restriction prevents it. It is not limited to cars and does not in itself impose a maximum MMA (maximum authorised mass) of 3,500 kg; nor does it turn a conventional road into a motorway. [RGC, Annex I](https://www.boe.es/buscar/doc.php?id=BOE-A-2025-12199).
- S-5 identifies a tunnel, underpass or equivalent section. It announces specific traffic rules applicable to the signposted section. You study lighting in “Lights and signalling on your light lorry”; separation in “Speed and safe following distances”; and emergencies in “Accidents, breakdowns and first aid”. [RGC, Annex I](https://www.boe.es/buscar/doc.php?id=BOE-A-2025-12199).
- S-7 recommends a maximum speed and S-9 an advisable speed range, for example 70 to 90 km/h, in favourable conditions. You must adapt your driving to the conditions and observe any lower mandatory limit. Below a hazard warning sign, the recommendation refers to the section where that hazard persists. It does not authorise you to exceed your lorry’s maximum speed or require you to maintain the recommended speed in bad weather. [RGC, Annex I](https://www.boe.es/buscar/doc.php?id=BOE-A-2025-12199).
- S-16 identifies an emergency escape lane for stopping vehicles with braking problems. You may use it to deal with this braking emergency in your lorry; you must keep its access clear so that it can serve this purpose. S-32 indicates that electronic toll payment is available alongside other methods; you must distinguish it from the mandatory electronic toll payment indicated by R-418. [RGC, Annex I](https://www.boe.es/buscar/doc.php?id=BOE-A-2025-12199).
- S-17 indicates parking, and you must read its reservations and conditions. S-18 reserves stopping and parking for taxis available for hire and in service: you cannot use it to unload your lorry. A service sign does not make every nearby space available for immobilising your vehicle. [RGC, Annex I](https://www.boe.es/buscar/doc.php?id=BOE-A-2025-12199).
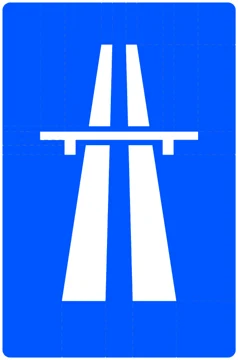 S-1
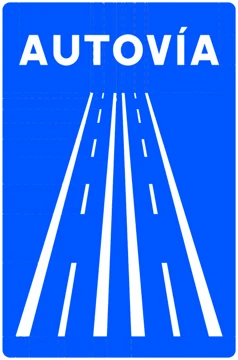 S-1a
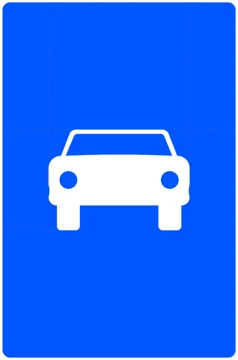 S-3
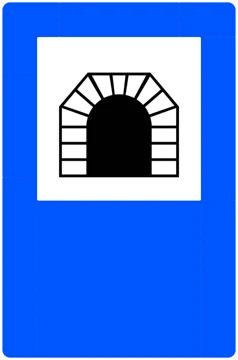 S-5
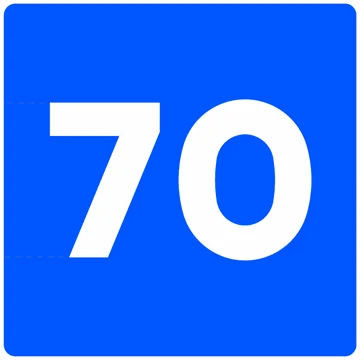 S-7
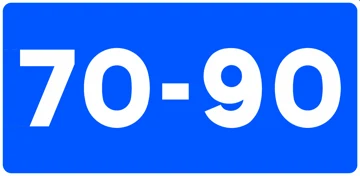 S-9
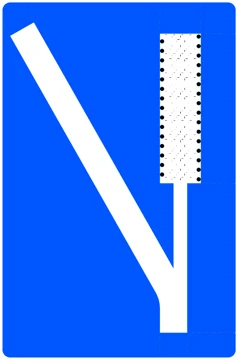 S-16
 S-32
 S-17
 S-18
21Lanes, mountain passes and directions
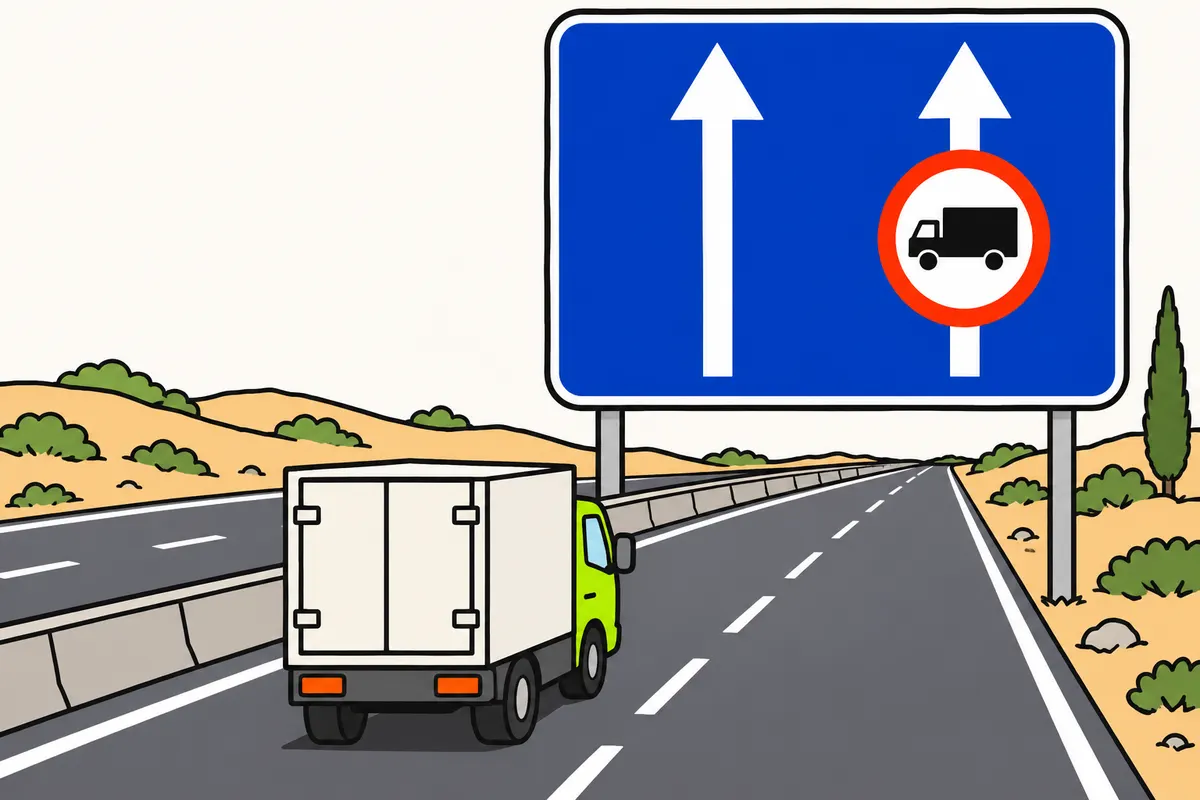
Plan your route and read lane, mountain pass and access restrictions together.
| Sign type | How you use it |
|---|---|
| Advance direction | Prepare your lane and route early. |
| Direction | Find your destination. |
| Route identification | Identify the road. |
| Confirmation | Check destinations and distances. |
Remember
- Lane signs may contain mandatory limits.
- VAO identifies a lane reserved for high-occupancy vehicles.
- Check lorry access to VAO lanes in “Manoeuvres with your lorry”.
- For mountain passes, read conditions, restrictions, equipment and where they start.
- Check branch restrictions before taking an exit.
- An advertised service does not guarantee space to park your lorry.
Exam trap: Wrong: You decide whether a mountain pass is open from one colour. Right: Read conditions, restrictions, equipment and where they start.
Read the full explanation
- You must read lane signs from their diagrams: the number of lanes, directions, merging lanes or lane endings, and any restrictions shown within them. An information sign may include a mandatory maximum speed, minimum speed or prohibition. [RGC, Annex I](https://www.boe.es/buscar/doc.php?id=BOE-A-2025-12199).
- The VAO (high-occupancy vehicle) indication identifies a lane reserved for high-occupancy vehicles; check the conditions for lorry access in “Manoeuvres with your lorry”, section “Reserved lanes, reversible lanes and lanes running against the usual direction”. [RGC, art. 35](https://www.boe.es/buscar/act.php?id=BOE-A-2003-23514#a35).
- S-21 provides information on whether a road section or mountain pass is open to traffic. You must interpret the road conditions, lorry restrictions, equipment requirements and the point where they begin together. [RGC, Annex I](https://www.boe.es/buscar/doc.php?id=BOE-A-2025-12199).
- You must use advance direction signs to prepare your lane and route in good time. Direction signs guide you towards destinations; road identification signs identify the road; confirmation signs remind you of destinations and distances. With a lorry, you must also check the restrictions on each slip road before committing to an exit. [RGC, Annex I](https://www.boe.es/buscar/doc.php?id=BOE-A-2025-12199).
- Service signs may indicate fuel, charging, assistance, food or rest facilities; you must distinguish the advertised service from the actual possibility of parking a vehicle of your dimensions. Location signs identify settlements, boundaries or places: you must relate them to the rules associated with them. [RGC, Annex I](https://www.boe.es/buscar/doc.php?id=BOE-A-2025-12199).
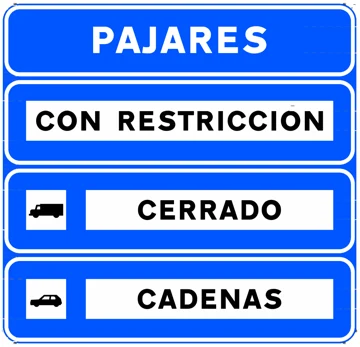 S-21
22Road layout and surface hazards
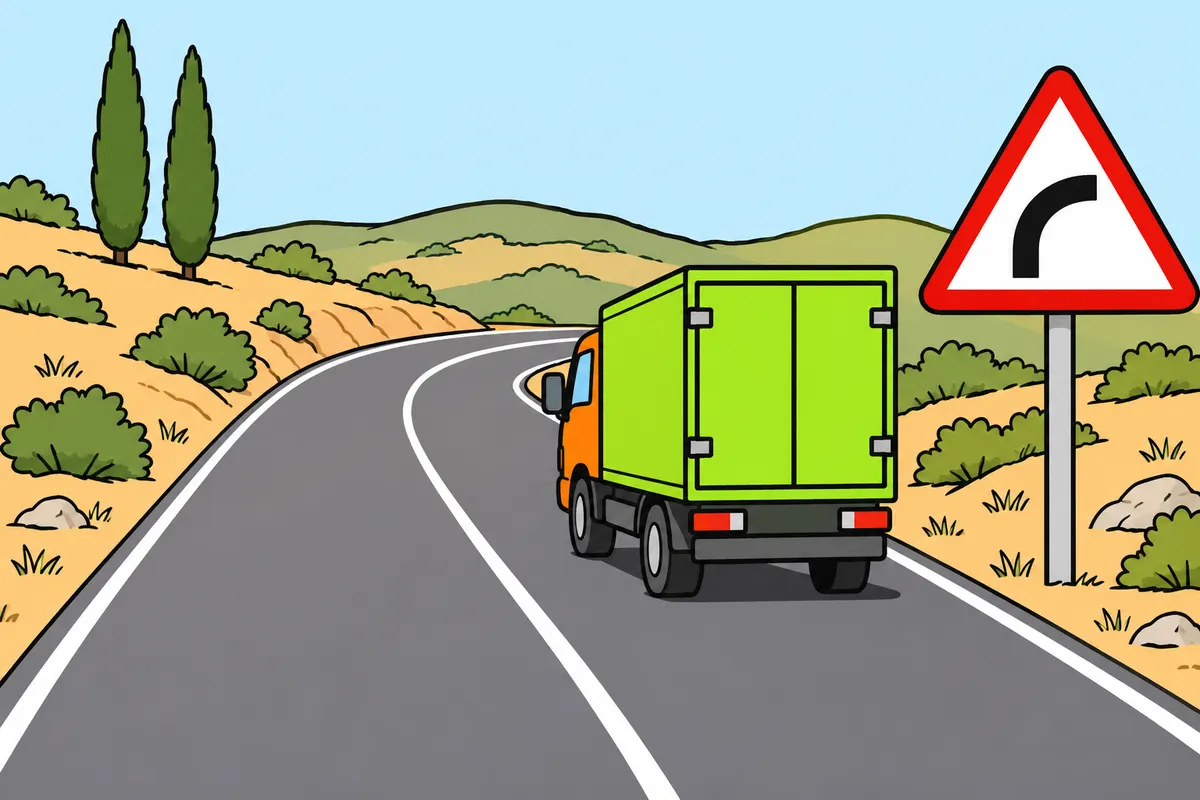
Anticipate bends, gradients and dangerous surfaces without assuming a fixed speed from the picture.
| Sign | Hazard you anticipate |
|---|---|
| P-16a / P-16b | Steep descent / ascent. |
| P-15a / P-15b | Hump / dip. |
| P-19 / P-28 | Slippery surface / loose chippings. |
| P-29 | Crosswinds. |
| P-33 / P-34 | Reduced visibility / frequent ice or snow. |
Remember
- With successive bends, check which way the first bend goes.
- A gradient compares height difference with horizontal distance, not degrees.
- Prepare your lorry and load for bumps and surface changes.
- With two-way traffic, do not use the whole carriageway width.
- Crosswinds particularly affect your lorry because of its size.
Exam trap: Wrong: You read 10 % as ten degrees. Right: It means 10 m of height difference per 100 m horizontally.
Read the full explanation
- P-13a and P-13b warn of a dangerous bend to the right and left respectively. P-14a and P-14b announce a series of bends close together, with the first to the right and left respectively. You must prepare your lorry’s approach and identify the first bend, without inferring a fixed speed from the diagram. [RGC, Annex I](https://www.boe.es/buscar/doc.php?id=BOE-A-2025-12199).
- P-16a warns of a steep descent and P-16b of a steep ascent. The figure indicates the gradient as a percentage relative to the horizontal: 10 % means a 10 m change in height for every 100 m horizontally. It is not a speed, a remaining distance or an angle expressed in degrees. [RGC, Annex I](https://www.boe.es/buscar/doc.php?id=BOE-A-2025-12199).
- P-15 warns of an uneven road; P-15a, a hump; P-15b, a dip. You must anticipate changes in how the vehicle and its load are supported. P-19 warns of a slippery road surface and P-28 of loose chippings: you must distinguish loss of grip from material that may be thrown up. [RGC, Annex I](https://www.boe.es/buscar/doc.php?id=BOE-A-2025-12199).
- P-26 announces possible falling rocks and obstacles; P-30, a step or drop at the side of the road. You must pay attention to the space available for your lorry’s wheels. P-25 warns of two-way traffic, so you must not continue assuming that the full width of the carriageway is for your direction. [RGC, Annex I](https://www.boe.es/buscar/doc.php?id=BOE-A-2025-12199).
- P-29 warns of crosswinds, particularly relevant because of your lorry’s size. P-33 announces reduced visibility; P-34, frequent ice or snow. The sign does not in itself set a speed for driving through the section. [RGC, Annex I](https://www.boe.es/buscar/doc.php?id=BOE-A-2025-12199).
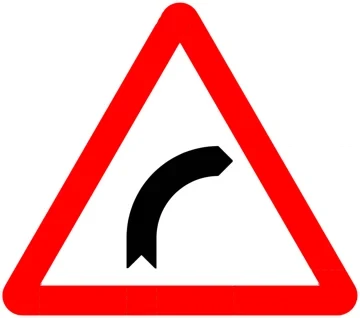 P-13a
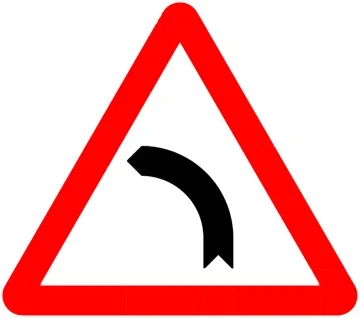 P-13b
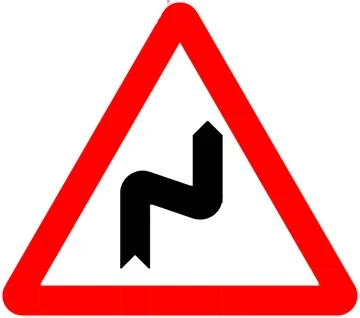 P-14a
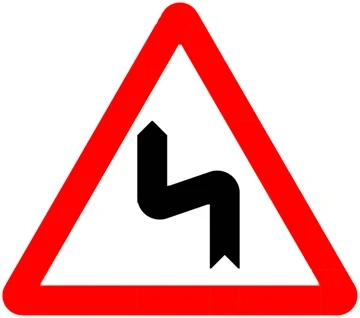 P-14b
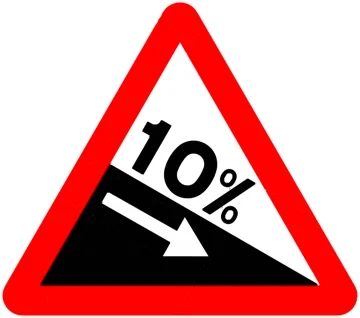 P-16a
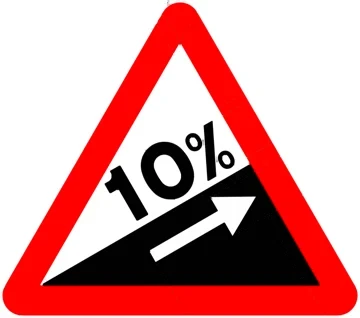 P-16b
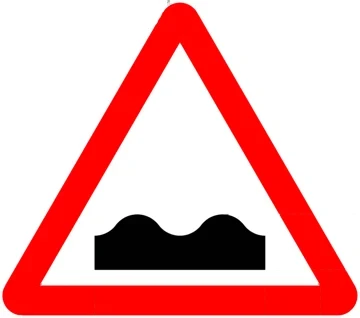 P-15
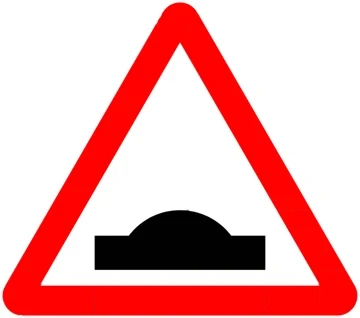 P-15a
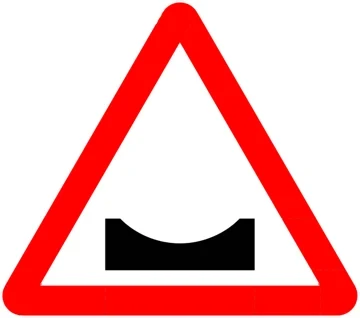 P-15b
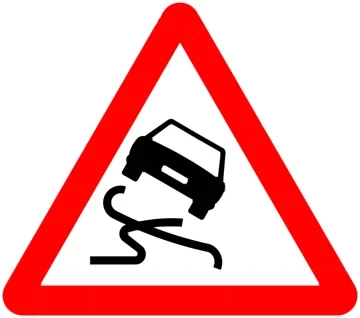 P-19
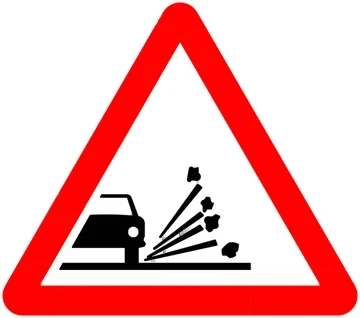 P-28
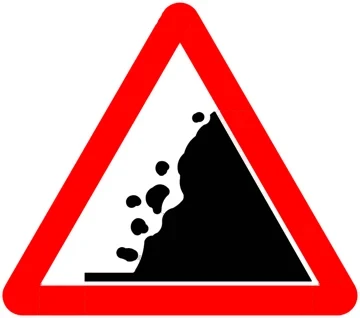 P-26
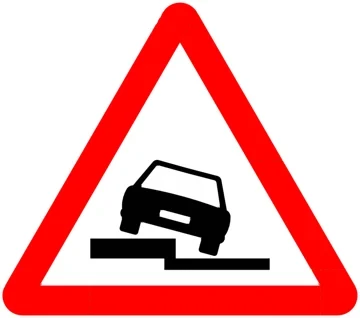 P-30
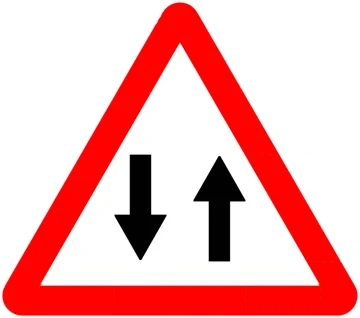 P-25
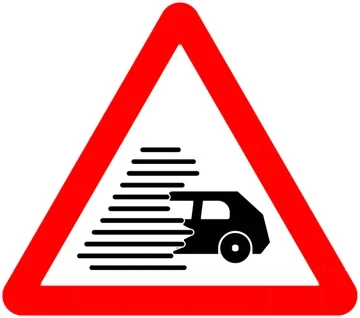 P-33
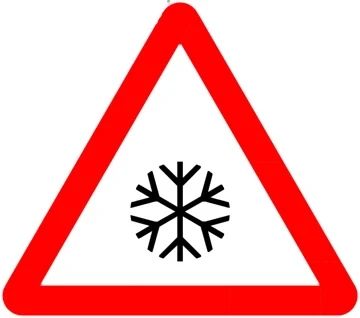 P-34
23Traffic hazards and vulnerable road users
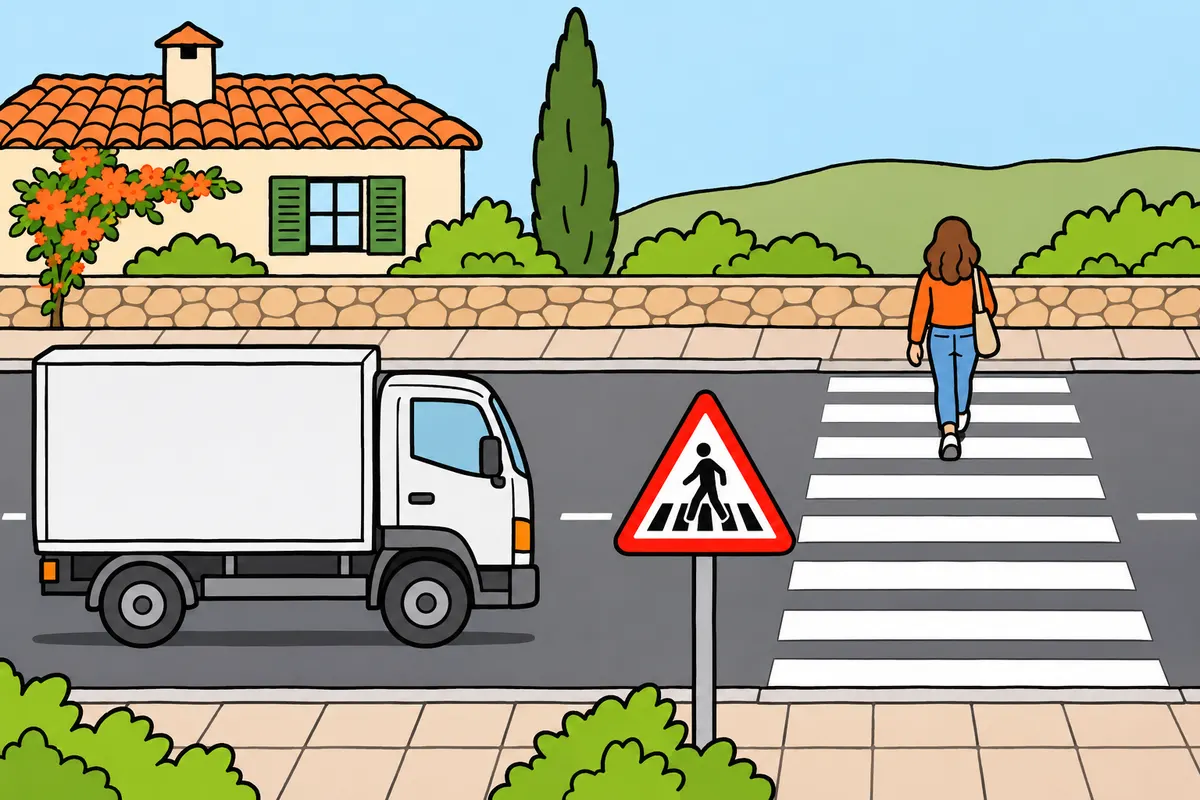
Anticipate obstacles and vulnerable road users before reaching the hazard.
| Signs | What you anticipate |
|---|---|
| P-20a / P-20b / P-20c | Pedestrian crossing / frequent pedestrians / pedestrian and cycle crossings. |
| P-21a / P-21b | Children / people with mobility or sensory difficulties. |
| P-22a / P-22b | Cycle crossing / frequent cycle traffic. |
| P-23 / P-24 / P-24a | Livestock or domestic animals / wild animals / wild boar. |
| P-7 / P-8 | Level crossing with barriers / without barriers. |
Remember
- Expect stationary vehicles before the hazard ahead.
- Check areas your lorry may hide from you.
- Adapt your driving before you see the obstacle.
- Do not enter a crossing where you could become trapped.
- Read the plate when the sign warns of other hazards.
Exam trap: Wrong: Every triangular cycle warning requires you to stop. Right: Check the rules, signs and markings that determine priority.
Read the full explanation
- P-3 announces traffic lights ahead; P-4, a roundabout junction; P-31, congestion; P-32, an obstruction on the carriageway. You must anticipate stationary vehicles before reaching the indicated point. P-35 warns of weaving traffic, where lane-changing paths may cross between a merge and a diverge. [RGC, Annex I](https://www.boe.es/buscar/doc.php?id=BOE-A-2025-12199).
- P-20a announces pedestrian crossings; P-20b, an area with frequent pedestrian traffic; P-20c, pedestrian and cycle crossings. P-21a warns of children and P-21b of people with mobility or sensory impairments. You must be especially observant, taking account of areas your lorry may hide from view. [RGC, Annex I](https://www.boe.es/buscar/doc.php?id=BOE-A-2025-12199).
- P-22a announces cycle crossings and P-22b frequent cycle traffic. You determine actual priority from the applicable rules and markings, without treating every triangular warning sign as an instruction to stop. [RGC, Annex I](https://www.boe.es/buscar/doc.php?id=BOE-A-2025-12199).
- P-23 warns of domestic animals or livestock; P-24, wild animals, and P-24a highlights the danger of wild boar. P-50 announces other hazards without a specific sign. You must check the explanatory plate and anticipate something suddenly entering the road, without waiting to see the obstacle before adapting your driving. [RGC, Annex I](https://www.boe.es/buscar/doc.php?id=BOE-A-2025-12199).
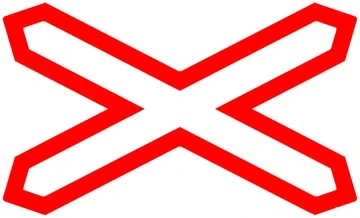
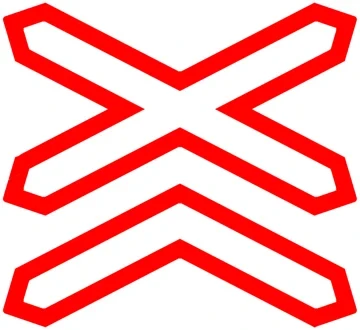
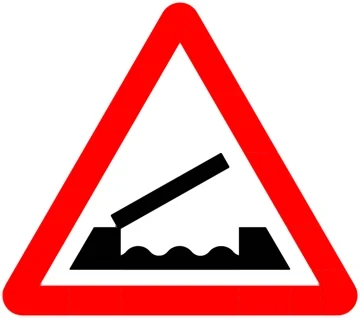
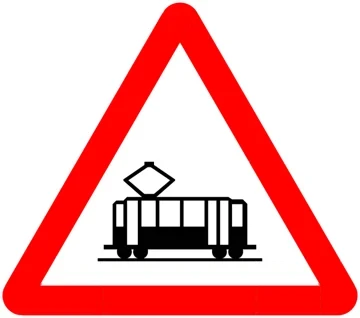
- P-7 and P-8 announce level crossings with and without barriers respectively; P-11 and P-11a identify crossings without barriers, with one or several railway tracks respectively. P-5 warns of an opening bridge and P-6 of a tram crossing. You must anticipate closures and not enter a crossing where your lorry may become trapped. [RGC, Annex I](https://www.boe.es/buscar/doc.php?id=BOE-A-2025-12199).
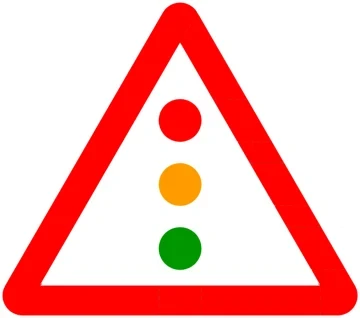 P-3
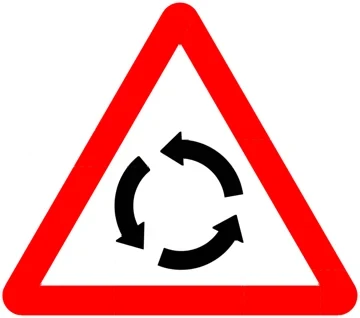 P-4
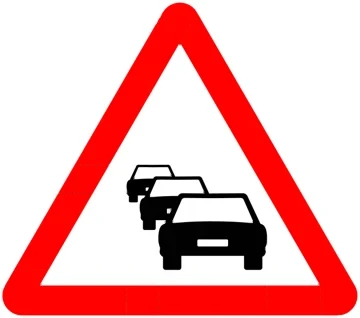 P-31
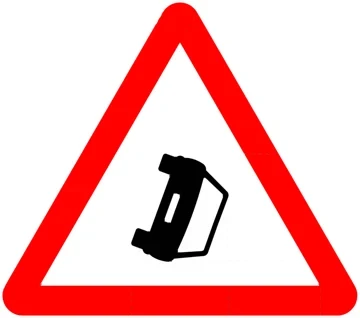 P-32
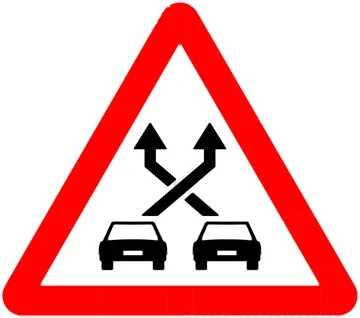 P-35
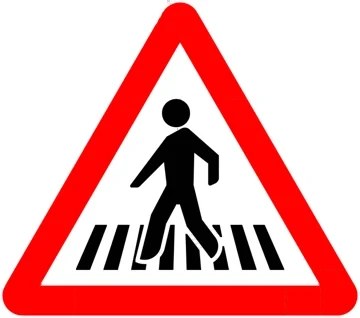 P-20a
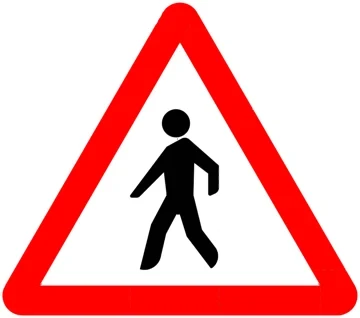 P-20b
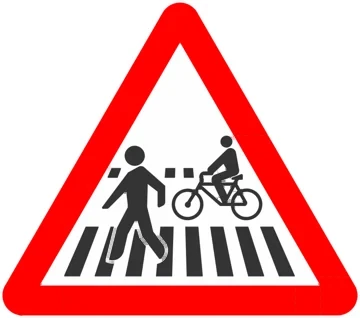 P-20c
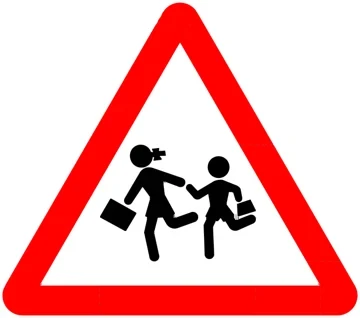 P-21a
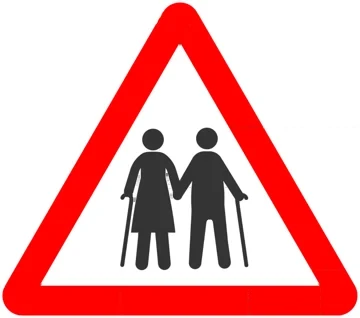 P-21b
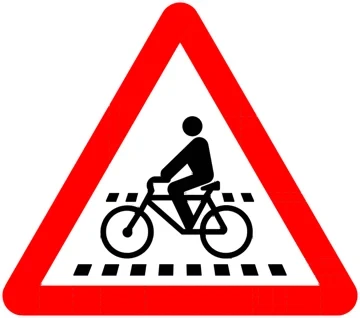 P-22a
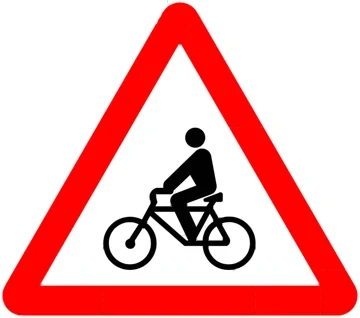 P-22b
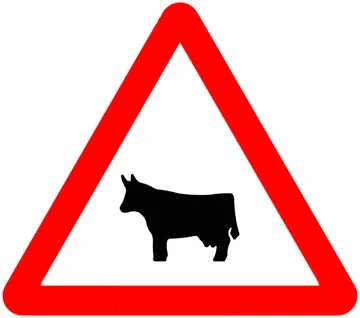 P-23
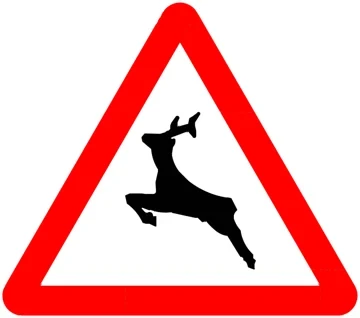 P-24
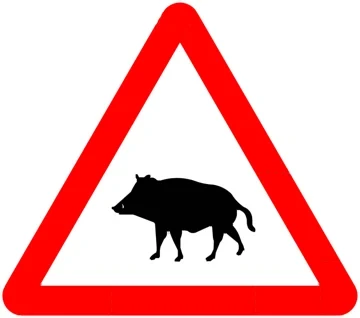 P-24a
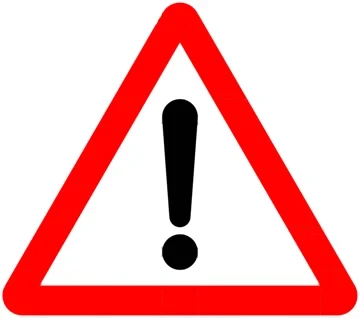 P-50
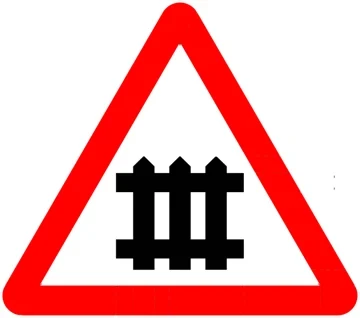 P-7
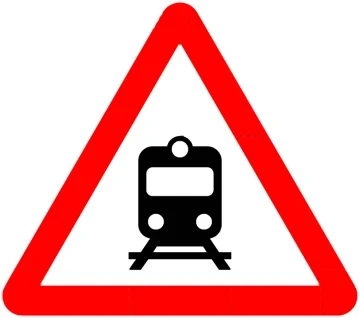 P-8
 P-11
 P-11a
 P-5
 P-6
24Supplementary plates and emergencies
Read the whole plate to know where a rule starts and whom it affects.
| Plate or sign | What you read |
|---|---|
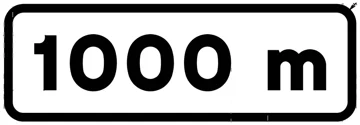
| S-800 | Distance to the start of the hazard or rule. |
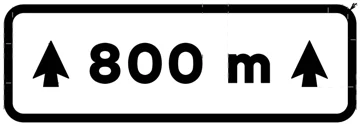
| S-810 | Length of the affected section. |
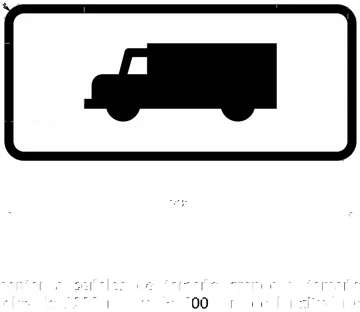
| S-880a | The main sign applies exclusively to lorries. |
| S-880b | It applies to vehicles with trailers, except single-axle trailers. |
| S-960 / S-980 | Emergency telephone / emergency exit. |
Remember
- A plate adds meaning; alone, it imposes no requirement or prohibition.
- If you see EXCEPTO, exclude the category shown.
- Read times, conditions and branches before deciding whether you may pass.
- The priority road may bend; do not assume it always continues straight.
- Evacuation arrows guide people, not your lorry.
Exam trap: Wrong: You confuse distance to the start with section length. Right: S-800 shows how far ahead it starts; S-810 shows how long the affected section is.
Read the full explanation
- S-800 indicates the distance to the start of the hazard or requirement; S-810, the length of the affected section. With 200 m below S-800, the hazard starts at that distance; below S-810, it extends for that length. Below a road narrowing warning, check whether the plate gives the clear width available. [RGC, Annex I](https://www.boe.es/buscar/doc.php?id=BOE-A-2025-12199).
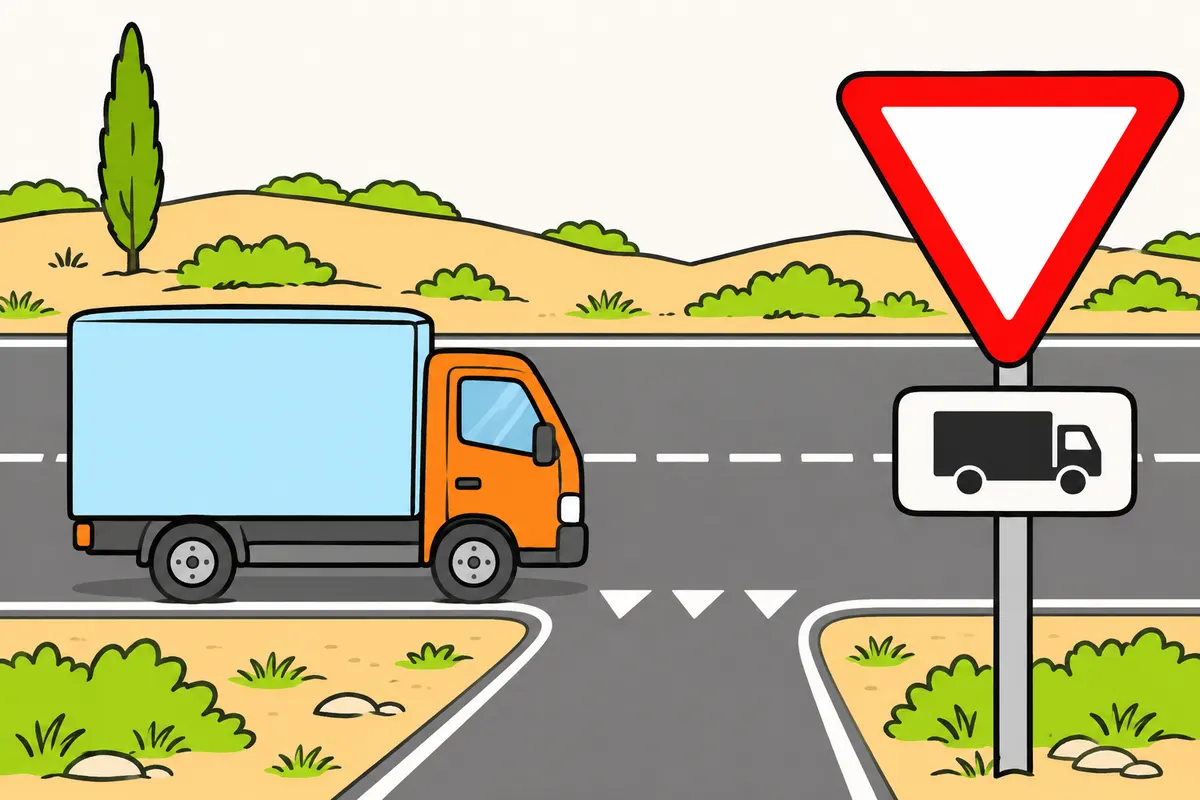
- S-880a limits the main sign exclusively to lorries. S-880b limits it to vehicles towing trailers, except where the trailer has only one axle. You must apply the instruction it accompanies: the plate does not impose a prohibition or obligation on its own. If the word EXCEPTO (EXCEPT) appears above the pictogram, you must interpret it as excluding that category, without reversing the meaning of the sign and plate together. [RGC, Annex I, catalogue of upright traffic signs, volume I, sections 2.3 and 3.17](https://www.boe.es/buscar/doc.php?id=BOE-A-2025-12199).
- Plates may specify times, weather conditions or exit slip roads. You must read the full inscription before comparing your vehicle’s category or mass. Priority road diagrams show its route: you must not assume that priority requires you to continue straight ahead if the main road turns. [RGC, Annex I](https://www.boe.es/buscar/doc.php?id=BOE-A-2025-12199).
- S-960 identifies an emergency telephone; S-980, an emergency exit, and S-990a and S-990b, Emergency exit ahead, indicate the direction and distance to the nearest emergency exit. You must interpret the arrow and distance as evacuation guidance for people, without confusing it with an ordinary exit you can take in your lorry. [RGC, Annex I](https://www.boe.es/buscar/doc.php?id=BOE-A-2025-12199).
- Speed, traffic light, STOP or following-distance enforcement signs announce monitoring; other signs help you maintain your distance using chevrons or marker posts. An enforcement sign does not authorise you to break the rules away from the monitored point. Telephone and fire extinguisher pictograms identify that equipment, not an exit or a medical post. [RGC, Annex I](https://www.boe.es/buscar/doc.php?id=BOE-A-2025-12199).
 S-800
 S-810
 S-880a
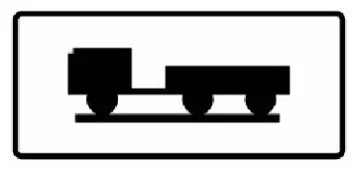 S-880b
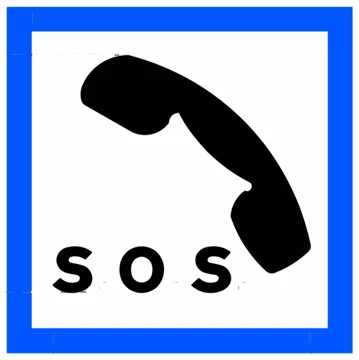 S-960
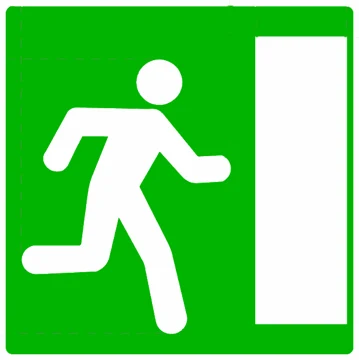 S-980
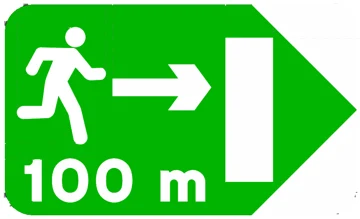 S-990a
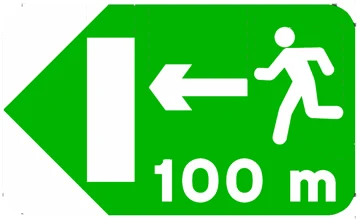 S-990b
25Longitudinal lines and arrows
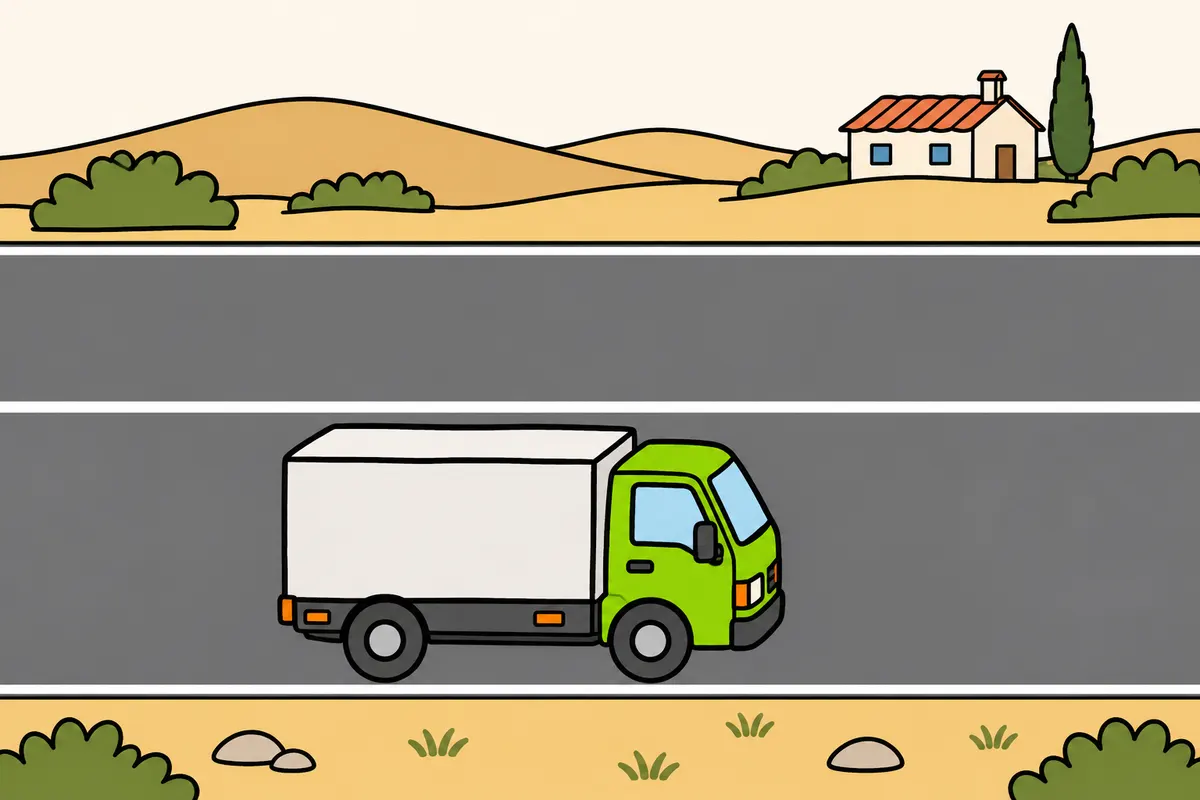
Read the line on your side and change lanes only when allowed and safe.
| Line | What you must do |
|---|---|
| Broken | Cross only for permitted manoeuvres, respecting traffic in the destination lane. |
| Solid | Do not cross or drive on it, except where legal exceptions apply. |
| Solid beside broken | Follow the line on your side. |
| Returning after overtaking from the broken side, with opposing directions separated | You may cross the solid line to return after finishing or abandoning overtaking. |
| Double broken | Recognise a reversible lane controlled by traffic lights or other means. |
Remember
- A broken line does not allow overtaking prohibited by other rules.
- Do not drive on broken lines unless needed for width and safe.
- Painted edge lines do not change hard shoulder rules.
- Check reversible lane use in “Manoeuvres with your lorry”.
- Lane-ending arrows do not give you priority to merge.
- Check BUS or TAXI reservations before using the lane.
Exam trap: Wrong: A broken line always allows you to overtake. Right: Also check signs, visibility and overtaking rules.
Read the full explanation
- Broken lines M-1.1 to M-1.3 mark lane boundaries and allow you to cross them for authorised manoeuvres, giving way to anyone already in the lane you are entering. You must not drive along these lines unless lane widths make it necessary and you can do so safely. A broken line does not authorise overtaking prohibited by a sign, visibility conditions or a rule. [RGC, Annex I](https://www.boe.es/buscar/doc.php?id=BOE-A-2025-12199).
- You must not cross or drive along continuous lines M-2.1 to M-2.3, subject to the exceptions provided by the regulations. If they separate opposing directions of traffic, you must not drive to their left. Two parallel continuous lines have the same meaning as one. Edge lines mark the boundaries of the carriageway, and their appearance does not change the rules governing the use of the arcén (hard shoulder). [RGC, Annex I, catalogue of road markings, section 4.1](https://www.boe.es/buscar/doc.php?id=BOE-A-2025-12199).
- Where a continuous line runs alongside a broken line, M-3.1 to M-3.3, you must obey the line on your side. If the marking separates opposing directions of traffic and you overtake from the broken-line side, you may cross the continuous line to return after completing or abandoning the manoeuvre. [RGC, Annex I](https://www.boe.es/buscar/doc.php?id=BOE-A-2025-12199).
- Double broken lines M-1.4 and M-1.5 mark the boundaries of reversible lanes controlled by traffic lights or other means; see the rules for using them in “Manoeuvres with your lorry”, section “Reserved lanes, reversible lanes and lanes running against the usual direction”. Warning broken lines M-1.9 and M-1.10 indicate a continuous line or a stretch with particular risks ahead. [RGC, Annex I, catalogue of road markings, section 4.1](https://www.boe.es/buscar/doc.php?id=BOE-A-2025-12199).
- Lane direction arrows indicate permitted or compulsory movements in the lane. M-5.4 indicates that the lane ends ahead and requires you to merge, giving way to anyone already in the lane you are entering; M-5.5, the return arrow, indicates a continuous line ahead which prohibits driving to its left: do not begin overtaking, or complete the manoeuvre safely as soon as possible. [RGC, Annex I](https://www.boe.es/buscar/doc.php?id=BOE-A-2025-12199).
- M-1.8 indicates a fork or merging traffic ahead. The inscriptions BUS or TAXI identify reserved lanes, and a wide continuous line may separate lanes for specific uses: you must read the vehicle category and conditions before entering them. The width of your lorry does not authorise you to use a reserved lane. [RGC, Annex I](https://www.boe.es/buscar/act.php?id=BOE-A-2003-23514).
26Transverse lines and crossings
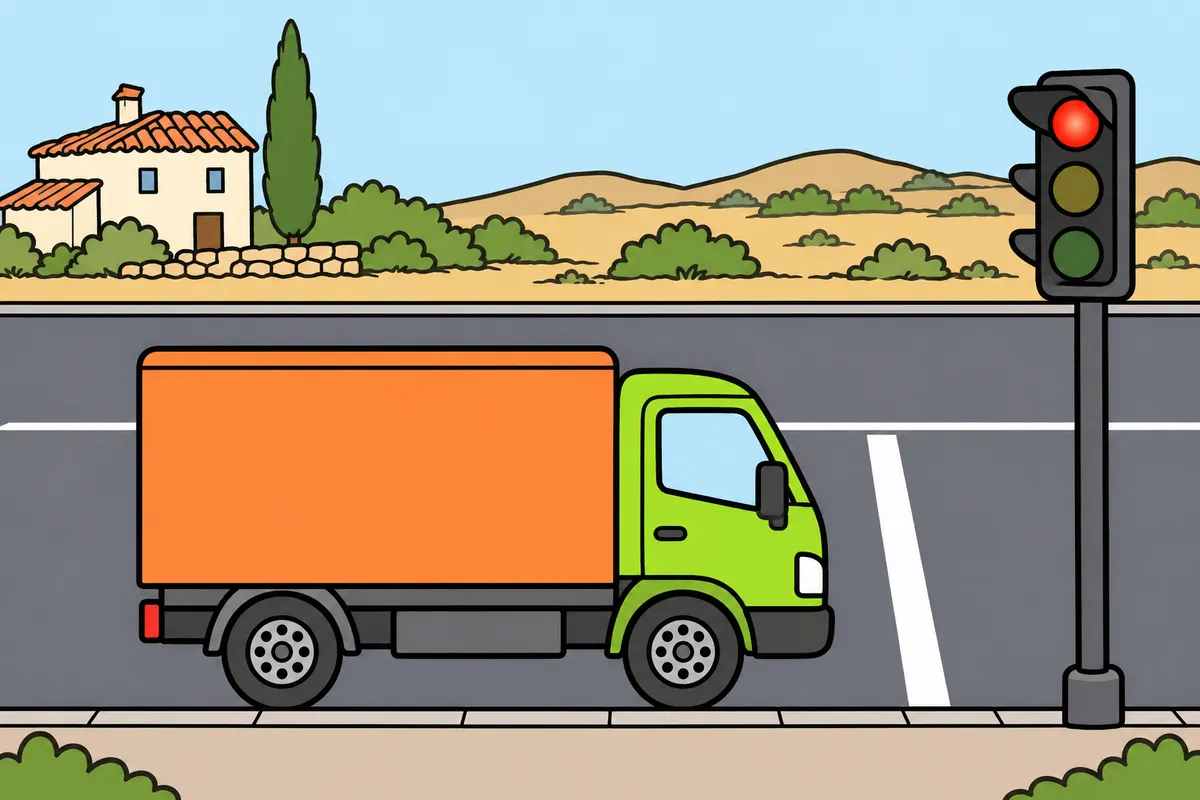
Respect stop lines and recognise pedestrian and cycle crossings.
| Marking | What you must do |
|---|---|
| M-4.1: solid transverse line | Do not cross it when you must stop. |
| M-4.2: broken transverse line | Do not proceed while required to give way, except in the specified abnormal visibility circumstances. |
| M-4.3: pedestrian crossing | Let pedestrians cross according to the rules. |
| M-4.4: cycle crossing | Give way to cyclists, checking officers and traffic lights. |
Remember
- When you must stop, neither your lorry nor its load crosses the line.
- Read a give way line together with the priority sign or rule.
- At a signal-controlled crossing, obey its traffic lights.
- Painted STOP and give way markings apply to their lane.
- A painted speed figure sets a maximum for that lane.
Exam trap: Wrong: At a cycle crossing, you only yield to cyclists from your right. Right: Give way according to the crossing's rules, including officers and traffic lights.
Read the full explanation
- M-4.1 is the continuous transverse stop line. Neither your lorry nor its load may cross it when you must stop because of a STOP sign, traffic light, traffic officer or another specified reason. [RGC, Annex I](https://www.boe.es/buscar/doc.php?id=BOE-A-2025-12199).
- M-4.2, a broken transverse line, indicates the point beyond which you must not proceed while you have to give way, except in the specified exceptional visibility circumstances. The marking alone does not always require you to stop. You must read it together with the sign or priority rule requiring you to give way. [RGC, Annex I](https://www.boe.es/buscar/doc.php?id=BOE-A-2025-12199).
- M-4.3 identifies a pedestrian crossing with stripes parallel to the centre line of the carriageway, forming a transverse pattern. You must give way to pedestrians in accordance with the rules. A crossing controlled by traffic lights may use two broken transverse lines: you must obey the traffic lights, rather than relying only on the similarity of the markings. [RGC, Annex I](https://www.boe.es/buscar/doc.php?id=BOE-A-2025-12199).
- M-4.4 identifies a cycle crossing with two parallel broken transverse lines, where you must give way to cyclists. It may be supplemented with coloured surfacing and variants provided in the catalogue. Priority does not depend on whether the cyclist approaches from your right; check for traffic officers and traffic lights controlling the crossing. [RGC, Annex I](https://www.boe.es/buscar/doc.php?id=BOE-A-2025-12199).
- The painted STOP marking, M-6.3 or M-6.4, and the give way marking M-6.5 apply to the lane in which they are placed. A speed figure painted on the road imposes a maximum speed in the lane concerned. You must resolve conflicts with upright signs using the hierarchy and continue to obey any compatible instructions. [RGC, Annex I](https://www.boe.es/buscar/doc.php?id=BOE-A-2025-12199).
27Reserved areas, parking and coloured markings
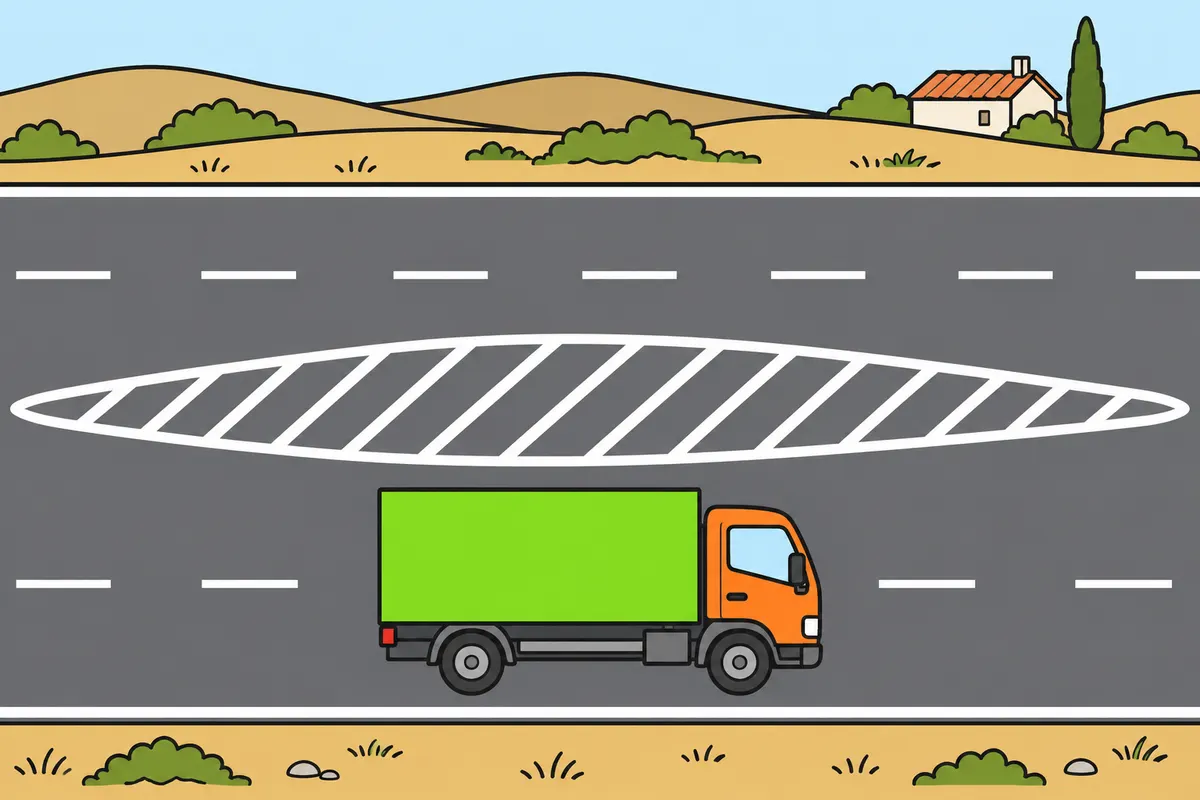
Respect reserved areas and distinguish the prohibitions shown by yellow markings.
| Yellow marking | What you must do |
|---|---|
| Broken (M-7.7) | Do not park along its length on that side. |
| Solid (M-7.8) | Do not stop or park. |
| Zigzag (M-7.9) | Do not park; check the reserved use before stopping or unloading. |
| Temporary prohibition | Read the applicable period on the upright sign. |
Remember
- With your ordinary lorry, do not enter hatching enclosed by a solid line.
- Do not enter a junction if you expect to stop blocking crossing traffic.
- Follow this rule even with green or priority.
- Do not stop or park on an escape lane's red-and-white chequered area.
- For blue parking bays, check times, duration and local permit requirements.
- At dragon's teeth markings, slow down considerably.
Exam trap: Wrong: A zigzag allows any lorry to unload. Right: It prohibits parking; check the reserved use and the conditions at that location.
Read the full explanation
- You must not enter a hatched area M-7.1 or M-7.2 bounded by a continuous line, unless you are a road user required to travel on the hard shoulder. You cannot use it in your ordinary lorry to overtake, wait or cut a corner. You must distinguish an area closed to traffic from a taper open for merging. [RGC, Annex I](https://www.boe.es/buscar/doc.php?id=BOE-A-2025-12199).
- A broken longitudinal yellow line M-7.7 prohibits parking along its entire length on that side. A continuous yellow line M-7.8 prohibits stopping and parking. If the prohibition is temporary, you must read the upright sign specifying the period; do not assume an exception applies outside business hours. [RGC, Annex I](https://www.boe.es/buscar/doc.php?id=BOE-A-2025-12199).
- A yellow zigzag line M-7.9 prohibits parking because the space is reserved for a special use without a prolonged stay, such as bus stops or loading and unloading. It does not in itself prohibit every stop or authorise any lorry to unload: you must check the reserved use and the conditions at that location. [RGC, Annex I](https://www.boe.es/buscar/doc.php?id=BOE-A-2025-12199).
- The box marking M-7.10 reminds you that you must not enter a junction if you are likely to stop and obstruct crossing traffic, even if you have a green light or priority. The white and red chequered marking M-7.11 marks the entrance to an escape bed: you must not stop, park or use that surface for other purposes. [RGC, Annex I](https://www.boe.es/buscar/doc.php?id=BOE-A-2025-12199).
- Parking markings define parking spaces and show how you must position your vehicle; their colours and pictograms may indicate time limits, users or purposes. You must respect reserved spaces even if your lorry fits. At advanced stop areas reserved for cycles or motorcycles at traffic lights, you must stop before the line that applies to your vehicle. [RGC, Annex I](https://www.boe.es/buscar/doc.php?id=BOE-A-2025-12199).
- Road markings are white except where the catalogue specifies other colours. In blue parking spaces, you must check the hours, time limits and method of showing authorisation under local regulations; the paint does not establish a uniform time limit throughout Spain. Coloured geometric shapes used for traffic calming are not considered road markings and must allow you to interpret the regulatory markings. [RGC, Annex I](https://www.boe.es/buscar/act.php?id=BOE-A-2003-23514).
- M-7.12 provides reference marks to help you maintain your distance. Dragon's teeth markings M-8.1 indicate a stretch ahead where you need to reduce your speed considerably; the zigzag line M-8.2 warns of a pedestrian or cycle crossing, and M-8.3 highlights a road hazard. These warnings do not in themselves set a numerical speed limit. [RGC, Annex I](https://www.boe.es/buscar/act.php?id=BOE-A-2003-23514).
Interpreting several signs at the same entrance
Apply the message that corresponds to your lorry and your intended path.
- Identify your lorry’s position, lane and intended manoeuvre.
- Read the main signs, supplementary plates, operating times and the road users they apply to.
- Check whether the messages complement or contradict one another.
- Where they contradict one another, apply the higher-ranking signal; within the same type, apply the most restrictive.
- Comply with compatible messages and check that you can carry out the manoeuvre safely.
Checking a restriction for your lorry
Choose the correct quantity before deciding whether you can proceed.
- Identify whether the restriction concerns a vehicle category, goods, MMA, laden mass, an axle or a dimension.
- For R-107, use MMA; for R-201, actual mass; for R-202, mass per axle.
- For R-203, R-204 and R-205, include the load when checking length, width and height.
- Compare against the stated figure, distinguishing between equalling and exceeding it.
- Check the other prohibitions and the route before entering.
Complying with a STOP sign when visibility is poor
Make your initial stop and observations at the indicated point.
- Bring your lorry to a complete stop before the line or, if there is no line, immediately before the intersecting carriageway.
- Give way to vehicles on the priority road.
- If you cannot see well enough, move forward cautiously and stop again where you can see safely.
- Move off when you can complete the entire manoeuvre safely.
Check what you know
Real questions from the bank on this topic. Pick an answer to see the explanation.
Finished this module?
Mark it as read and you will see your progress on the theory list.